Tutorial: Copy data to Azure Data Box Heavy via NFS
This tutorial describes how to connect to and copy data from your host computer using the local web UI to your Azure Data Box Heavy.
In this tutorial, you learn how to:
- Prerequisites
- Connect to Data Box Heavy
- Copy data to Data Box Heavy
Prerequisites
Before you begin, make sure that:
- You have completed the Tutorial: Set up Azure Data Box Heavy.
- You have received your Data Box Heavy and the order status in the portal is Delivered.
- You have a host computer that has the data that you want to copy over to Data Box Heavy. Your host computer must
- Run a Supported operating system.
- Be connected to a high-speed network. For fastest copy speeds, two 40-GbE connections (one per node) can be utilized in parallel. If you do not have 40-GbE connection available, we recommend that you have at least two 10-GbE connections (one per node).
Connect to Data Box Heavy
Based on the storage account selected, Data Box Heavy creates up to:
- Three shares for each associated storage account for GPv1 and GPv2.
- One share for premium storage.
- One share for blob storage account.
These shares are created on both the nodes of the device.
Under block blob and page blob shares:
- First-level entities are containers.
- Second-level entities are blobs.
Under shares for Azure Files:
- First-level entities are shares.
- Second-level entities are files.
The following table shows the UNC path to the shares on your Data Box Heavy and Azure Storage path URL where the data is uploaded. The final Azure Storage path URL can be derived from the UNC share path.
| Storage | UNC path |
|---|---|
| Azure Block blobs | //<DeviceIPAddress>/<StorageAccountName_BlockBlob>/<ContainerName>/files/a.txthttps://<StorageAccountName>.blob.core.windows.net/<ContainerName>/files/a.txt |
| Azure Page blobs | //<DeviceIPAddress>/<StorageAccountName_PageBlob>/<ContainerName>/files/a.txthttps://<StorageAccountName>.blob.core.windows.net/<ContainerName>/files/a.txt |
| Azure Files | //<DeviceIPAddress>/<StorageAccountName_AzFile>/<ShareName>/files/a.txthttps://<StorageAccountName>.file.core.windows.net/<ShareName>/files/a.txt |
If you are using a Linux host computer, perform the following steps to configure your device to allow access to NFS clients.
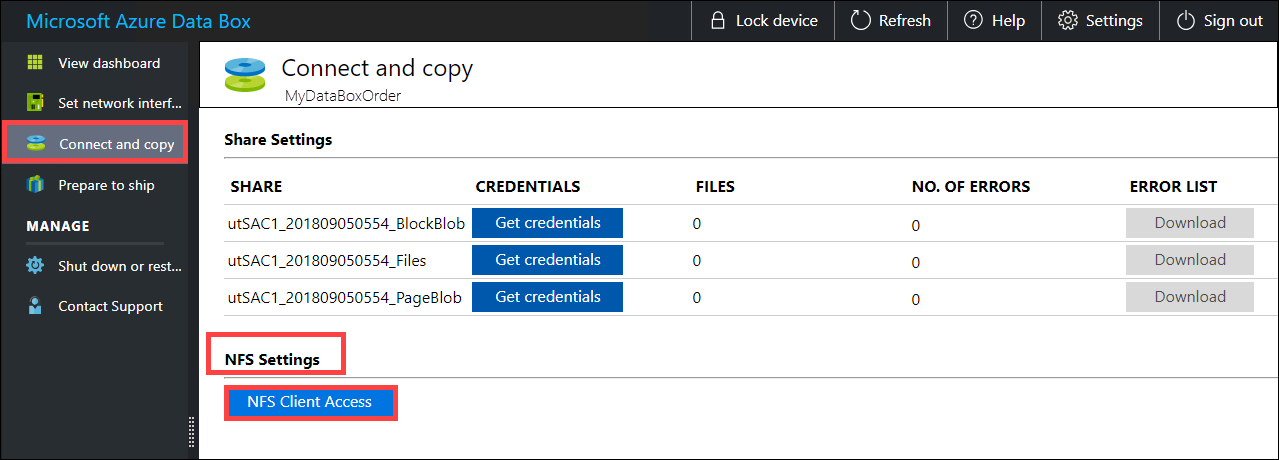
Supply the IP addresses of the allowed clients that can access the share. In the local web UI, go to Connect and copy page. Under NFS settings, click NFS client access.

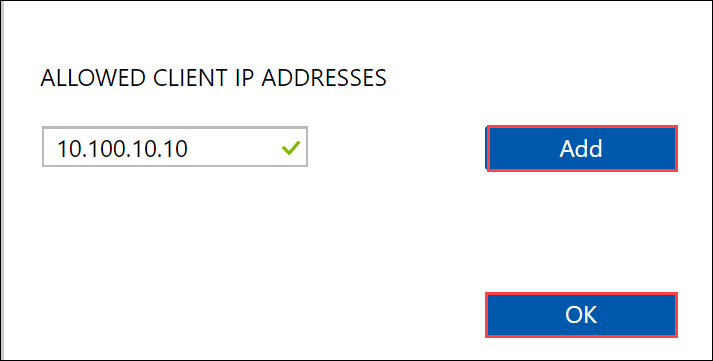
Supply the IP address of the NFS client and click Add. You can configure access for multiple NFS clients by repeating this step. Click OK.

Ensure that the Linux host computer has a supported version of NFS client installed. Use the specific version for your Linux distribution.
Once the NFS client is installed, use the following command to mount the NFS share on your Data Box device:
sudo mount <Data Box Heavy device IP>:/<NFS share on Data Box Heavy device> <Path to the folder on local Linux computer>The following example shows how to connect via NFS to a Data Box Heavy share. The Data Box Heavy IP is
10.161.23.130, the shareMystoracct_Blobis mounted on the ubuntuVM, mount point being/home/databoxheavyubuntuhost/databoxheavy.sudo mount -t nfs 10.161.23.130:/Mystoracct_Blob /home/databoxheavyubuntuhost/databoxheavyFor Mac clients, you will need to add an additional option as follows:
sudo mount -t nfs -o sec=sys,resvport 10.161.23.130:/Mystoracct_Blob /home/databoxheavyubuntuhost/databoxheavyAlways create a folder for the files that you intend to copy under the share and then copy the files to that folder. The folder created under block blob and page blob shares represents a container to which data is uploaded as blobs. You cannot copy files directly to root folder in the storage account.
Copy data to Data Box Heavy
Once you are connected to the Data Box Heavy shares, the next step is to copy data. Before you begin the data copy, review the following considerations:
Ensure that you copy the data to shares that correspond to the appropriate data format. For instance, copy the block blob data to the share for block blobs. Copy VHDs to page blobs. If the data format does not match the appropriate share type, then at a later step, the data upload to Azure will fail.
While copying data, ensure that the data size conforms to the size limits described in the Azure storage and Data Box Heavy limits.
If data, which is being uploaded by Data Box Heavy, is concurrently uploaded by other applications outside of Data Box Heavy, then this could result in upload job failures and data corruption.
We recommend that you do not use both SMB and NFS concurrently or copy same data to same end destination on Azure. In such cases, the final outcome cannot be determined.
Always create a folder for the files that you intend to copy under the share and then copy the files to that folder. The folder created under block blob and page blob shares represents a container to which data is uploaded as blobs. You cannot copy files directly to root folder in the storage account.
If ingesting case-sensitive directory and file names from an NFS share to NFS on Data Box Heavy:
- The case is preserved in the name.
- The files are case-insensitive.
For example, if copying
SampleFile.txtandSamplefile.Txt, the case will be preserved in the name when copied to device but the second file will overwrite the first one as these are considered the same file.
If you're using a Linux host computer, use a copy utility similar to Robocopy. Some of the alternatives available in Linux are rsync, FreeFileSync, Unison, or Ultracopier.
The cp command is one of best options to copy a directory. For more information on the usage, go to cp man pages.
If using rsync option for a multi-threaded copy, follow these guidelines:
Install the CIFS Utils or NFS Utils package depending on the filesystem your Linux client is using.
sudo apt-get install cifs-utilssudo apt-get install nfs-utilsInstall Rsync, and Parallel (varies depending on the Linux distributed version).
sudo apt-get install rsyncsudo apt-get install parallelCreate a mount point.
sudo mkdir /mnt/databoxheavyMount the volume.
sudo mount -t NFS4 //Databox-heavy-IP-Address/share_name /mnt/databoxheavyMirror folder directory structure.
rsync -za --include='*/' --exclude='*' /local_path/ /mnt/databoxheavyCopy files.
cd /local_path/; find -L . -type f | parallel -j X rsync -za {} /mnt/databoxheavy/{}where j specifies the number of parallelization, X = number of parallel copies
We recommend that you start with 16 parallel copies and increase the number of threads depending on the resources available.
Important
The following Linux file types are not supported: symbolic links, character files, block files, sockets, and pipes. These file types will result in failures during the Prepare to ship step.
Open the target folder to view and verify the copied files. If you have any errors during the copy process, download the error files for troubleshooting. For more information, see View error logs during data copy to Data Box Heavy. For a detailed list of errors during data copy, see Troubleshoot Data Box Heavy issues.
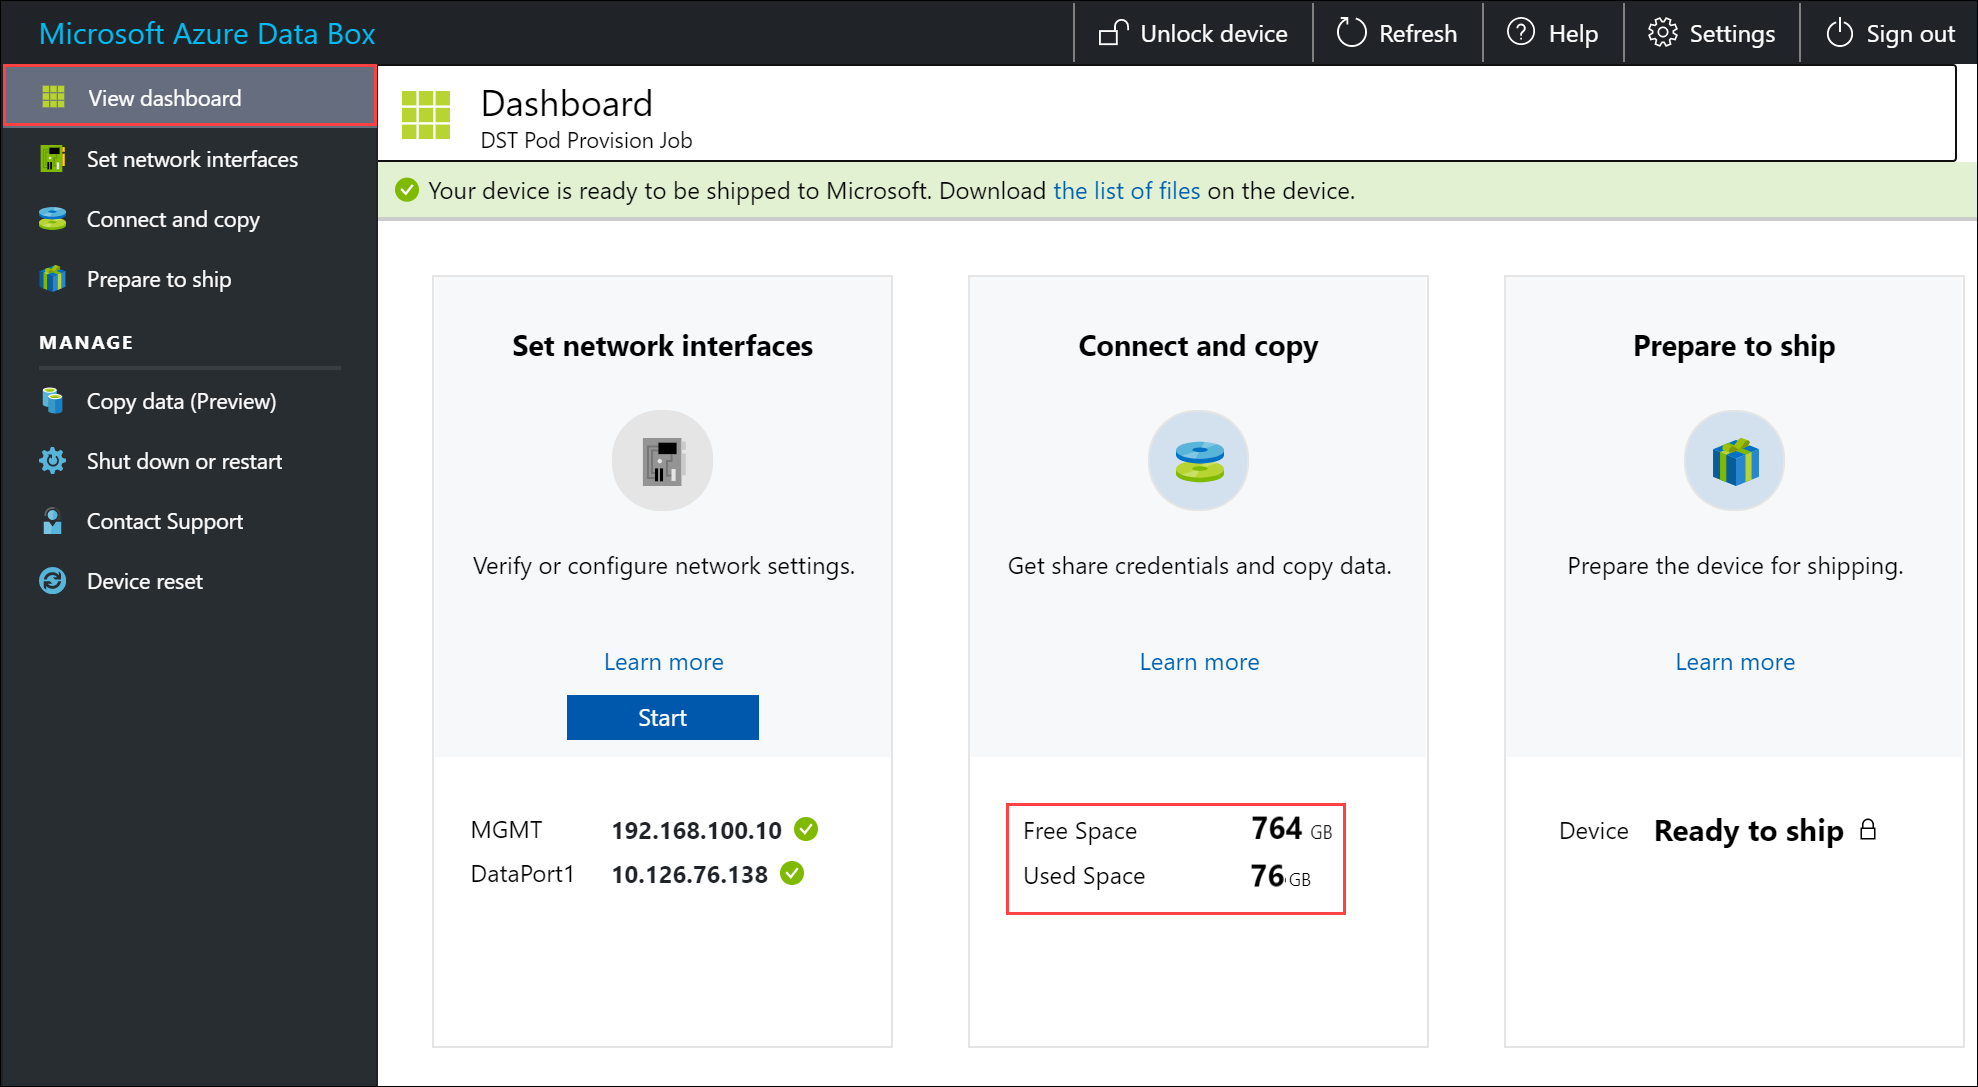
To ensure data integrity, checksum is computed inline as the data is copied. Once the copy is complete, verify the used space and the free space on your device.

Next steps
In this tutorial, you learned about Azure Data Box Heavy topics such as:
- Prerequisites
- Connect to Data Box Heavy
- Copy data to Data Box Heavy
Advance to the next tutorial to learn how to ship your Data Box back to Microsoft.