Set an external identity source for VMware NSX
In this article, learn how to set up an external identity source for VMware NSX in an instance of Azure VMware Solution.
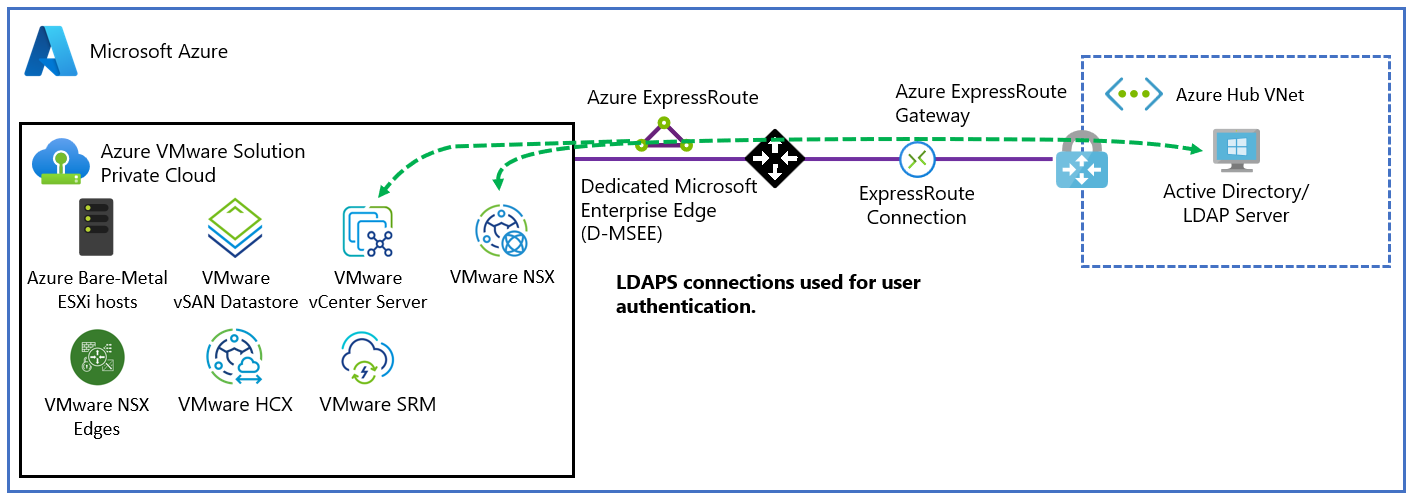
You can set up NSX to use an external Lightweight Directory Access Protocol (LDAP) directory service to authenticate users. A user can sign in by using their Windows Server Active Directory account credentials or credentials from a third-party LDAP server. Then, the account can be assigned an NSX role, like in an on-premises environment, to provide role-based access for NSX users.
Prerequisites
A working connection from your Windows Server Active Directory network to your Azure VMware Solution private cloud.
A network path from your Windows Server Active Directory server to the management network of the instance of Azure VMware Solution in which NSX is deployed.
A Windows Server Active Directory domain controller that has a valid certificate. The certificate can be issued by a Windows Server Active Directory Certificate Services Certificate Authority (CA) or by a third-party CA.
We recommend that you use two domain controllers that are located in the same Azure region as the Azure VMware Solution software-defined datacenter.
Note
Self-signed certificates are not recommended for production environments.
An account that has Administrator permissions.
Azure VMware Solution DNS zones and DNS servers that are correctly configured. For more information, see Configure NSX DNS for resolution to your Windows Server Active Directory domain and set up DNS forwarder.
Note
For more information about Secure LDAP (LDAPS) and certificate issuance, contact your security team or your identity management team.
Use Windows Server Active Directory as an LDAPS identity source
Sign in to NSX Manager, and then go to System > User Management > LDAP > Add Identity Source.
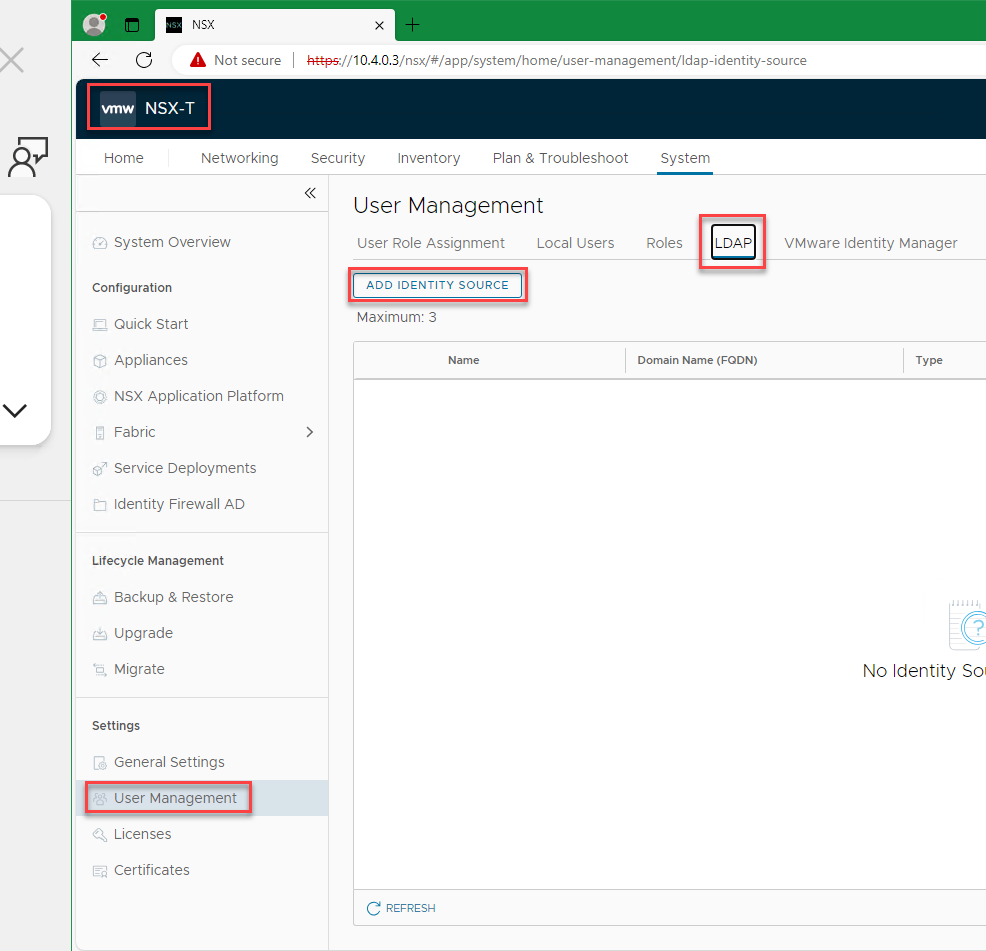
Enter values for Name, Domain Name (FQDN), Type, and Base DN. You can add a description (optional).
The base DN is the container where your user accounts are kept. The base DN is the starting point that an LDAP server uses when it searches for users in an authentication request. For example, CN=users,dc=azfta,dc=com.
Note
You can use more than one directory as an LDAP provider. An example is if you have multiple Windows Server Azure Directory domains, and you use Azure VMware Solution as a way to consolidate workloads.
Next, under LDAP Servers, select Set as shown in the preceding screenshot.
On Set LDAP Server, select Add LDAP Server, and then enter or select values for the following items:
Name Action Hostname/IP Enter the LDAP server’s FQDN or IP address. For example, azfta-dc01.azfta.com or 10.5.4.4. LDAP Protocol Select LDAPS. Port Leave the default secure LDAP port. Enabled Leave as Yes. Use Start TLS Required only if you use standard (unsecured) LDAP. Bind Identity Use your account that has domain Administrator permissions. For example, <admin@contoso.com>.Password Enter the password for the LDAP server. This password is the one that you use with the example <admin@contoso.com>account.Certificate Leave empty (see step 6). 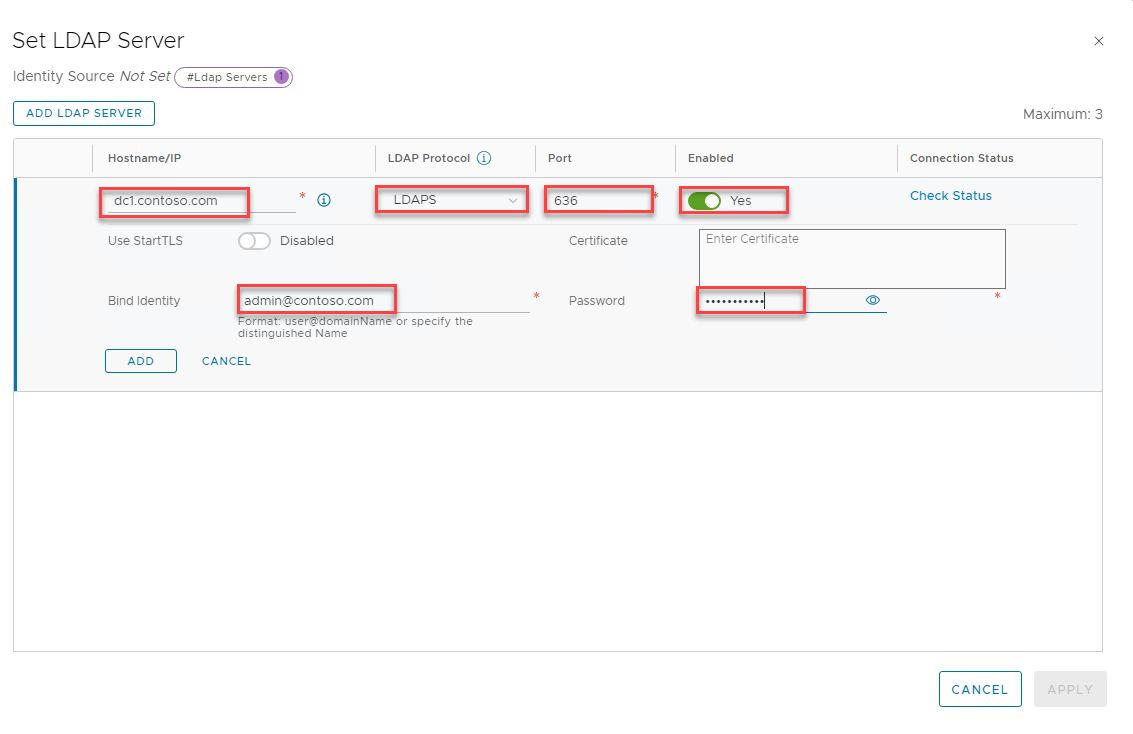
After the page updates and displays a connection status, select Add, and then select Apply.
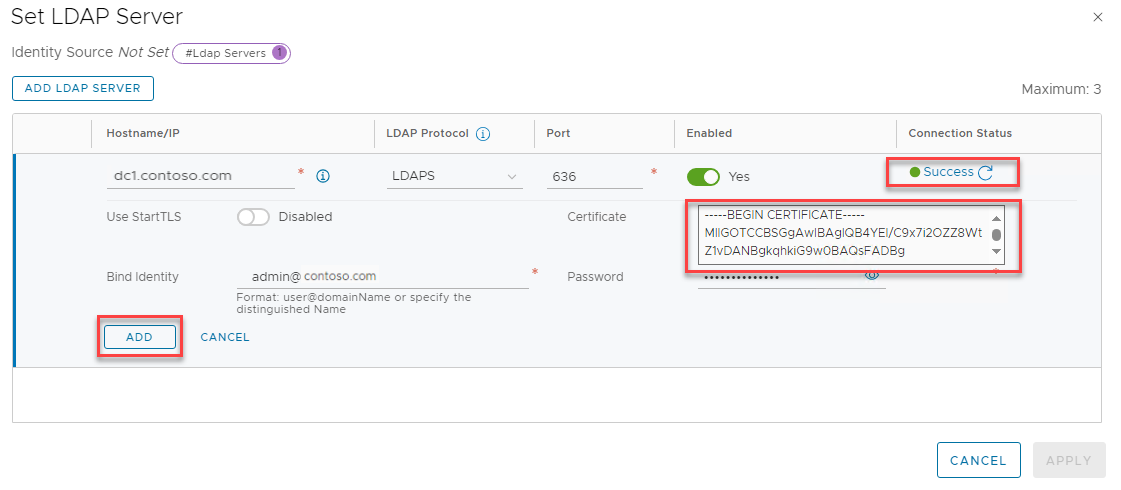
On User Management, select Save to complete the changes.
To add a second domain controller or another external identity provider, return to step 1.
Note
A recommended practice is to have two domain controllers to act as LDAP servers. You can also put the LDAP servers behind a load balancer.
Assign roles to Windows Server Active Directory identities
After you add an external identity, you can assign NSX roles to Windows Server Active Directory security groups based on your organization's security controls.
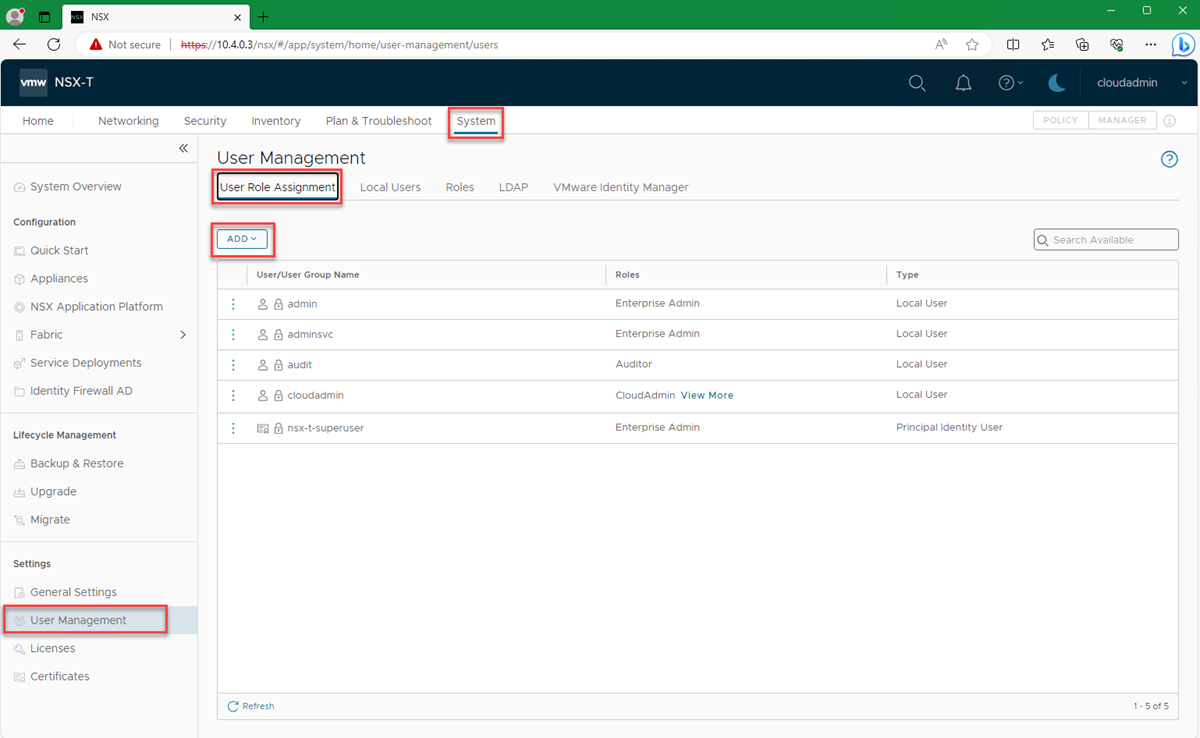
In NSX Manager, go to System > User Management > User Role Assignment > Add.
Select Add > Role Assignment for LDAP.
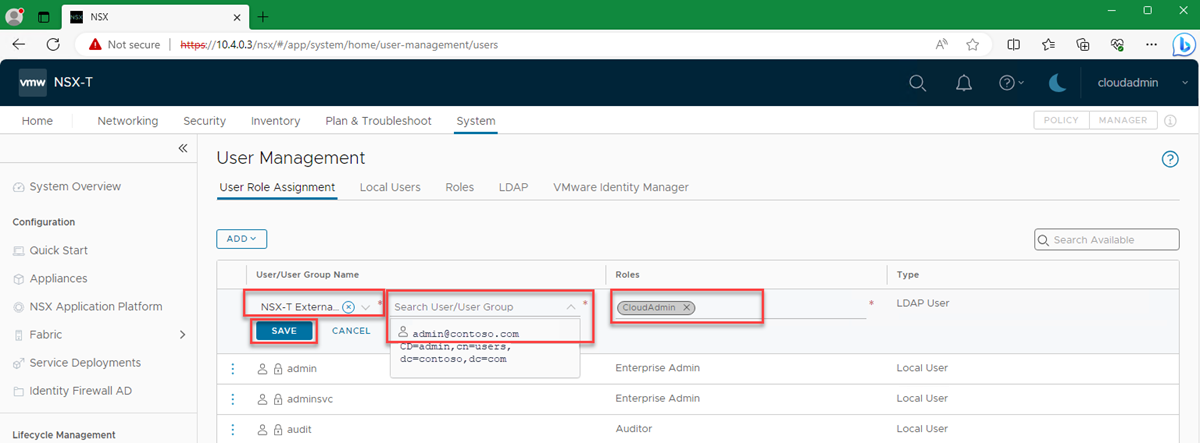
Select the external identity provider that you selected in step 3 in the preceding section. For example, NSX External Identity Provider.
Enter the first few characters of the user's name, the user's sign-in ID, or a group name to search the LDAP directory. Then select a user or group from the list of results.
Select a role. In this example, assign the FTAdmin user the CloudAdmin role.
Select Save.
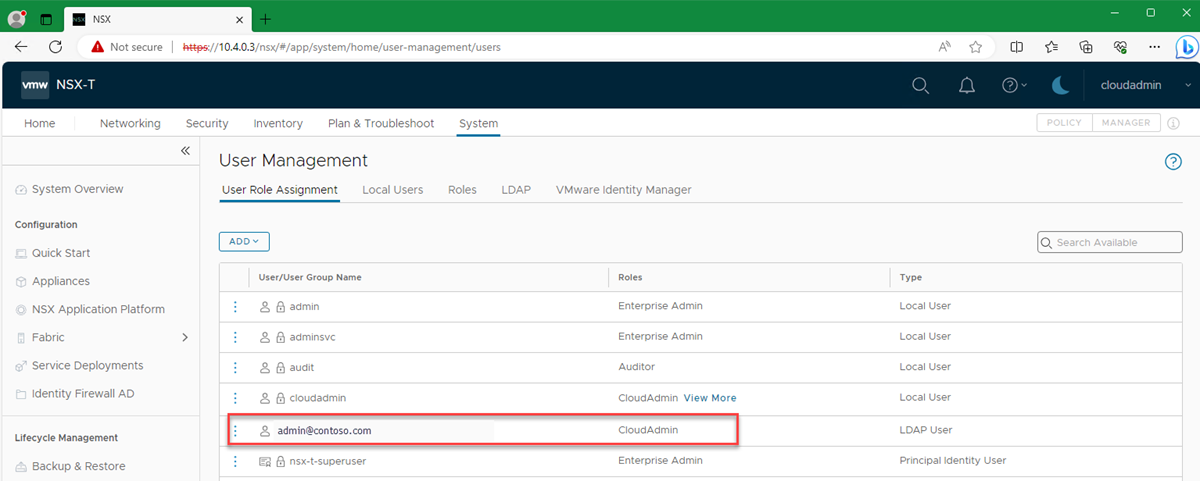
Under User Role Assignment, verify that the permissions assignment appears.
Your users should now be able to sign in to NSX Manager by using their Windows Server Active Directory credentials.
