Create a Relay namespace using the Azure portal
A namespace is a scoping container for all your Azure Relay components. Multiple relays can reside in a single namespace, and namespaces often serve as application containers. There are currently two different ways to create a relay namespace:
- Azure portal (this article).
- Azure Resource Manager templates.
Create a namespace in the Azure portal
Sign in to the Azure portal.
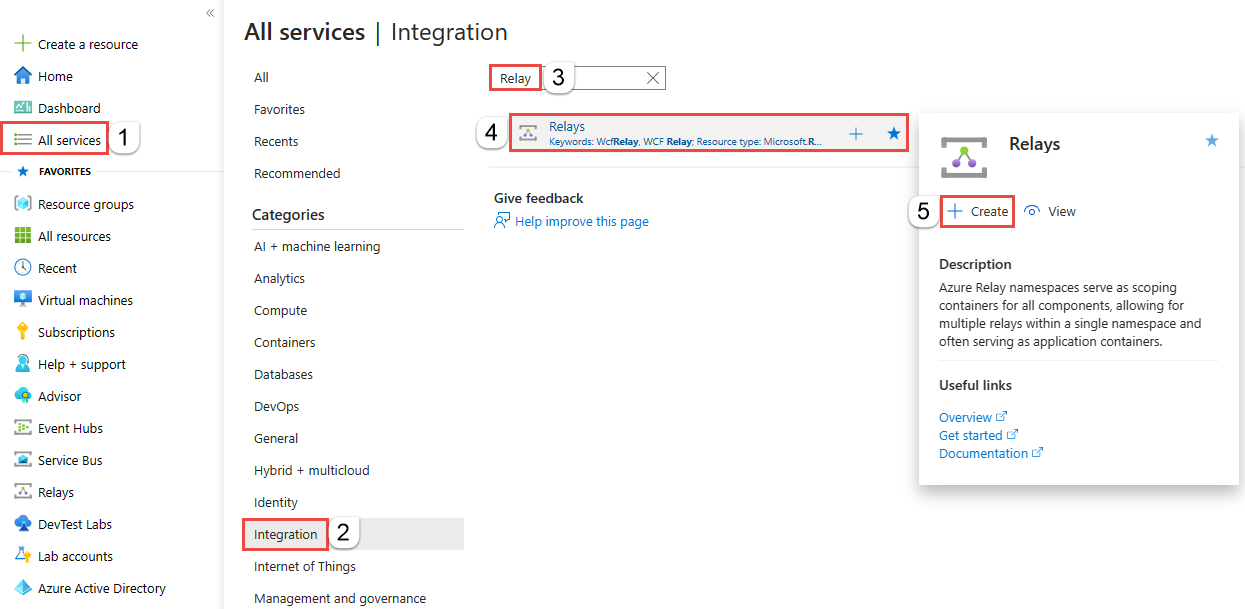
Select All services on the left menu. Select Integration, search for Relays, move the mouse over Relays, and then select Create.

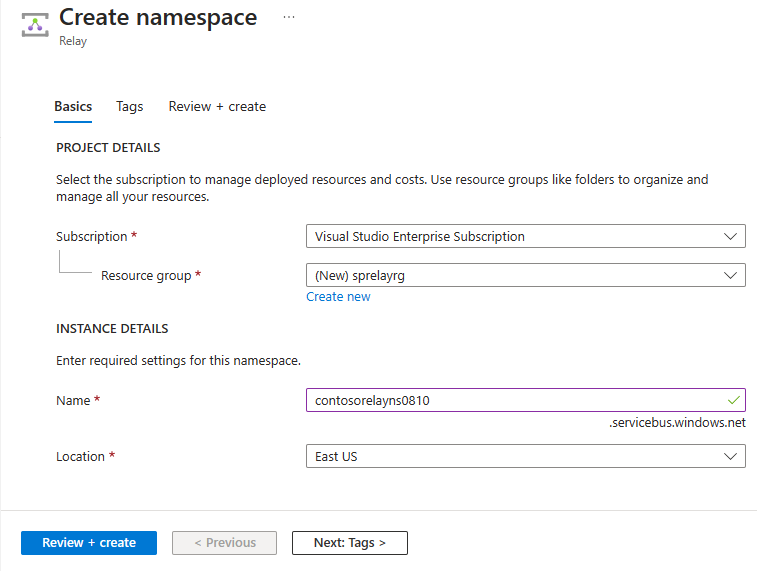
On the Create namespace page, follow these steps:
Choose an Azure subscription in which to create the namespace.
For Resource group, choose an existing resource group in which to place the namespace, or create a new one.
Enter a name for the Relay namespace.
Select the region in which your namespace should be hosted.
Select Review + create at the bottom of the page.

On the Review + create page, select Create.
After a few minutes, you see the Relay page for the namespace.

Get management credentials
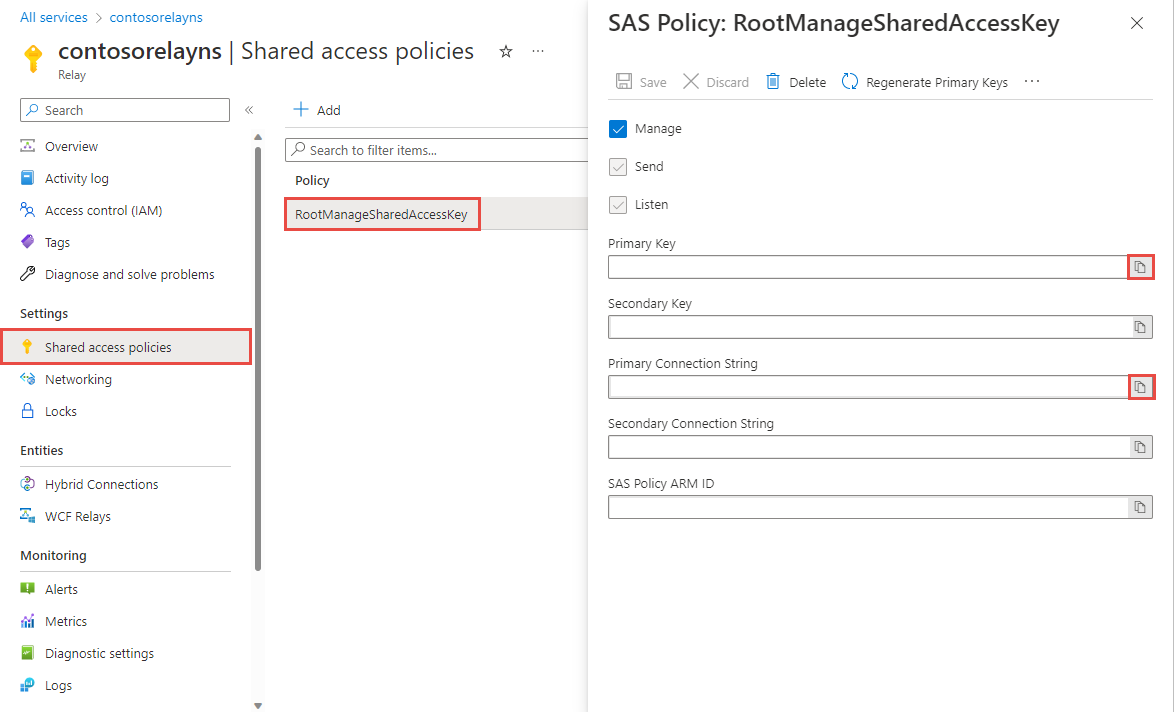
On the Relay page, select Shared access policies on the left menu.
On the Shared access policies page, select RootManageSharedAccessKey.
Under SAS Policy: RootManageSharedAccessKey, select the Copy button next to Primary Connection String. This action copies the connection string to your clipboard for later use. Paste this value into Notepad or some other temporary location.
Repeat the preceding step to copy and paste the value of Primary key to a temporary location for later use.
