Overview of common autoscale patterns
Autoscale settings help ensure that you have the right amount of resources running to handle the fluctuating load of your application. You can configure autoscale settings to be triggered based on metrics that indicate load or performance, or triggered at a scheduled date and time.
Azure autoscale supports many resource types. For more information about supported resources, see Autoscale supported resources.
This article describes some of the common patterns you can use to scale your resources in Azure.
Prerequisites
This article assumes that you're familiar with autoscale. For more information, see Get started here to scale your resource.
Scale based on metrics
Scale your resource based on metrics produced by the resource itself or any other resource. For example:
- Scale your virtual machine scale set based on the CPU usage of the virtual machine.
- Ensure a minimum number of instances.
- Set a maximum limit on the number of instances.
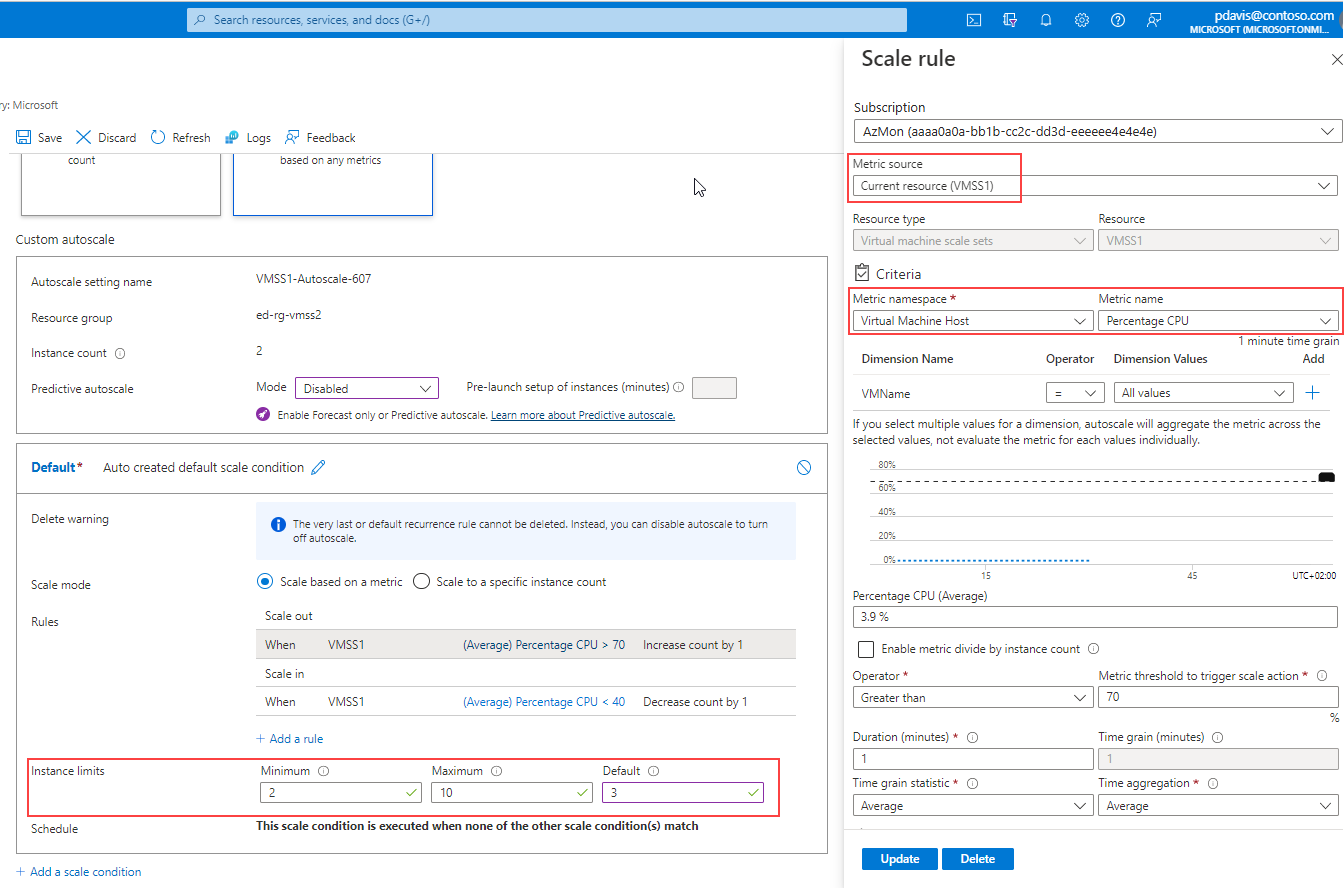
The following image shows a default scale condition for a virtual machine scale set:
- The Scale rule tab shows that the metric source is the scale set itself and the metric used is Percentage CPU.
- The minimum number of instances running is set to 2.
- The maximum number of instances is set to 10.
- When the scale set starts, the default number of instances is 3.
Scale based on another resource's metric
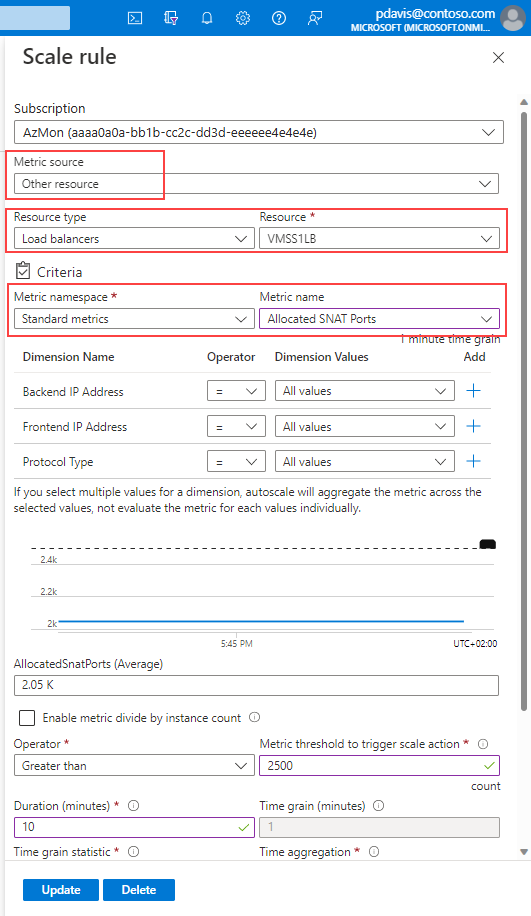
Scale a resource based on the metrics from a different resource. The following image shows a scale rule that's scaling a virtual machine scale set based on the number of allocated ports on a load balancer.
Scale differently on weekends
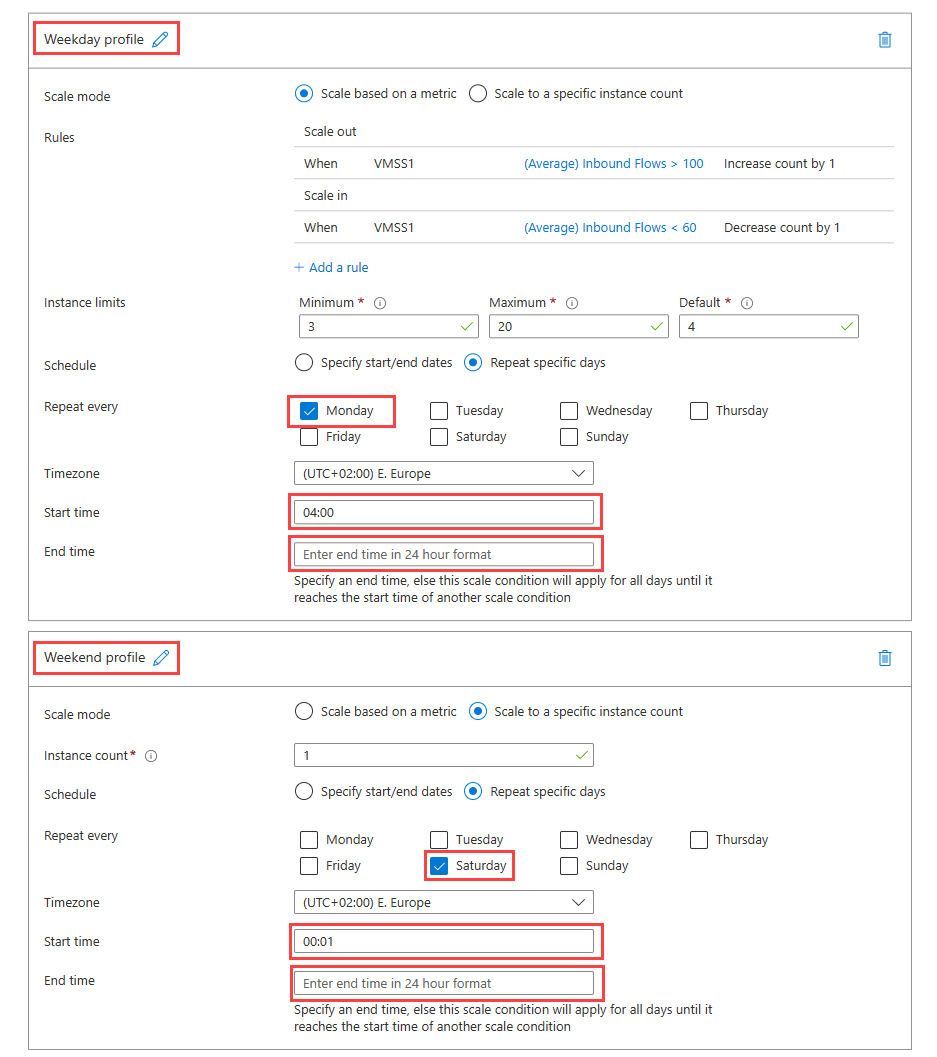
You can scale your resources differently on different days of the week. For example, you might have a virtual machine scale set and want to:
- Set a minimum of 3 instances on weekdays, scaling based on inbound flows.
- Scale in to a fixed 1 instance on weekends when there's less traffic.
In this example:
- The weekend profile starts at 00:01 Saturday morning and ends at 04:00 on Monday morning.
- The end times are left blank. The weekday profile ends when the weekend profile starts and vice-versa.
- The default profile is irrelevant because there's no time that isn't covered by the other profiles.
Note
Creating a recurring profile with no end time is only supported via the Azure portal and Azure Resource Manager templates (ARM templates). For more information on how to create recurring profiles with ARM templates, see Add a recurring profile by using ARM templates.
If the end time isn't included in the CLI command, a default end time of 23:59 will be implemented by creating a copy of the default profile with the naming convention "name": {\"name\": \"Auto created default scale condition\", \"for\": \"<non-default profile name>\"}.
Scale differently during specific events
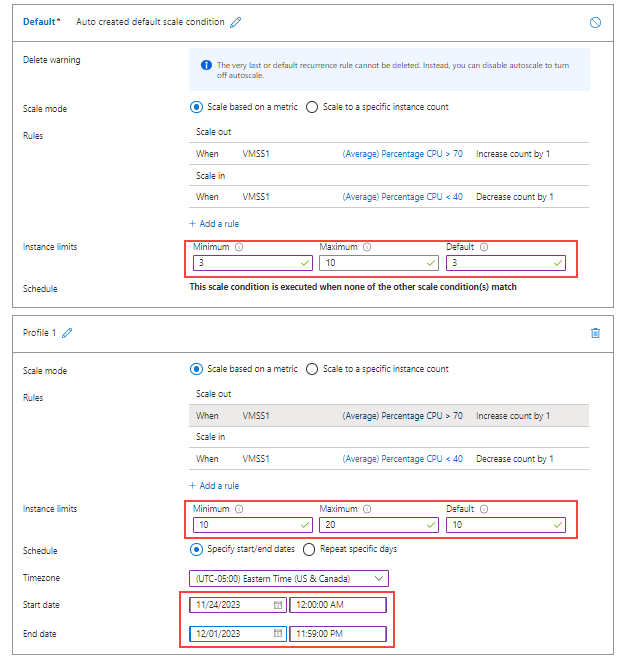
You can set your scale rules and instance limits differently for specific events. For example:
Set a minimum of 3 instances by default.
For the week of Black Friday, set the minimum number of instances to 10 to handle the anticipated traffic.
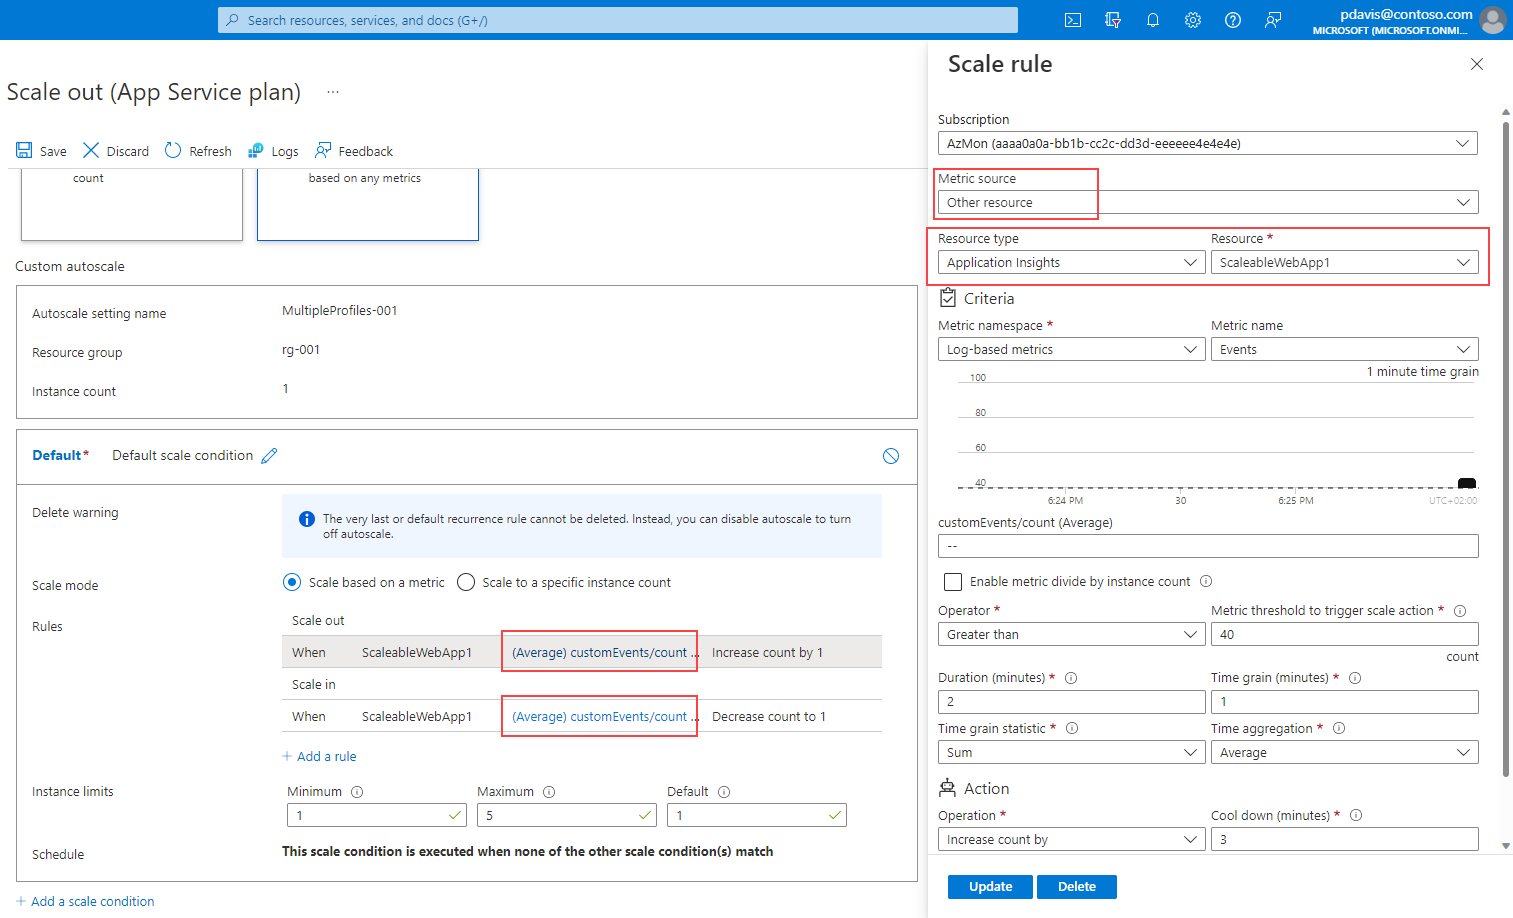
Scale based on custom metrics
Scale by custom metrics generated by your application. For example, you might have a web front end and an API tier that communicates with the back end and you want to scale the API tier based on custom events in the front end.
Next steps
Learn more about autoscale in the following articles:
