Configure role-based access control with Data Access Policy
Managing access to your Azure Cache for Redis instance is critical to ensure that the right users have access to the right set of data and commands. In Redis version 6, the Access Control List (ACL) was introduced. ACL limits which user can execute certain commands, and the keys that a user can be access. For example, you can prohibit specific users from deleting keys in the cache using DEL command.
Azure Cache for Redis now integrates this ACL functionality with Microsoft Entra ID to allow you to configure your Data Access Policies for your application's service principal and managed identity.
Azure Cache for Redis offers three built-in access policies: Data Owner, Data Contributor, and Data Reader. If the built-in access policies don't satisfy your data protection and isolation requirements, you can create and use your own custom data access policy as described in Configure custom data access policy.
Scope of availability
| Tier | Basic, Standard, Premium | Enterprise, Enterprise Flash |
|---|---|---|
| Availability | Yes | No |
Prerequisites and limitations
- Redis ACL and Data Access Policies aren't supported on Azure Cache for Redis instances that run Redis version 4.
- Microsoft Entra authentication and authorization are supported for SSL connections only.
- Some Redis commands are blocked.
Permissions for your data access policy
As documented on Redis Access Control List, ACL in Redis version 6.0 allows configuring access permissions for three areas:
Command categories
Redis has created groupings of commands such as administrative commands, dangerous commands, etc. to make setting permissions on a group of commands easier.
- Use
+@commandcategoryto allow a command category - Use
-@commandcategoryto disallow a command category
These commands are still blocked. The following groups are useful command categories that Redis supports. For more information on command categories, see the full list under the heading Command Categories.
admin- Administrative commands. Normal applications never need to use these, including
MONITOR,SHUTDOWN, and others.
- Administrative commands. Normal applications never need to use these, including
dangerous- Potentially dangerous commands. Each should be considered with care for various reasons, including
FLUSHALL,RESTORE,SORT,KEYS,CLIENT,DEBUG,INFO,CONFIG, and others.
- Potentially dangerous commands. Each should be considered with care for various reasons, including
keyspace- Writing or reading from keys, databases, or their metadata in a type agnostic way, including
DEL,RESTORE,DUMP,RENAME,EXISTS,DBSIZE,KEYS,EXPIRE,TTL,FLUSHALL, and more. Commands that can modify the keyspace, key, or metadata also have the write category. Commands that only read the keyspace, key, or metadata have the read category.
- Writing or reading from keys, databases, or their metadata in a type agnostic way, including
pubsub- PubSub-related commands.
read- Reading from keys, values or metadata. Commands that don't interact with keys, don't have either read or write.
set- Data type: sets related.
sortedset- Data type: sorted sets related.
stream- Data type: streams related.
string- Data type: strings related.
write- Writing to keys (values or metadata).
Commands
Commands allow you to control which specific commands can be run by a particular Redis user.
- Use
+commandto allow a command. - Use
-commandto disallow a command.
Keys
Keys allow you to control access to specific keys or groups of keys stored in the cache.
Use
~<pattern>to provide a pattern for keys.Use either
~*orallkeysto indicate that the command category permissions apply to all keys in the cache instance.
How to specify permissions
To specify permissions, you need to create a string to save as your custom access policy, then assign the string to your Azure Cache for Redis user.
The following list contains some examples of permission strings for various scenarios.
Allow application to execute all commands on all keys
Permissions string:
+@all allkeysAllow application to execute only read commands
Permissions string:
+@read ~*Allow application to execute read command category and set command on keys with prefix
Az.Permissions string:
+@read +set ~Az*
Configure a custom data access policy for your application
In the Azure portal, select the Azure Cache for Redis instance where you want to configure Microsoft Entra token-based authentication.
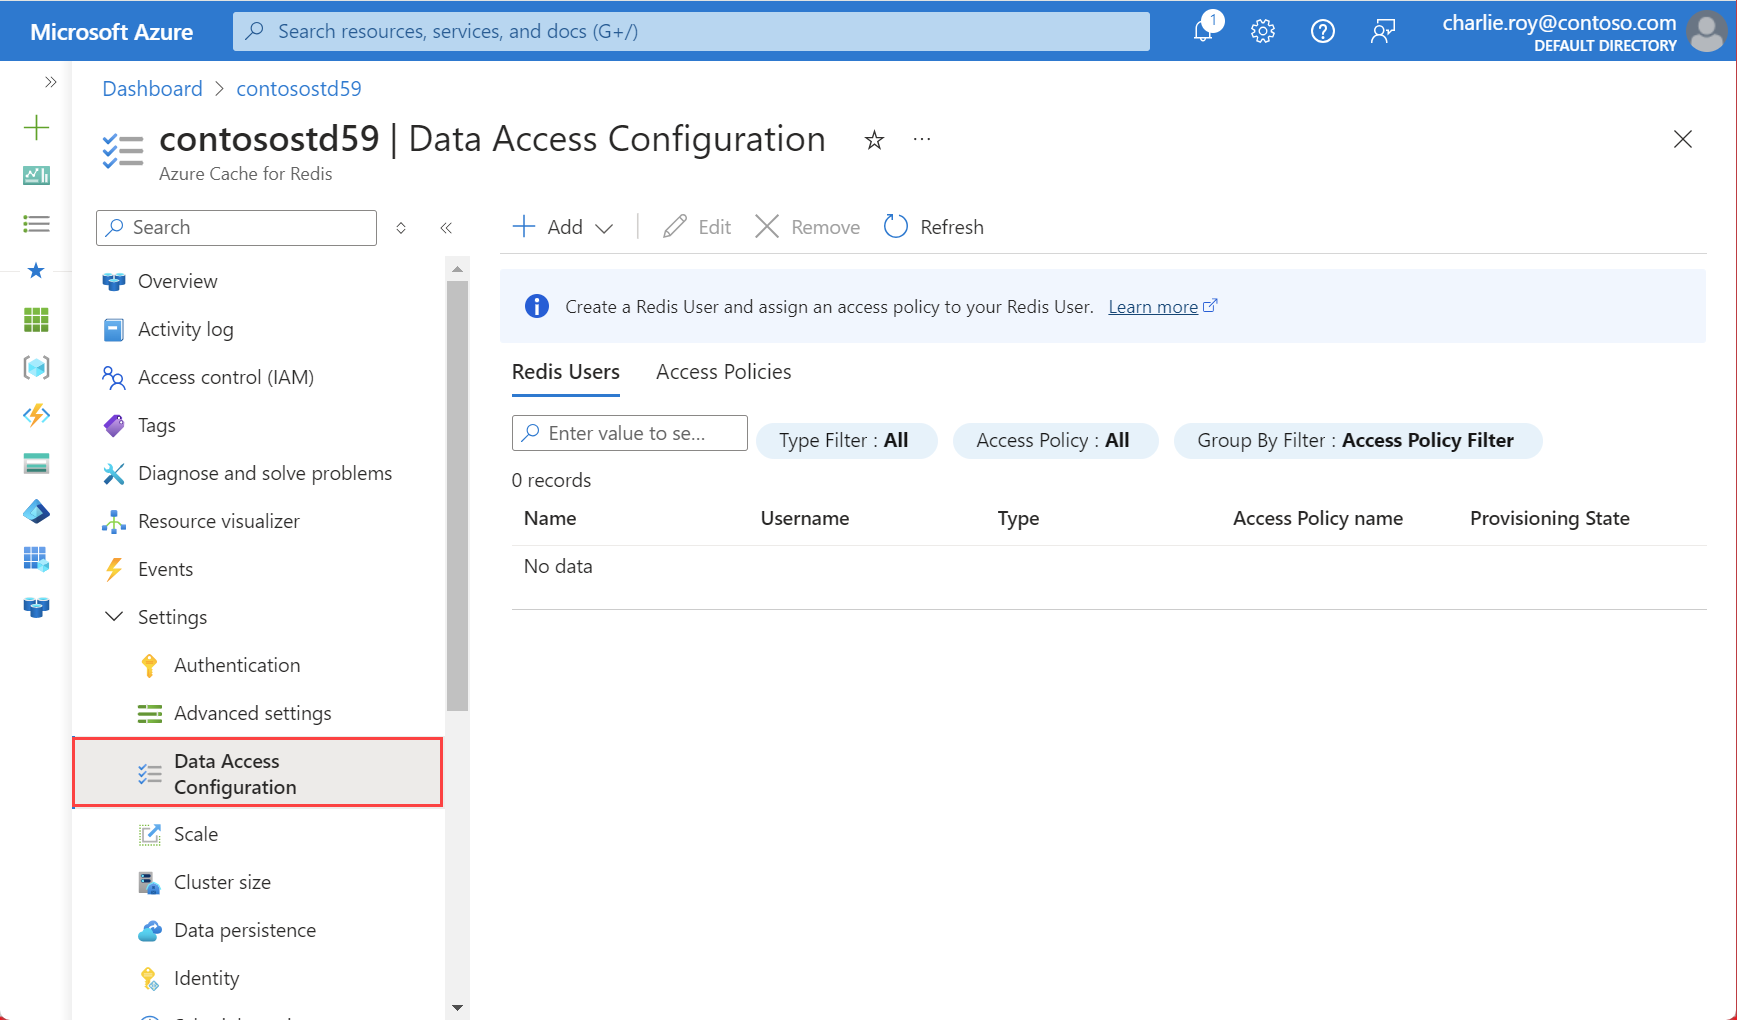
From the Resource menu, select Data Access configuration.

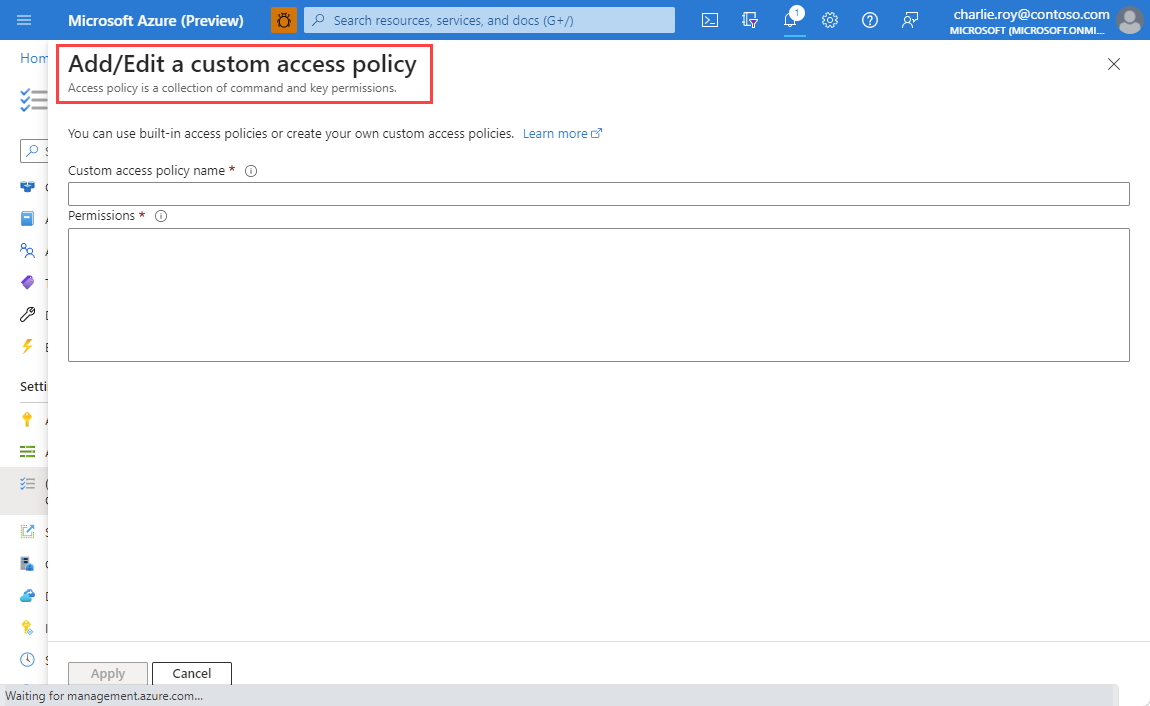
Select Add and choose New Access Policy.

Provide a name for your access policy.
Configure Permissions as per your requirements.
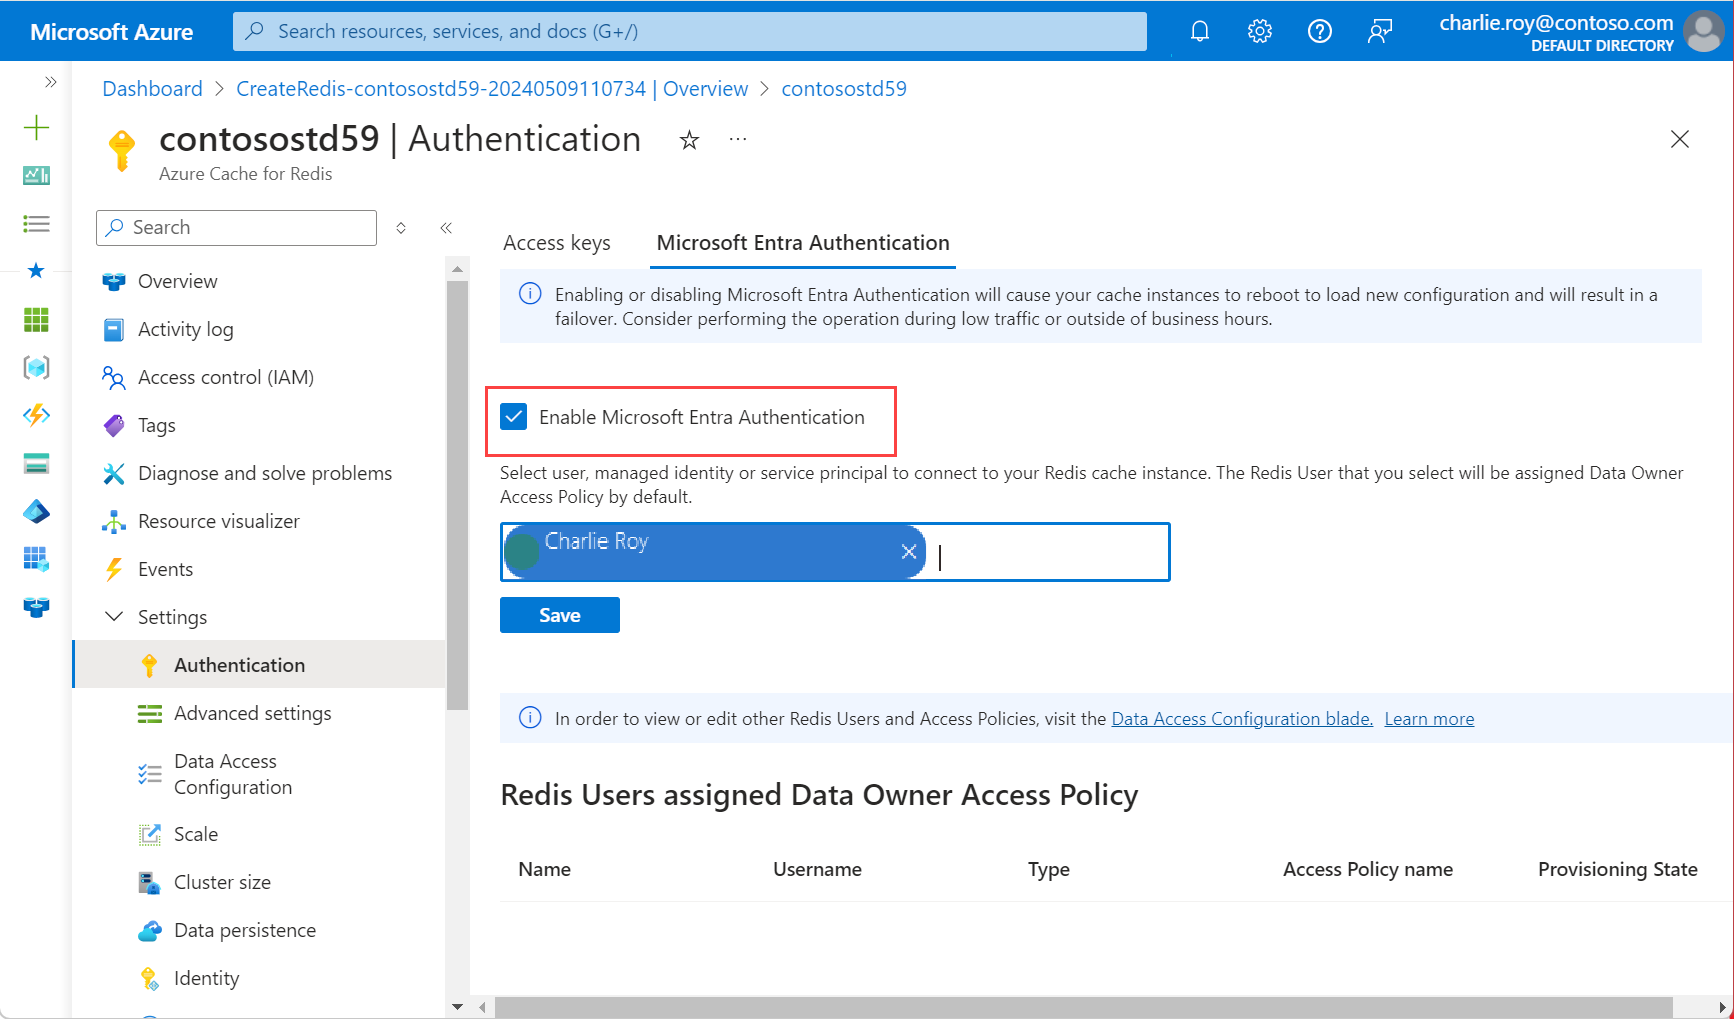
To add a user to the access policy using Microsoft Entra ID, you must first enable Microsoft Entra ID by selecting Authentication from the Resource menu.
Select Enable Microsoft Entra Authentication as the tab in the working pane.
If not checked already, check the box labeled Enable Microsoft Entra Authentication and select OK. Then, select Save.

A popup dialog box displays asking if you want to update your configuration, and informing you that it takes several minutes. Select Yes.
Important
Once the enable operation is complete, the nodes in your cache instance reboots to load the new configuration. We recommend performing this operation during your maintenance window or outside your peak business hours. The operation can take up to 30 minutes.
Configure your Redis client to use Microsoft Entra ID
Now that you have configured Redis User and Data access policy for configuring role based access control, you need to update your client workflow to support authenticating using a specific user/password. To learn how to configure your client application to connect to your cache instance as a specific Redis User, see Configure your Redis client to use Microsoft Entra.