Configure Azure Application Gateway TCP/TLS proxy (Preview)
To try out the layer 4 features of Azure Application Gateway, this article shows how to use the Azure portal to create an Azure Application Gateway with a SQL Server virtual machine as the backend server. Connectivity through a SQL client is also tested to verify the configuration works correctly. The article guides you through the following procedures:
- Create a SQL server Azure virtual machine
- Create a new application gateway
Configure basic settings and a frontend public IP address
Add a backend pool and set the SQL server as a backend target
Create a routing rule
- Create a listener with the required port (SQL 1433)
- Create a backend setting using layer 4 protocol
Add a SQL server to the backend pool
- Connect to the application gateway using a SQL client
Important
Application Gateway TCP/TLS proxy is currently in PREVIEW.
See the Supplemental Terms of Use for Microsoft Azure Previews for legal terms that apply to Azure features that are in beta, preview, or otherwise not yet released into general availability.
Register to the preview
Note
When you join this preview, all Application Gateways will have the ability to use Layer 4 proxy features. This is an auto-approved registration and needs about 30 minutes to take effect.
For more information about preview features, see Set up preview features in Azure subscription.
Use the following steps to enroll into the public preview for Application Gateway TCP/TLS proxy using the Azure portal:
Sign in to the Azure portal.
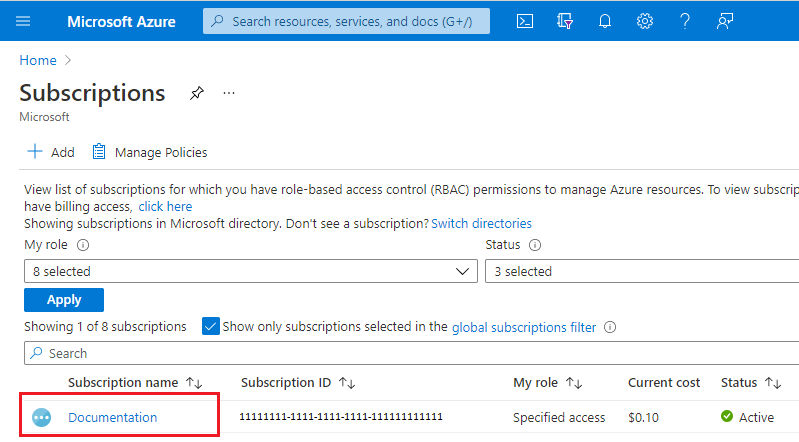
In the search box, enter subscriptions and select Subscriptions.

Select the link for your subscription's name.
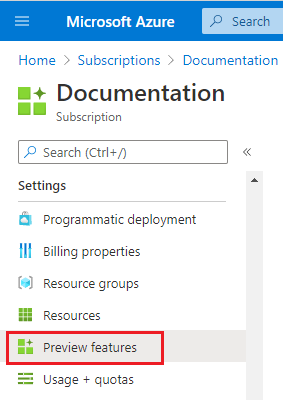
From the left menu, under Settings select Preview features.
You see a list of available preview features and your current registration status.
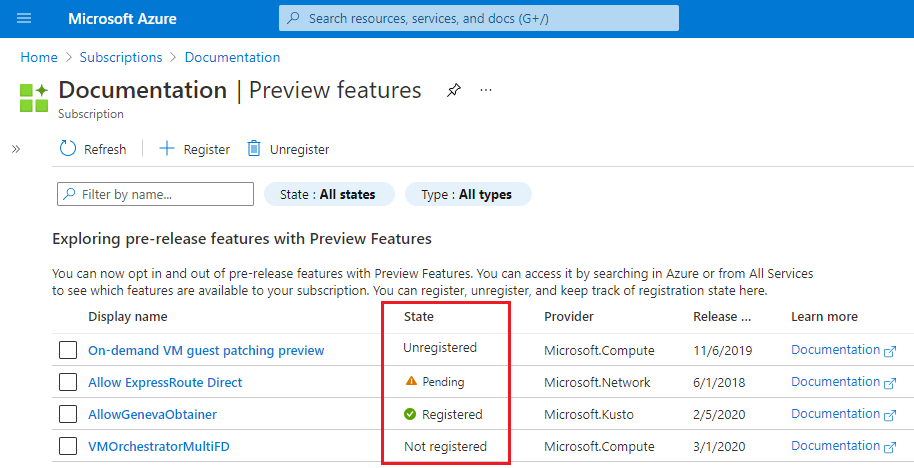
From Preview features type into the filter box AllowApplicationGatewayTlsProxy, select the feature, and then select Register.

Create a SQL server
First, create a SQL Server virtual machine (VM) using the Azure portal.
From the Azure portal Home page, search for SQL Virtual Machines and then select SQL virtual machines under Services.

Select Create and then on the Select SQL deployment option page, choose a Free SQL Server License option from the drop-down menu. For example: SQL Server 2022 Developer on Windows Server 2022. You can also select a different Free license version to test.
After choosing a free SQL license version, select Create. The Basics tab opens.
Enter the following information on the Basics tab:
- Subscription: Select your Azure subscription name.
- Resource group: Create a new resource group so that you can easily remove it after testing, for example: myresourcegroup.
- Virtual machine name: mySQLVM
- Region: Select the same region as your resource group.
- Availability options: Accept the default settings.
- Security type: Accept the default settings.
- Image: Accept the default settings.
- VM architecture: Accept the default settings.
- Size: Select a size compatible with the region.
- Administrator details: Enter a username and password.
- Inbound port rules: Accept the default settings.
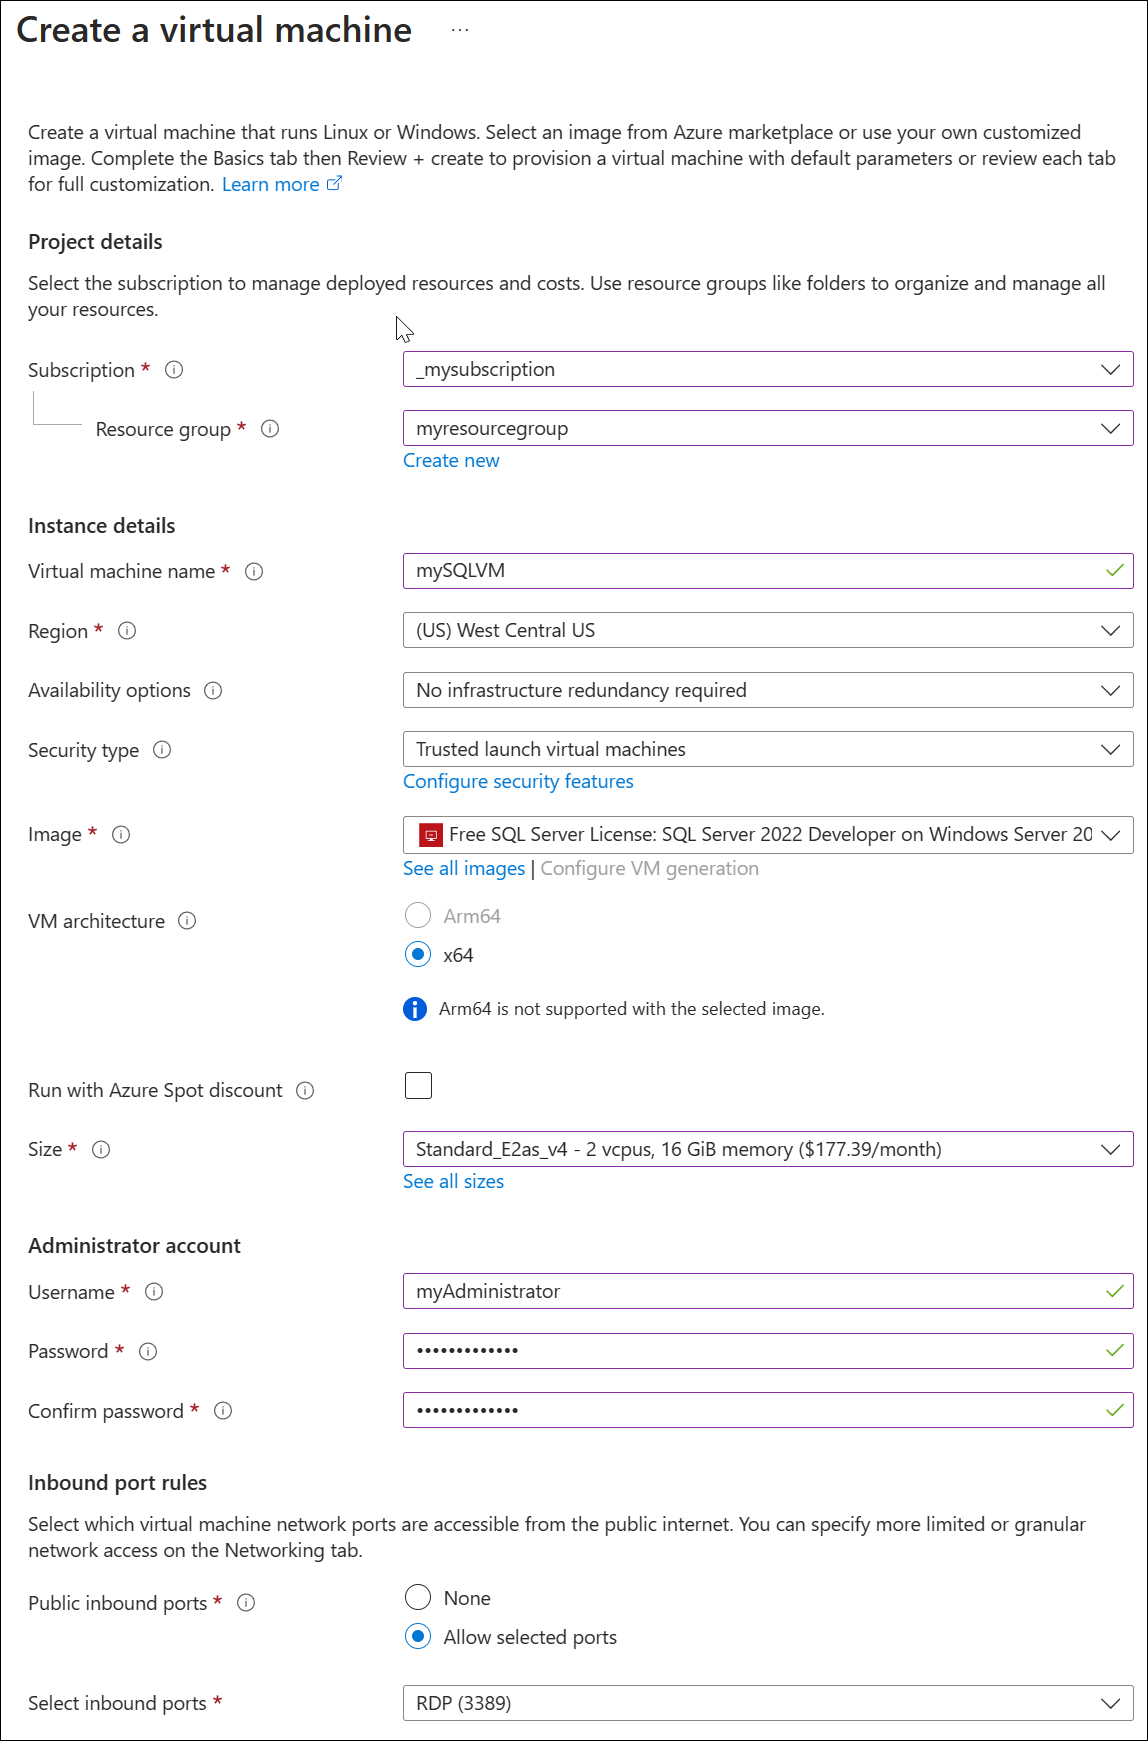
Select Review + create, and then select Create. Deployment of the virtual machine takes a few minutes.
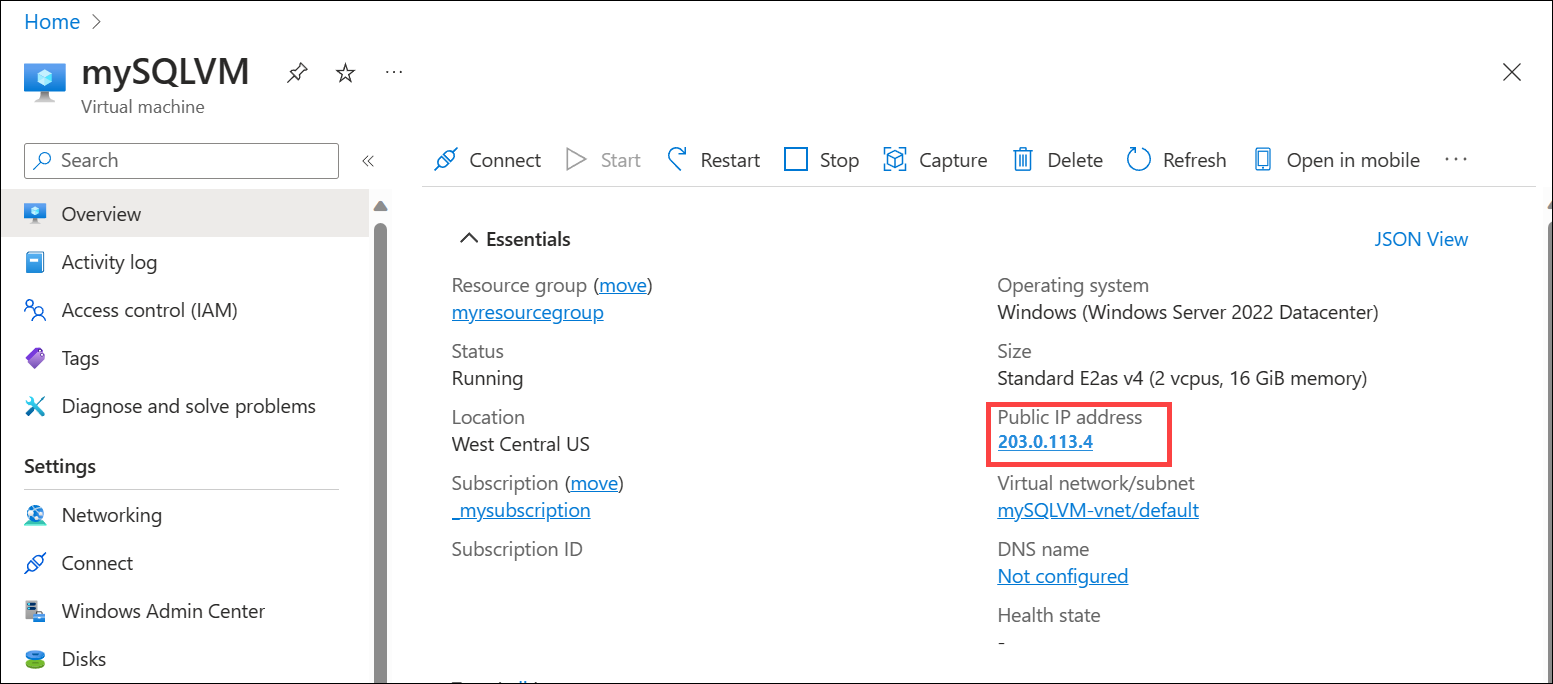
When deployment is complete, select the SQL server resource's overview page and write down the public IP address of the virtual machine.
Create an Application Gateway
On the Azure portal menu or from the Home page, select Create a resource.
Under Categories, select Networking and then select Application Gateway in the Popular Azure services list.
On the Basics tab, enter the following details:
- Subscription: Select your Azure subscription name.
- Resource group: Select the same resource group that you entered for the previous procedure to create a SQL server virtual machine.
- Application gateway name: myL4AppGW
- Region: Select the same region as your resource group.
- Tier: Standard V2
- Enable autoscaling: Accept the default setting.
- Minimum instance count: 2
- All other Instance details: Accept the default settings.
- Virtual network: Select Create new and enter a name. For example: myL4AppGWVNet. Accept the default address space settings and replace the subnet name of default with a descriptive name such as appgw-subnet.
Note
Default address space and subnet settings are adjusted to avoid conflicting with other VNets that you have deployed.
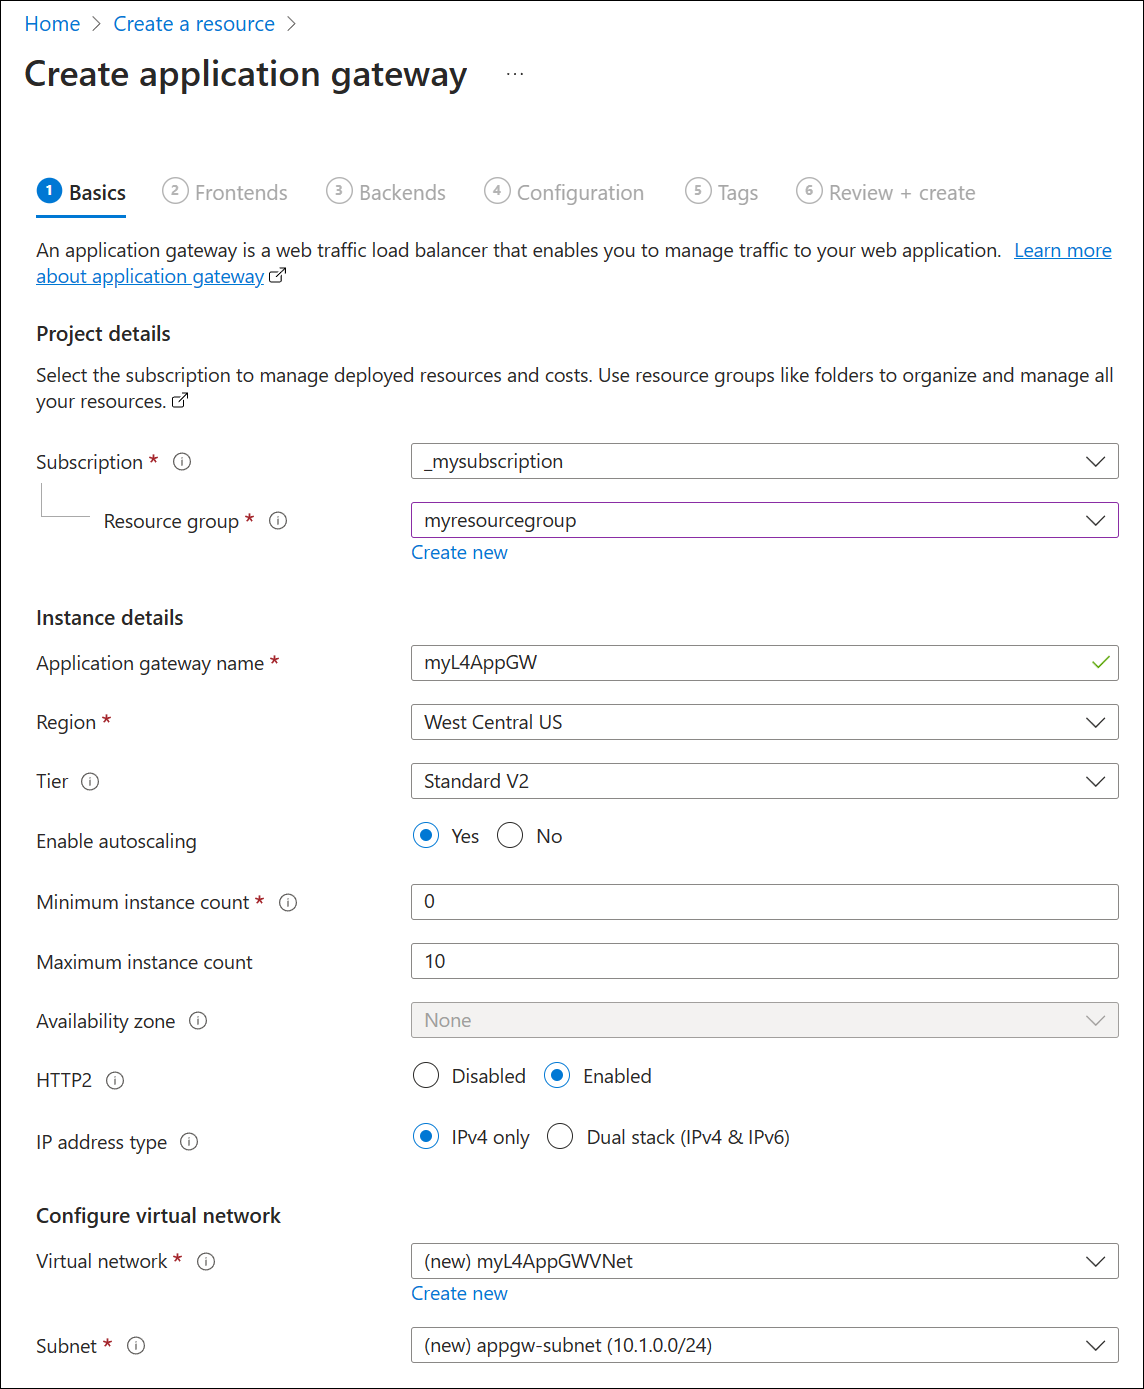
The following table provides more information about the settings used in this procedure.
Field Details Subscription Select the same subscription where you deployed the SQL server. Resource group Select the same resource group where you deployed the SQL server. Application gateway name You can provide any name for easy identification. Region The region is automatically selected based on the resource group that you choose. Tier For TCP/TLS proxy, you can select either Standard v2 or WAF v2. The WAF functions only apply to HTTP(S) when using a gateway in hybrid mode (HTTP, HTTPS along with TCP or TLS). Enable autoscaling This setting allows your gateway to scale out and scale in based on loads. This is applicable for both Layer 7 and Layer 4 proxy. The default setting is Yes. Min/Max instance counts For more information, see Scaling Application Gateway v2 and WAF v2. Availability zone For more information, see What are Azure regions and availability zones?. HTTP2 The default setting of disabled can be used for this test. Virtual network and subnet You can choose an existing VNet under the region or create a new VNet. Application Gateway requires its own dedicated subnet with no other services deployed in it. Select Next: Frontends.
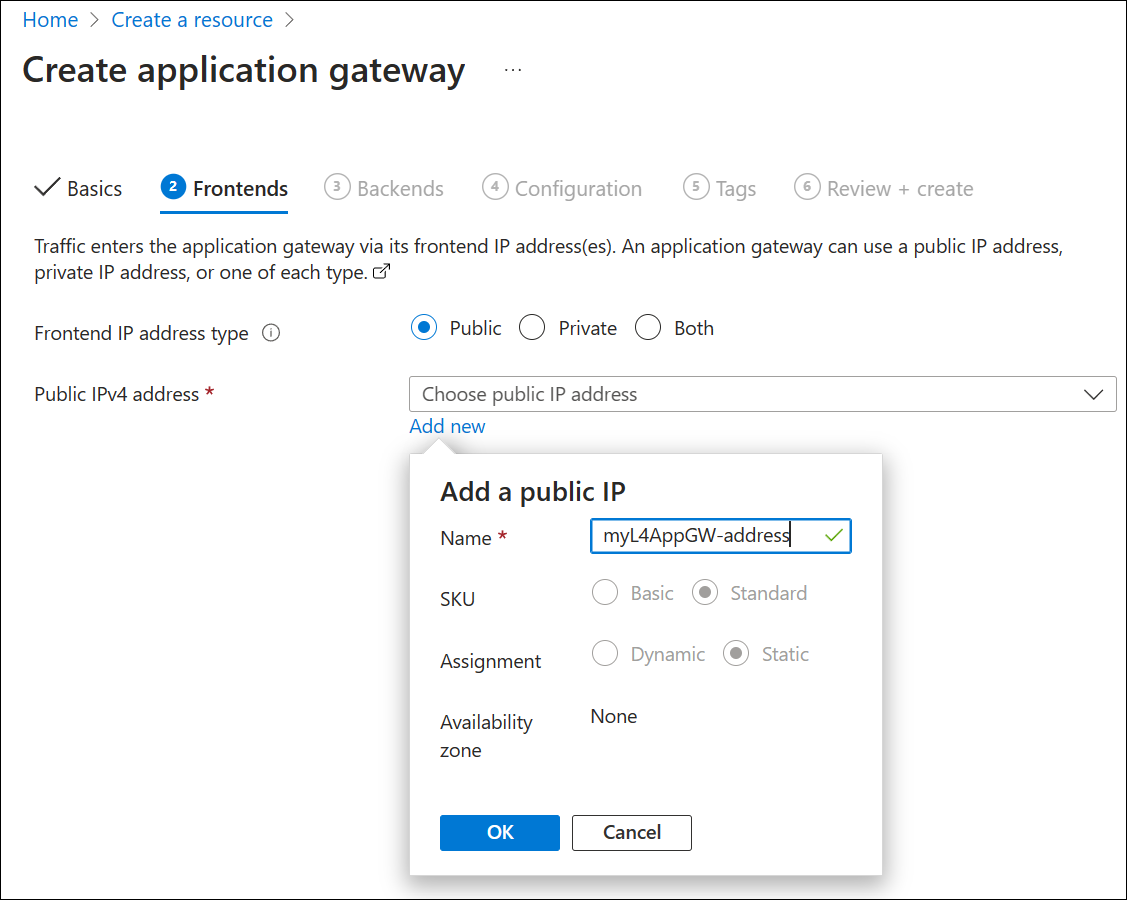
Select a Frontend IP address type of Public and either use an existing IP address or create a new one.
Select Next: Backends.
On the Backends tab, select Add a backend pool.
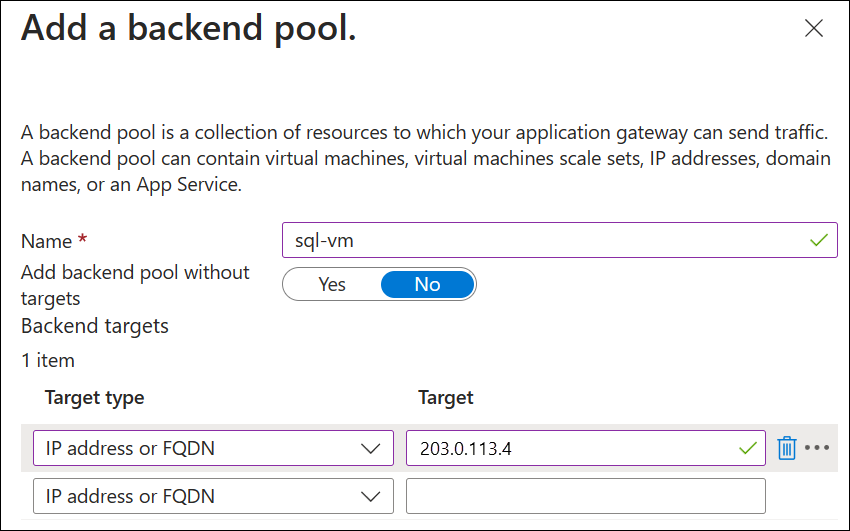
Enter details under Add a backend pool:
- Name: Enter a name for the backend pool, for example sql-vm.
- Target type: Select IP address or FQDN and enter the public IP address of the SQL server virtual machine that you wrote down previously.
Select Add and then select Next: Configuration.
Next, you create listeners, backend settings and a routing rule that links frontend and backend properties. Start by selecting Add a routing rule and entering the following settings on the Listener tab:
Rule name: SQL-rule
Priority: 100
Listener name: sql-client-listener
Frontend IP: Public IPv4
Protocol: TCP
Port: 1433
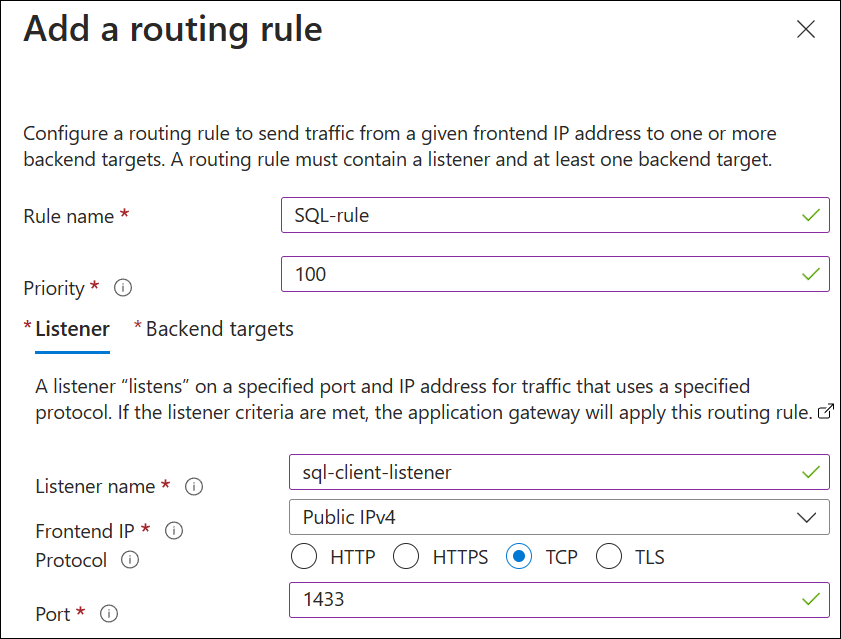
Select the Backend targets tab and enter the following settings:
- Target type: Backend pool
- Backend target: Select the pool name you created, for example sql-vm.
- Backend settings: Select Add new and create backend settings with the following values:
Backend settings name: backend-settings-sql
Backend protocol: TCP
Backend port: 1433
Time-out (seconds): 20
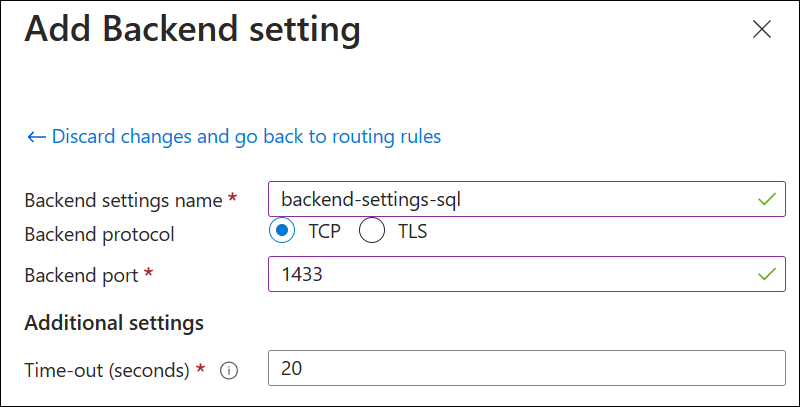
Select Add to add the backend settings, and then select Add to add the routing rule.
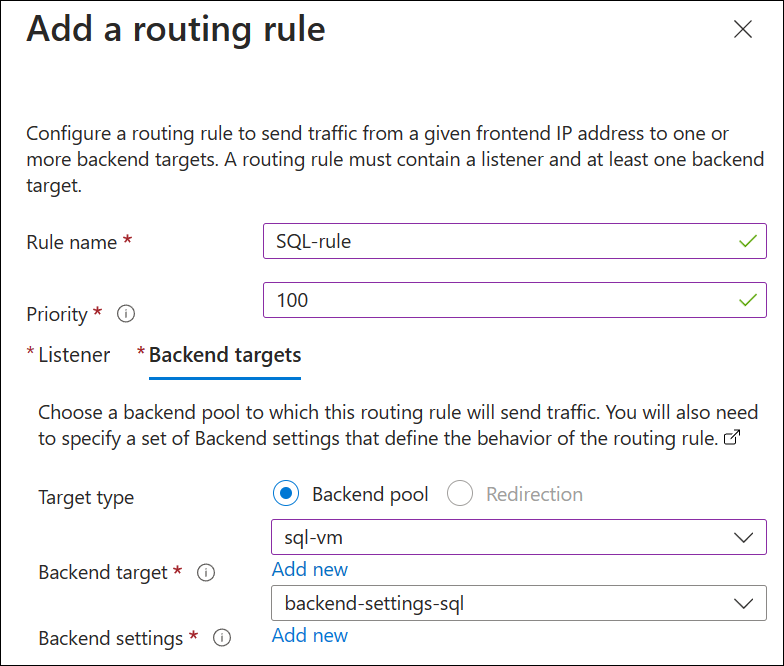
Select Next: Tags and add tags if desired. No tags are required for this demonstration.
Select Next: Review + Create and then select Create. The deployment process takes a few minutes.
Connect to the SQL server
Before connecting to the SQL server, verify that you have:
- The public IP address of the Application Gateway frontend
- Configured the SQL server to accept SQL authentication
- Created an admin account on the SQL server
On a client device with SQL Server Management Studio installed, connect to the public IP address of the Azure virtual machine.
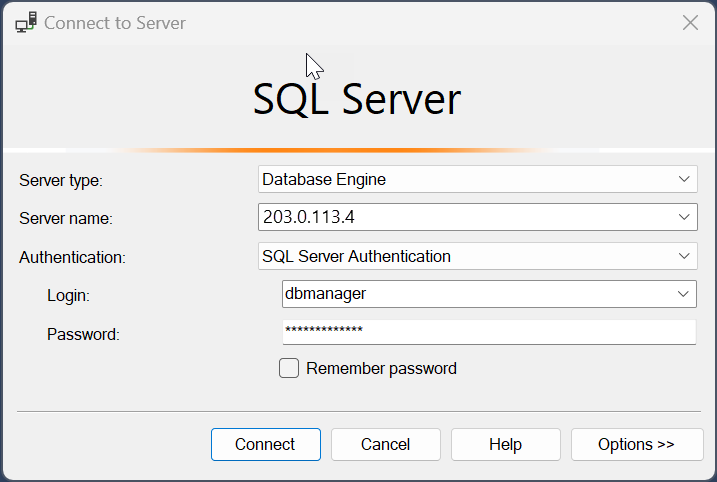
Clean up resources
When no longer needed, remove the application gateway and all related resources by deleting the resource group you created, myresourcegroup.
Unregister from the preview
Using the same process that you used to register for the preview, unregister from the preview by selecting the preview feature and then selecting Unregister.
Next steps
To monitor the health of your backend pool, see Backend health and diagnostic logs for Application Gateway.