How to use autolabeling for Custom Named Entity Recognition
Labeling process is an important part of preparing your dataset. Since this process requires both time and effort, you can use the autolabeling feature to automatically label your entities. You can start autolabeling jobs based on a model you've previously trained or using GPT models. With autolabeling based on a model you've previously trained, you can start labeling a few of your documents, train a model, then create an autolabeling job to produce entity labels for other documents based on that model. With autolabeling with GPT, you may immediately trigger an autolabeling job without any prior model training. This feature can save you the time and effort of manually labeling your entities.
Prerequisites
Before you can use autolabeling based on a model you've trained, you need:
- A successfully created project with a configured Azure blob storage account.
- Text data that has been uploaded to your storage account.
- Labeled data
- A successfully trained model
Trigger an autolabeling job
When you trigger an autolabeling job based on a model you've trained, there's a monthly limit of 5,000 text records per month, per resource. This means the same limit applies on all projects within the same resource.
Tip
A text record is calculated as the ceiling of (Number of characters in a document / 1,000). For example, if a document has 8921 characters, the number of text records is:
ceil(8921/1000) = ceil(8.921), which is 9 text records.
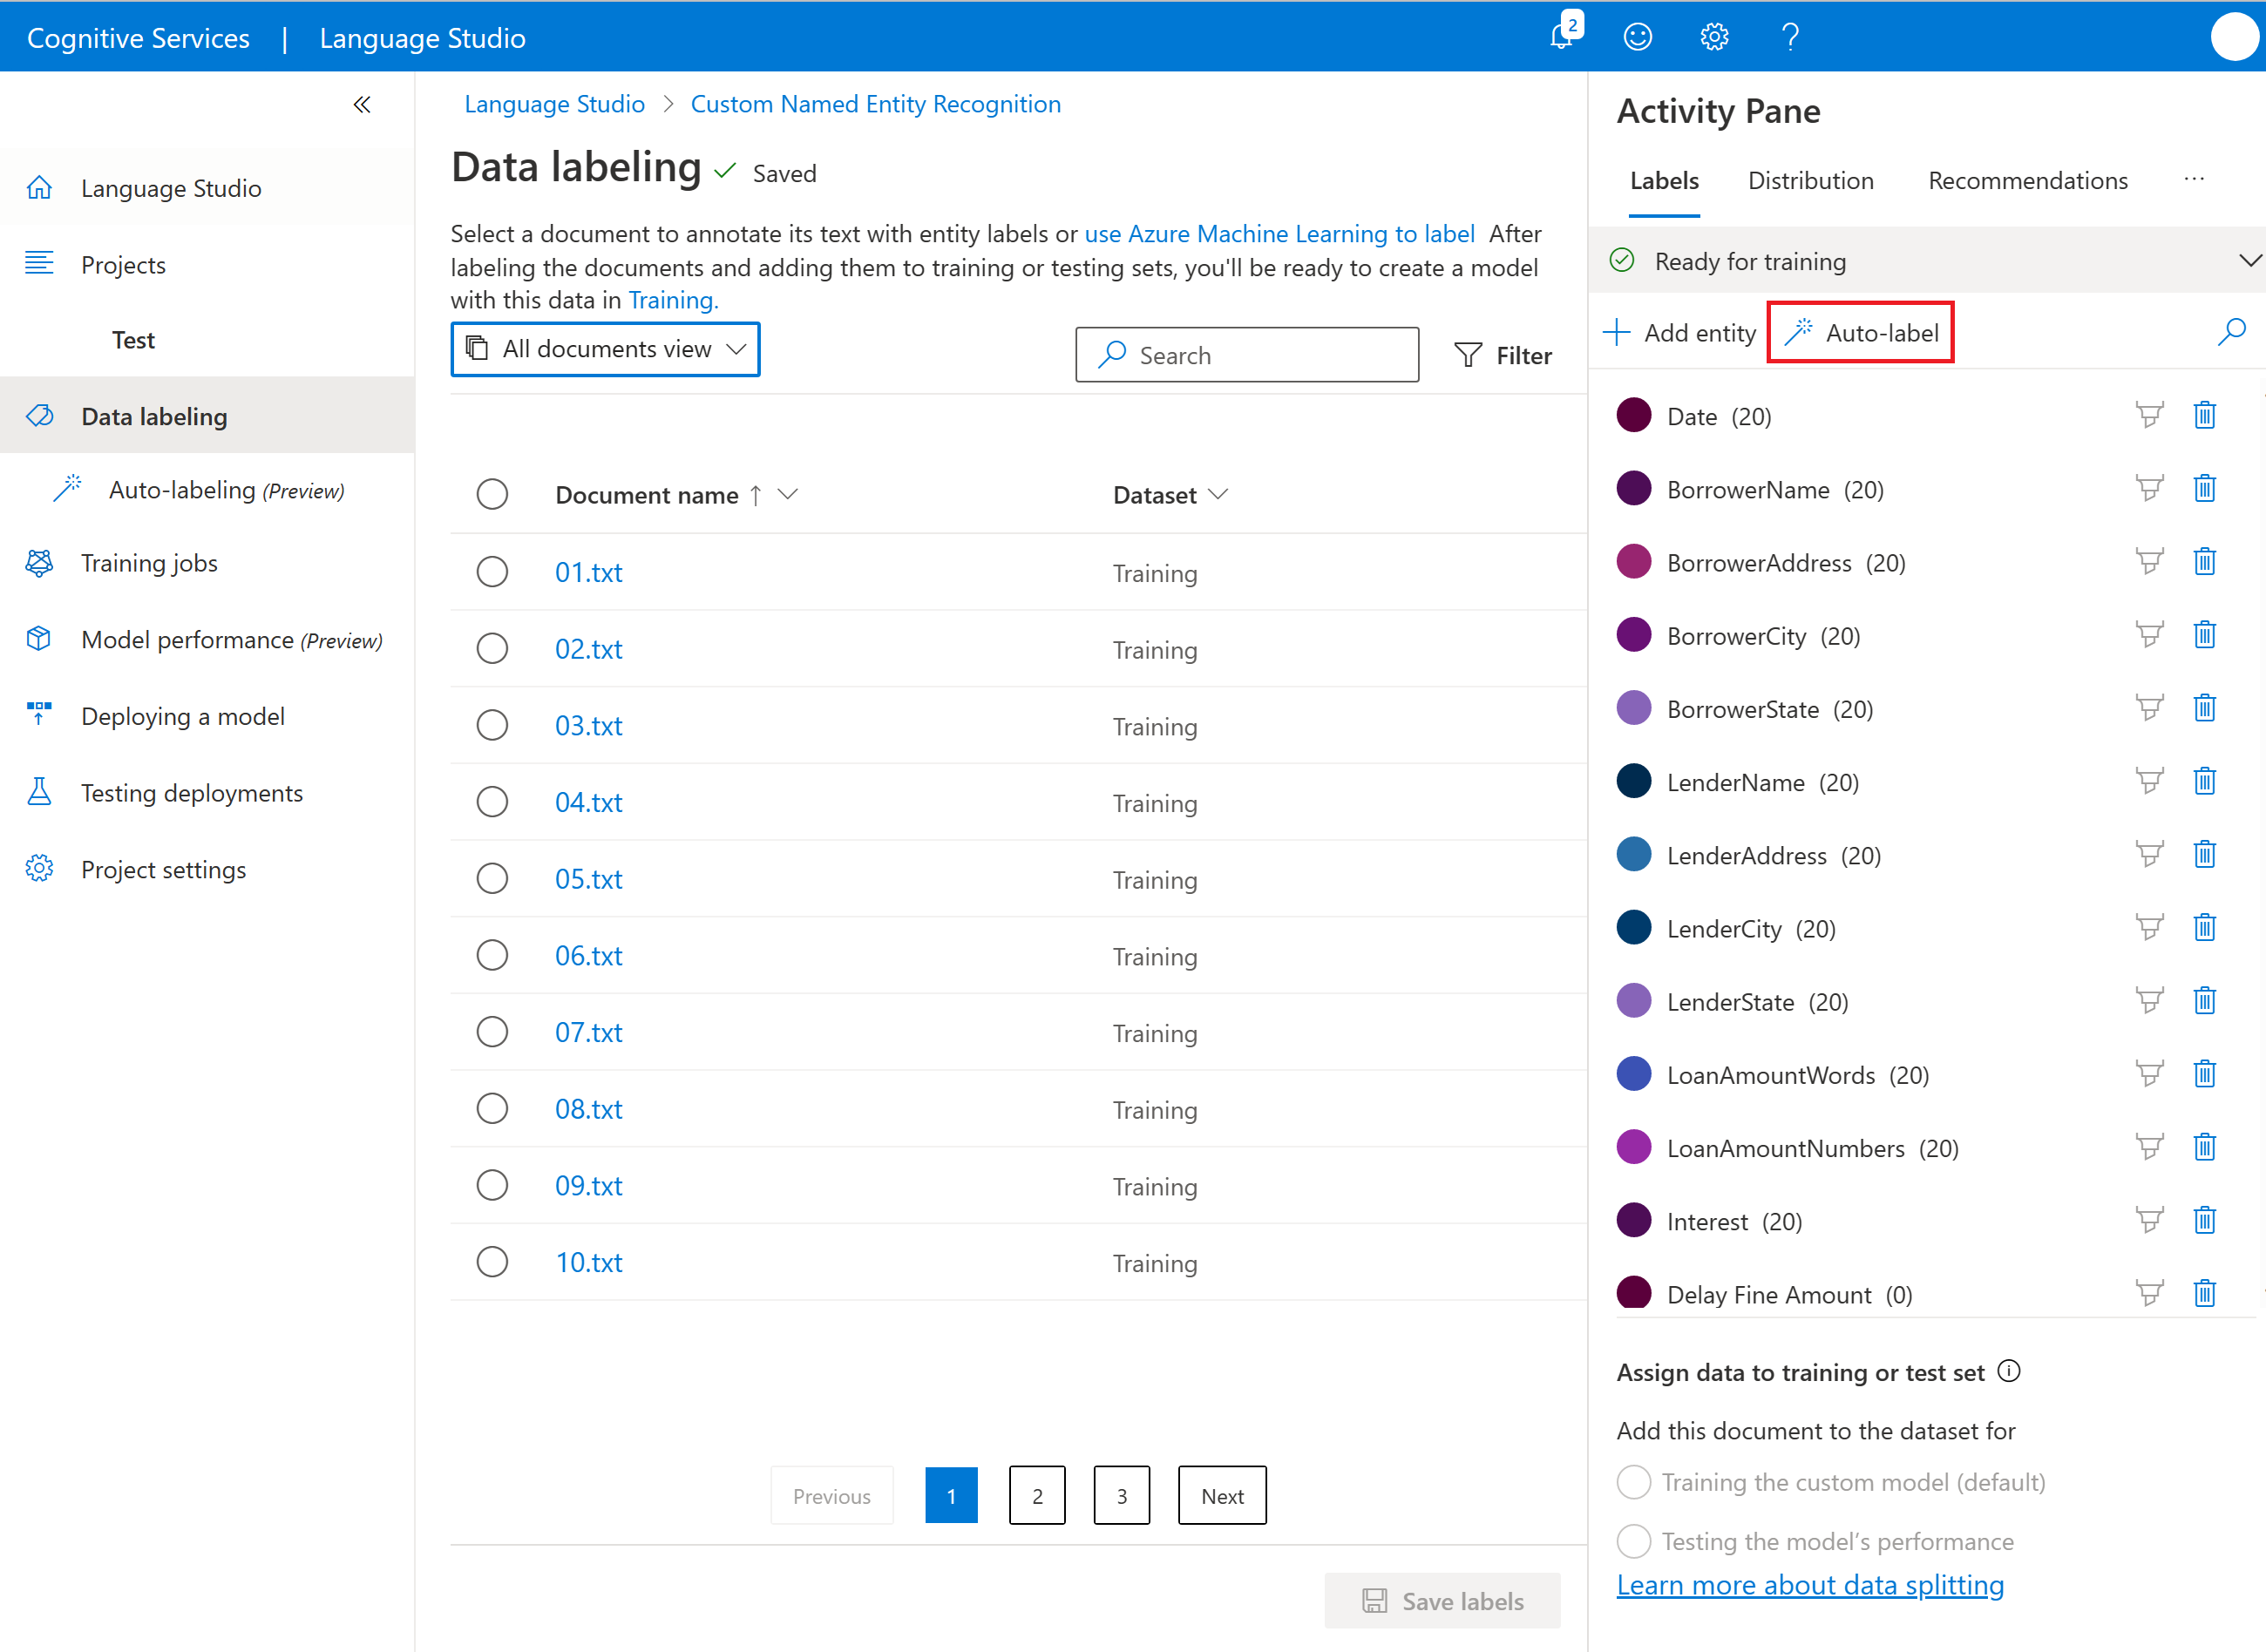
From the left navigation menu, select Data labeling.
Select the Autolabel button under the Activity pane to the right of the page.
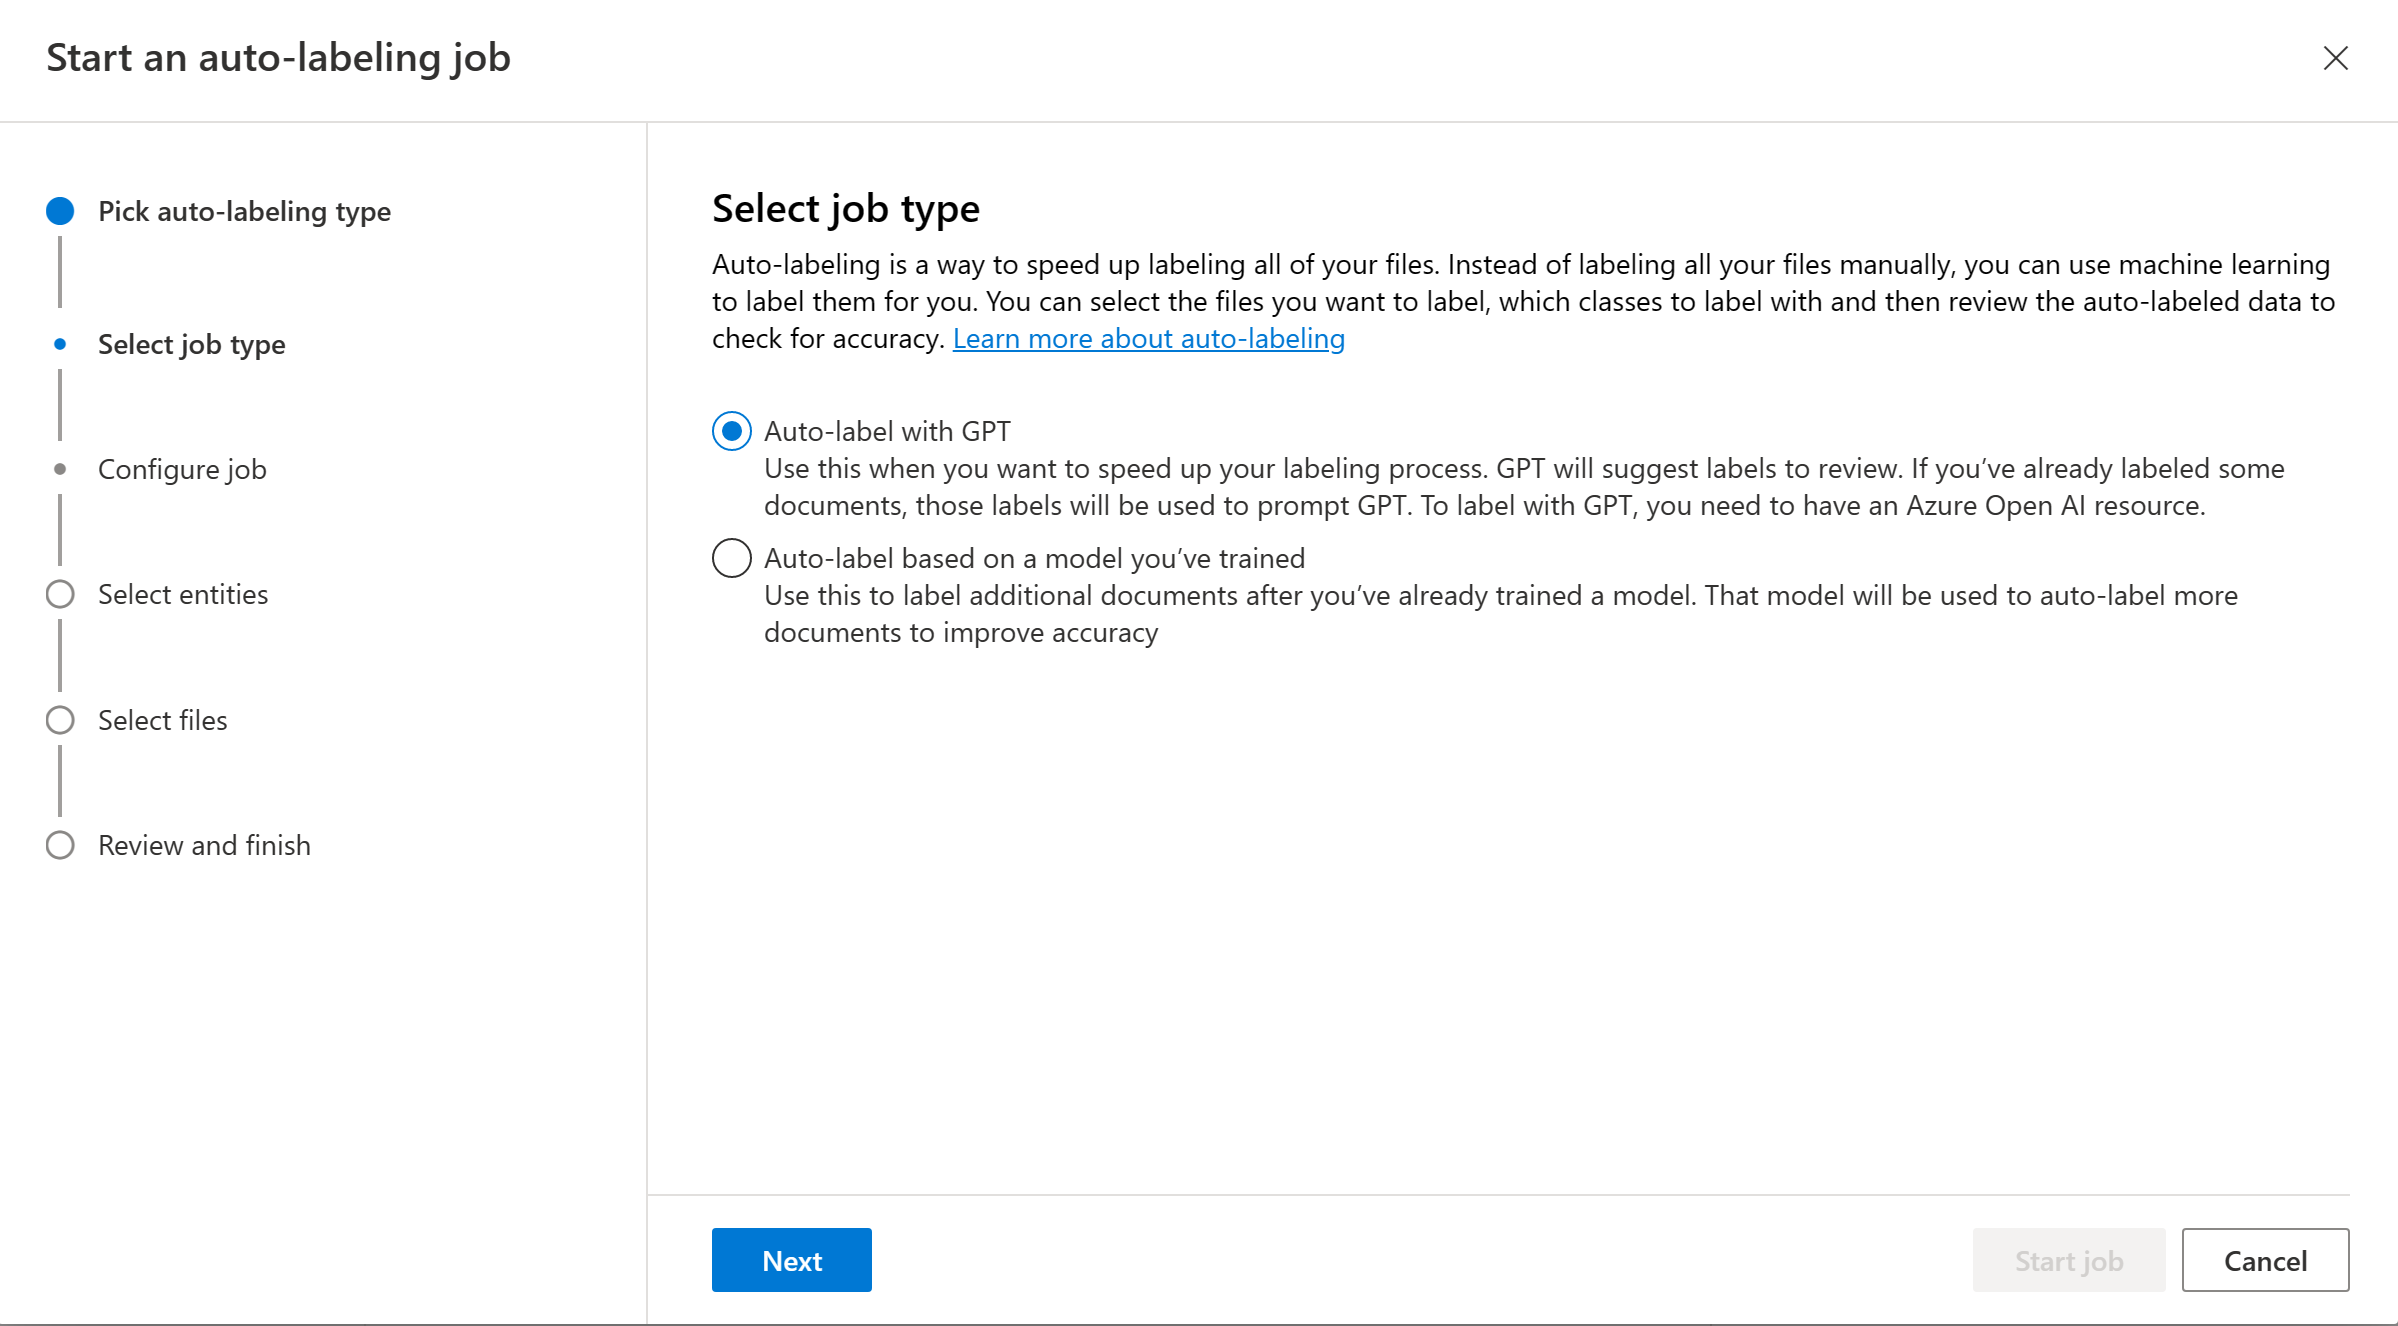
Choose Autolabel based on a model you've trained and select Next.
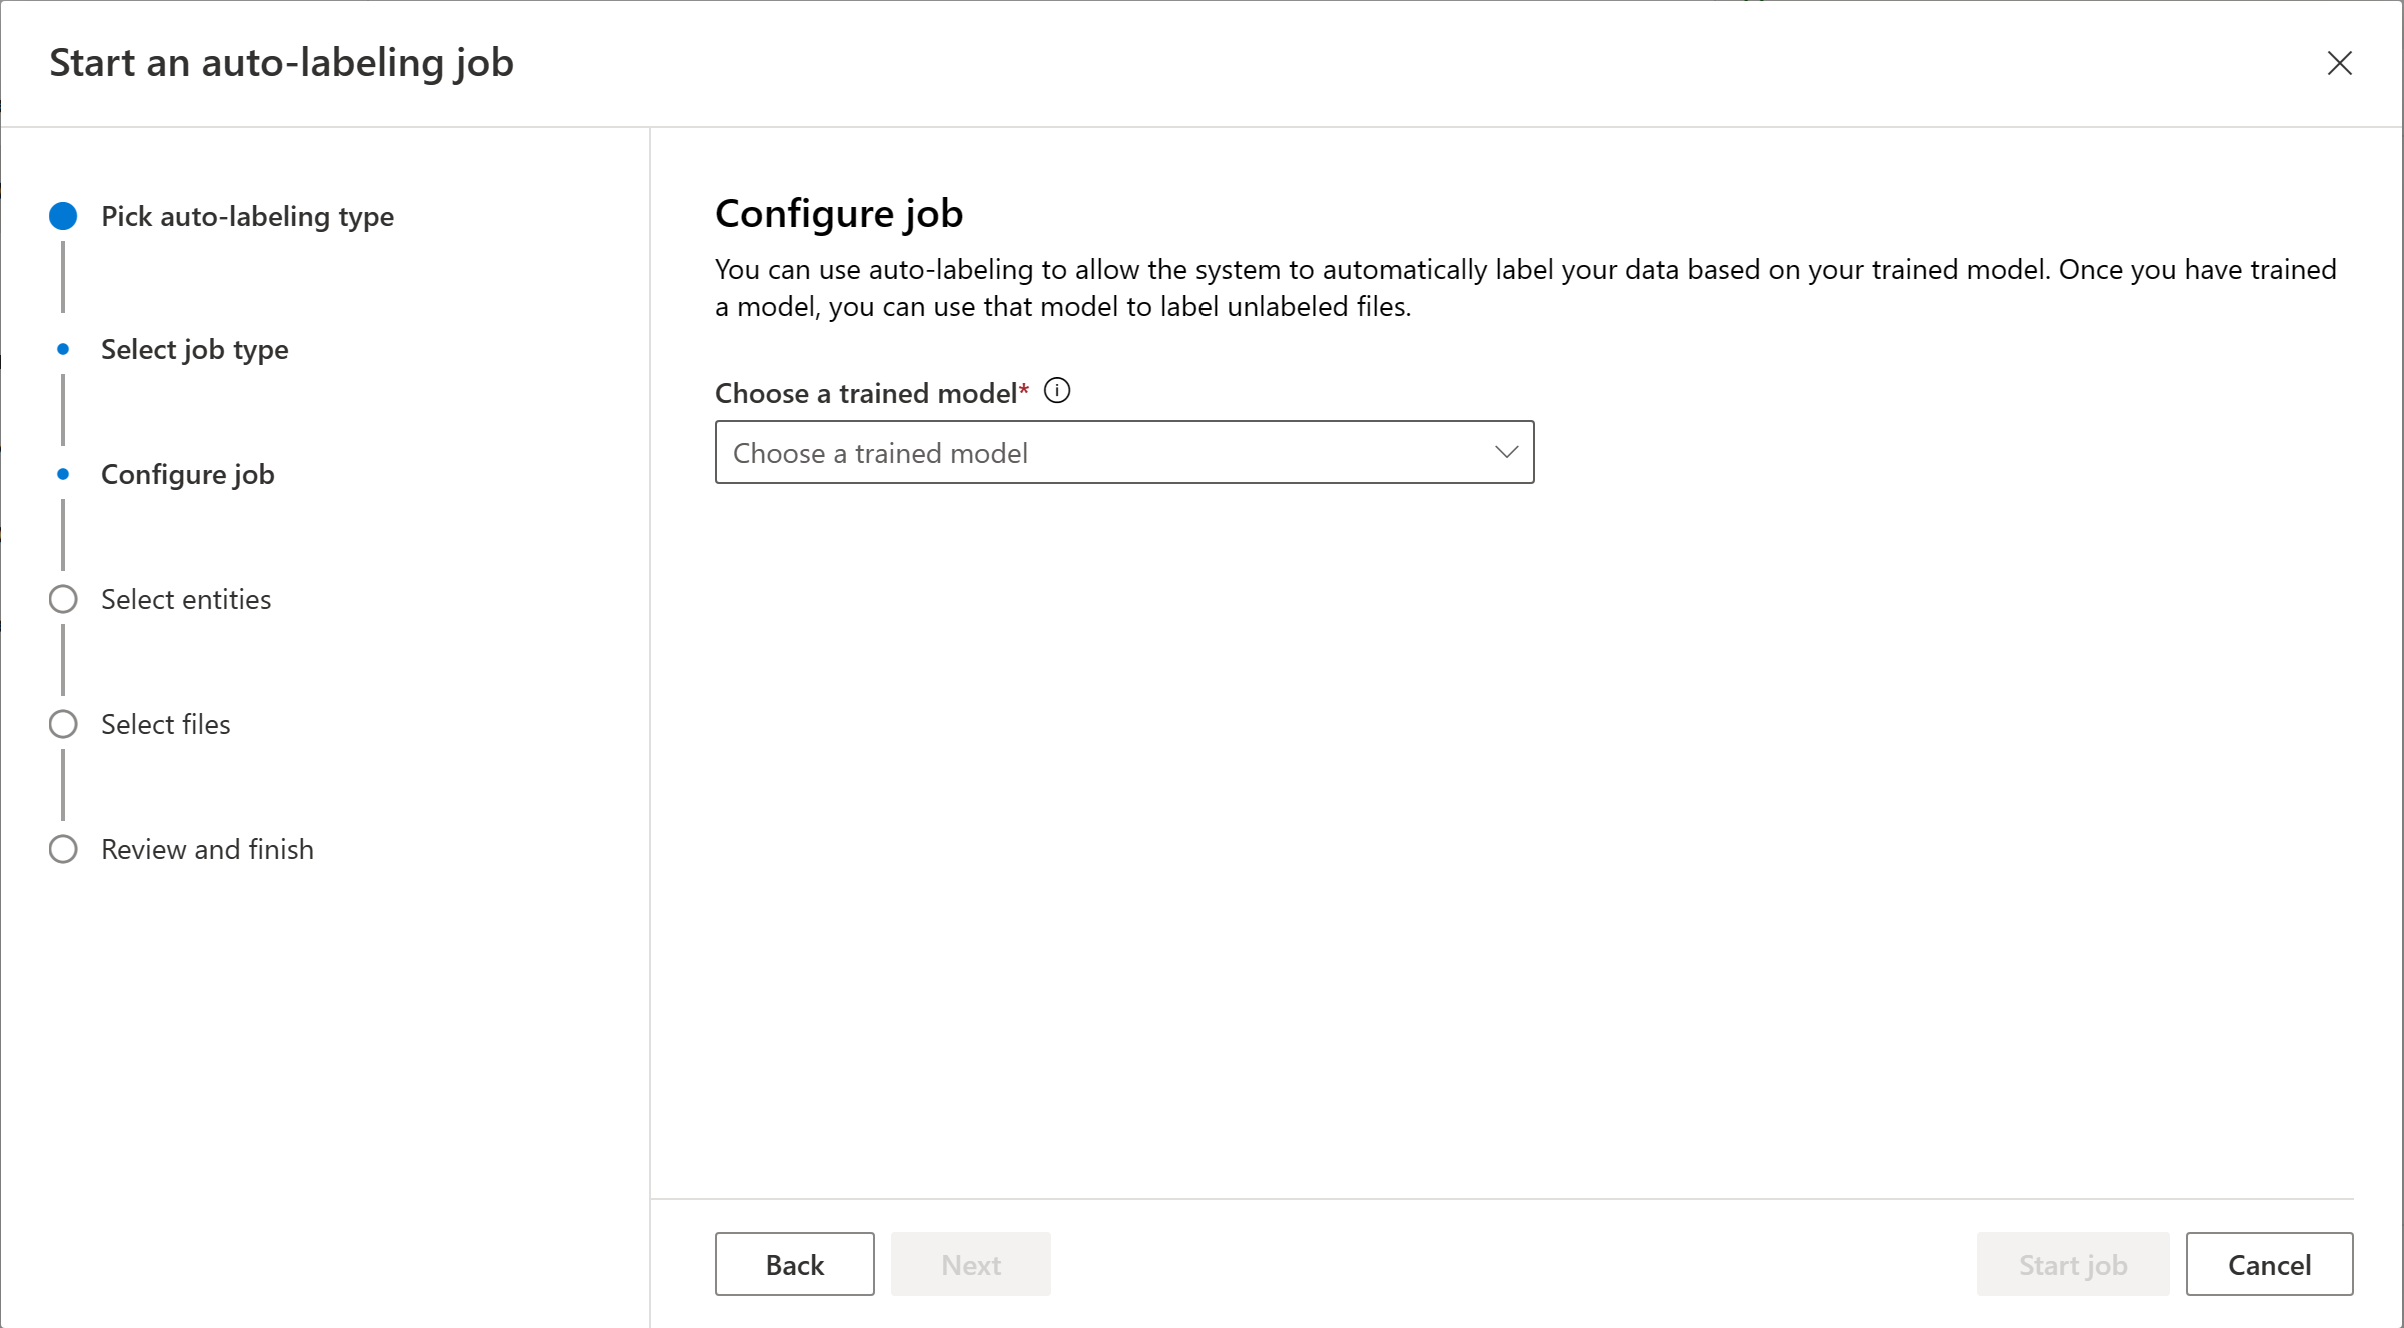
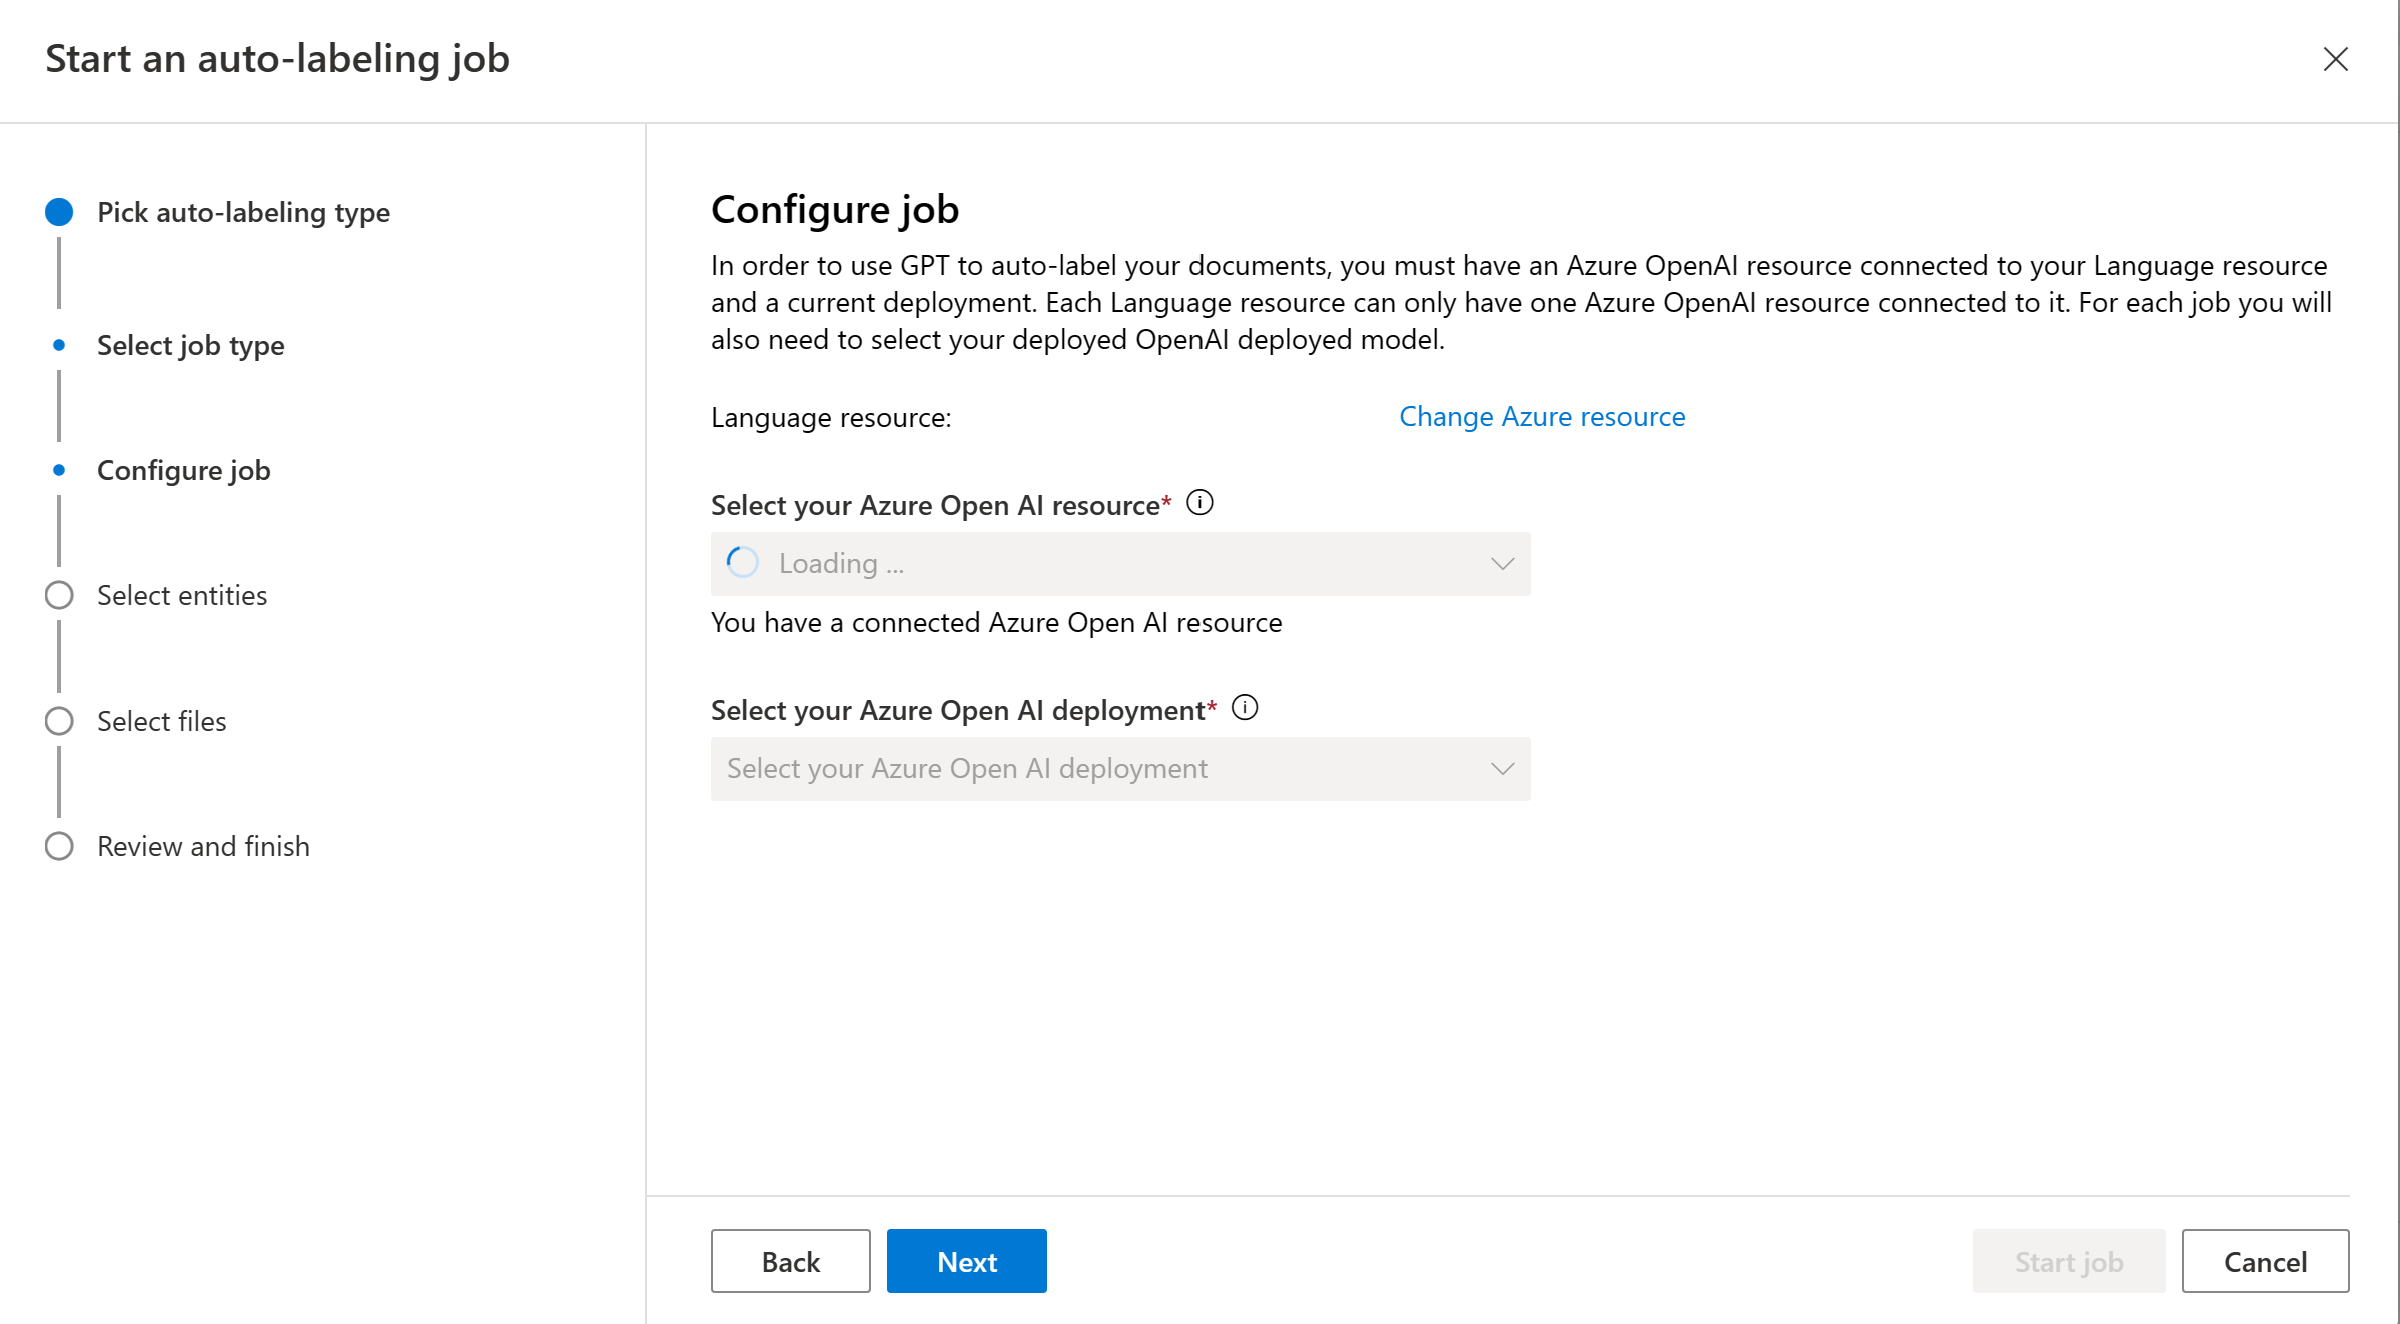
Choose a trained model. It's recommended to check the model performance before using it for autolabeling.
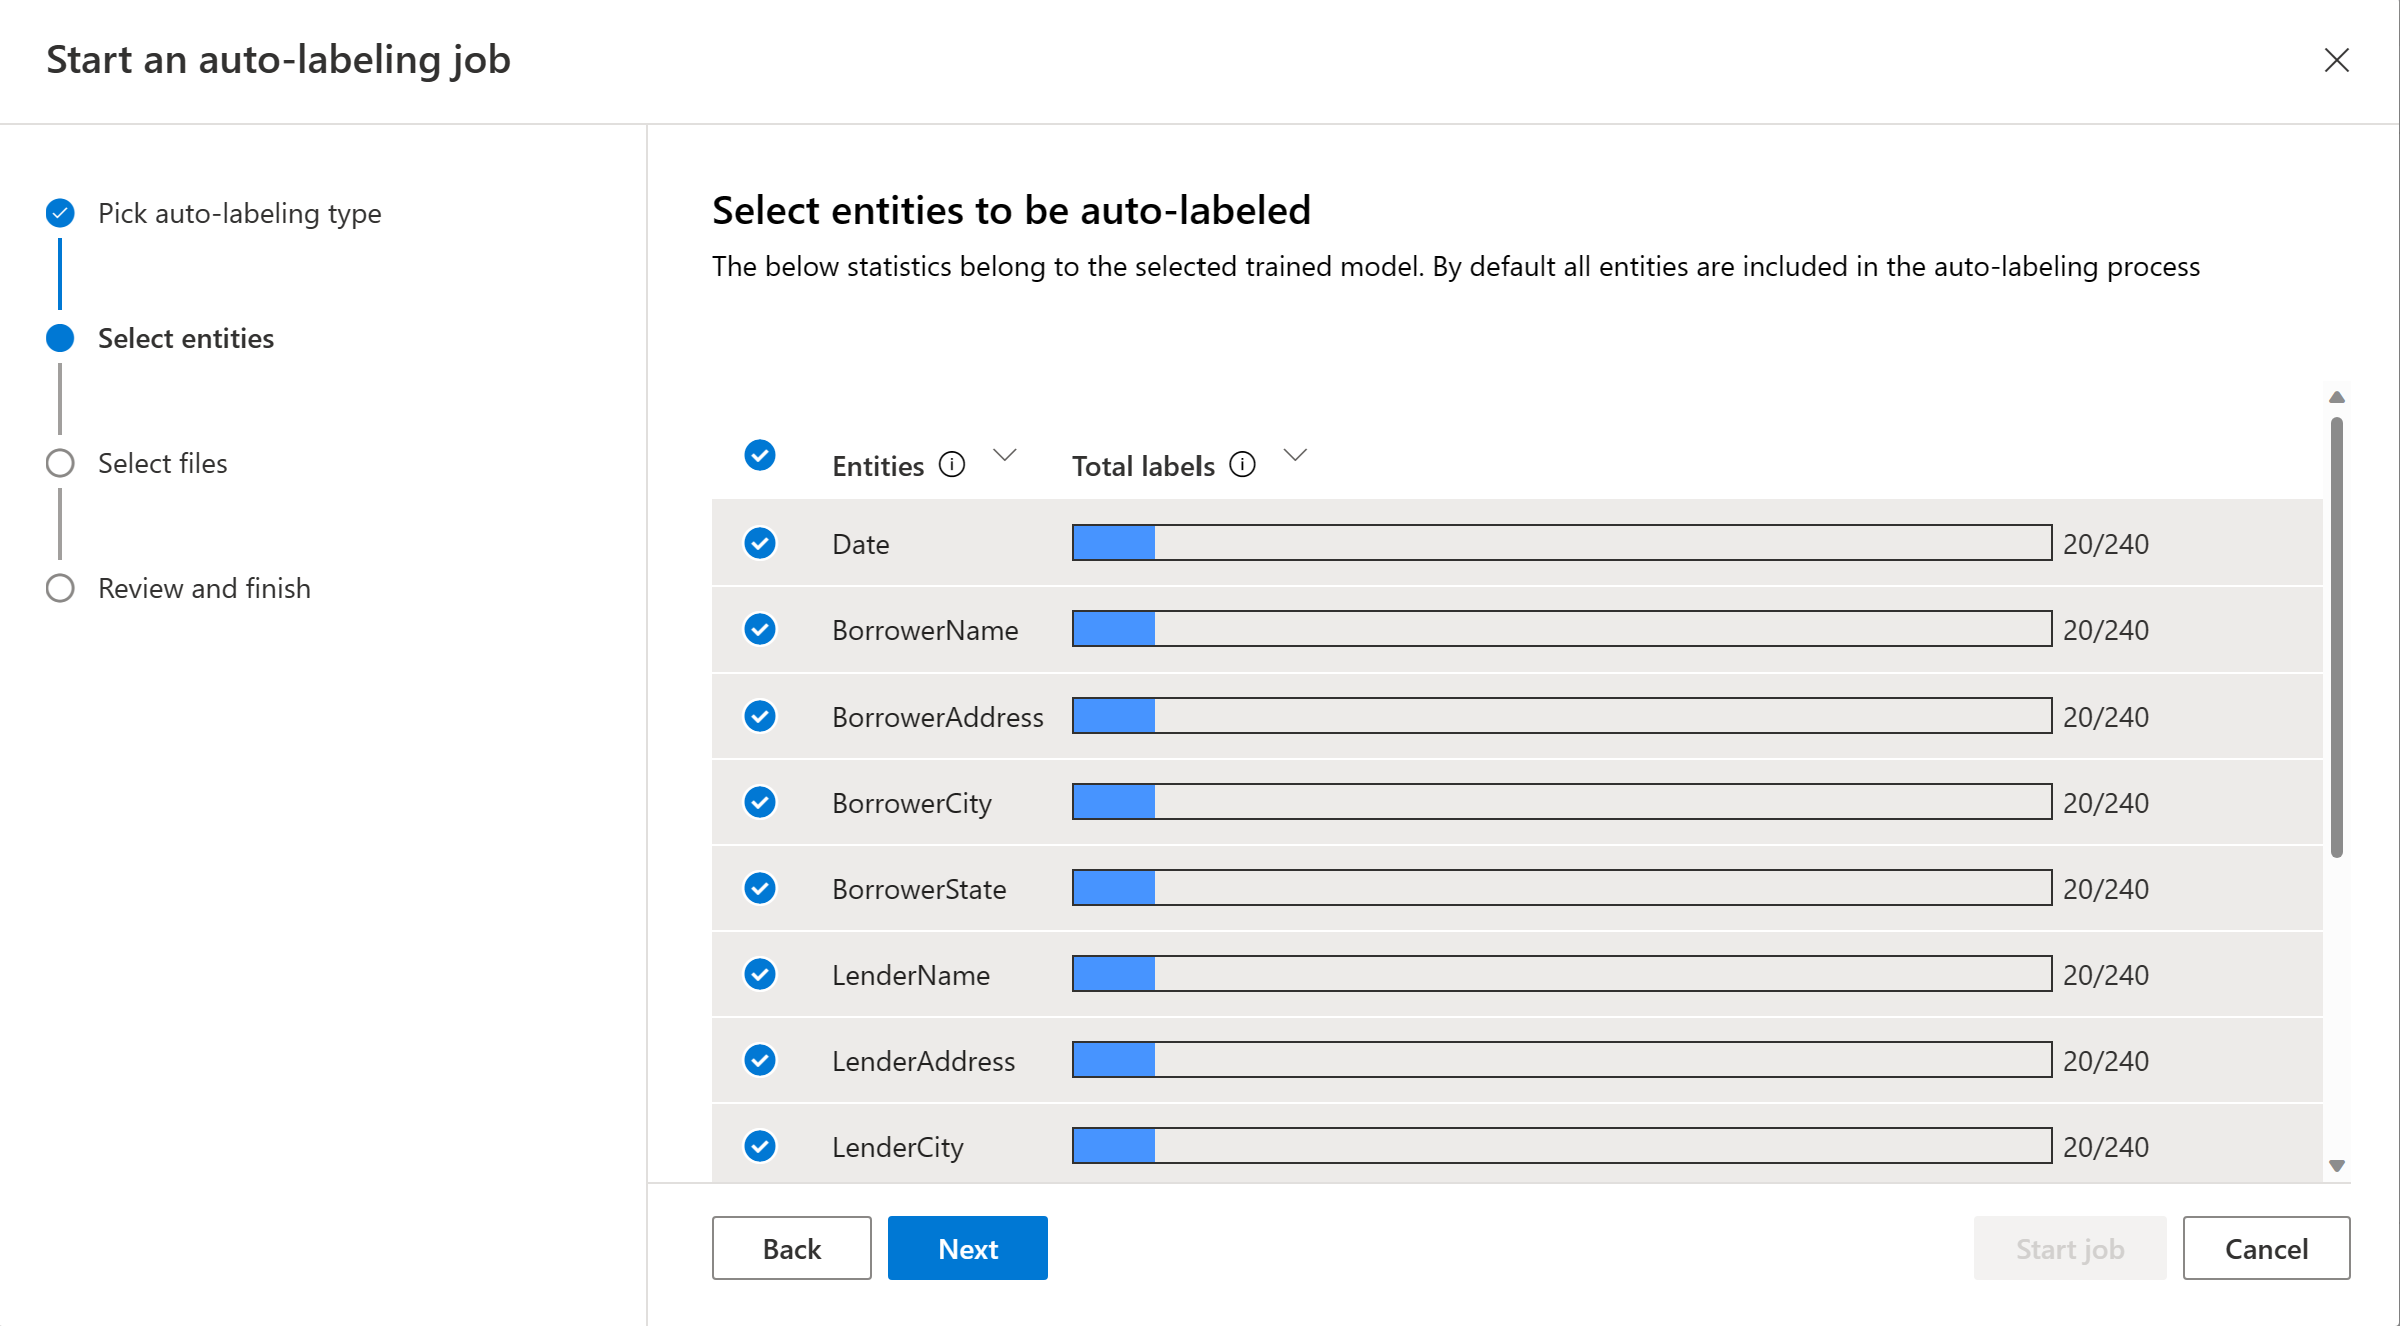
Choose the entities you want to be included in the autolabeling job. By default, all entities are selected. You can see the total labels, precision and recall of each entity. It's recommended to include entities that perform well to ensure the quality of the automatically labeled entities.
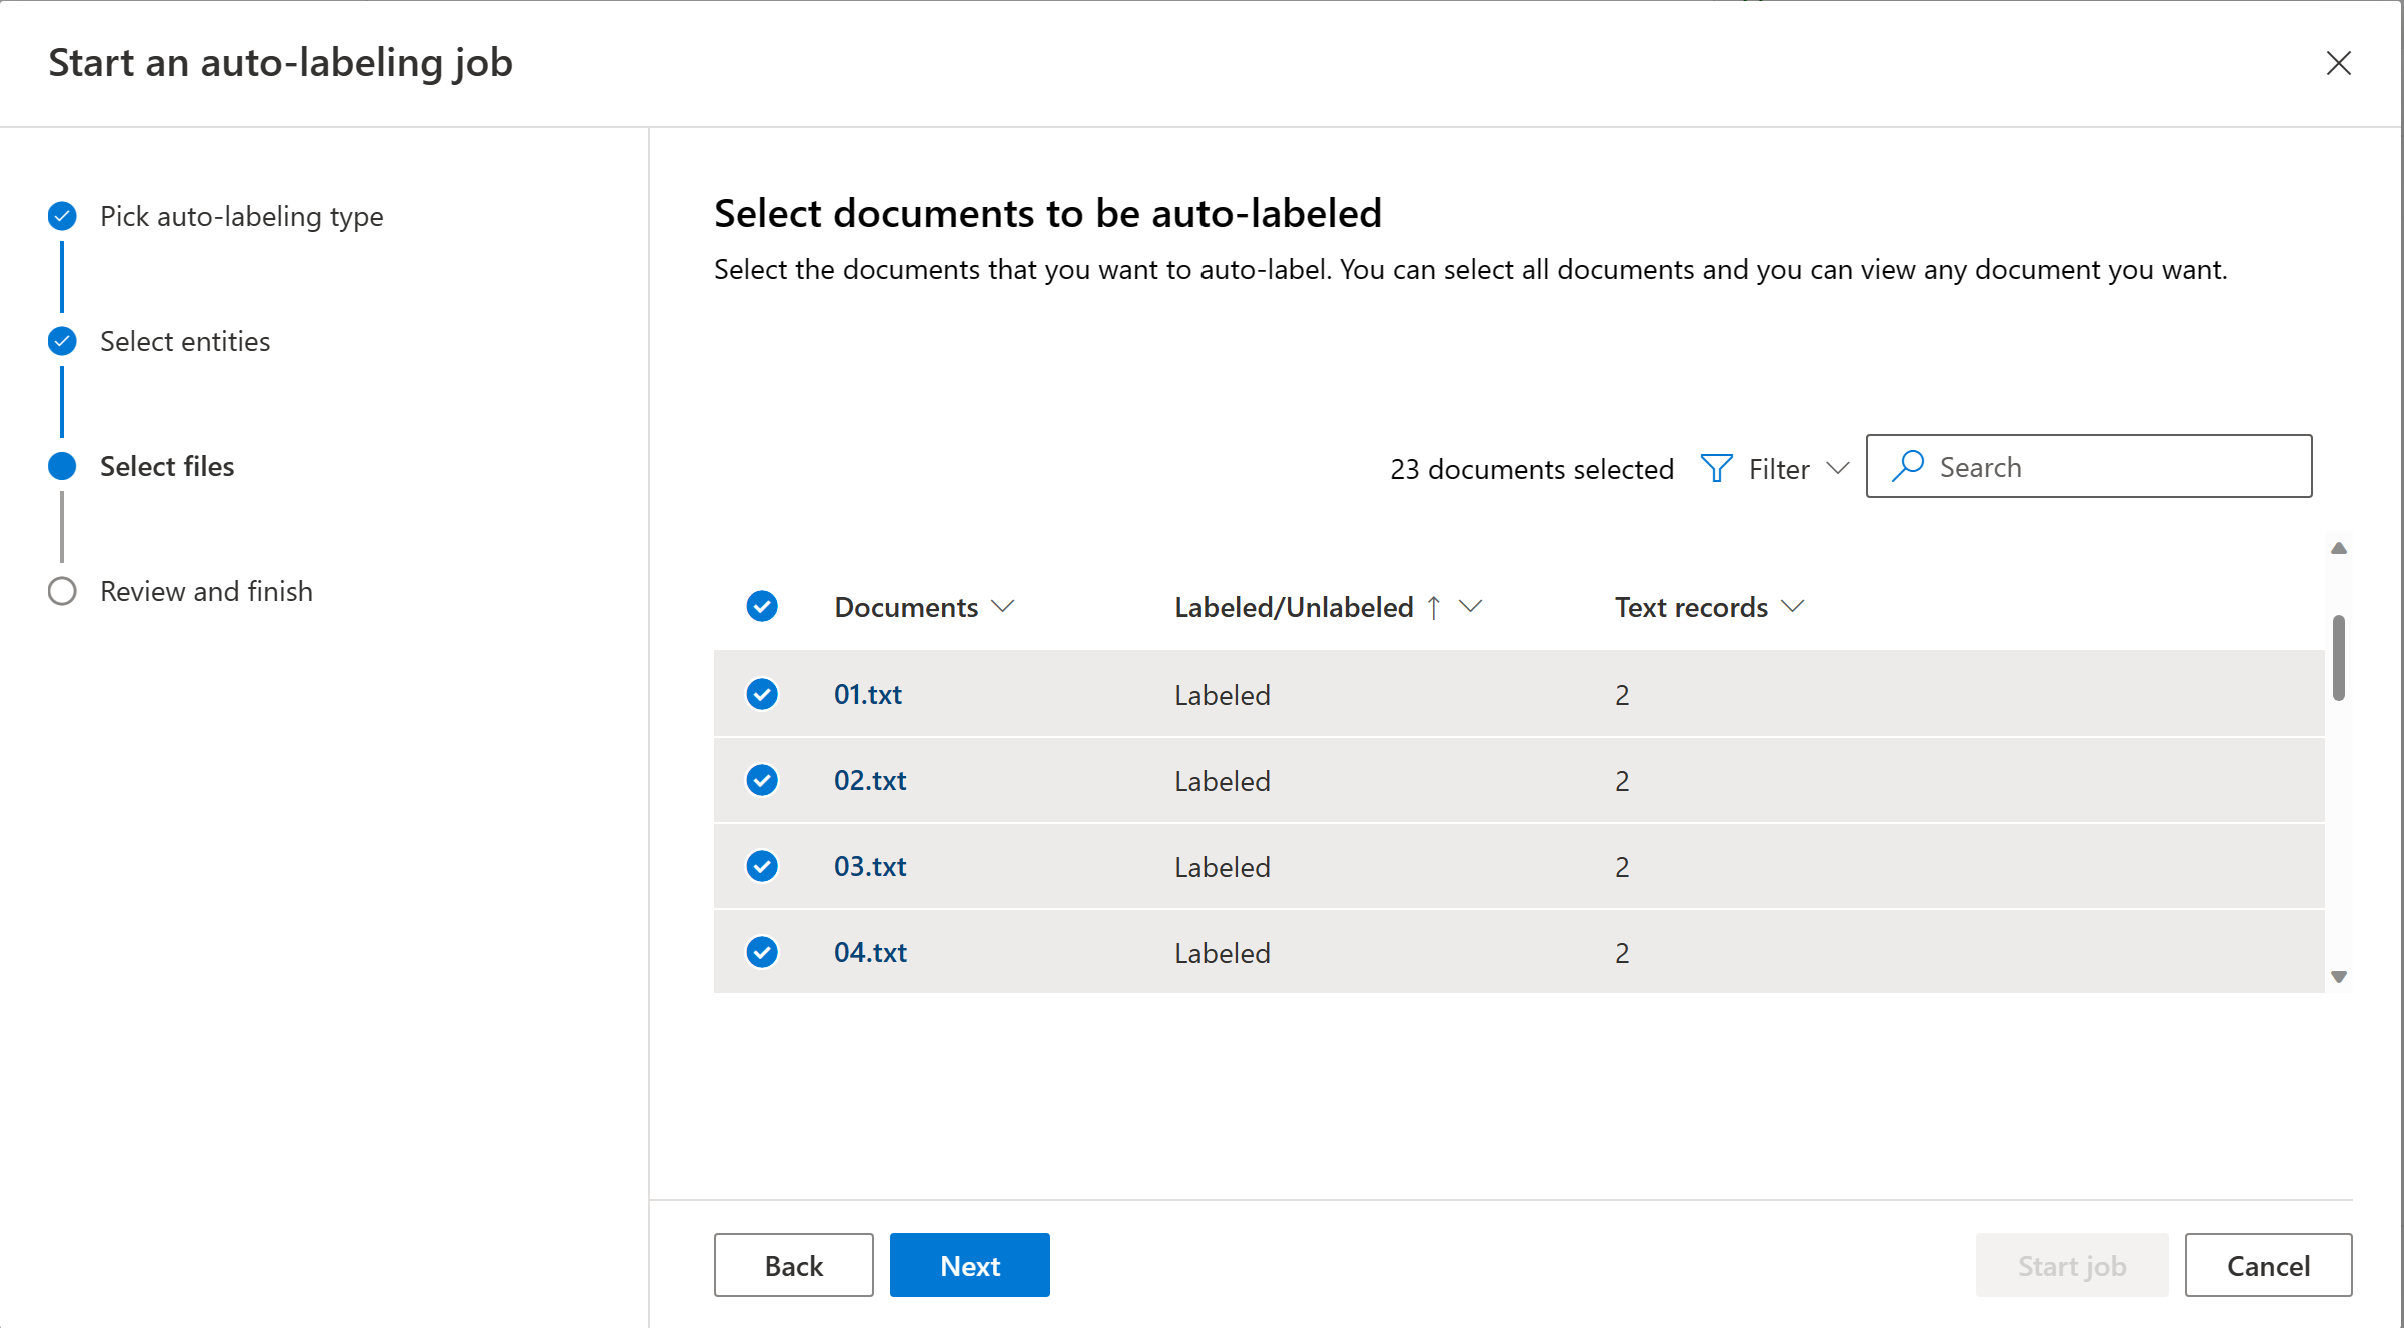
Choose the documents you want to be automatically labeled. The number of text records of each document is displayed. When you select one or more documents, you should see the number of texts records selected. It's recommended to choose the unlabeled documents from the filter.
Note
- If an entity was automatically labeled, but has a user defined label, only the user defined label is used and visible.
- You can view the documents by clicking on the document name.
Select Autolabel to trigger the autolabeling job. You should see the model used, number of documents included in the autolabeling job, number of text records and entities to be automatically labeled. Autolabeling jobs can take anywhere from a few seconds to a few minutes, depending on the number of documents you included.
Review the auto labeled documents
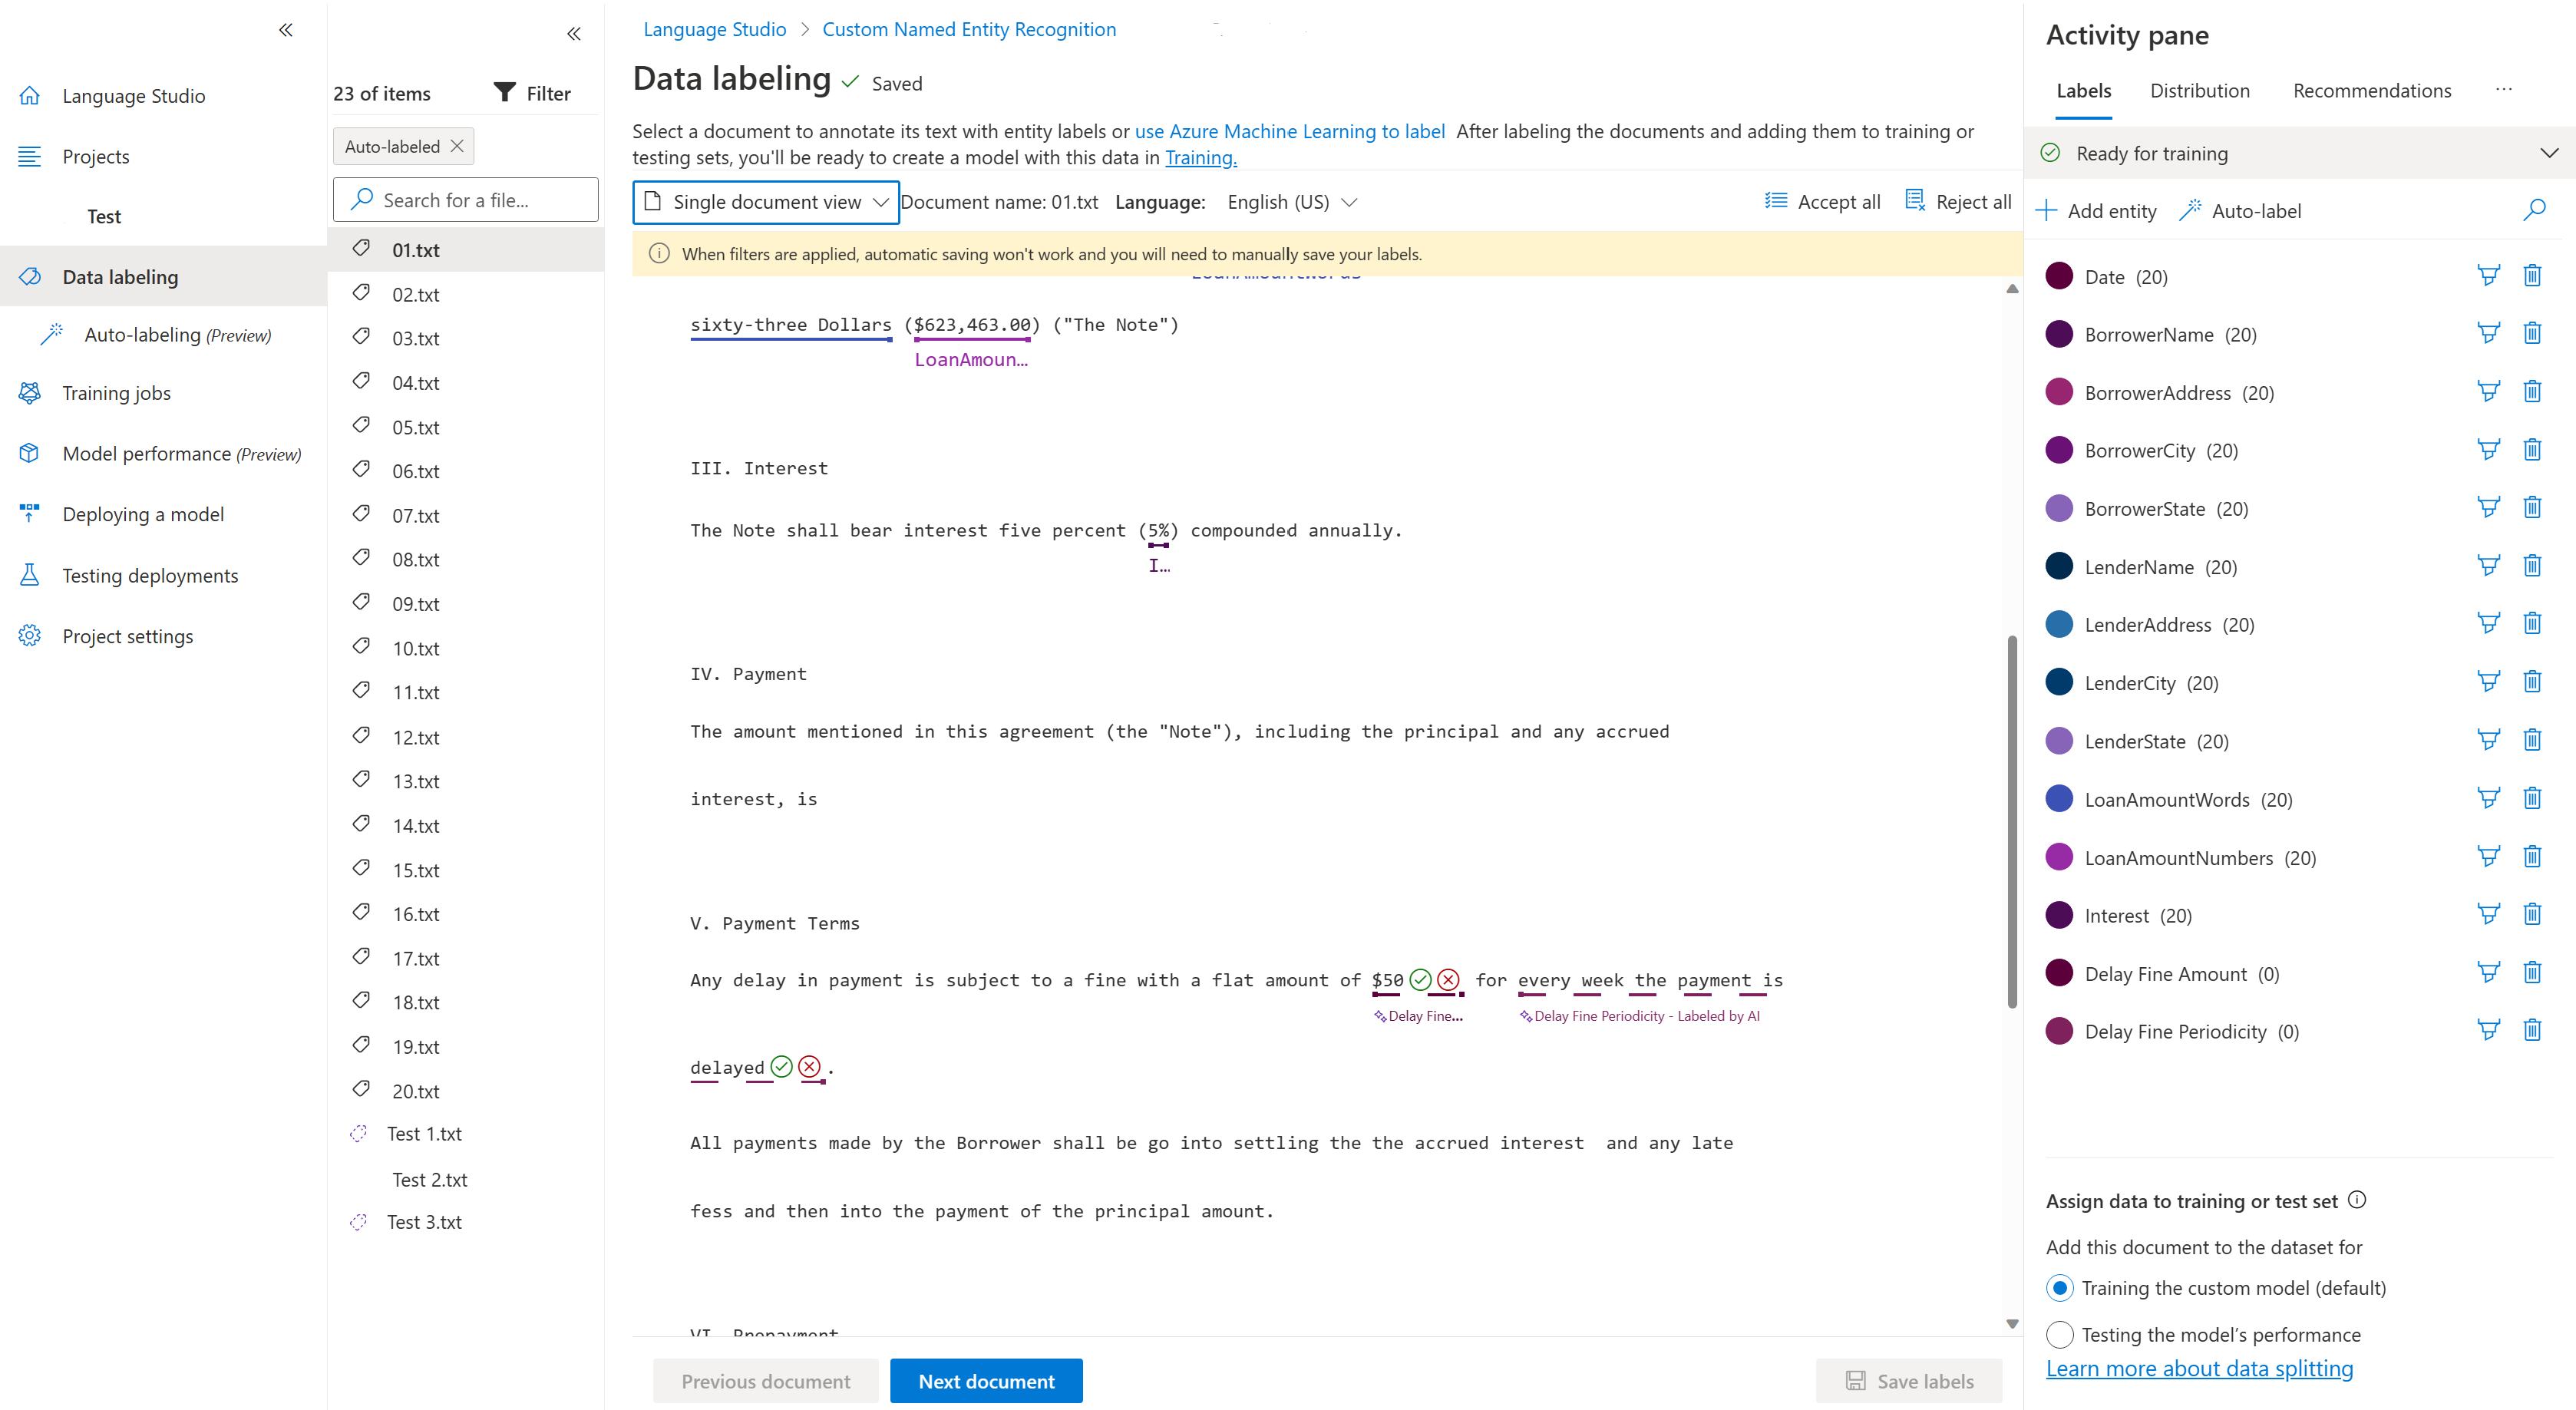
When the autolabeling job is complete, you can see the output documents in the Data labeling page of Language Studio. Select Review documents with autolabels to view the documents with the Auto labeled filter applied.
Entities that have been automatically labeled appear with a dotted line. These entities have two selectors (a checkmark and an "X") that allow you to accept or reject the automatic label.
Once an entity is accepted, the dotted line changes to a solid one, and the label is included in any further model training becoming a user defined label.
Alternatively, you can accept or reject all automatically labeled entities within the document, using Accept all or Reject all in the top right corner of the screen.
After you accept or reject the labeled entities, select Save labels to apply the changes.
Note
- We recommend validating automatically labeled entities before accepting them.
- All labels that were not accepted are be deleted when you train your model.
Next steps
- Learn more about labeling your data.
