Tutorial: Hinzufügen des An- und Abmeldens bei einer Angular-SPA für einen externen Mandanten
Dieses Tutorial ist der letzte Teil einer Reihe, in der das Erstellen einer Single-Page-Webanwendung (SPA) in Angular und ihre Vorbereitung für die Authentifizierung mithilfe des Microsoft Entra Admin Centers veranschaulicht wird. In Teil 3 dieser Reihe haben Sie Ihrer Angular-SPA Authentifizierungsflows hinzugefügt und diese so konfiguriert, dass sie mit dem externen Mandanten funktionieren. In diesem Artikel erfahren Sie, wie Sie der Anwendung Anmelde- und Abmeldefunktionen hinzufügen. Zum Abschluss testen Sie die Anwendung.
In diesem Tutorial:
- Fügen Sie Ihrer Anwendung die Funktionen für das An- und Abmelden hinzu.
- Testen der App
Voraussetzungen
An- und Abmelden von Benutzern
Öffnen Sie src/app/app.component.ts, und ersetzen Sie den Code durch den folgenden Code, sodass Benutzer sich über einen Einwahlpunkt (POP, Point Of Presence) anmelden können. Dieser Code verwendet die Angular-Bibliothek MSAL für die Anmeldung von Benutzer*innen.
  import { Component, OnInit, Inject, OnDestroy } from '@angular/core';
  import {
    MsalService,
    MsalBroadcastService,
    MSAL_GUARD_CONFIG,
    MsalGuardConfiguration,
  } from '@azure/msal-angular';
  import {
    AuthenticationResult,
    InteractionStatus,
    InteractionType,
    PopupRequest,
    RedirectRequest,
    EventMessage,
    EventType
  } from '@azure/msal-browser';
  import { Subject } from 'rxjs';
  import { filter, takeUntil } from 'rxjs/operators';

  @Component({
    selector: 'app-root',
    templateUrl: './app.component.html',
    styleUrls: ['./app.component.css'],
  })
  export class AppComponent implements OnInit, OnDestroy {
    title = 'Microsoft identity platform';
    loginDisplay = false;
    isIframe = false;

    private readonly _destroying$ = new Subject<void>();

    constructor(
      @Inject(MSAL_GUARD_CONFIG) private msalGuardConfig: MsalGuardConfiguration,
      private authService: MsalService,
      private msalBroadcastService: MsalBroadcastService,
    ) { }

    ngOnInit(): void {
      this.isIframe = window !== window.parent && !window.opener;
      this.setLoginDisplay();
      this.authService.instance.enableAccountStorageEvents(); // Optional - This will enable ACCOUNT_ADDED and ACCOUNT_REMOVED events emitted when a user logs in or out of another tab or window

      /**
       * You can subscribe to MSAL events as shown below. For more info,
       * visit: https://github.com/AzureAD/microsoft-authentication-library-for-js/blob/dev/lib/msal-angular/docs/v2-docs/events.md
       */
      this.msalBroadcastService.inProgress$
        .pipe(
          filter(
            (status: InteractionStatus) => status === InteractionStatus.None
          ),
          takeUntil(this._destroying$)
        )
        .subscribe(() => {
          this.setLoginDisplay();
          this.checkAndSetActiveAccount();
        });

      this.msalBroadcastService.msalSubject$
        .pipe(
          filter(
            (msg: EventMessage) => msg.eventType === EventType.LOGOUT_SUCCESS
          ),
          takeUntil(this._destroying$)
        )
        .subscribe((result: EventMessage) => {
          this.setLoginDisplay();
          this.checkAndSetActiveAccount();
        });

      this.msalBroadcastService.msalSubject$
        .pipe(
          filter(
            (msg: EventMessage) => msg.eventType === EventType.LOGIN_SUCCESS
          ),
          takeUntil(this._destroying$)
        )
        .subscribe((result: EventMessage) => {
          const payload = result.payload as AuthenticationResult;
          this.authService.instance.setActiveAccount(payload.account);
        });
    }

    setLoginDisplay() {
      this.loginDisplay = this.authService.instance.getAllAccounts().length > 0;
    }

    checkAndSetActiveAccount() {
      /**
       * If no active account set but there are accounts signed in, sets first account to active account
       * To use active account set here, subscribe to inProgress$ first in your component
       * Note: Basic usage demonstrated. Your app may require more complicated account selection logic
       */
      let activeAccount = this.authService.instance.getActiveAccount();

      if (!activeAccount && this.authService.instance.getAllAccounts().length > 0) {
        let accounts = this.authService.instance.getAllAccounts();
        // add your code for handling multiple accounts here
        this.authService.instance.setActiveAccount(accounts[0]);
      }
    }

    login() {
      if (this.msalGuardConfig.interactionType === InteractionType.Popup) {
        if (this.msalGuardConfig.authRequest) {
          this.authService.loginPopup({
            ...this.msalGuardConfig.authRequest,
          } as PopupRequest)
            .subscribe((response: AuthenticationResult) => {
              this.authService.instance.setActiveAccount(response.account);
            });
        } else {
          this.authService.loginPopup()
            .subscribe((response: AuthenticationResult) => {
              this.authService.instance.setActiveAccount(response.account);
            });
        }
      } else {
        if (this.msalGuardConfig.authRequest) {
          this.authService.loginRedirect({
            ...this.msalGuardConfig.authRequest,
          } as RedirectRequest);
        } else {
          this.authService.loginRedirect();
        }
      }
    }

    logout() {

      if (this.msalGuardConfig.interactionType === InteractionType.Popup) {
        this.authService.logoutPopup({
          account: this.authService.instance.getActiveAccount(),
        });
      } else {
        this.authService.logoutRedirect({
          account: this.authService.instance.getActiveAccount(),
        });
      }
    }

    // unsubscribe to events when component is destroyed
    ngOnDestroy(): void {
      this._destroying$.next(undefined);
      this._destroying$.complete();
    }
  }
Testen Ihrer Anwendung
Starten Sie den Webserver, indem Sie in einer Eingabeaufforderung im Anwendungsordner die folgenden Befehle ausführen:
npm install
npm start
Geben Sie in Ihrem Browser
http://localhost:4200ein, um die Anwendung zu öffnen.
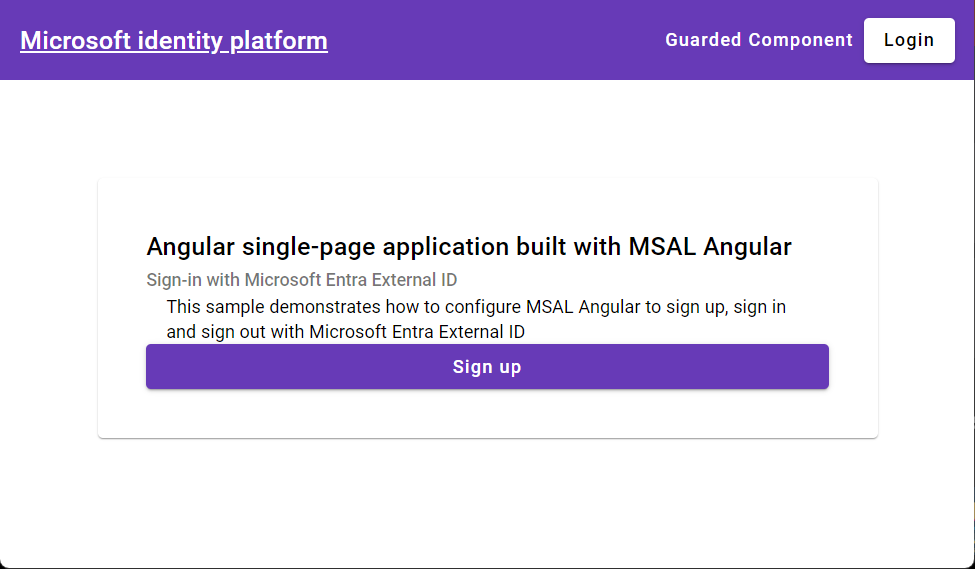
Wählen Sie die Schaltfläche Anmelden in der oberen rechten Ecke des Bildschirms.
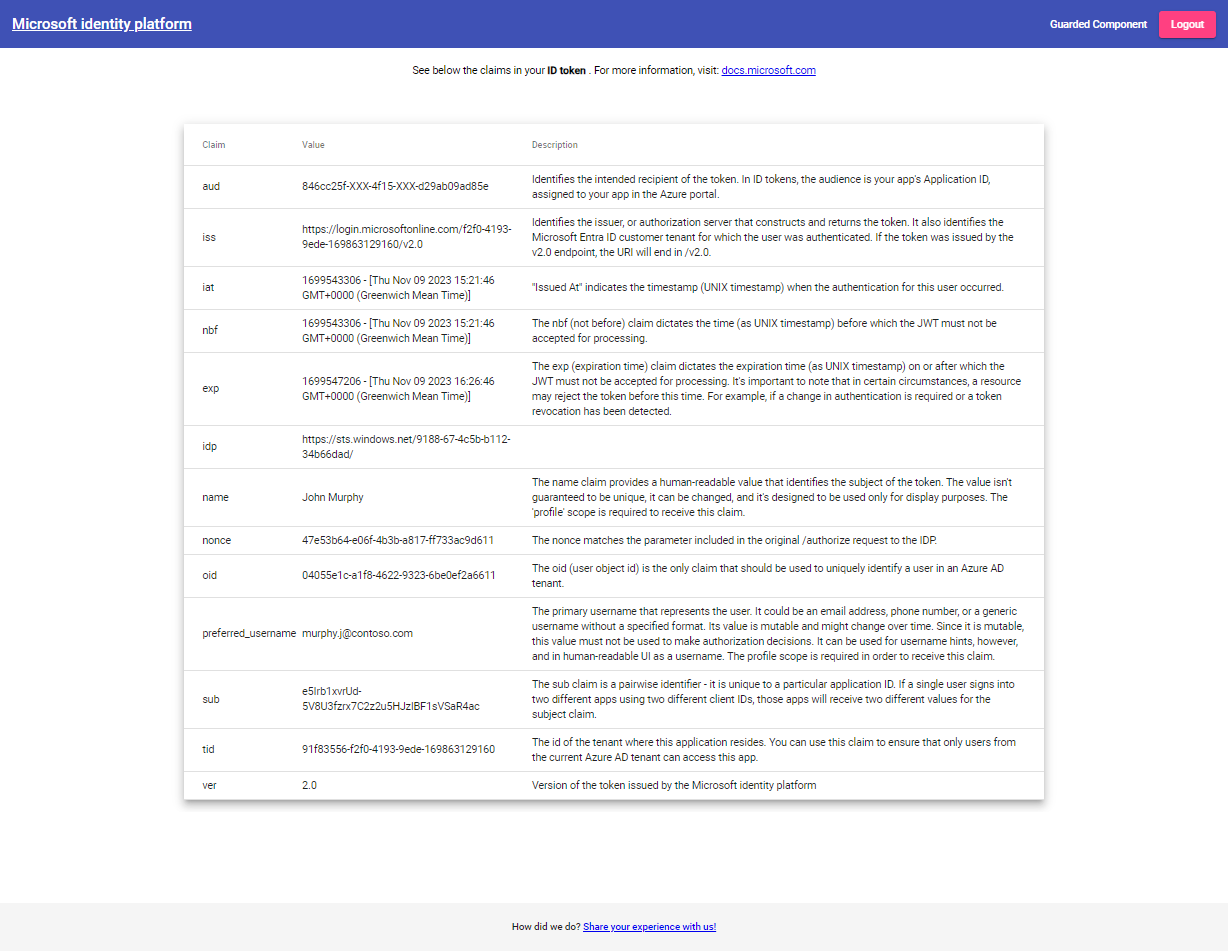
Wenn Sie sich erfolgreich angemeldet haben, werden Ihre Profilinformationen auf der Seite angezeigt.

Wählen Sie die Schaltfläche Abmelden in der oberen rechten Ecke des Bildschirms, um sich abzumelden.
Weitere Informationen
Nach Abschluss dieses Tutorials sollten Sie sich mit folgenden Themen vertraut machen: