Anleitung: Migrieren von WebLogic Server zu Azure mit Elastic als Protokollierungslösung auf Azure
In diesem Lernprogramm stellen Sie WebLogic Server (WLS) auf virtuellen Azure-Computern (VMs) bereit und integrieren sie in Elastic Cloud (Elasticsearch). Außerdem konfigurieren Sie Elastic Custom Logs, um Protokolldaten aus WLS zu erfassen. Schließlich verwenden Sie Kibana, um WLS-Protokolle zu durchsuchen und zu analysieren. Während jede Komponente einzeln dokumentiert ist, veranschaulicht dieses Lernprogramm, wie sie nahtlos integriert werden, um eine robuste Protokollverwaltungslösung für WLS in Azure bereitzustellen.
In diesem Tutorial erfahren Sie, wie Sie:
- Erstellen Sie eine Elastic-Instanz auf Azure.
- Bereitstellen von WLS in Azure.
- Konfigurieren benutzerdefinierter Elastic-Protokolle für die Integration von WLS-Protokollen
- Durchsuchen von WebLogic Server-Protokollen aus Kibana
Voraussetzungen
- Ein aktives Azure-Abonnement. Wenn Sie nicht über ein Azure-Abonnement verfügen, erstellen Sie ein kostenloses Konto.
- Die Möglichkeit, eine der unter Welche Lösungen zum Ausführen von Oracle WebLogic Server in Azure Virtual Machines gibt es? aufgeführten Azure-Anwendungen mit WSL in Virtual Machines bereitzustellen
- Ein Terminal für den SSH-Zugriff auf virtuelle Computer.
Bereitstellen von WLS in Azure
Stellen Sie WebLogic Server bereit, indem Sie die Schritte unter Welche Lösungen zum Ausführen von Oracle WebLogic Server in Azure Virtual Machines gibt es? ausführen. Sowohl „Bereitstellen von Oracle WebLogic Server mit Verwaltungsserver auf einem einzelnen Knoten“ als auch „Bereitstellen eines Oracle WebLogic Server-Clusters in Microsoft Azure-IaaS“ sind mit Elastic in Azure kompatibel. In diesem Tutorial wird WebLogic auf VM als Beispiel verwendet.
Anmerkung
Die Standardmäßige VM-Größe verfügt möglicherweise nicht über genügend Arbeitsspeicher für den Elastic-Agent. Stellen Sie sicher, dass die ausgewählte VM-Größe mindestens 2,5 GB Arbeitsspeicher aufweist. Standard_A2_v2 ist die mindest ausreichende Größe.
Nachdem Sie die erforderlichen Informationen ausgefüllt haben, wählen Sie Erstellen aus, um die WLS-Bereitstellung in Azure zu starten. Die Bereitstellung dauert in der Regel etwa 30 Minuten. Gehen Sie nach der Bereitstellung zu Ausgaben, und notieren Sie den Wert für adminConsoleURL. Dabei handelt es sich um die URL für den Zugriff auf die Verwaltungskonsole.
Grundlegendes zu WebLogic-Protokollen
WebLogic Server-Subsysteme verwenden Protokollierungsdienste zum Nachverfolgen von Ereignissen wie Anwendungsbereitstellungs- und Subsystemfehlern. Diese Protokolle ermöglichen es Serverinstanzen, ihren Status zu kommunizieren und auf bestimmte Ereignisse zu reagieren und detaillierte Einblicke zu liefern, die bei der Problembehandlung und Überwachung hilfreich sein können. Mit den Protokollierungsdiensten von WebLogic können Sie Fehler melden, Protokollmeldungen aus bestimmten Subsystemen überwachen und Systemstatusaktualisierungen erfassen. Ausführlichere Informationen zu WebLogic-Protokollierungsdiensten finden Sie unter Understanding WebLogic Logging Services.
Diese Anleitung befasst sich mit der Konfiguration der folgenden zentralen WebLogic-Protokolle:
Serverprotokolldateien: Typischerweise im Verzeichnis logs unter dem Stammverzeichnis der Serverinstanz zu finden. Der Pfad ist in der Regel wie DOMAIN_NAME/servers/SERVER_NAME/logs/SERVER_NAME.log.
Domänenprotokolldateien: Diese Protokolle bieten eine Übersicht über den Domänenstatus und werden im Verzeichnis der Protokolle des Administrationsservers gespeichert. Der Standardpfad ist DOMAIN_NAME/servers/ADMIN_SERVER_NAME/logs/DOMAIN_NAME.log.
HTTP-Zugriffsprotokolle: Standardmäßig nutzen HTTP-Zugriffsprotokolle das Verzeichnis und die Rotationsrichtlinie des Serverprotokolls. Der Standardpfad ist DOMAIN_NAME/servers/SERVER_NAME/logs/1access.log.
Sie können diese Protokolle konfigurieren und verwalten, um die Integration mit Überwachungstools wie Elastic in Azure zu erleichtern, wodurch eine zentralisierte Protokollanalyse und Warnungen auf WebLogic Server-Instanzen ermöglicht werden.
Während das Angebot bereitgestellt wird, können Sie direkt zu den Schritten im Abschnitt Erstellen einer Instanz von Elasticsearch in Azure gehen. Kehren Sie hierher zurück, wenn die Bereitstellung des Angebots abgeschlossen ist.
Herstellen einer Verbindung mit dem WLS-Computer
Um auf die virtuelle Maschine zuzugreifen, auf der der WebLogic Server (WLS) läuft, folgen Sie den Schritten in Verbinden mit der virtuellen Maschine. In dieser Anleitung stellen Sie eine Verbindung mit der Maschine her, auf der der WebLogic Administration Server namens adminVMgehostet wird.
Elasticsearch-Instanz in Azure erstellen
Elastic Cloud (Elasticsearch) für Azure ist ein Azure Native ISV Services, den Sie über Azure Marketplace erhalten und mit dem Azure-Portal bereitstellen können. Mit Azure Native ISV Services können Sie Software und Dienste von unabhängigen Softwareanbietern (ISV) in Azure problemlos bereitstellen, verwalten und eng integrieren. Elastic Cloud – Azure Native ISV Service wird von Microsoft und Elastic entwickelt und verwaltet. Sie erstellen, bereitstellen und verwalten elastische Ressourcen über das Azure-Portal. Elastic besitzt und führt die SaaS-Anwendung einschließlich der erstellten Elastic-Konten aus. Eine Übersicht über Elastic Cloud (Elasticsearch) finden Sie unter Was ist Elastic Cloud (Elasticsearch) – Ein Azure Native ISV-Dienst?
Erstellen von Elastic auf Azure
Führen Sie zum Erstellen einer Elastic-Anwendung die Schritte in Schnellstart: Erste Schritte mit Elasticaus.
Führen Sie im ersten Schritt des Abschnitts Erstellen einer Ressourcedie folgenden Schritte für Ersetzungen aus:
Führen Sie im Bereich Grundlagen unter Plandetails die folgenden Schritte aus:
- Geben Sie für Ressourcengruppe einen eindeutigen Ressourcengruppennamen ein. In diesem Tutorial wird
elkrg1030verwendet. - Geben Sie für Ressourcennamen einen eindeutigen Namen für Ihre Elastic-Instanz ein. Sie können denselben Wert verwenden, den Sie für Ressourcengruppeverwendet haben.
- Wählen Sie für RegionIhre gewünschte Region aus.
- Behalten Sie die Standardwerte für andere Felder bei.
- Geben Sie für Ressourcengruppe einen eindeutigen Ressourcengruppennamen ein. In diesem Tutorial wird
Wählen Sie im Bereich Protokolle & Metriken die Optionen Abonnement-Aktivitätsprotokolle senden und Azure-Ressourcenprotokolle für alle definierten Ressourcen senden aus, um die Azure-Ressourcen zu überwachen. Dieses Lernprogramm konzentriert sich jedoch ausschließlich auf WLS-Protokolle und deckt keine Infrastrukturprotokolle ab.
Sie können die Abschnitte Azure OpenAI-Konfiguration und Tagsüberspringen.
Führen Sie die verbleibenden Schritte im Artikel aus.
Fahren Sie nach der erfolgreichen Bereitstellung mit dem nächsten Abschnitt in diesem Artikel fort.
Starten von Kibana
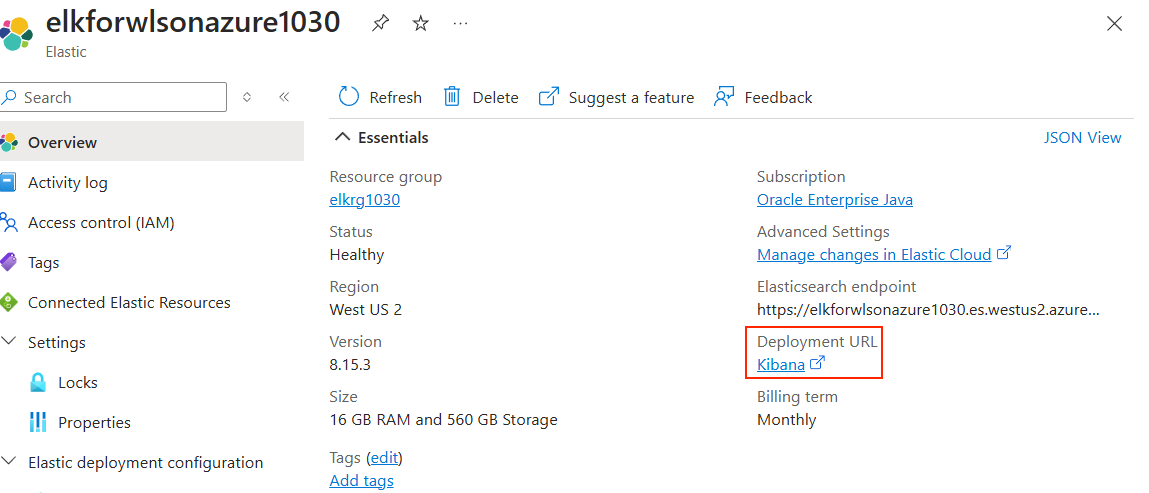
Nachdem Elastic auf Azure bereitgestellt wurde, öffnen Sie die Elastic-Ressource aus dem Azure-Portal. Suchen Sie die Kibana-URL neben der Bezeichnung Bereitstellungs-URL, wie im folgenden Screenshot gezeigt:
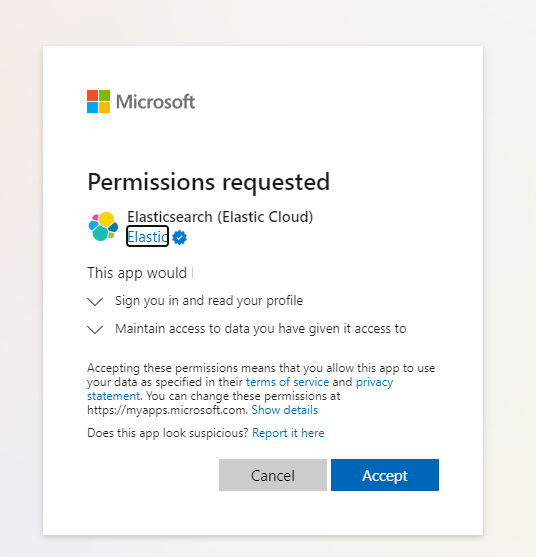
Wenn Sie Kibana starten, werden Sie aufgefordert, sich anzumelden, indem Sie ein Azure-Konto auswählen. Wählen Sie das Azure-Konto aus, das zum Erstellen der Elastic-Bereitstellung verwendet wird, und überprüfen und nehmen Sie die angeforderten Elasticsearch-Berechtigungen an.
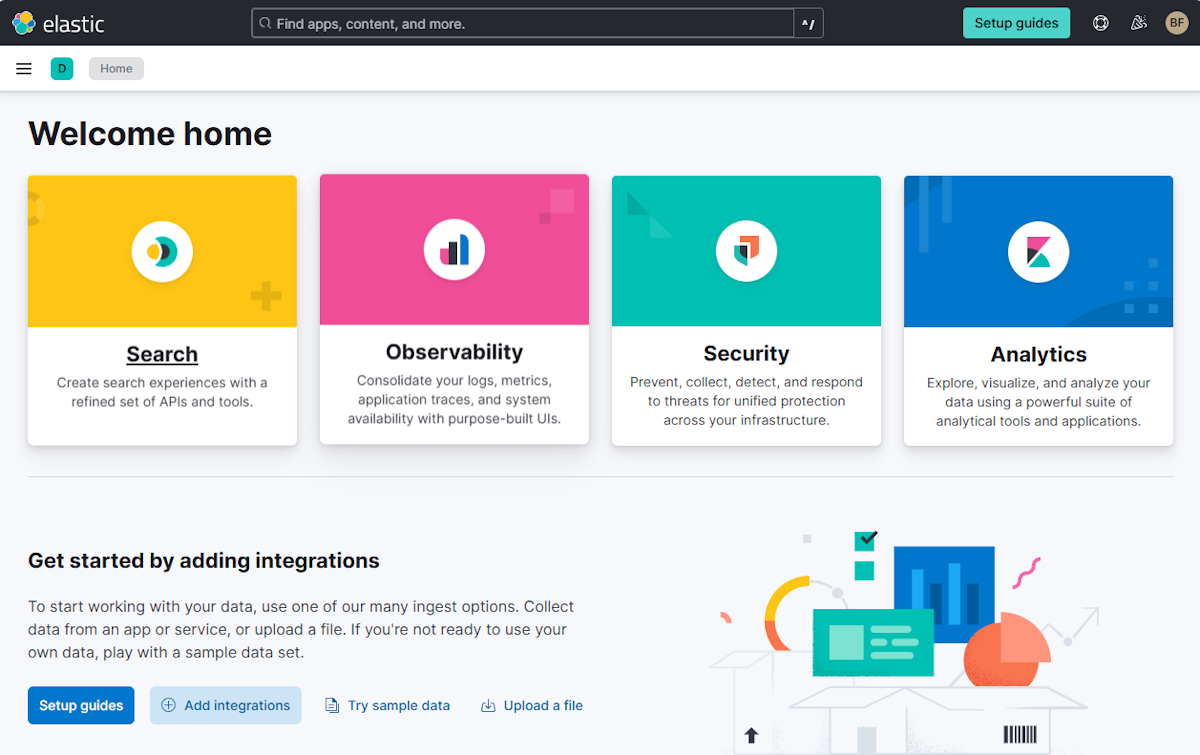
Nachdem Sie angemeldet sind, navigiert der Browser zur Willkommensseite von Kibana, wie im folgenden Screenshot gezeigt:
Konfigurieren benutzerdefinierter Elastic-Protokolle und Integrieren in WLS-Protokolle
Führen Sie die folgenden Schritte aus, um die benutzerdefinierte Protokollintegration für WebLogic Server in Kibana einzurichten:
Führen Sie die folgenden Schritte aus, um zum Integrationssetup von Kibana zu navigieren:
Suchen Sie auf der Willkommensseite von Kibana nach Get started by adding integrations, und wählen Sie dann Add integrations aus.
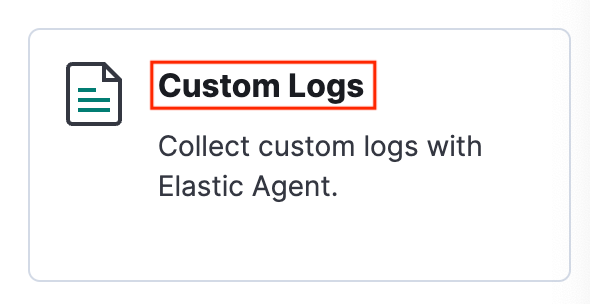
Suchen Sie nach Custom Logs, und wählen Sie diese Option aus.
Wählen Sie Add Custom Logs aus, um Anweisungen zum Installieren von Elastic Agent und zum Hinzufügen von Integrationen anzuzeigen.
Führen Sie die folgenden Schritte aus, um den Elastic Agent zu installieren:
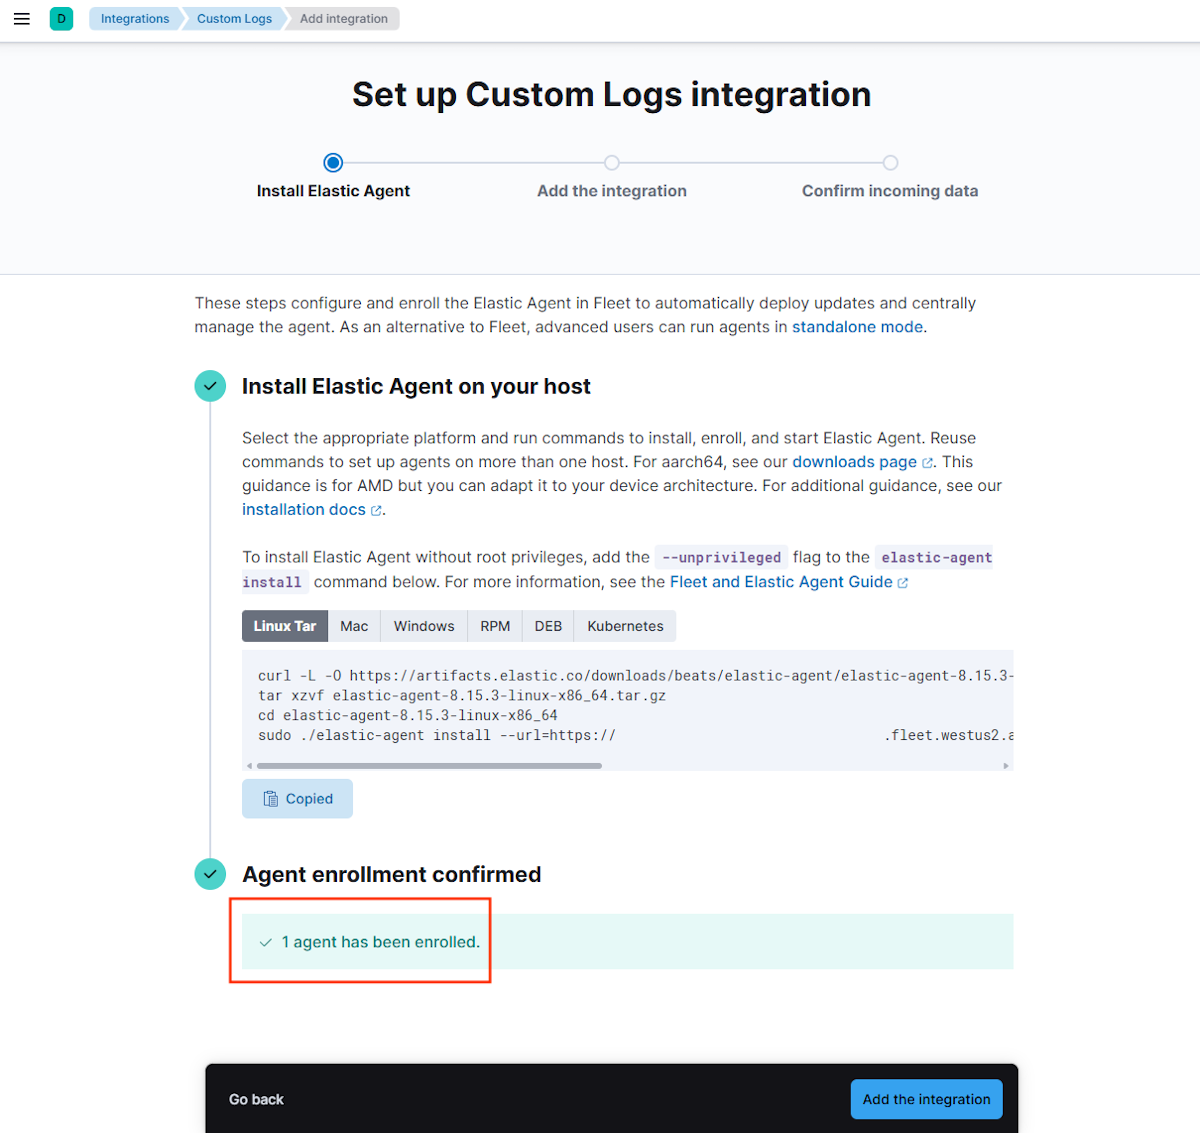
Wählen Sie Install Elastic Agent aus. Dadurch werden die Schritte für die Installation angezeigt.
Stellen Sie eine SSH-Verbindung mit dem WLS-Computer her, und wechseln Sie dann mit dem folgenden Befehl zu Stammberechtigungen:
sudo su -Kopieren Sie in Kibana den Befehl Linux Tar aus dem Abschnitt Install Elastic Agent on your host, und führen Sie ihn auf dem WLS-Computer aus.
Bestätigen Sie die Installation im Computerterminal, indem Sie bei entsprechender Aufforderung y eingeben, wie im folgenden Beispiel gezeigt:
Elastic Agent will be installed at /opt/Elastic/Agent and will run as a service. Do you want to continue? [Y/n]:ySuchen Sie nach dem Text
Elastic Agent has been successfully installed.Dieser Text gibt eine erfolgreiche Installation an. Wenn dieser Text nicht angezeigt wird, beheben Sie das Problem, bevor Sie fortfahren.
Überprüfen Sie die Agent-Anmeldung. Überprüfen Sie in Kibana Agent enrollment unter Confirm agent enrollment.
Führen Sie die folgenden Schritte aus, um die Integration für WLS-Domänenprotokolle hinzuzufügen:
Wählen Sie Add the integration aus.
Legen Sie unter Custom log file die folgenden Eigenschaften fest:
- Geben Sie für Log file path den Pfad /u01/domains/adminDomain/servers/admin/logs/adminDomain.log ein.
- Verwenden Sie generic für Dataset name.
Erweitern Sie Erweiterte Optionen. Legen Sie für Custom configurations die folgenden Eigenschaften fest:
- Verwenden Sie pattern für multiline.type.
- Verwenden Sie '^####' für multiline.pattern.
- Verwenden Sie true für multiline.negate.
- Verwenden Sie after für multiline.match.
Erweitern Sie Erweiterte Optionen. Geben Sie unter Integration name den Namen log-weblogic-domain-log ein.
Wählen Sie Confirm incoming data aus, um eine Vorschau der Protokolle anzuzeigen. Wählen Sie anschließend View assets >Assets >Views >Logs aus, um die Domänenprotokolle in Kibana anzuzeigen.
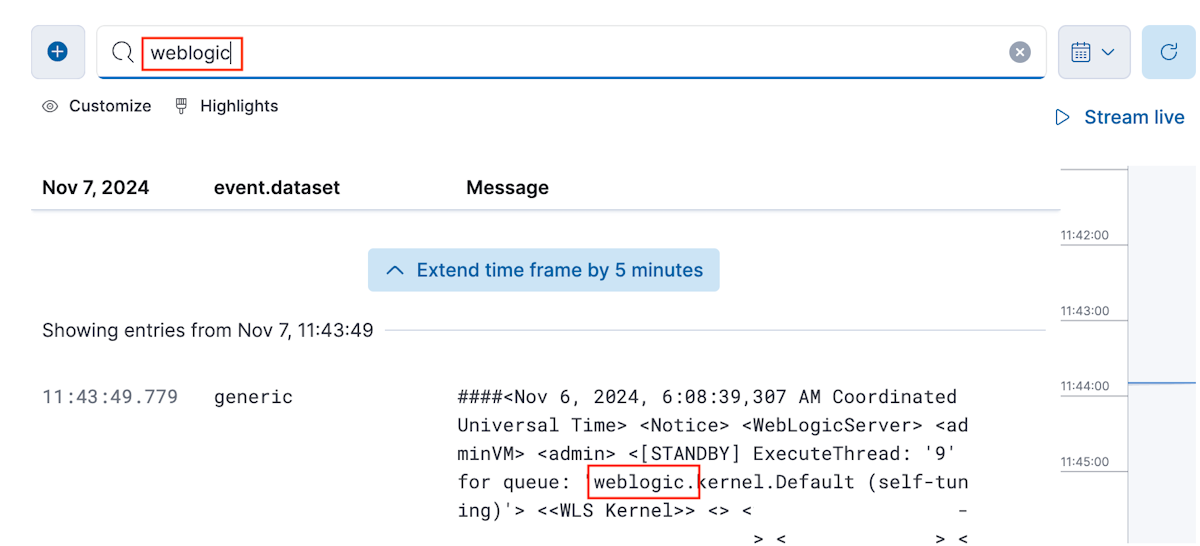
Geben Sie im Textbereich mit dem Text Search for log messages die Zeichenfolge weblogic ein, und drücken Sie die EINGABETASTE. Sie sollten Protokollmeldungen sehen, die die Zeichenfolge weblogicenthalten.
Führen Sie die folgenden Schritte aus, um Integrationen für Serverprotokolle und HTTP-Zugriffsprotokolle hinzuzufügen:
Suchen Sie in Kibana nach Integrations, und wählen Sie diese Option aus.
Wählen Sie Installed integrations>Custom Logs>Add Custom Logs aus.
Geben Sie die entsprechenden Konfigurationen aus den folgenden Listen für jeden Protokolltyp – Server und HTTP-Zugriffsprotokolle ein. Nachdem Sie alle Konfigurationsfelder ausgefüllt haben, wählen Sie Save and continue und dann Save and deploy changes aus.
Verwenden Sie für das Serverprotokoll die folgenden Werte:
Verwenden Sie für Integration settings > Integration name die Zeichenfolge log-weblogic-server-log.
Geben Sie unter Custom log file > Log file path den Pfad /u01/domains/adminDomain/servers/admin/logs/admin.log ein.
Verwenden Sie unter Custom log file > Advanced options > Custom configurations die folgenden Werte:
- Verwenden Sie pattern für multiline.type.
- Verwenden Sie '^####' für multiline.pattern.
- Verwenden Sie true für multiline.negate.
- Verwenden Sie after für multiline.match.
Geben Sie unter Where to add this integration? > Existing hosts die Zeichenfolge My first agent policy ein.
Verwenden Sie für HTTP-Zugriffsprotokolle die folgenden Werte:
- Verwenden Sie unter Integration settings > Integration name die Zeichenfolge log-http-access-log.
- Geben Sie unter Custom log file > Log file path den Pfad /u01/domains/adminDomain/servers/admin/logs/access.log ein.
- Unter Custom log file > Advanced options > Custom configurations wird keine Konfiguration angegeben.
- Geben Sie unter Where to add this integration? > Existing hosts die Zeichenfolge My first agent policy ein.
Durchsuchen von WLS-Protokollen in Kibana
Führen Sie nach der Integration die folgenden Schritte aus, um mit der Analyse der Protokolle in Kibana zu beginnen:
Um auf die Seite „Discover“ zuzugreifen, öffnen Sie das Hamburger-Menü. Wählen Sie dann unter Analytics die Option Discover aus.
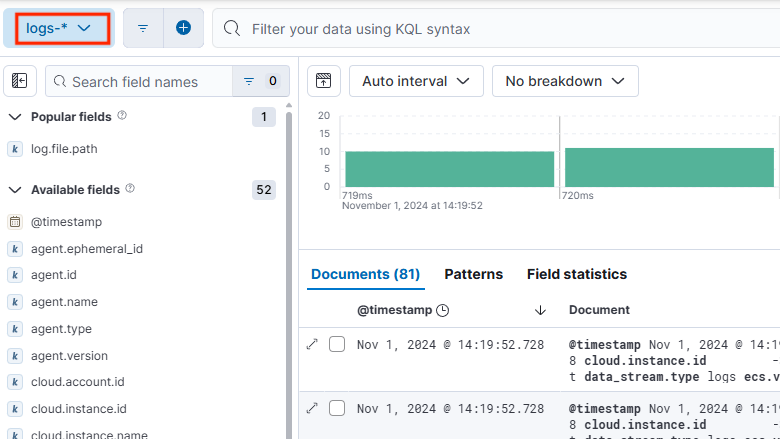
Wählen Sie zum Auswählen des Protokollindex auf der Seite Discover die Option logs-* aus.
Suchen und filtern Sie die WLS-Protokolle. Weitere Informationen zur Verwendung von Discover finden Sie in der Kibana-Dokumentation im Abschnitt Discover.
Anmerkung
Wenn Sie einen WLS-Cluster ausführen, müssen Sie den Elastic Agent auf jedem virtuellen Computer installieren und benutzerdefinierte Protokolle auf den entsprechenden Hosts konfigurieren.
Bereinigen von Ressourcen
Wenn Sie WLS oder den Elastic-Stapel nicht mehr benötigen, können Sie diese Ressourcen mithilfe der in diesem Abschnitt beschriebenen Schritte bereinigen.
Bereinigen von WLS
Verwenden Sie die folgenden Schritte, um WLS zu bereinigen:
Klicken Sie auf der Homepage des Azure-Portals auf Ressourcengruppen.
Geben Sie im Textfeld Nach einem beliebigen Feld filtern... den Namen der Ressourcengruppe ein, in der Sie die WLS-Bereitstellung erstellt haben.
Wenn die Liste Ihre Ressourcengruppe anzeigt, wählen Sie sie aus.
Wählen Sie in der Ressourcengruppenübersicht die Option Ressourcengruppe löschen aus.
Geben Sie im Abschnitt Möchten Sie den Löschvorgang durchführen? den Namen der Ressourcengruppe ein, und wählen Sie dann Löschen aus. Sie können weiterhin mit dem Azure-Portal arbeiten, während die Ressourcengruppe und deren Inhalte gelöscht werden.
Elastisch auf Azure bereinigen
Führen Sie die gleichen Schritte wie im vorherigen Abschnitt aus, um Elastic in Azure zu löschen, verwenden Sie jedoch den Ressourcengruppennamen der Elastic on Azure-Bereitstellung als zu löschende Ressourcengruppe.
Nächster Schritt
Fahren Sie mit Ihrer Migrationsreise fort, indem Sie WebLogic Server auf virtuellen Azure-Computern erkunden.
