Erstellen eines Azure Local VM-Images mithilfe von Azure Marketplace-Images
Gilt für: Azure Local 2311.2 und höher
In diesem Artikel wird beschrieben, wie Sie Vm-Images für Azure Local mithilfe von Quellimages aus Azure Marketplace erstellen. Sie können VM-Images mithilfe des Azure-Portal oder der Azure CLI erstellen und dann diese VM-Images verwenden, um Arc-VMs auf Azure Local zu erstellen.
Voraussetzungen
Bevor Sie beginnen, stellen Sie sicher, dass die folgenden Voraussetzungen abgeschlossen sind.
Überprüfen und abschließen Sie die Voraussetzungen.
Stellen Sie sicher, dass Sie über die Rolle Azure Connected Machine Resource Manager verfügen. Weitere Informationen finden Sie unter Zuweisen von Azure-Rollen.
Wenn Sie einen Client zum Herstellen einer Verbindung mit Ihrer lokalen Azure-Instanz verwenden, lesen Sie "Remoteverbindung mit dem System herstellen".
Hinzufügen eines VM-Images aus Azure Marketplace
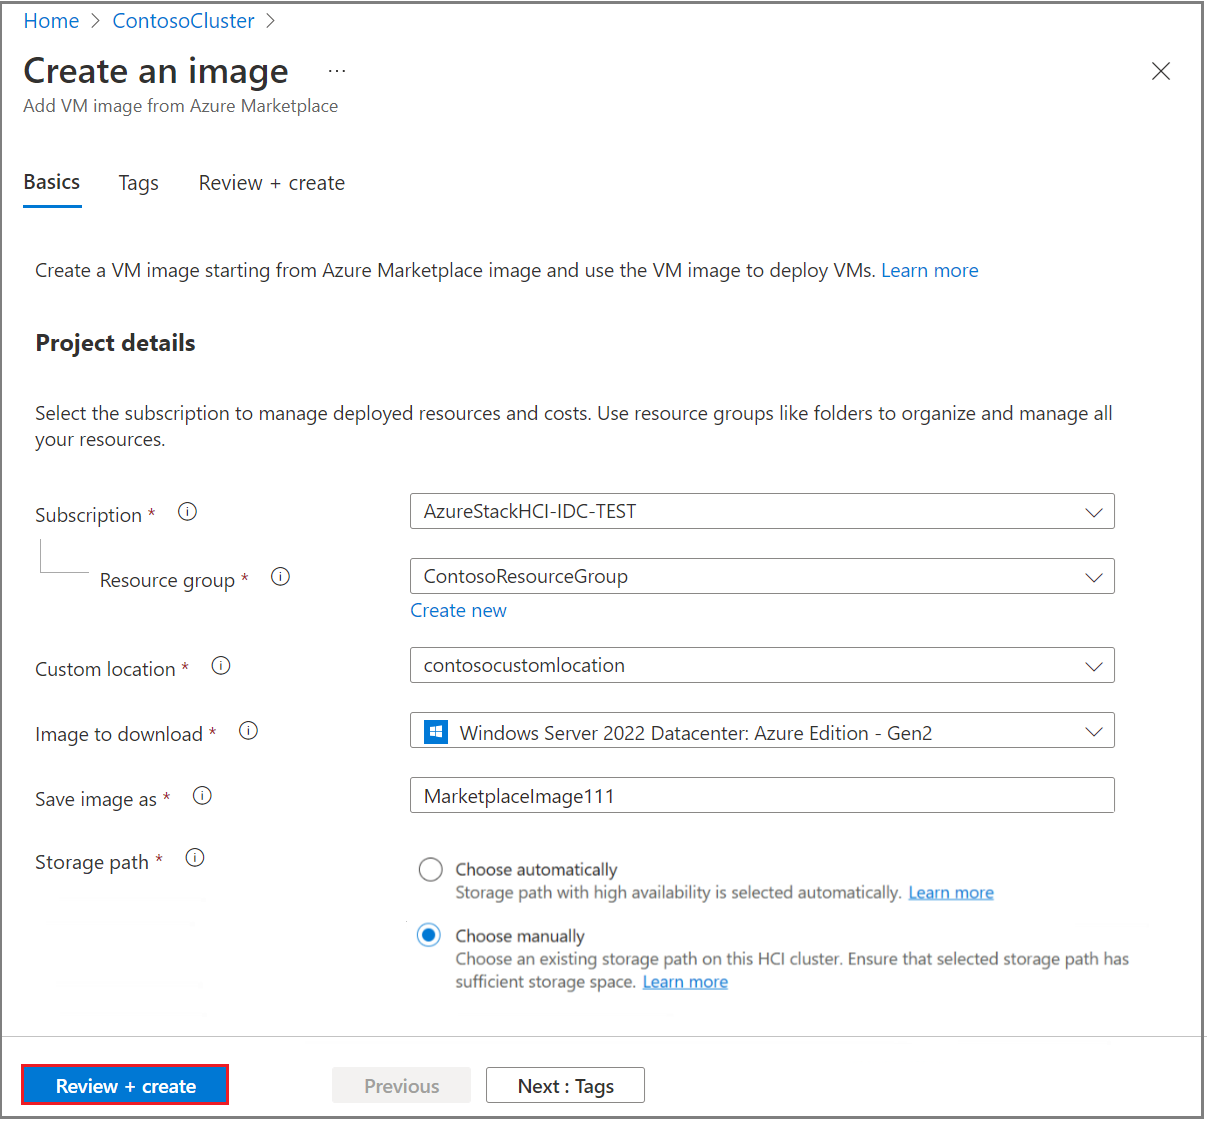
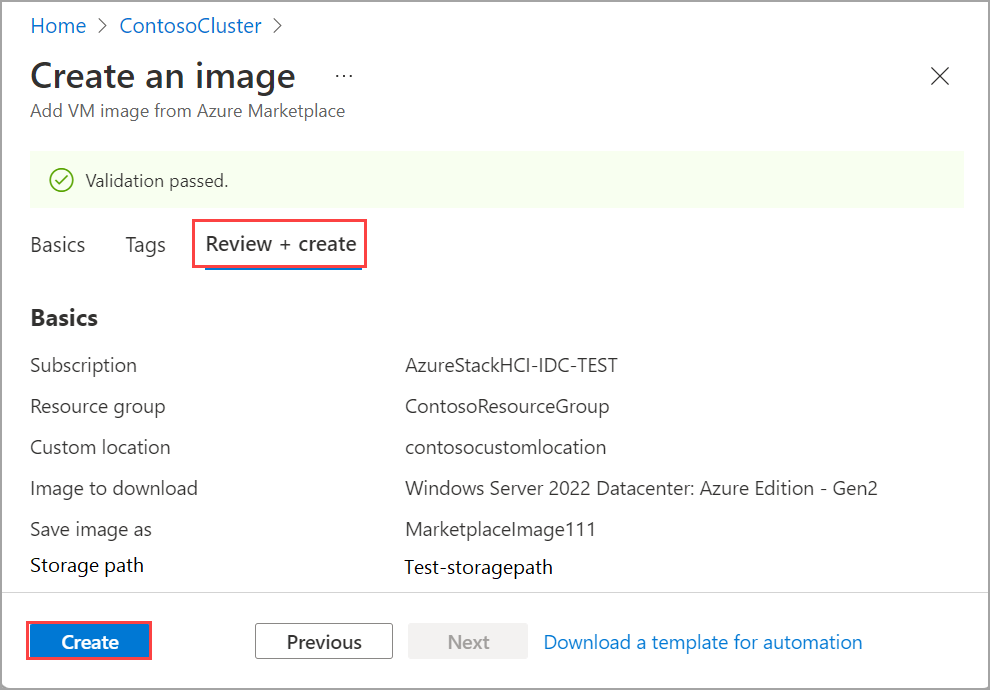
Sie erstellen ein VM-Image ab einem Azure Marketplace-Image und verwenden dann dieses Image, um virtuelle Computer in Ihrer lokalen Azure-Instanz bereitzustellen.
Führen Sie die folgenden Schritte aus, um ein VM-Image mithilfe der Azure CLI zu erstellen.
Anmelden und Festlegen des Abonnements
Stellen Sie eine Verbindung mit einem Computer auf Ihrem lokalen Azure-Computer her.
Anmelden. Typ:
az login --use-device-codeLegen Sie Ihr Abonnement fest.
az account set --subscription <Subscription ID>
Festlegen einiger Parameter
Legen Sie Parameter für Ihr Abonnement, die Ressourcengruppe, den Standort, den Betriebssystemtyp für das Image fest. Ersetzen Sie die Parameter
< >durch die entsprechenden Werte.$subscription = "<Subscription ID>" $resource_group = "<Resource group>" $mktplaceImage = "<Marketplace image name>" $customLocationName = "<Custom location name>" $customLocationID = (az customlocation show --resource-group $resource_group --name "<custom_location_name_for_Azure_Local>" --query id -o tsv) $location = "<Location for your Azure Local>" $osType = "<OS of source image>"Die Parameter werden in der folgenden Tabelle beschrieben:
Parameter Beschreibung subscriptionAbonnement, das Ihrem lokalen Azure zugeordnet ist. resource-groupRessourcengruppe für Ihr Azure Local, das Sie diesem Image zuordnen. nameName des Marketplace-Images für Azure Local. customLocationRessourcen-ID des benutzerdefinierten Speicherorts für Ihr Azure Local. locationSpeicherort für Ihr Azure Local. Das kann beispielsweise eastussein.os-typeBetriebssystem, das dem Quellimage zugeordnet ist. Dies kann Windows oder Linux sein. Hier ist eine Beispielausgabe:
PS C:\Users\azcli> $subscription = "<Subscription ID>"
PS C:\Users\azcli> $resource_group = "mylocal-rg"
PS C:\Users\azcli> $mktplaceImage= "mylocal-marketplaceimage"
PS C:\Users\azcli> $customLocationName = "mylocal-cl"
PS C:\Users\azcli> $customerLocationID /subscriptions$subscription/resourcegroups/$resource_group/providers/microsoft.extendedlocation/customlocations/$customLocationName
PS C:\Users\azcli> $location = "eastus"
PS C:\Users\azcli> $ostype = "Windows"
Erstellen eines VM-Images aus dem Marketplace-Image
Legen Sie zusätzliche Parameter fest, die das beabsichtigte VM-Image angeben, das Sie erstellen möchten. Sie müssen das Angebot, den Herausgeber, die SKU und die Version für das Marketplace-Image einschließen. Ersetzen Sie die Parameter <> durch die entsprechenden Werte:
$publisher = "<Publisher name>"
$offer = "<OS offer>"
$sku = "<Image SKU>"
Verwenden Sie die folgende Tabelle, um die verfügbaren Marketplace-Bilder und deren Attributwerte zu finden:
Name Herausgeber Angebot SKU Windows 11 Enterprise multi-session + Microsoft 365 microsoftwindowsdesktop office-365 win11-23h2-avd-m365 Windows 10 Enterprise multi-session + Microsoft 365 microsoftwindowsdesktop office-365 win10-21h2-avd-m365
win10-22h2-avd-m365Windows 11 Pro microsoftwindowsdesktop windows-11 win11-23h2-pro Windows 11 Enterprise microsoftwindowsdesktop windows-11 win11-22h2-ent
win11-23h2-ent
win11-24h2-entWindows 11 Enterprise (mehrere Sitzungen) microsoftwindowsdesktop windows-11 win11-22h2-avd
win11-23h2-avd
win11-24h2-avdWindows 10 Pro microsoftwindowsdesktop Windows-10 win10-22h2-pro-g2 Windows 10 Enterprise microsoftwindowsdesktop Windows-10 win10-22h2-ent-g2 Windows 10 Enterprise für mehrere Sitzungen microsoftwindowsdesktop Windows-10 win10-22h2-avd Windows Server 2025 Datacenter: Azure Edition microsoftwindowsserver windowsserver 2025-datacenter-azure-edition-smalldisk
2025-datacenter-azure-edition-core
2025-datacenter-azure-editionWindows Server 2022 Datacenter: Azure Edition microsoftwindowsserver windowsserver 2022-datacenter-azure-edition-hotpatch
2022-datacenter-azure-edition-core
2022-datacenter-azure-editionWindows Server 2019 microsoftwindowsserver windowsserver 2019-datacenter-gensecond
2019-datacenter-core-g2SQL Server 2022 Enterprise unter Windows Server 2022 microsoftsqlserver sql2022-ws2022 Enterprise-Gen2
standard-gen2Wenn Sie ein Windows Server 2019 Datacenter-Image erstellen möchten, haben Sie die folgenden Parameter:
$publisher = "microsoftwindowsserver"
$offer = "windowsserver"
$sku = "2019-datacenter-gensecond"
Erstellen Sie das VM-Image beginnend mit einem angegebenen Marketplace-Image:
az stack-hci-vm image create --resource-group $resource_group --custom-location $customLocationID --name $mktplaceImage --os-type $ostype --offer $offer --publisher $publisher --sku $sku
Hier ist eine Beispielausgabe:
PS C:\Users\azcli> az stack-hci-vm image create --custom-location $cl --name $mktplaceImage --os-type $ostype --resource-group $rg --publisher $publisher --offer $offer --sku $sku
{
  "extendedLocation": {
    "name": “/subscriptions/<Subscription ID>/resourceGroups/mylocal-rg/providers/Microsoft.ExtendedLocation/customLocations/mylocal-cl",
    "type": "CustomLocation"
  },
  "id": "/subscriptions/<Subscription ID>/resourceGroups/mylocal-rg/providers/Microsoft.AzureStackHCI/marketplacegalleryimages/myhci-marketplaceimage",
\
  "location": "eastus",
  "name": "myhci-marketplaceimage",
  "properties": {
    "cloudInitDataSource": null,
    "containerId": null,
    "hyperVGeneration": null,
    "identifier": {
      "offer": "windowsserver",
      "publisher": "microsoftwindowsserver",
      "sku": "2019-datacenter-gensecond"
    },
    "osType": "Windows",
    "provisioningState": "Succeeded",
    "status": {
      "downloadStatus": {
        "downloadSizeInMb": 10832
      },
      "errorCode": "",
      "errorMessage": "",
      "progressPercentage": 100,
      "provisioningStatus": {
        "operationId": "13efc468-7473-429f-911b-858c1e6fc1d5*B11A62EE76B08EF194F8293CDD40F7BC71BFB93255D5A99DD11B4167690752D9",
        "status": "Succeeded"
      }
    },
    "version": {
      "name": "17763.6293.240905",
      "properties": {
        "storageProfile": {
          "osDiskImage": {
            "sizeInMb": 130050
          }
        }
      }

    }
  },
  "resourceGroup": "mylocal-rg",
  "systemData": {
    "createdAt": "2024-09-23T18:53:13.734389+00:00",
    "createdBy": "guspinto@contoso.com",
    "createdByType": "User",
    "lastModifiedAt": "2024-09-23T19:06:07.532276+00:00",
    "lastModifiedBy": "319f651f-7ddb-4fc6-9857-7aef9250bd05",
    "lastModifiedByType": "Application"
  },

  "tags": null,
  "type": "microsoft.azurestackhci/marketplacegalleryimages"
}
Weitere Informationen zu diesem CLI-Befehl finden Sie unter az stack-hci-vm image.
Auflisten von VM-Images
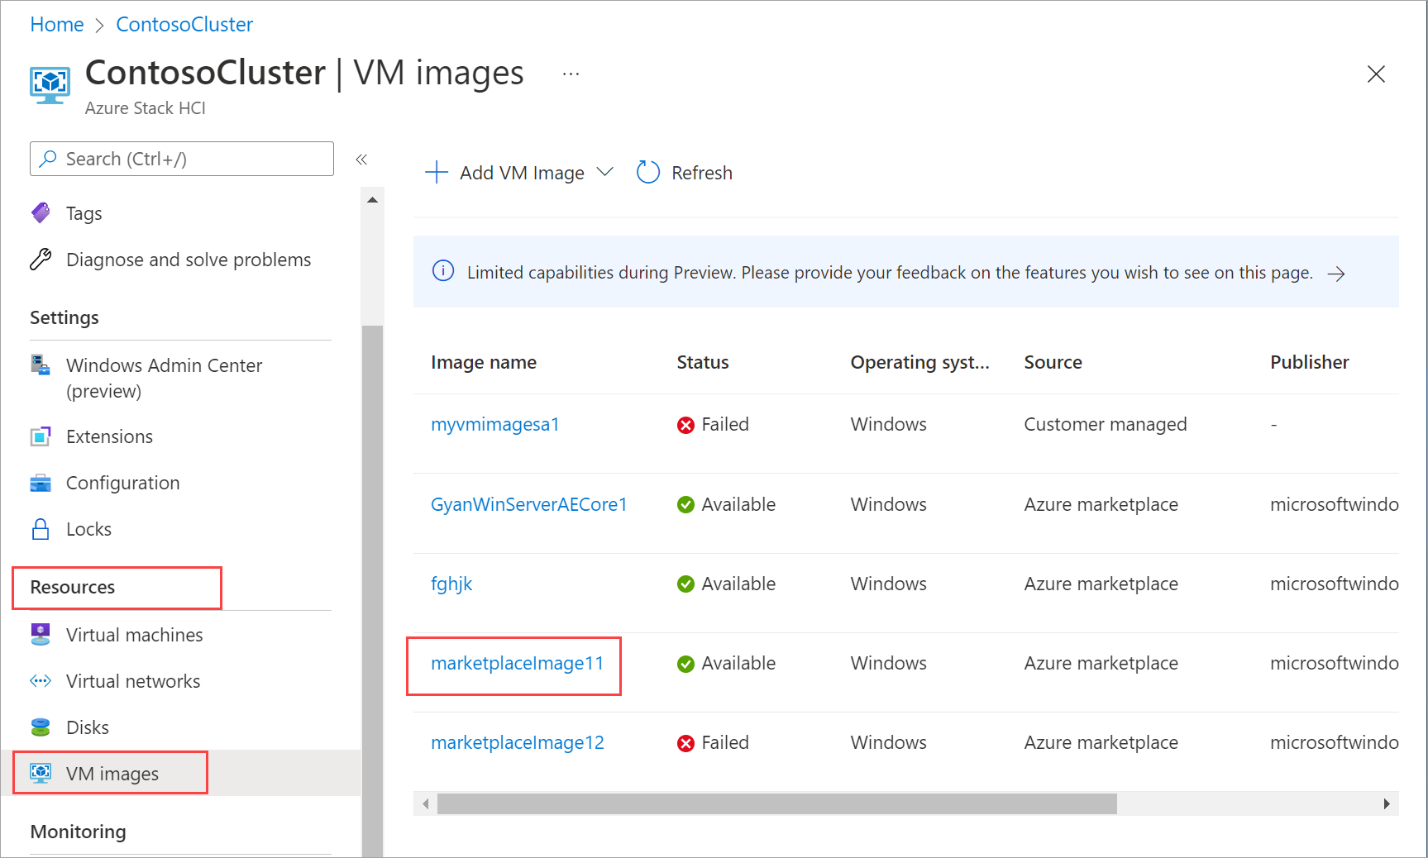
Sie müssen die Liste der VM-Images anzeigen, um ein zu verwaltenes Image auszuwählen.
Führen Sie die folgenden Schritte aus, um das VM-Image mithilfe der Azure CLI auflisten.
Führen Sie PowerShell als Administrator aus.
Legen Sie einige Parameter fest.
$subscription = "<Subscription ID associated with your Azure Local>"
$resource_group = "<Resource group name for your Azure Local>"
Auflisten aller VM-Images, die Ihrem lokalen Azure zugeordnet sind. Führen Sie den folgenden Befehl aus:
az stack-hci-vm image list --subscription $subscription --resource-group $resource_groupJe nach verwendetem Befehl werden eine entsprechende Gruppe von Bildern aufgeführt, die Ihrem lokalen Azure Zugeordnet sind.
- Wenn Sie nur das Abonnement angeben, listet der Befehl alle Bilder im Abonnement auf.
- Wenn Sie sowohl das Abonnement als auch die Ressourcengruppe angeben, listet der Befehl alle Bilder in der Ressourcengruppe auf.
Zu diesen Images gehören:
- VM-Images aus Marketplace-Images.
- Benutzerdefinierte Bilder, die sich in Ihrem Azure Storage-Konto befinden oder sich in einer lokalen Freigabe auf Ihrem System oder einem Client befinden, der mit Ihrem System verbunden ist.
Hier ist eine Beispielausgabe.
PS C:\Users\azcli> az stack-hci-vm image list --subscription "<Subscription ID>" --resource-group "myhci-rg"
Command group 'stack-hci-vm' is experimental and under development. Reference and support levels: https://aka.ms/CLI_refstatus
[
  {
    "extendedLocation": {
      "name": "/subscriptions/<Subscription ID>/resourcegroups/myhci-rg/providers/microsoft.extendedlocation/customlocations/myhci-cl",
      "type": "CustomLocation"
    },
    "id": "/subscriptions/<Subscription ID>/resourceGroups/myhci-rg/providers/microsoft.azurestackhci/marketplacegalleryimages/w
inServer2022Az-01",
    "location": "eastus",
    "name": "winServer2022Az-01",
    "properties": {
      "hyperVGeneration": "V2",
      "identifier": {
        "offer": "windowsserver",
        "publisher": "microsoftwindowsserver",
        "sku": "2022-datacenter-azure-edition-core"
      },
      "imagePath": null,
      "osType": "Windows",
      "provisioningState": "Succeeded",
      "status": {
        "downloadStatus": {
          "downloadSizeInMB": 6710
        },
        "progressPercentage": 100,
        "provisioningStatus": {
          "operationId": "19742d69-4a00-4086-8f17-4dc1f7ee6681*E1E9889F0D1840B93150BD74D428EAE483CB67B0904F9A198C161AD471F670ED",
          "status": "Succeeded"
        }
      },
      "storagepathId": null,
      "version": {
        "name": "20348.2031.231006",
        "properties": {
          "storageProfile": {
            "osDiskImage": {
              "sizeInMB": 130050
            }
          }
        }
      }
    },
    "resourceGroup": "mylocal-rg",
    "systemData": {
      "createdAt": "2023-10-30T21:44:53.020512+00:00",
      "createdBy": "guspinto@contoso.com",
      "createdByType": "User",
      "lastModifiedAt": "2023-10-30T22:08:25.495995+00:00",
      "lastModifiedBy": "319f651f-7ddb-4fc6-9857-7aef9250bd05",
      "lastModifiedByType": "Application"
    },
    "tags": {},
    "type": "microsoft.azurestackhci/marketplacegalleryimages"
  }
]
PS C:\Users\azcli>
Weitere Informationen zu diesem CLI-Befehl finden Sie in der Imageliste "az stack-hci-vm".
Anzeigen von VM-Imageeigenschaften
Möglicherweise möchten Sie die Eigenschaften von VM-Images anzeigen, bevor Sie das Image verwenden, um einen virtuellen Computer zu erstellen. Führen Sie die folgenden Schritte aus, um die Bildeigenschaften anzuzeigen:
Führen Sie die folgenden Schritte aus, um die Eigenschaften eines Bilds mithilfe der Azure CLI anzuzeigen:
Führen Sie PowerShell als Administrator aus.
Legen Sie die folgenden Parameter fest.
$subscription = "<Subscription ID>"
$resource_group = "<Azure Local resource group>"
$mktplaceImage = "<Marketplace image name>"
Sie können Bildeigenschaften auf zwei verschiedene Arten anzeigen: ID angeben oder Namen und Ressourcengruppe angeben. Führen Sie die folgenden Schritte aus, wenn Sie die Marketplace-Image-ID angeben:
Legen Sie den folgenden Parameter fest.
$mktplaceImageID = "/subscriptions/<Subscription ID>/resourceGroups/myhci-rg/providers/Microsoft.AzureStackHCI/galleryimages/mylocal-marketplaceimage"Führen Sie den folgenden Befehl aus, um die Eigenschaften anzuzeigen.
az stack-hci-vm image show --ids $mktplaceImageIDHier ist eine Beispielausgabe für diesen Befehl:
PS C:\Users\azcli> az stack-hci-vm image show --ids $mktplaceImageID
Command group 'stack-hci-vm' is experimental and under development. Reference and support levels: https://aka.ms/CLI_refstatus
{
  "extendedLocation": {
    "name": "/subscriptions/<Subscription ID>/resourcegroups/myhci-rg/providers/microsoft.extendedlocation/customlocations/mylocal-cl",
    "type": "CustomLocation"
  },
  "id": "/subscriptions/<Subscription ID>/resourceGroups/myhci-rg/providers/Microsoft.AzureStackHCI/galleryimages/mylocal-marketplaceimage",
  "location": "eastus",
  "name": "mylocal-marketplaceimage",
  "properties": {
    "containerName": null,
    "hyperVGeneration": null,
    "identifier": null,
    "imagePath": null,
    "osType": "Windows",
    "provisioningState": "Succeeded",
    "status": null,
    "version": null
  },
  "resourceGroup": "mylocal-rg",
  "systemData": {
    "createdAt": "2022-08-05T20:52:38.579764+00:00",
    "createdBy": "guspinto@microsoft.com",
    "createdByType": "User",
    "lastModifiedAt": "2022-08-05T20:52:38.579764+00:00",
    "lastModifiedBy": "guspinto@microsoft.com",
    "lastModifiedByType": "User"
  },
  "tags": null,
  "type": "microsoft.azurestackhci/galleryimages"
}
PS C:\Users\azcli>
Vm-Image aktualisieren
Wichtig
Die neuesten Updates können einige Zeit in Anspruch nehmen, um ihre VM-Images zu berücksichtigen, da zusätzliche Überprüfungen durchgeführt werden.
Wenn ein neues aktualisiertes Image in Azure Marketplace verfügbar ist, werden die VM-Images auf Ihrem lokalen Azure veraltet und sollten aktualisiert werden. Der Aktualisierungsvorgang ist keine direkte Aktualisierung des Bilds. Stattdessen können Sie sehen, für welche VM-Images ein aktualisiertes Image verfügbar ist, und bilder auswählen, die aktualisiert werden sollen. Nach dem Aktualisieren verwendet der Vorgang "VM-Image erstellen" das neue aktualisierte Image.
Um ein VM-Image zu aktualisieren, führen Sie die folgenden Schritte in Azure-Portal aus.
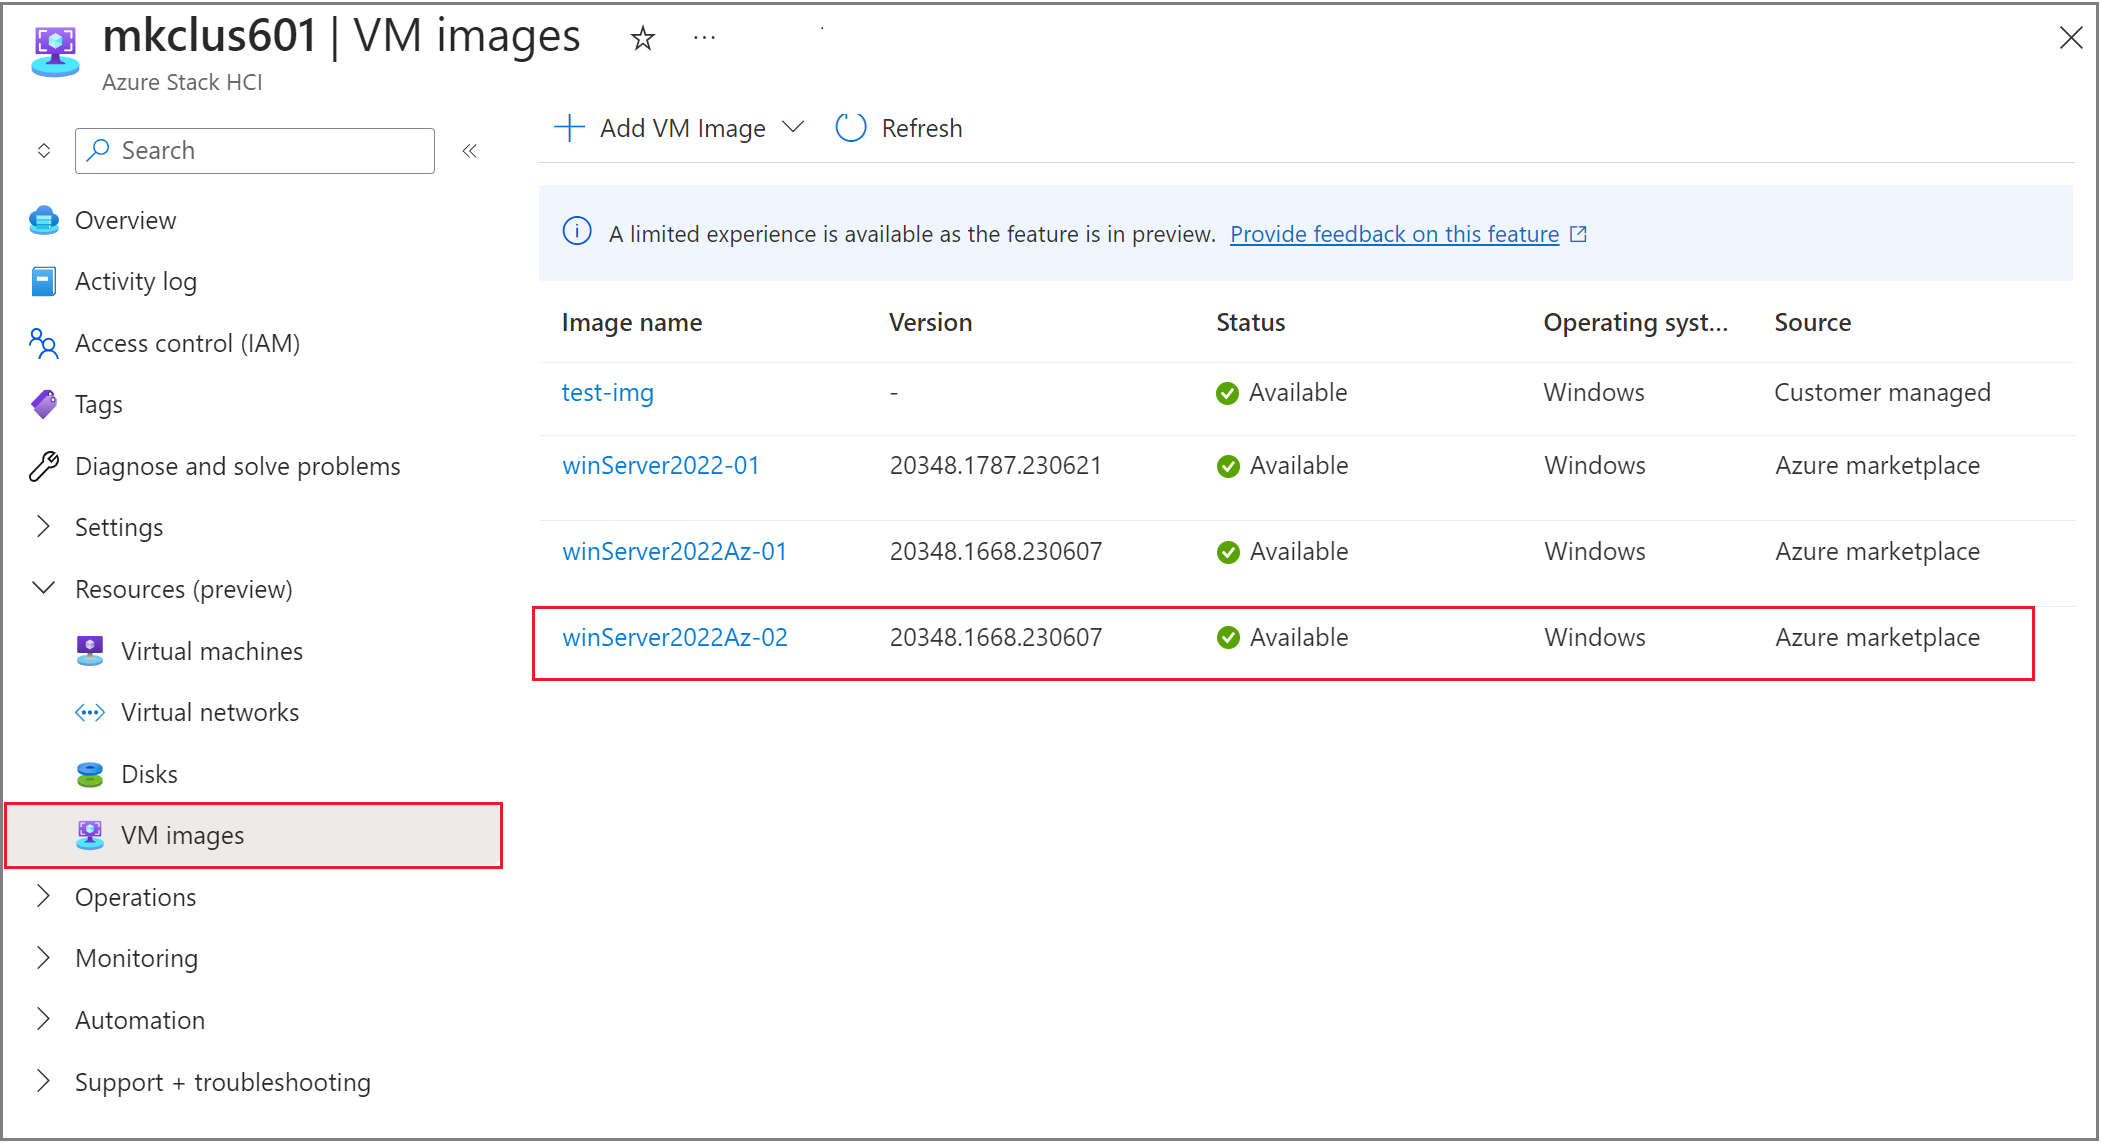
Um festzustellen, ob ein Update verfügbar ist, wählen Sie in der Listenansicht ein VM-Image aus.
Im Blatt "Übersicht" wird ein Banner angezeigt, in dem das neue VM-Image angezeigt wird, das zum Download verfügbar ist, sofern vorhanden. Um auf das neue Bild zu aktualisieren, wählen Sie das Pfeilsymbol aus.
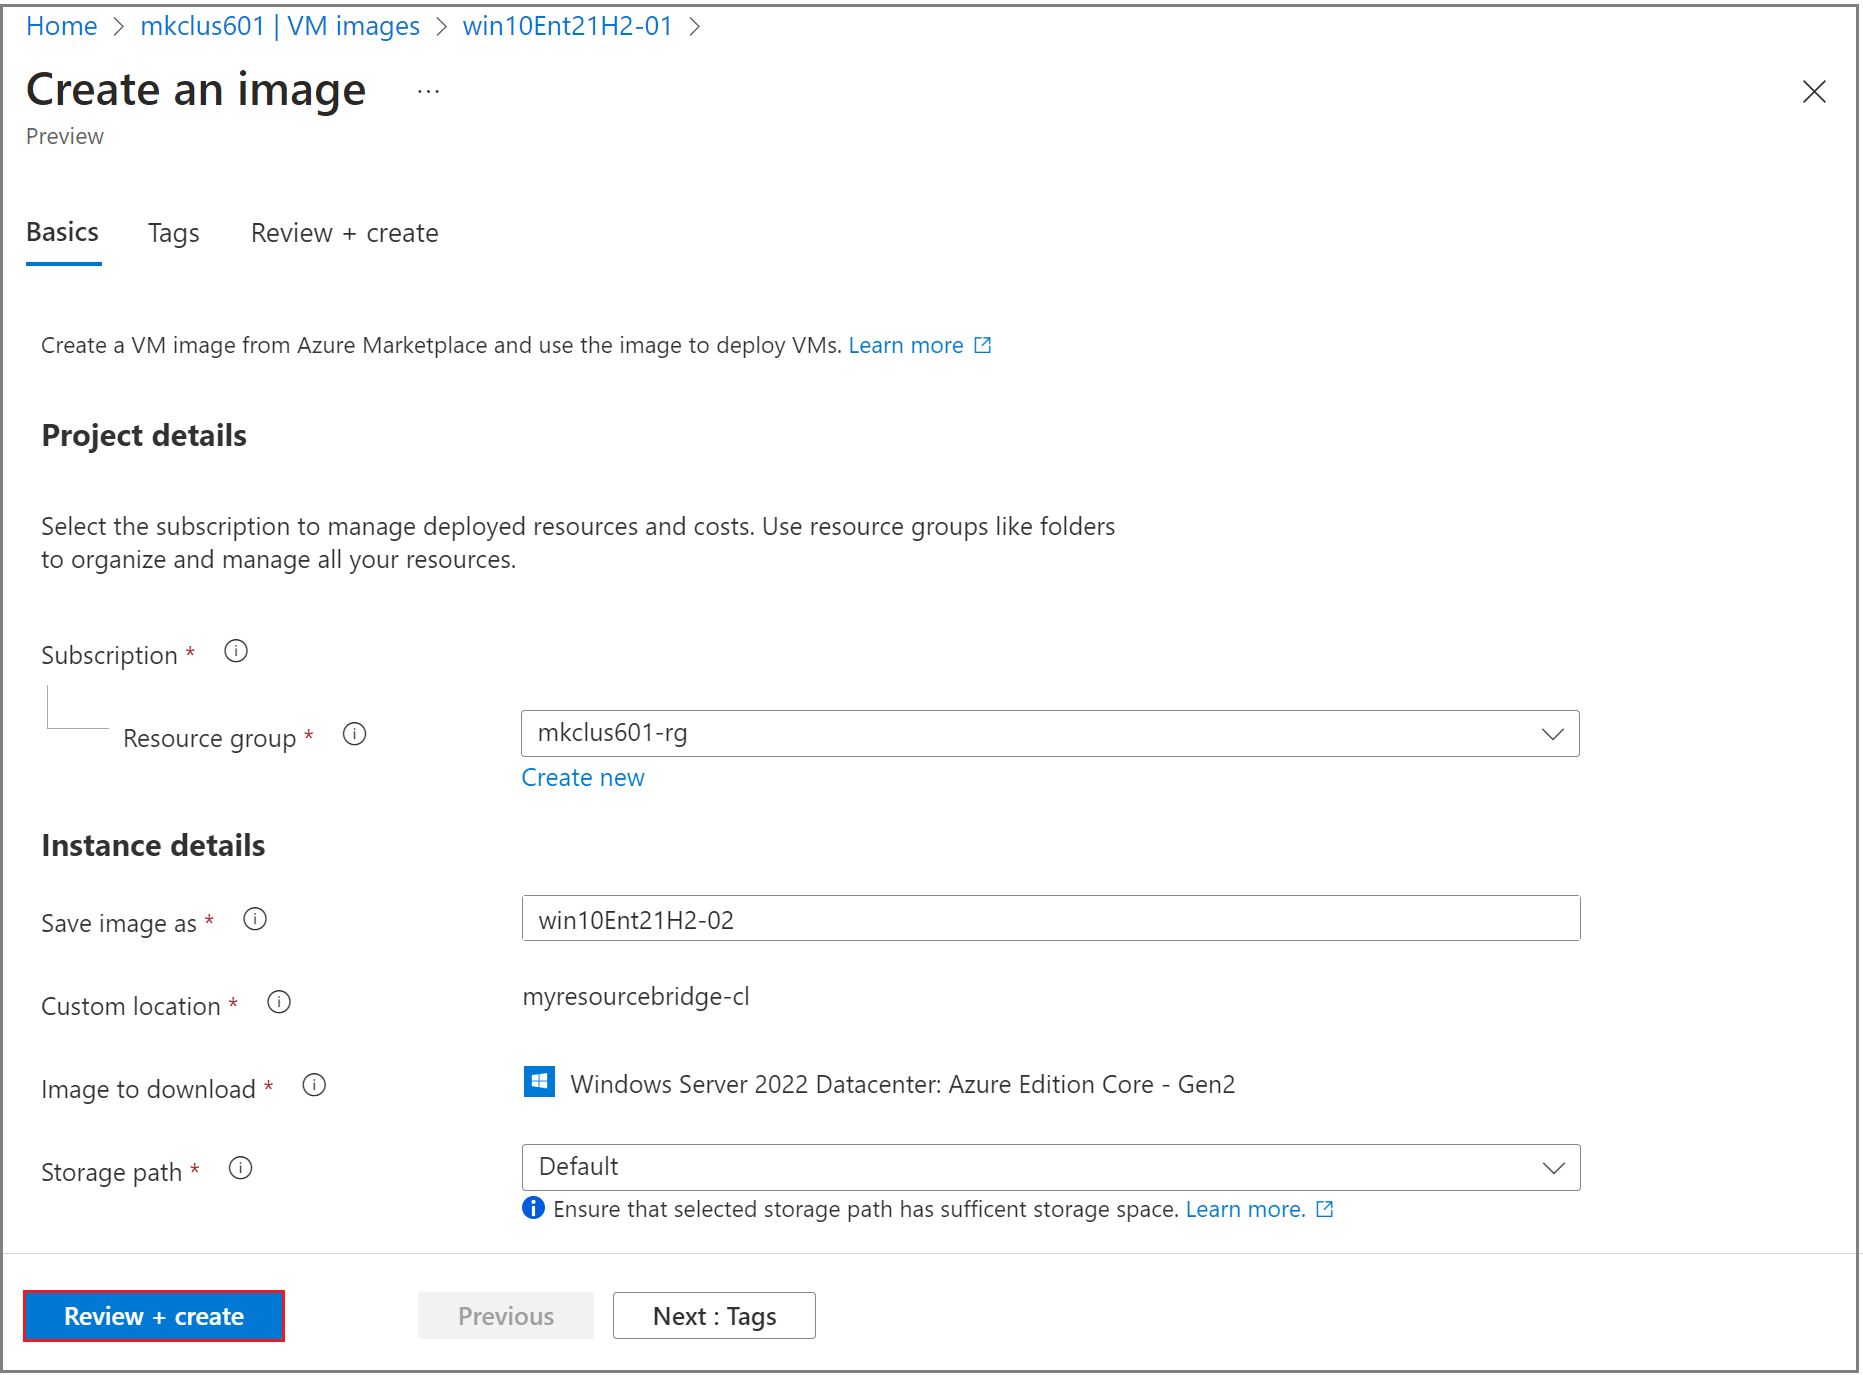
Überprüfen Sie Bilddetails, und wählen Sie dann "Überprüfen" und "Erstellen" aus. Standardmäßig verwendet das neue Bild dieselbe Ressourcengruppe und Instanzdetails wie das vorherige Bild.
Der Name für das neue Bild wird basierend auf dem Namen des vorherigen Bilds erhöht. Ein vorhandenes Image mit dem Namen "winServer2022-01" verfügt beispielsweise über ein aktualisiertes Image mit dem Namen "winServer2022-02".
Wählen Sie Erstellen aus, um den Vorgang abzuschließen.
Nachdem das neue VM-Image erstellt wurde, erstellen Sie einen virtuellen Computer mit dem neuen Image, und stellen Sie sicher, dass der virtuelle Computer ordnungsgemäß funktioniert. Nach der Überprüfung können Sie das alte VM-Image löschen.
VM-Image löschen
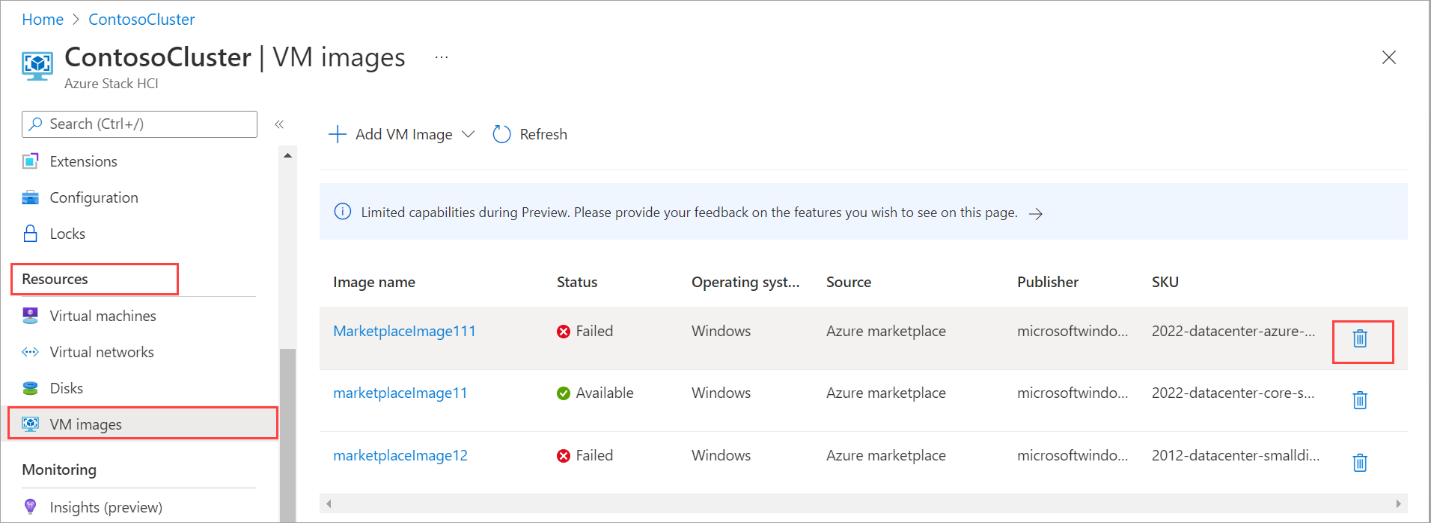
Möglicherweise möchten Sie ein VM-Image löschen, wenn der Download aus irgendeinem Grund fehlschlägt oder wenn das Image nicht mehr benötigt wird. Führen Sie die folgenden Schritte aus, um die VM-Images zu löschen.
Führen Sie PowerShell als Administrator aus.
Legen Sie die folgenden Parameter fest:
$subscription = "<Subscription ID>"
$resource_group = "<Azure Local resource group>"
$mktplaceImage = "<Markeplace image name>"
Entfernen Sie ein vorhandenes VM-Image. Führen Sie den folgenden Befehl aus:
az stack-hci-vm image delete --subscription $subscription --resource-group $resource_group --name $mktplaceImage --yes
Sie können das Bild auf zwei Arten löschen:
- Geben Sie Namen und Ressourcengruppe an.
- Geben Sie die ID an.
Nachdem Sie ein Bild gelöscht haben, können Sie überprüfen, ob das Bild entfernt wurde. Hier sehen Sie eine Beispielausgabe, als das Bild gelöscht wurde, indem Sie den Namen und die Ressourcengruppe angeben.
PS C:\Users\azcli> $subscription = "<Subscription ID>"
PS C:\Users\azcli> $resource_group = "mylocal-rg"
PS C:\Users\azcli> $mktplaceImage = "mymylocal-marketplaceimage"
PS C:\Users\azcli> az stack-hci-vm image delete --name $mktplaceImage --resource-group $resource_group
Command group 'stack-hci-vm' is experimental and under development. Reference and support levels: https://aka.ms/CLI_refstatus
Are you sure you want to perform this operation? (y/n): y
PS C:\Users\azcli> az stack-hci-vm image show --name $mktplaceImage --resource-group $resource_group
Command group 'stack-hci-vm' is experimental and under development. Reference and support levels: https://aka.ms/CLI_refstatus
ResourceNotFound: The Resource 'Microsoft.AzureStackHCI/marketplacegalleryimages/myhci-marketplaceimage' under resource group 'mylocal-rg' was not found. For more details please go to https://aka.ms/ARMResourceNotFoundFix
PS C:\Users\azcli>

