Tip #12: Did you know..How to create an IIS Virtual Directory from within Visual Web Developer?
Here are the steps on how to create a Local IIS Virtual Directory.To start with you should have IIS installed on your box.
Step1: Go to File Menu->Click on New Web Site.
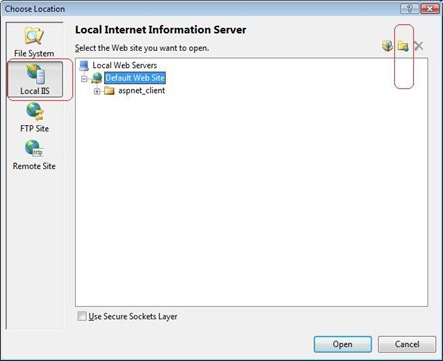
Step2: Click on the Browse button in the New Web Site dialog. This will bring up the “Choose Location” dialog in the picture below.
Step3: Click on Local IIS tab on your left.
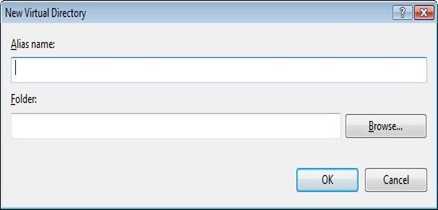
Step4: On the top right corner of the above dialog there is an icon for “Create New Virtual Directory”. Click on that icon and it will bring up the dialog for creating New Virtual Directory. In this dialog, type in the name and full path to your physical directory.
Step5: In the “Choose Location” dialog, you could also delete virtual directories. The delete icon is right next to the “Create Virtual Directory” icon on top left. Select the virtual directory in the tree view and click on the delete icon. This will pop up a confirmation dialog if you click OK on that dialog, the virtual directory will be deleted.
Reshmi Mangalore
SDET, Web Development Tools
Comments
Anonymous
October 08, 2008
PingBack from http://www.easycoded.com/tip-12-did-you-knowhow-to-create-an-iis-virtual-directory-from-within-visual-web-developer/Anonymous
October 08, 2008
No se sabía que se podía hacer esto directamente (normalmente yo creo los directorios virtuales por fueraAnonymous
October 10, 2008
Here are four new tips on Tips and Trick Blog. Tip #10 Did you know… Visual Web Developer 2008 has a

