Deploying Your Dockerized Angular Application To Azure Using VSTS - Part 1
Introduction
In my previous post I showed you how to deploy your Angular application to Azure using Visual Studio Team Services (VSTS). Whereas VSTS made it extremely easy to build a CI/CD pipeline, there was one challenging aspect which always proves to be challenging and that is the consistency across the development environment and the production environment. For example, when you develop your Angular application locally the application is served by the webpack server wheras when you hosted on Azure its served using IIS. In this post I will show you how you can use Docker containers to use the same environment under both the development and production machines while automating the whole process using VSTS.
I am going to assume that you are developing on a Windows 10 machine. Thus, you will need to install docker for windows to be able to run docker containers locally. At the time of writing this blog post the latest version of the Angular-Cli was 1.6.2 and the latest version of Angular was 5.1.2. Also I will assume that you have already created an Angular application using the Angular-Cli.
Building the Docker Image
We will start by tying docker into the development environment. If you are using VS Code (its no secret by now that its my favorite code editor) I highly recommend installing an extension called Docker that is maintained by Microsoft. It adds the necessary commands to VS Code to add a DockerFile to your existing angular project as follows:

Once the DockerFile is added to your Angular application its time to add the necessary commands to assemble a docker image which will be used to create docker containers that will run on both the development machine as well as on the production server. We will assume that nginx will be used as the web server. Here is the DockerFile that builds an image based on the nginx image and copies the dist folder that is generated by the angular build process into the specified directory inside the image.

The beauty of the docker image here is that we don’t have to burden ourselves with setting up an nginx server on either the development or production machines. It just works!!! Finally, we are going to expose the web server at port 80 (this is internal to the image and not accessible to the outside world, but more on this later).
If you want to test the above setup locally on your dev machine before you integrate it into your CI/CD pipeline you can build the angular application using the following command:
ng build –prod
and then build the docker image using the following command:
docker build -t my-angular-app
which would result in the my-angular-app image being created. Notice how the nginx image was automatically downloaded since it was utilized as the base image for the my-angular-app image that we created.

Once the image is created you can run instances of the image (aka containers) from the newly built image using the following command:
docker run -p 3000:80 -it my-angular-app
Notice that we had to specify an external port number that would map to the internal port number ( 80 in this case) in order to give access to the outside world as port 80 is only accessible inside the container. You can navigate to https://localhost:3000 which should serve the angular application from within the docker container.
Building a CI/CD Pipeline on VSTS
At this point we are ready to automate this process as part of our CI/CD pipeline. Our CI/CD pipeline will include four different tasks as shown in the figure below. Notice that we are using a Hosted Linux agent (still in preview at the time of writing this post) which will have native support for docker.

The first task will install the required npm packages.

The second task will build the application using the Angular-CLI which will place the bundled code under a folder called dist. Here the assumption is that you have modified your package.json scripts section to include a build-prod script.


The third and fourth tasks will build the docker image and push it to Azure Container Registry (ACR) respectively. Note that I could have used docker hub to store the docker image but I opted to use ACR as I love the idea of reducing network latency and eliminating ingress/egress charges by keeping my Docker registry in the same data center as my deployments. In addition, I wanted to store my image inside a private repository which ACR allows me to do as well.
To create an ACR you can follow the steps below.
- Sign into your Azure Account at https://portal.azure.com.
- In the Azure Portal, choose New, Containers, then choose Azure Container Registry.
- Enter a Registry name, Resource Group, and select a Location.
- For Admin user, choose Enable and then choose Create.
- Wait for the Azure Container Registry deployment to finish.

Task 3 and 4 below are utilizing an ACR that I created called waelscontainerregistry.


At this point the CI/CD pipeline will create a new docker image every time the code is checked in. Notice that I am using the build number as part of the image name to differentiate the different images that are resulting from different builds. The image below shows the ACR repository.

Now that the image is stored inside ACR we will need to set up continuous deployment of our Docker-enabled app to an Azure web app. Start by creating a Azure web app to host a container. This can be achieved in Azure by creating a "Web App for Containers" as shown below. Notice that I am pointing my web app to the ACR repository that I created in the previous step. At this point you may be thinking that I am hard coding my app to utilize an image with a specific tag number. Don't worry about it as I will override that later on when I push the docker container from within VSTS. 
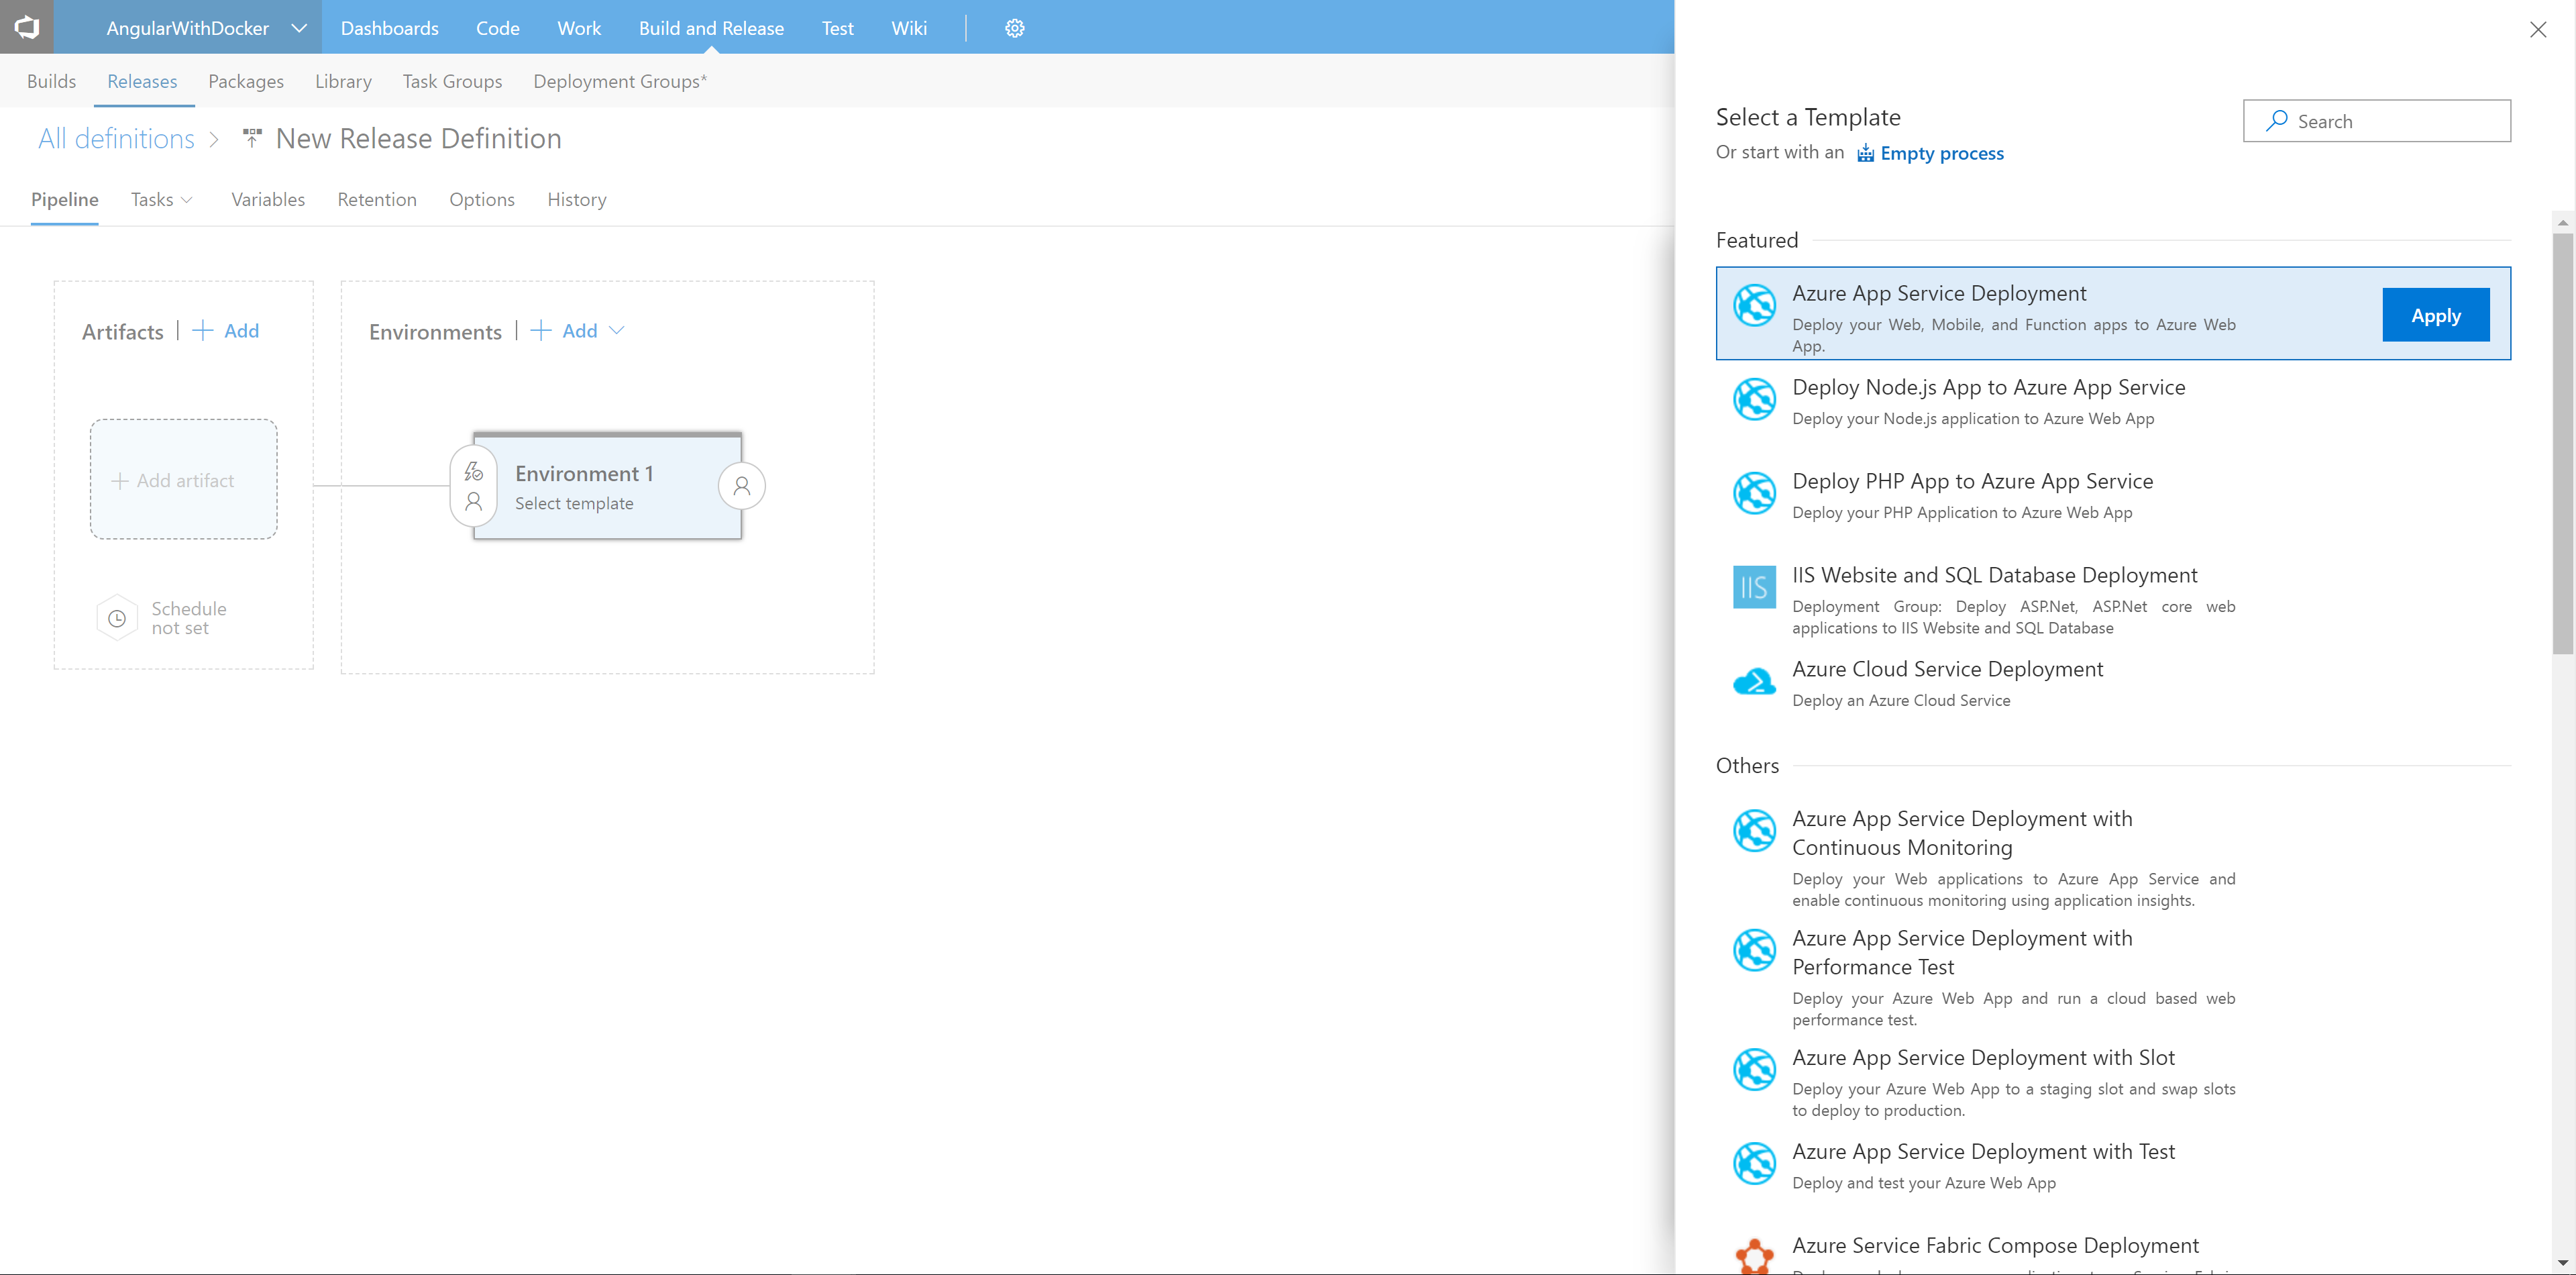
The final step involves creating a release definition on VSTS that will deploy to the Azure App Service we created above. Follow these steps to create a release definition:
-
- In the Build & Release hub, open the build summary for your build.

- In the build summary page, choose the Release icon to start a new release definition.

- Select the Azure App Service Deployment task and choose Apply.

- Configure the properties as follows:

- In the Build & Release hub, open the build summary for your build.
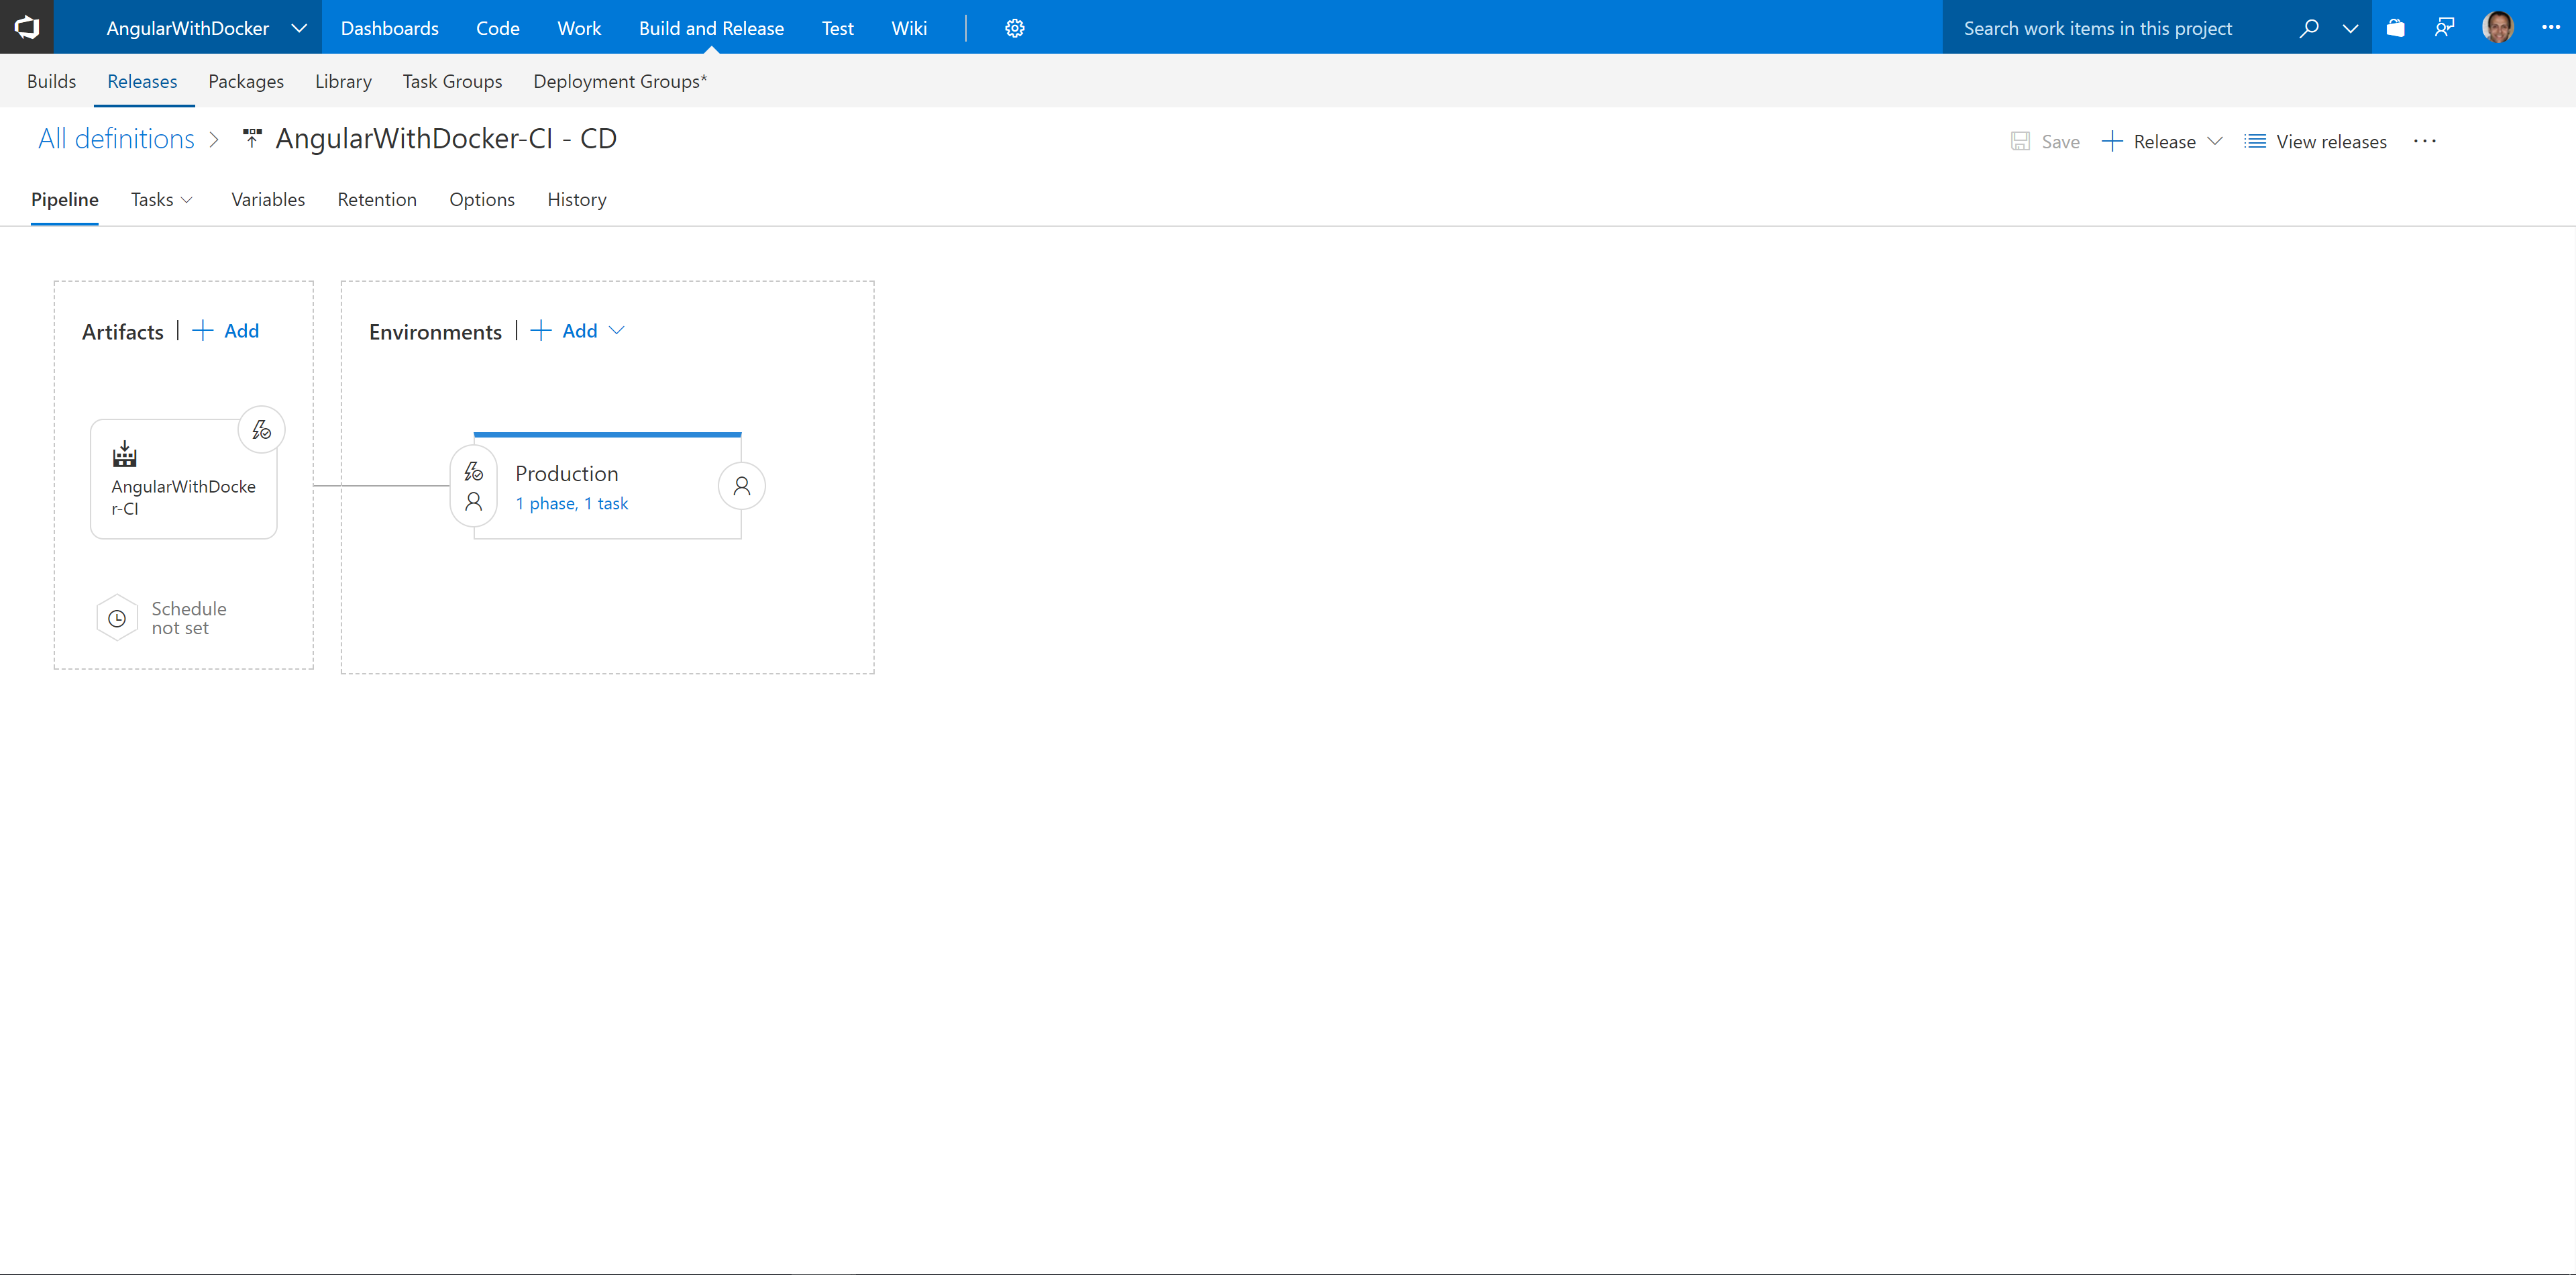
The image below shows your completed release definition.

Checking in your code should now trigger your build pipeline which generates a docker container that gets stored inside your ACR. The release management pipeline will pick up the docker image and publish it to your Azure App Service. Both your development as well as your production environment are running the same docker container which is utilizing nginx web server to serve your Angular application. This is a huge benefit as you don't have to deal with unexpected behaviors due to discrepancies in the hosting environments.
In a future post I will show you how to utilize the newly created docker container to start building your application using Micro-Services architecture. Stay tuned...
Comments
- Anonymous
January 25, 2018
I followed your example and I get the following:2018-01-25T20:07:27.1023294Z ##[error]COPY failed: stat /var/lib/docker/tmp/docker-builder488818194/dist: no such file or directory2018-01-25T20:07:27.1091288Z ##[error]/usr/local/bin/docker failed with return code: 1