Build a bot in under 3 minutes… in Azure!
 By Theo van Kraay, Data and AI Solution Architect at Microsoft
Chat bots are an increasingly popular way for businesses to allow customers or internal staff to interact with information in a more conversational way. People want the information they need as quickly as possible, and while email inboxes have become more and more cluttered, consumers are moving to social media and other channels to find the information they need. Bots help consumers find solutions without using forms, cluttered inboxes, or wasted minutes spent searching and scrolling through content.
QnA Maker is a free, easy-to-use, web-based service that trains AI to respond to questions in a natural, conversational way. It is compatible across development platforms, hosting services and channels, and is the only question and answer service with a graphical user interface. You don’t need to be a developer to build and deploy a question and answer bot based on FAQ URLs, structured documents, or editorial content in minutes!
The below instructions show you how to build the bot in QnA Maker, and make it visible as a “web chat” channel that anyone can interact with online. If you want to watch this being done in under 3 minutes, click here!
(please note that the video demo was done using the preview service – see below for a “quick start” guide to building a bot in minutes using the now Generally Available QnA Maker service)
Build a bot in minutes
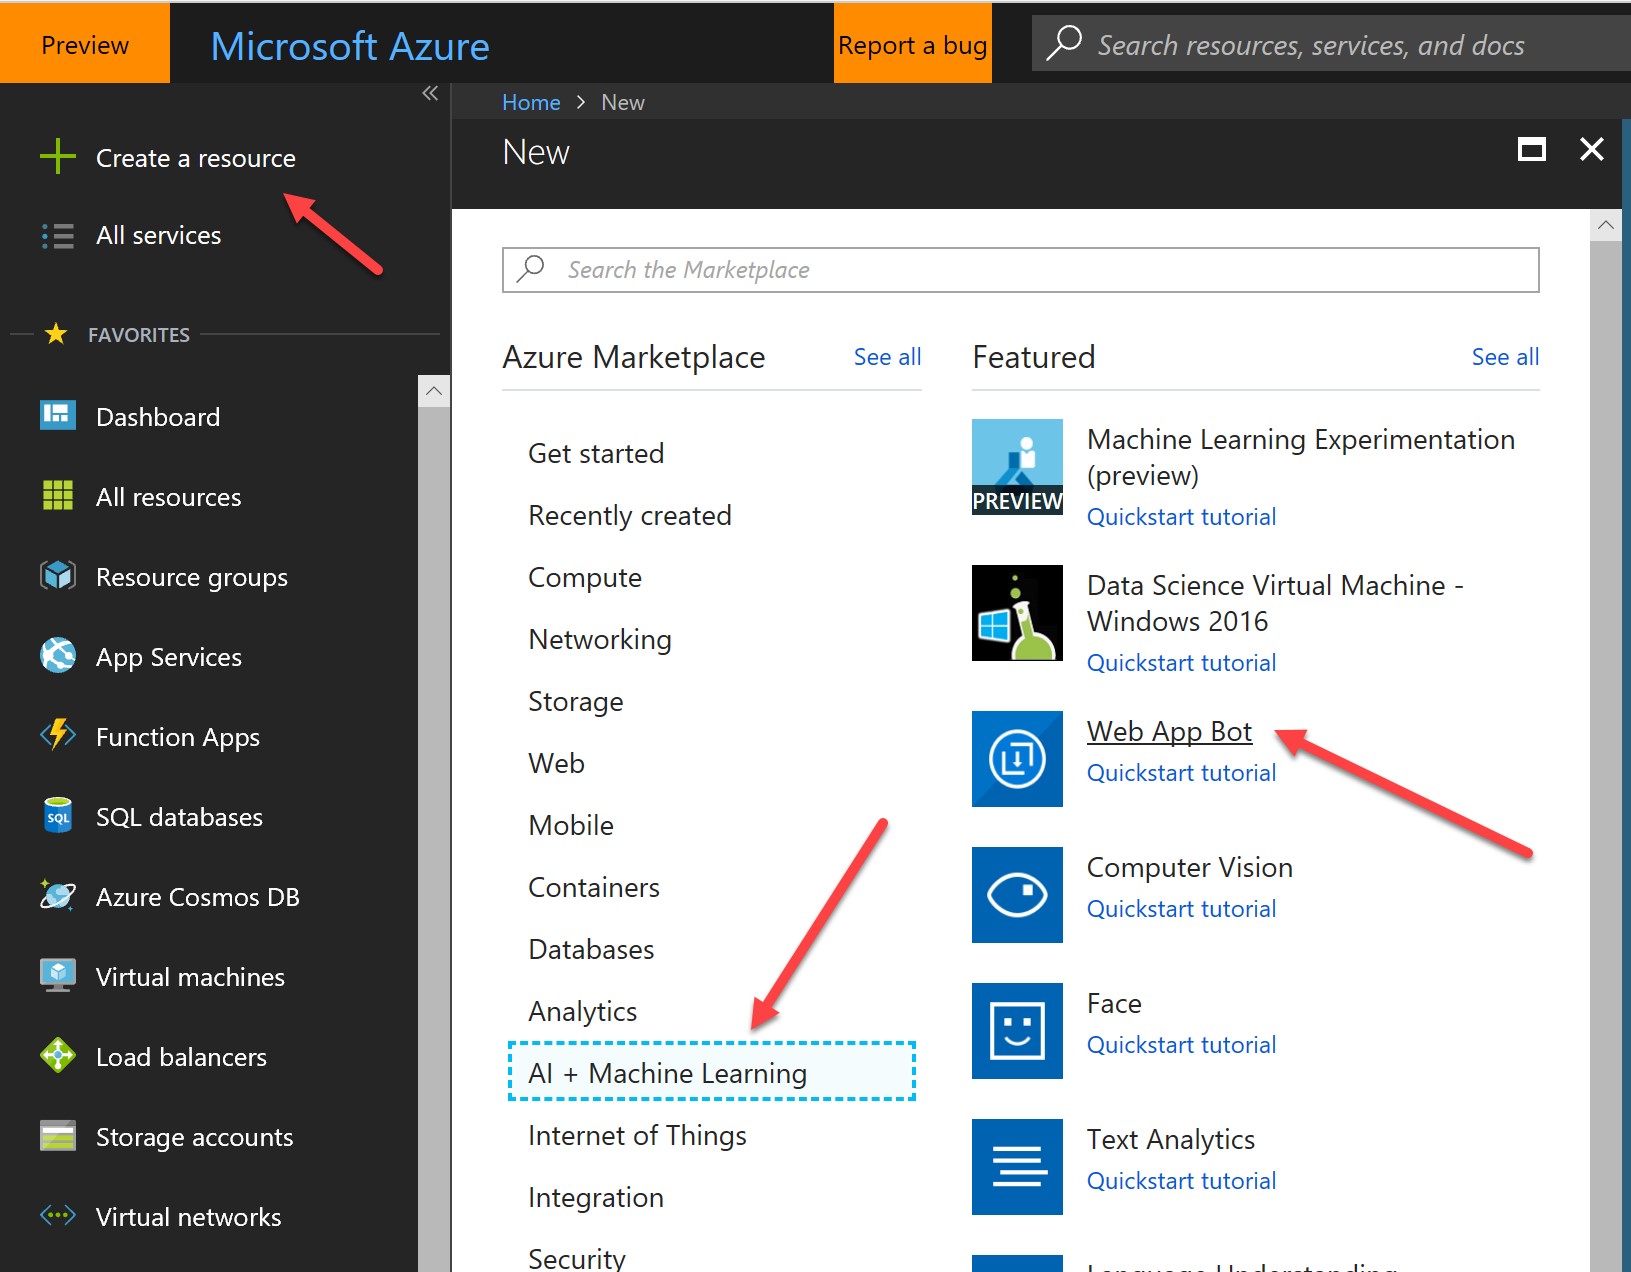
First, go to the Azure Portal (you will need a subscription, click here to sign up for free if you don’t already have one). Create a resource -> AI + Machine Learning -> Web App Bot:
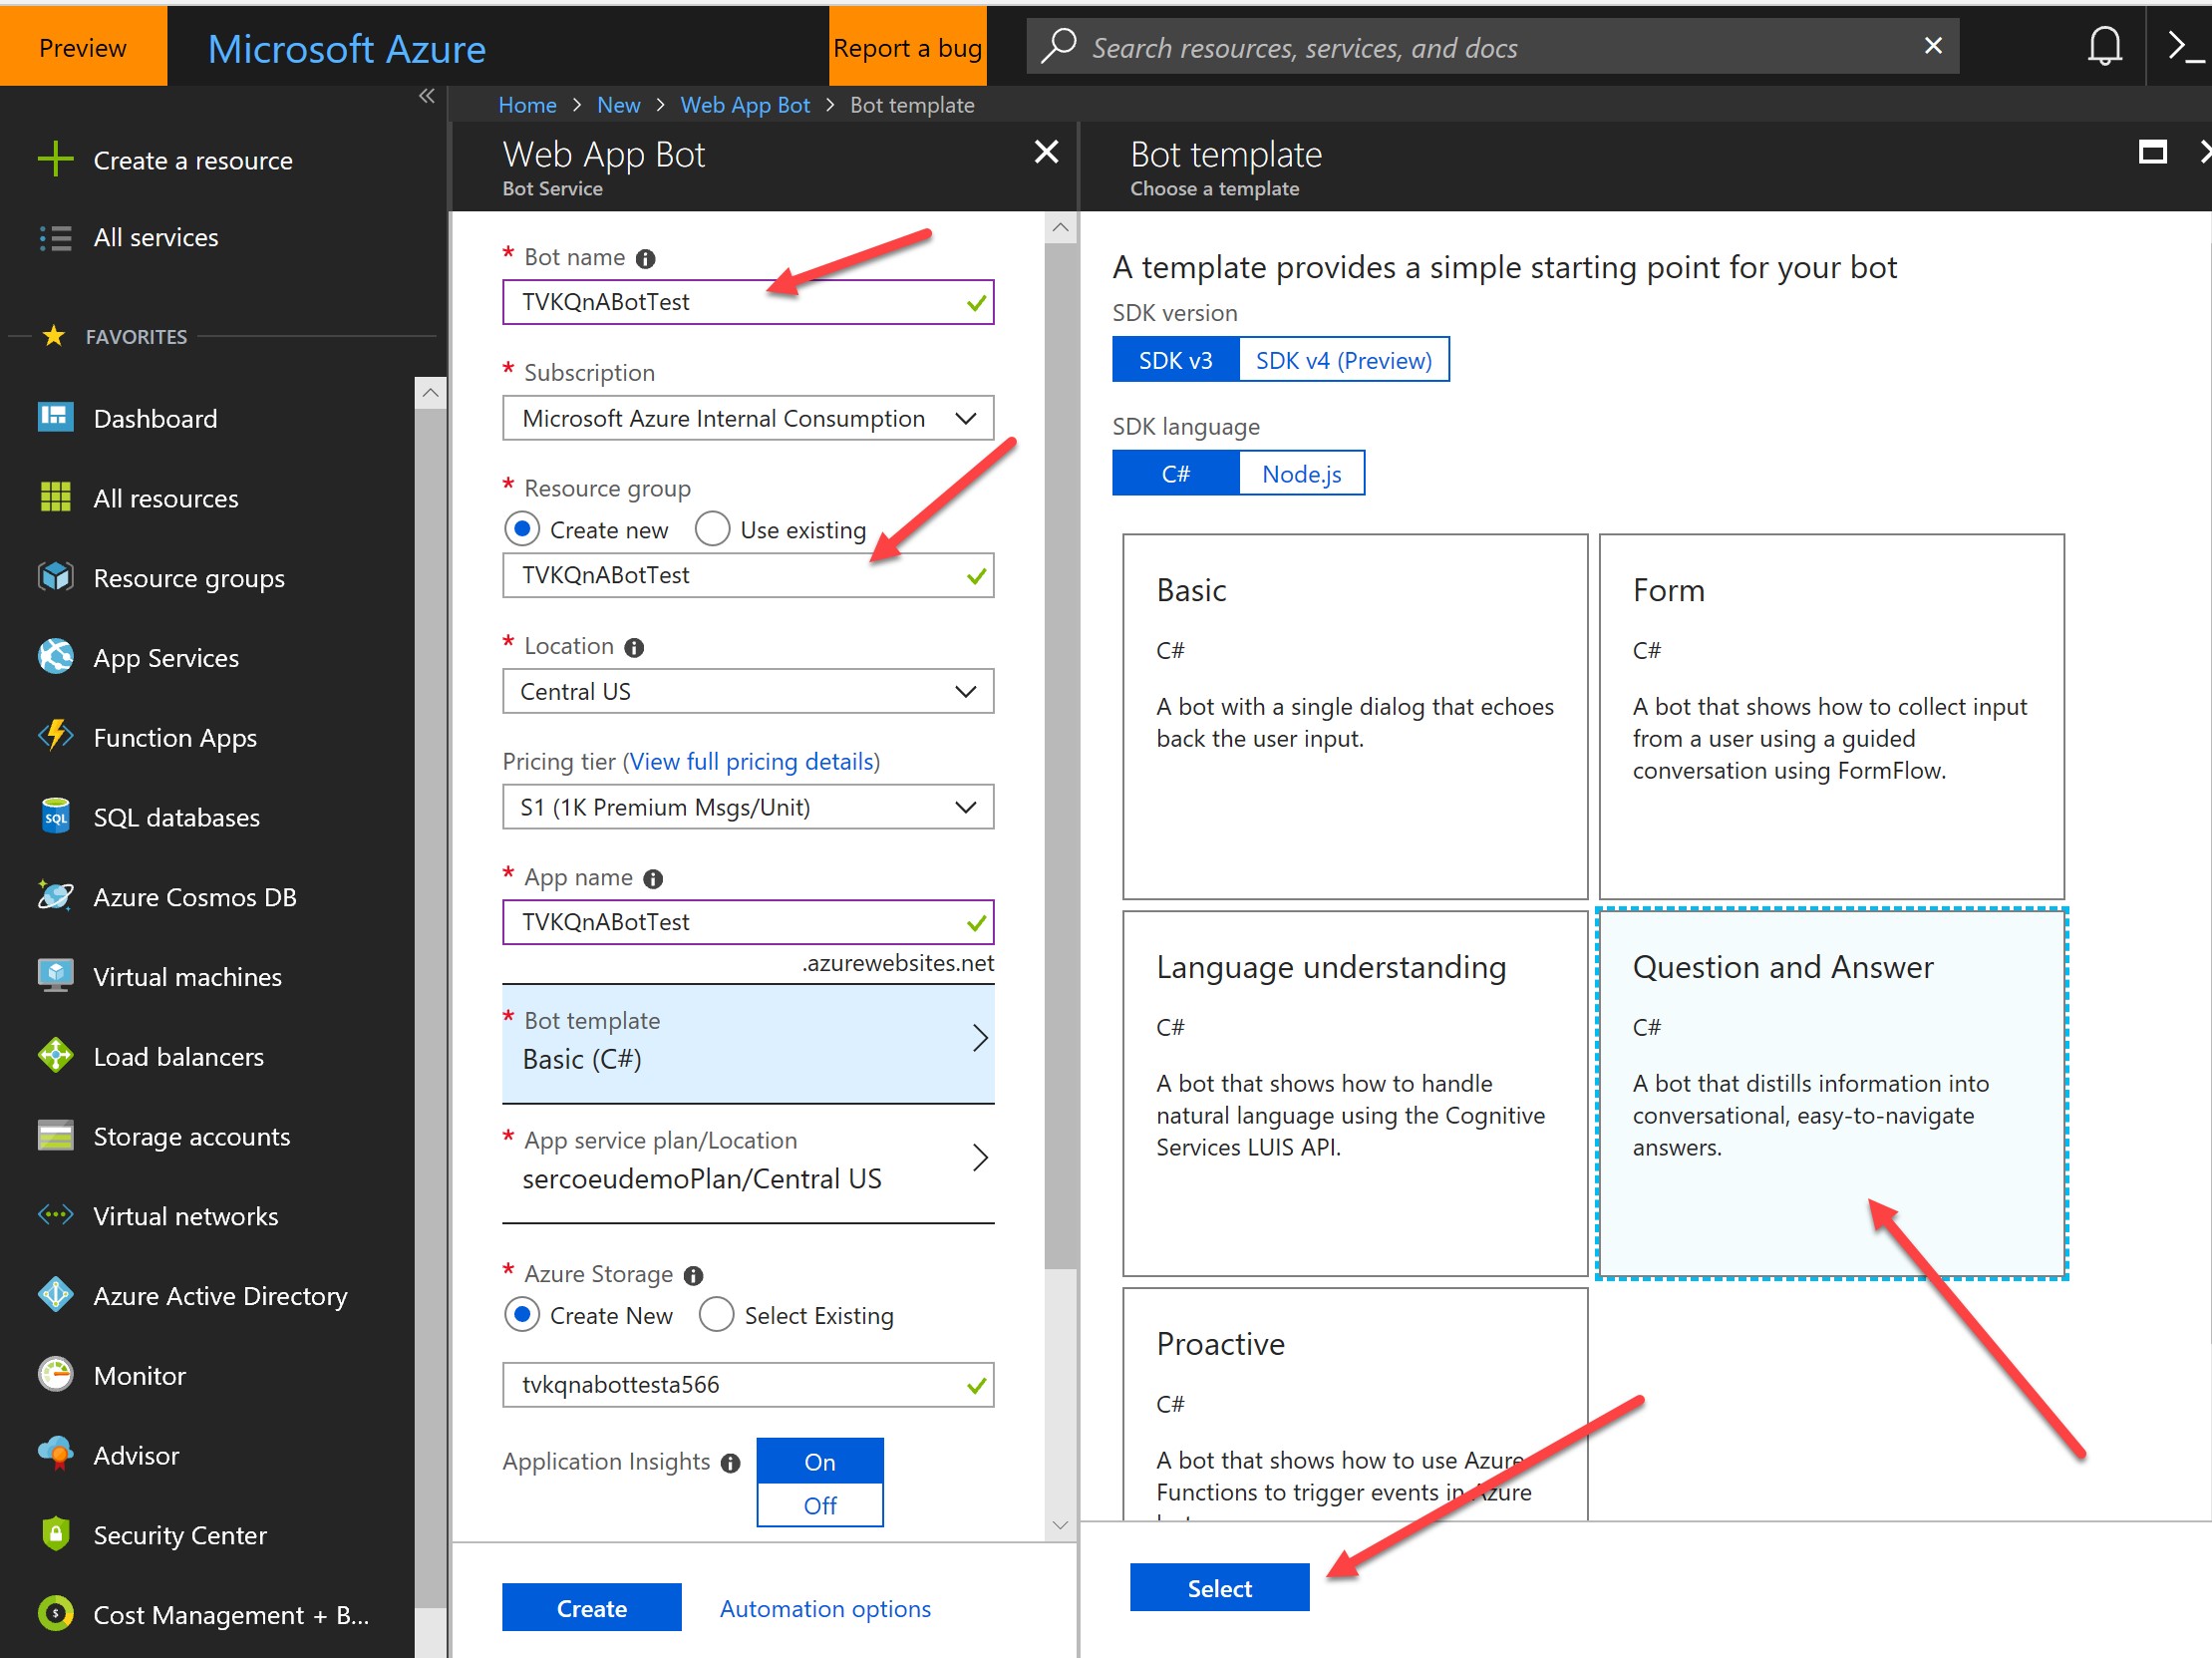
In the Web App Bot Blade, create a unique name for your bot (all other mandatory values will be pre-populated but you can edit as you see fit) then click on “Bot template” (another blade will appear to the right). Be sure to select the “Question and Answer” as the template, and then hit “select”:
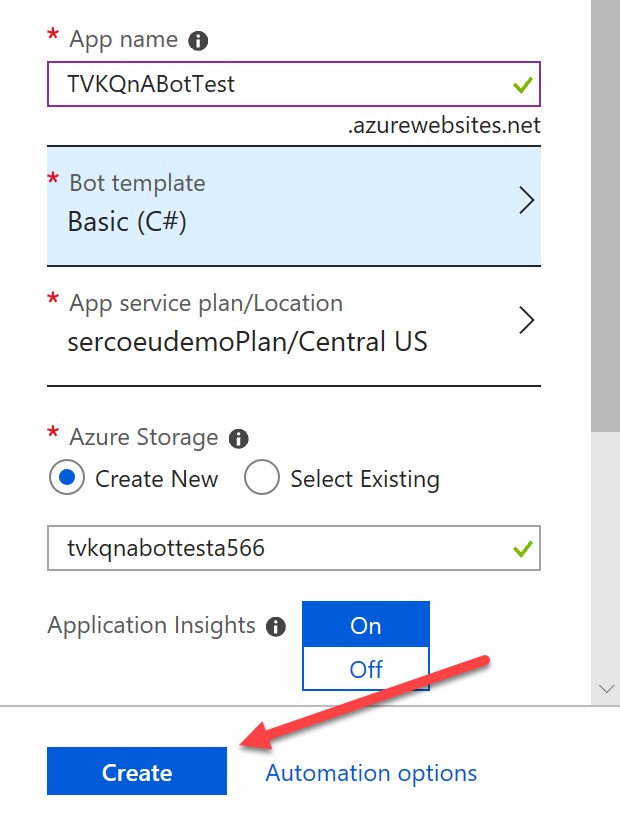
When selected, hit create:
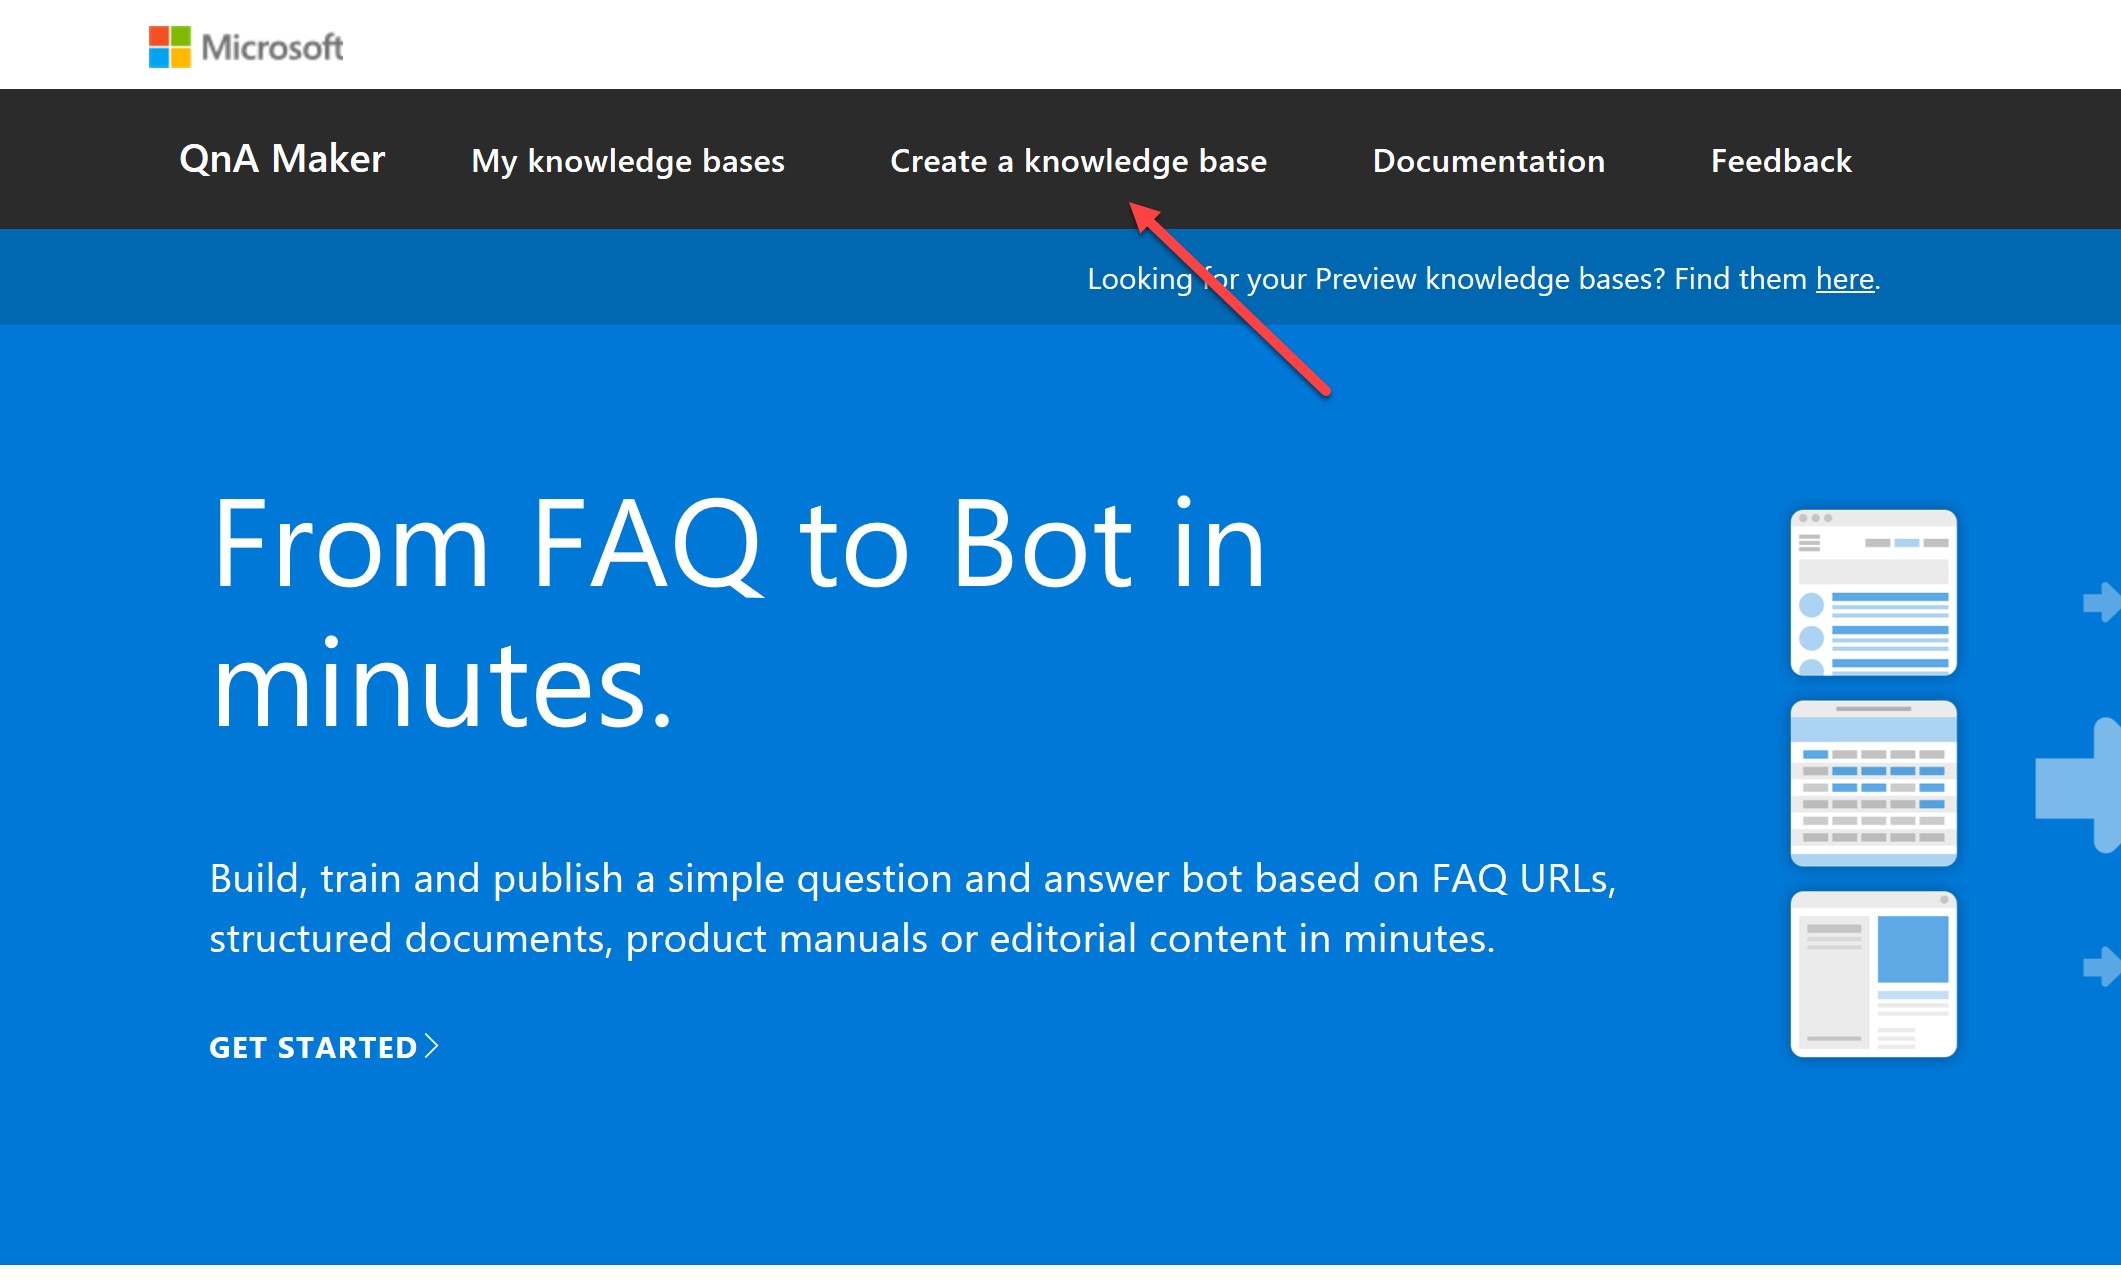
This will start deploying a web app bot, which won’t take long. While that is happening, open a new window and log in to QnA Maker (you will need a valid Microsoft account). Click “Create a knowledge base”:
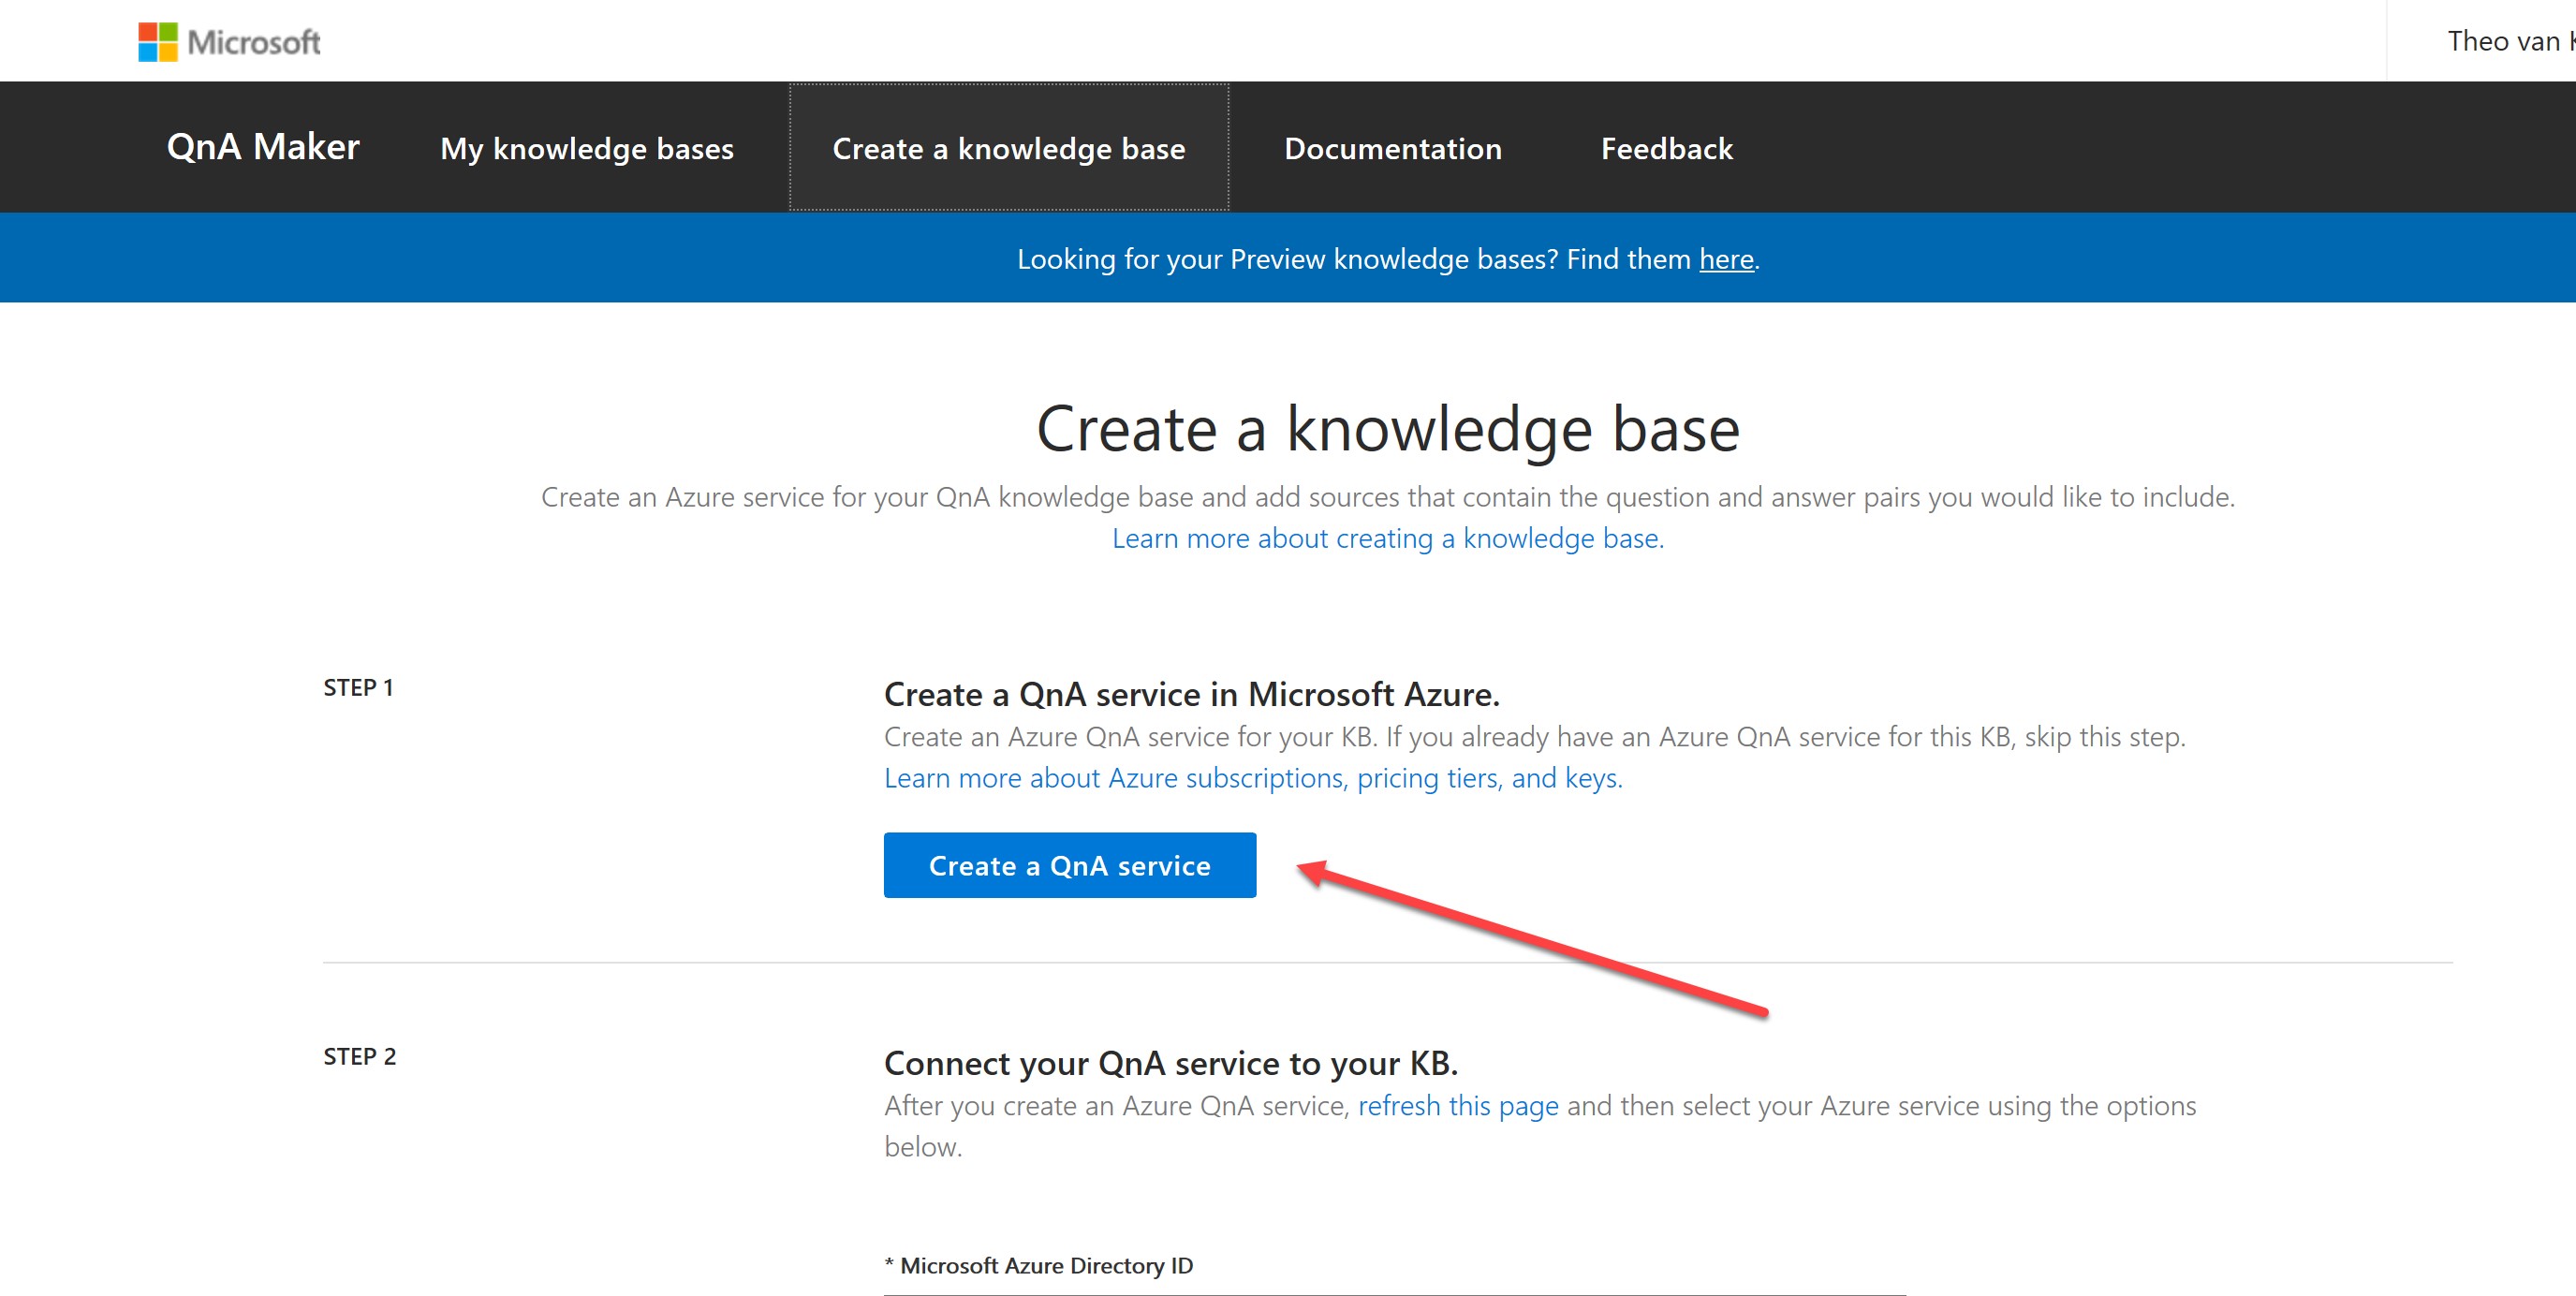
First you need to create a QnA Cognitive Service. Click “Create QnA service”:
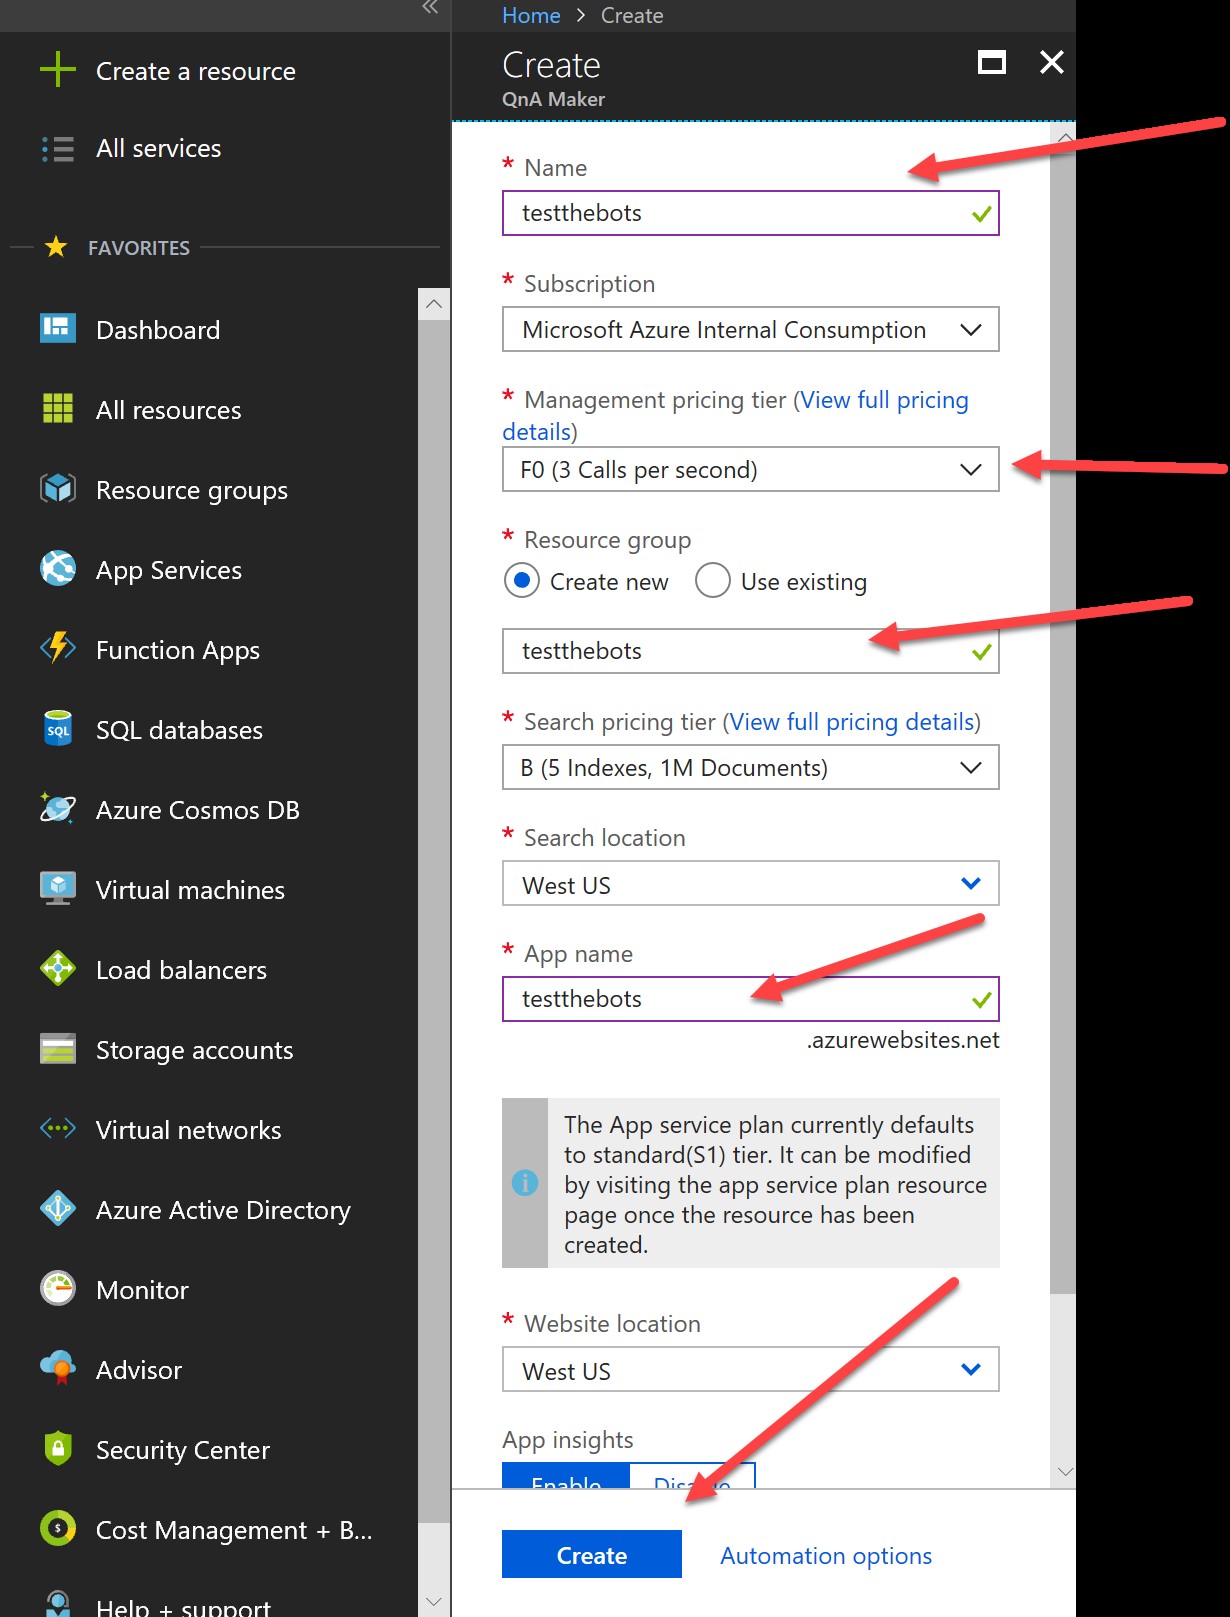
This will take you to the Azure portal to set up the service. Fill in the mandatory fields and hit “create”:
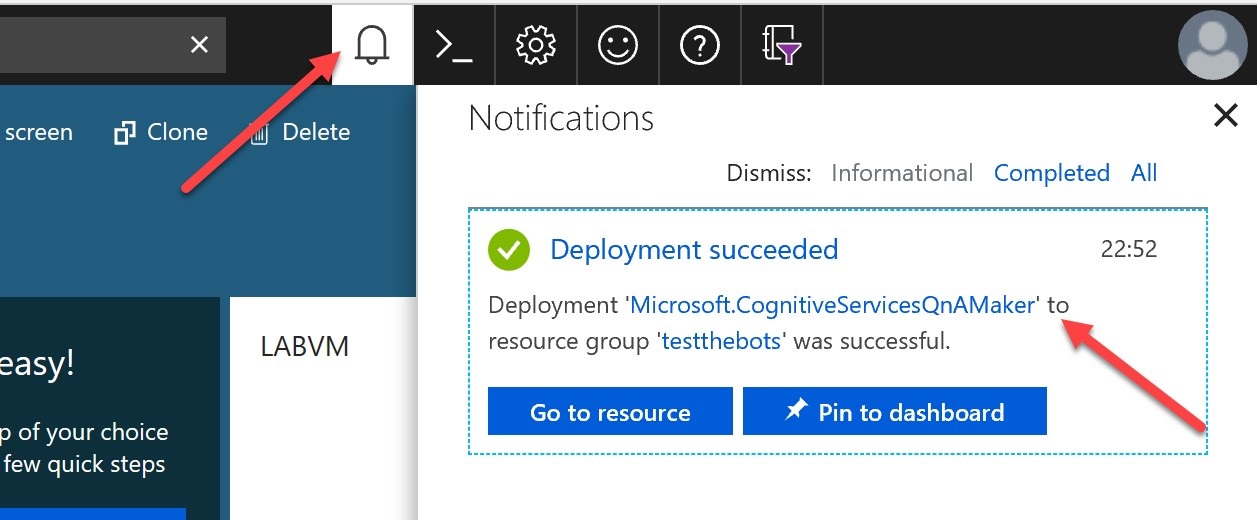
Wait for the service to deploy:
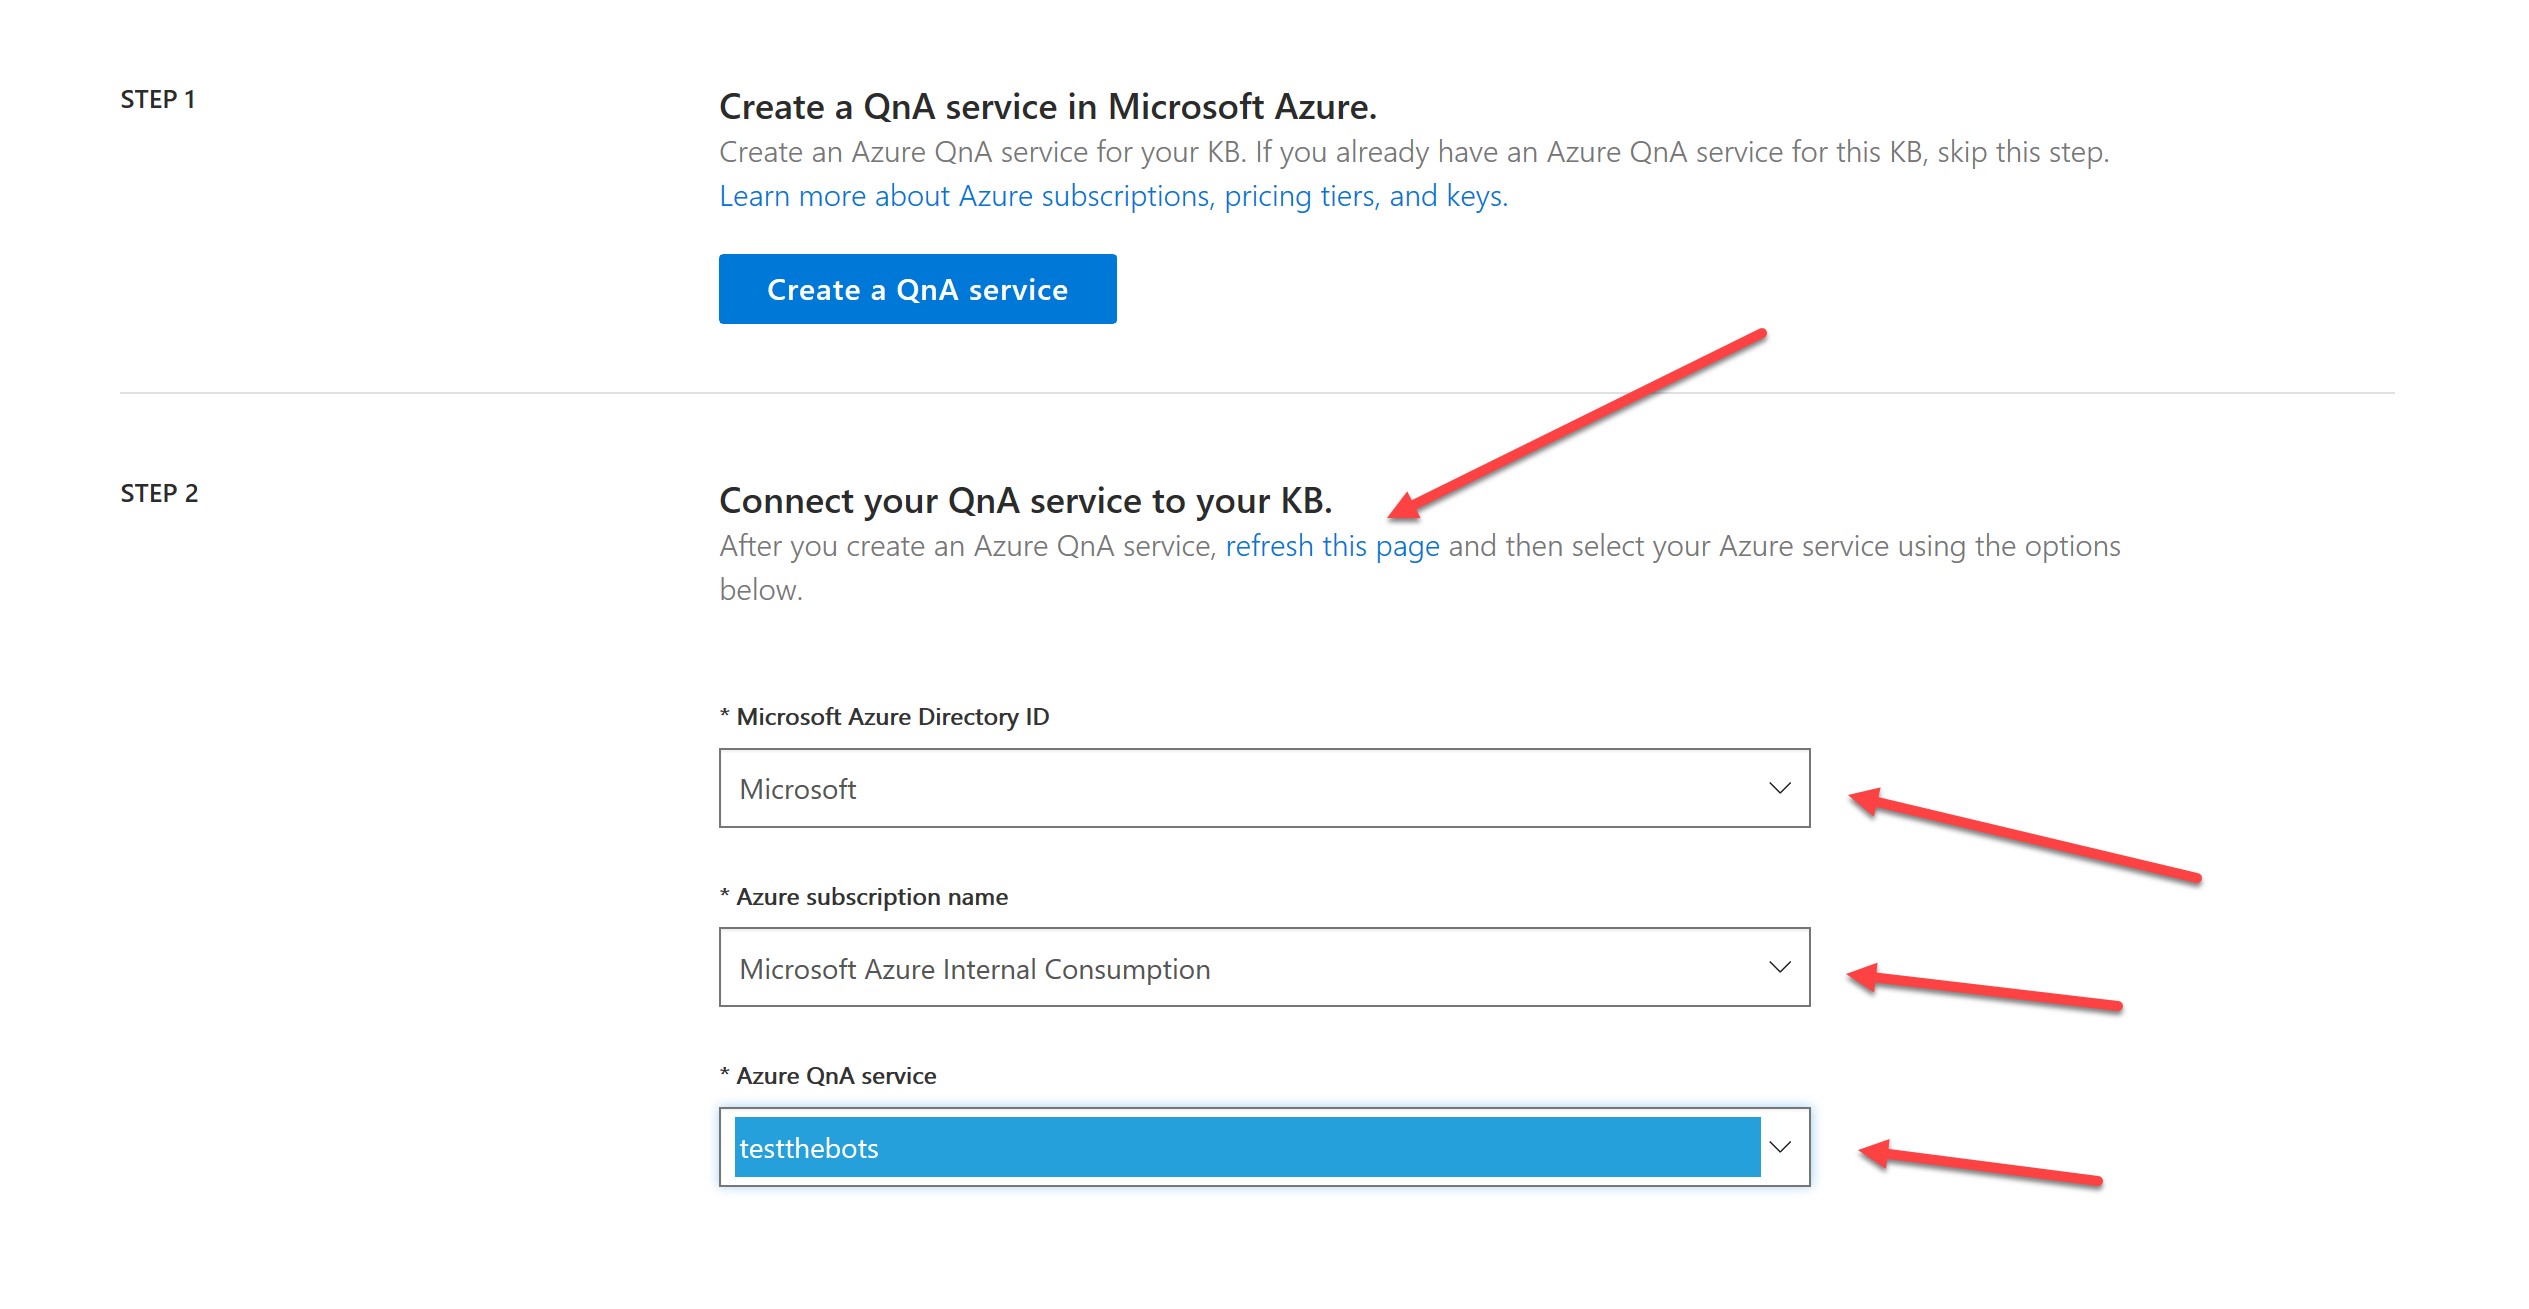
When Deployed, go back to your other still open browser window (from which you logged into QnA Maker). Hit “refresh this page”, after which you should then be able to select the appropriate Active Directory ID, subscription, and the QnA service you just setup, as below:
When selected, scroll to steps 3, 4 and 5 to give your QnA Service a name, and add the url of an FAQ site you want to crawl for question and answer pairs. You will also see an option to use a file (if you didn’t have an FAQ url) supporting various file formats. When you have selected an FAQ site or file to use for Q & A pair generation, hit “create your KB”:
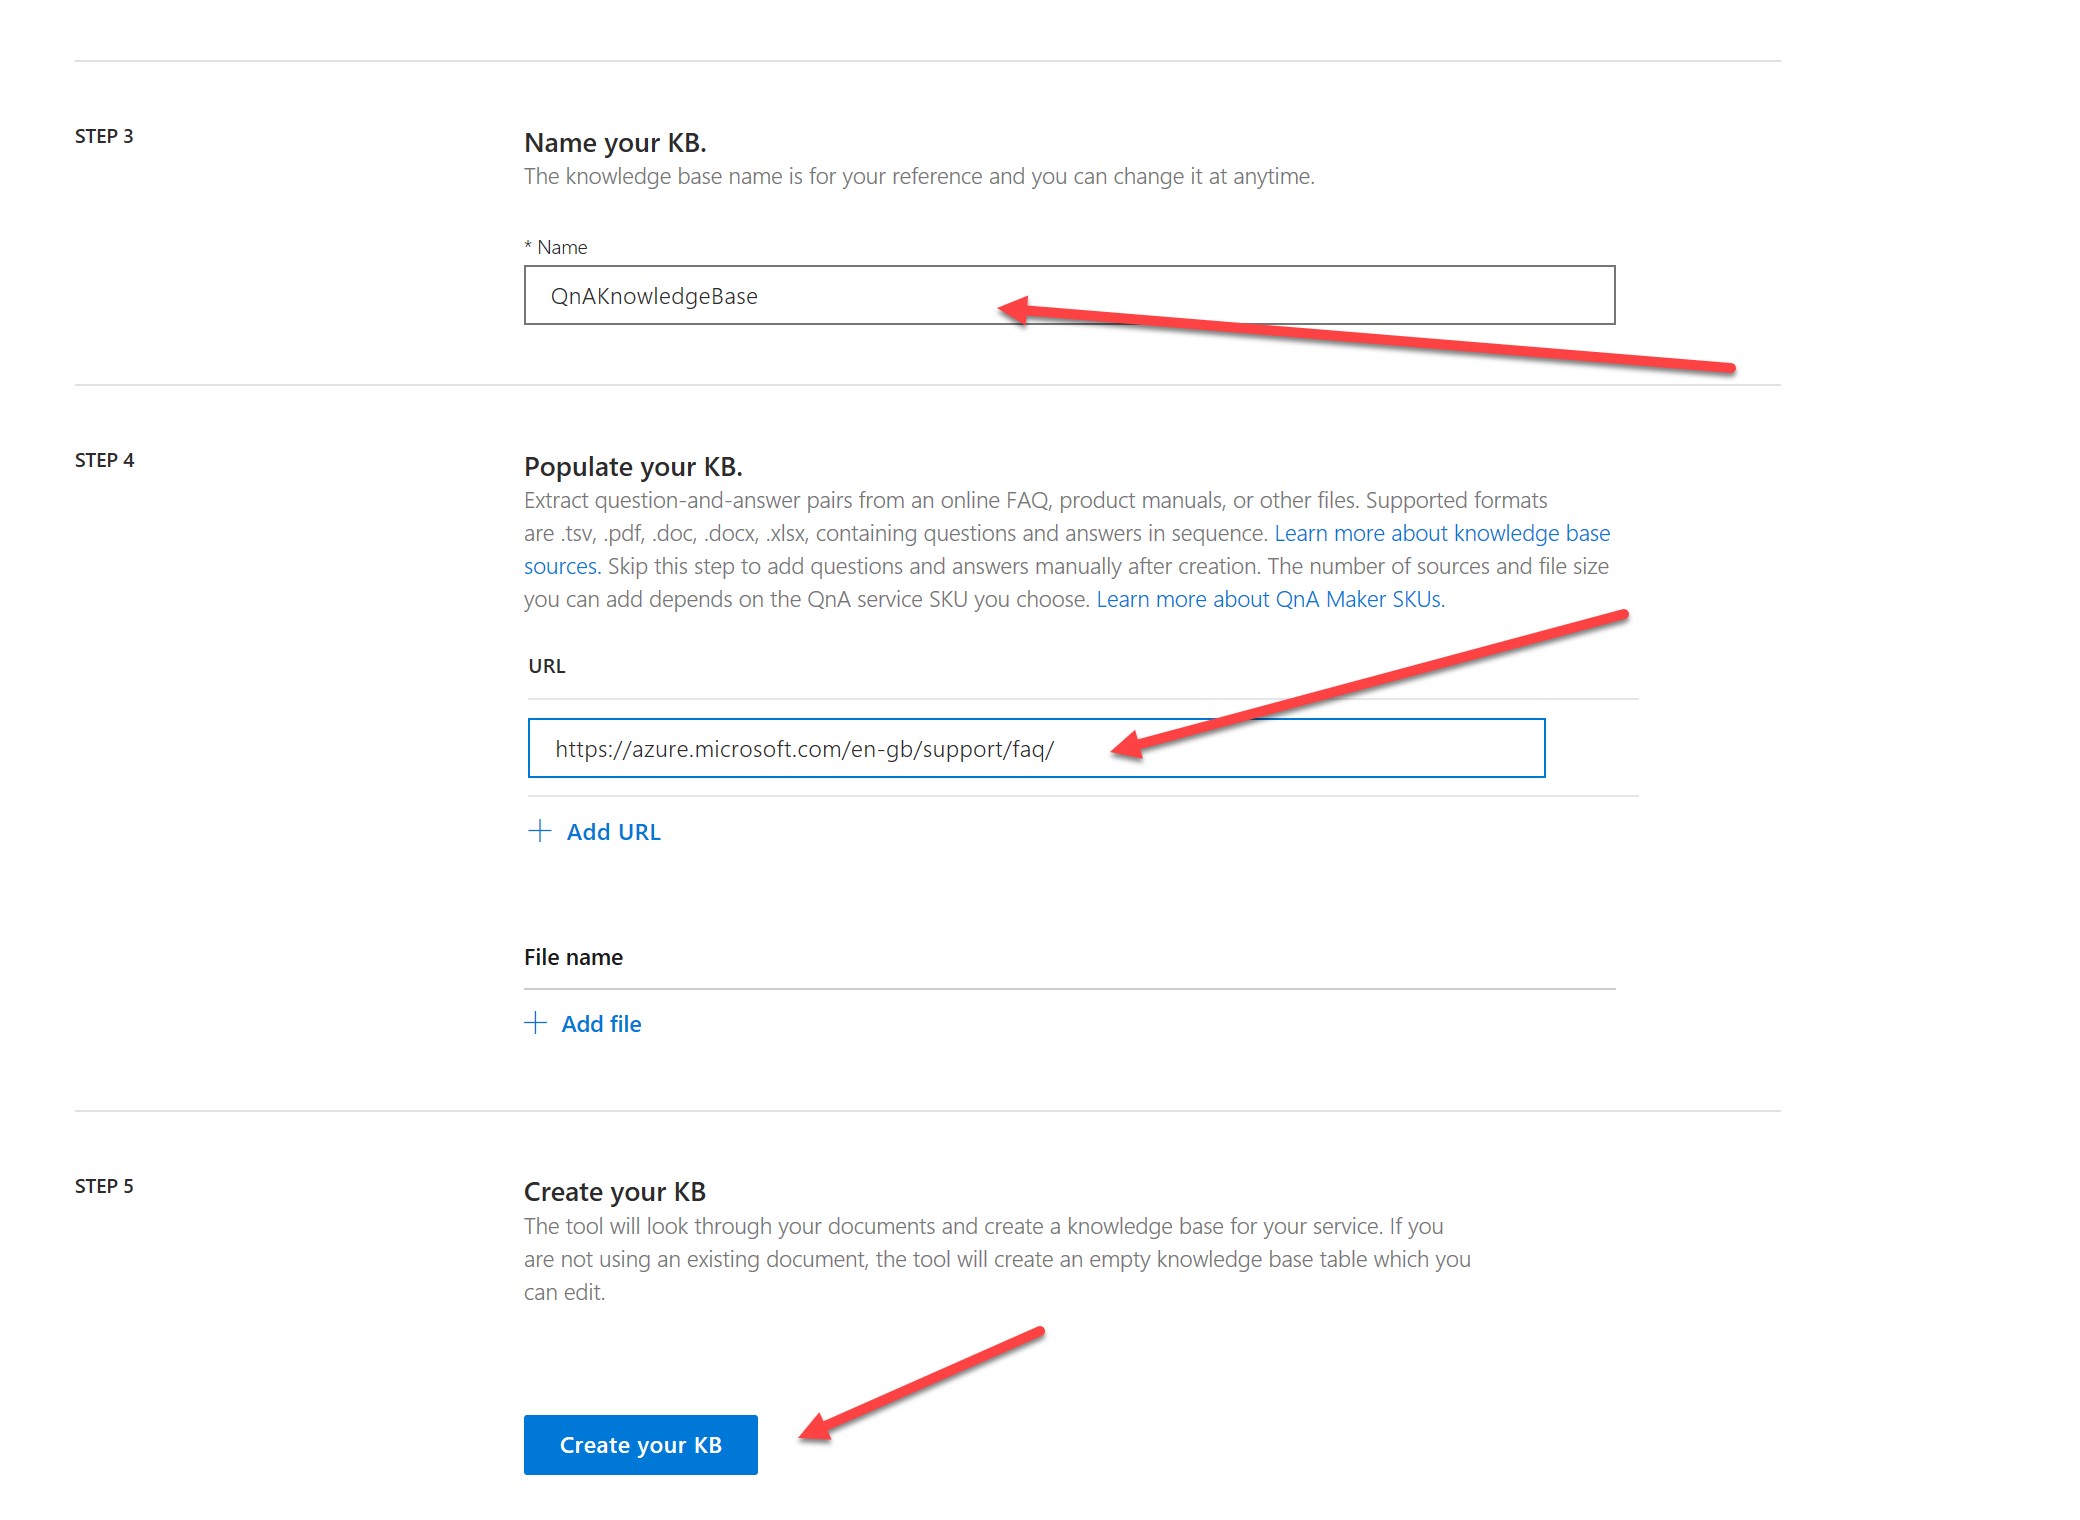
Warning: be sure that your site (or file if you use one) actually has text that can be identified as question and answer pairs. If the operation fails, it is likely that your site or document doesn’t qualify.
After a period of time, the knowledge base will be created:
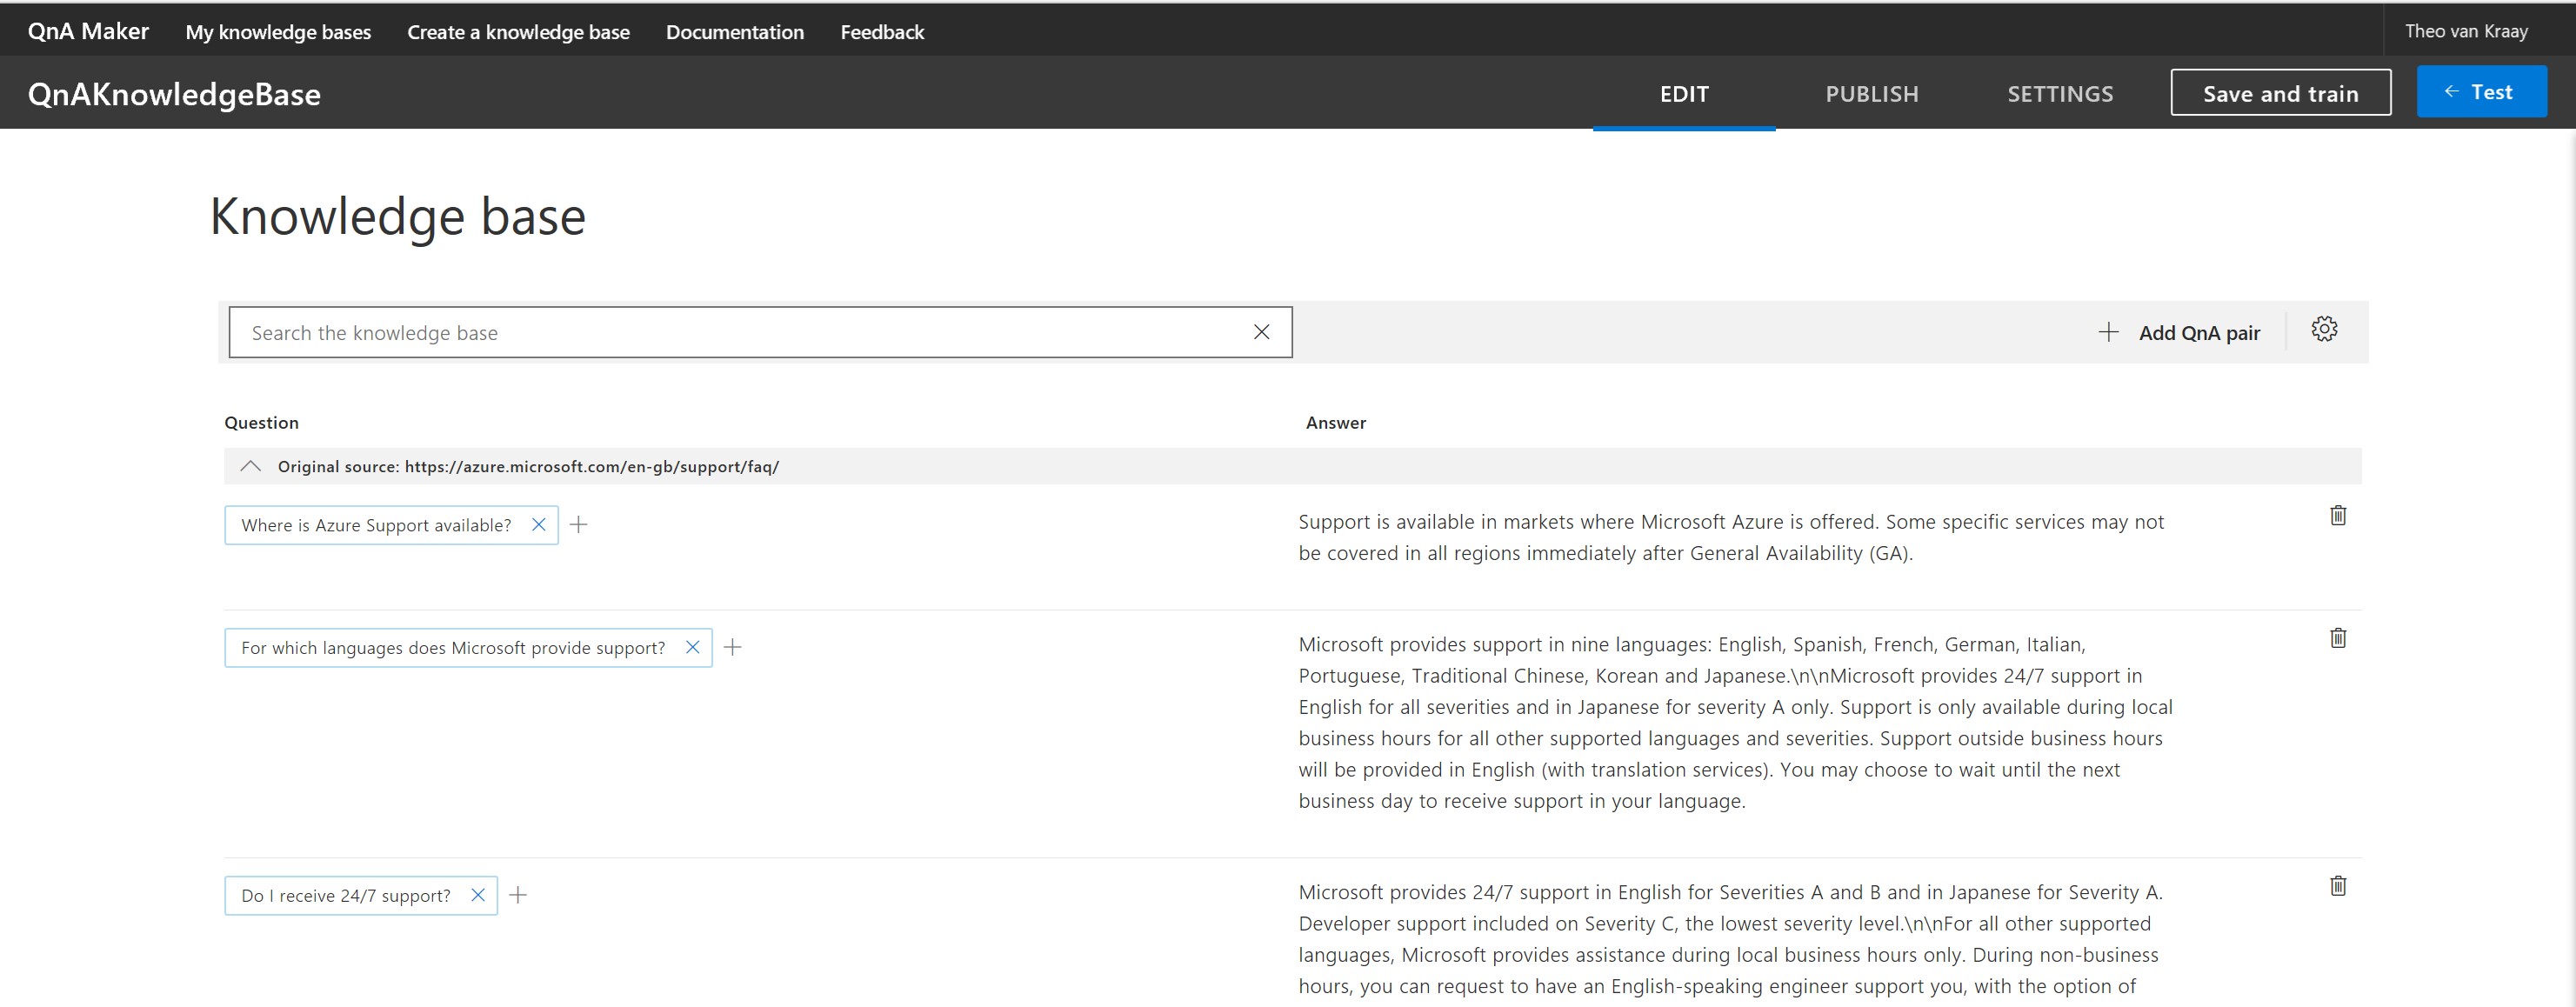
Essentially, you now have the conversational logic for your Q&A bot. For more detail on how to edit Question & Answer pairs, see here. For now though, we are in a rush to publish a bot quickly, so let’s do that! Hit publish:

On the review screen, hit publish again:

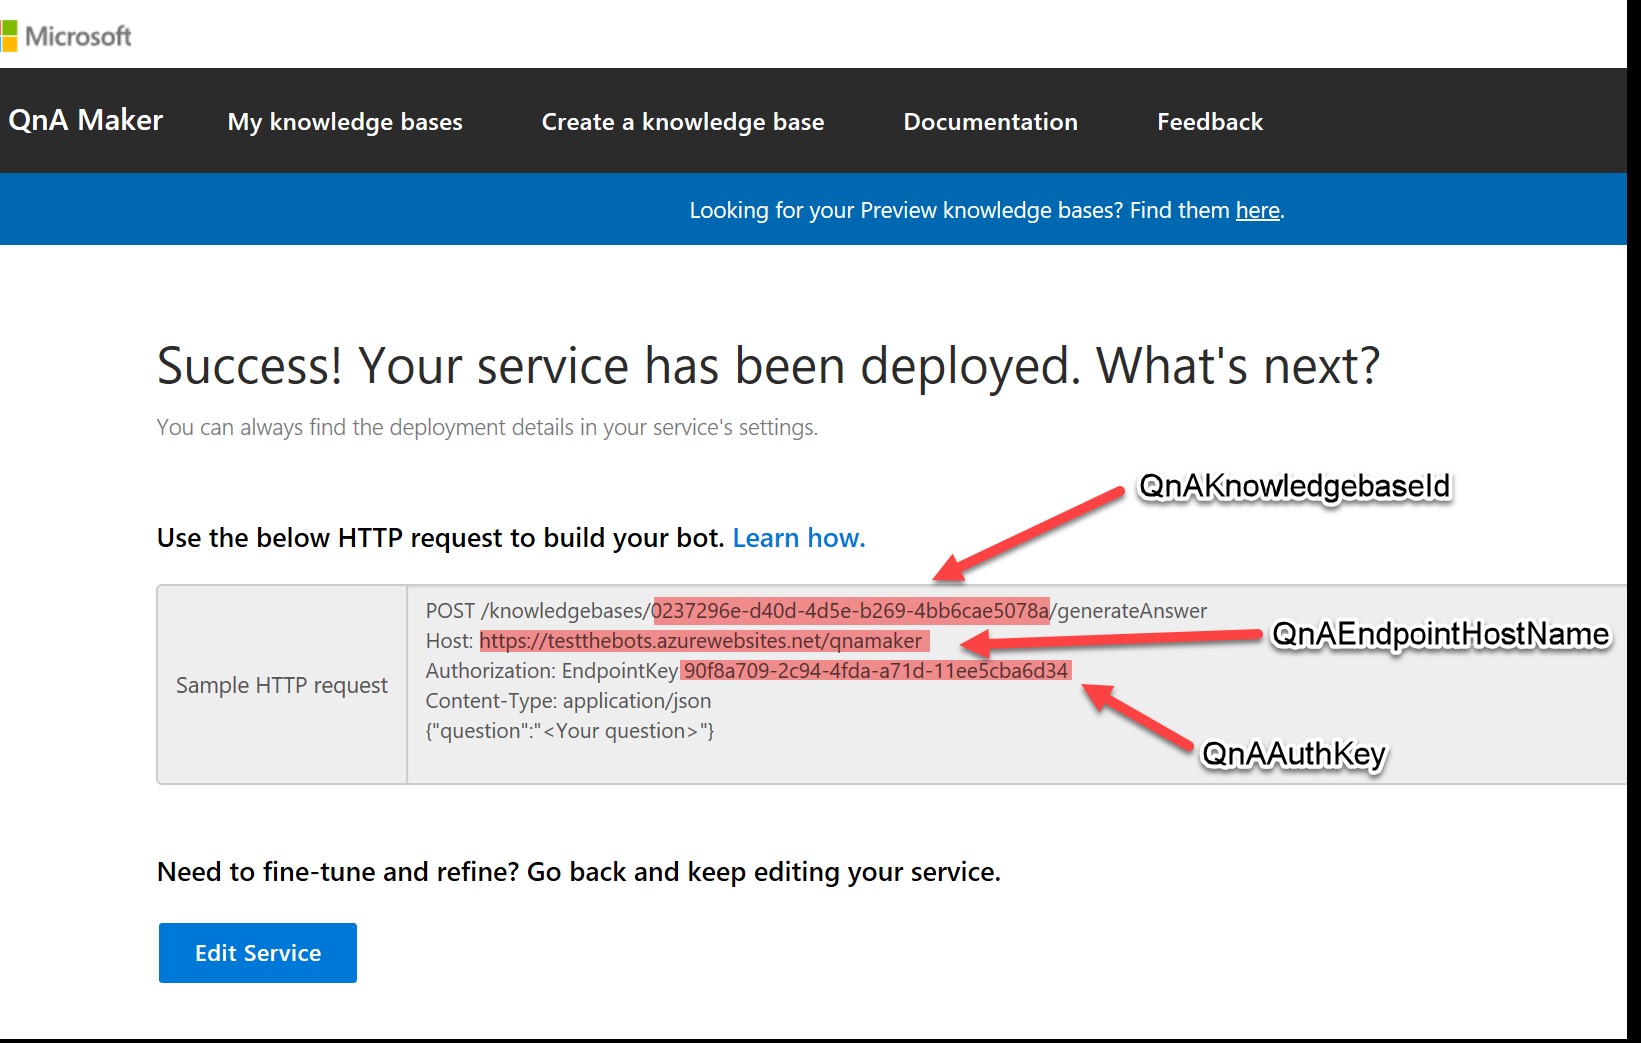
You will then have a published knowledge base, but that is all you have. We need to make your bot visible as a channel. For this, there are three values you need: QnAKnowledgebaseId, QnAEndpointHostName, and QnAAuthKey, which will be available in the screen presented to you after the service is deployed (these are highlighted below). Leave this window open.
Meanwhile, your web app bot has probably deployed. From notifications, hit “Go to resource” for the web app bot we created at the first step (in this case called “TVKQnABotTest”),

In the resource, hit application settings. Scroll to the bottom of application settings, where you will see fields for QnAKnowledgebaseId, QnAEndpointHostName, and QnAAuthKey. Enter the corresponding keys from the other (QnA Maker) window that you have left open, then hit save.
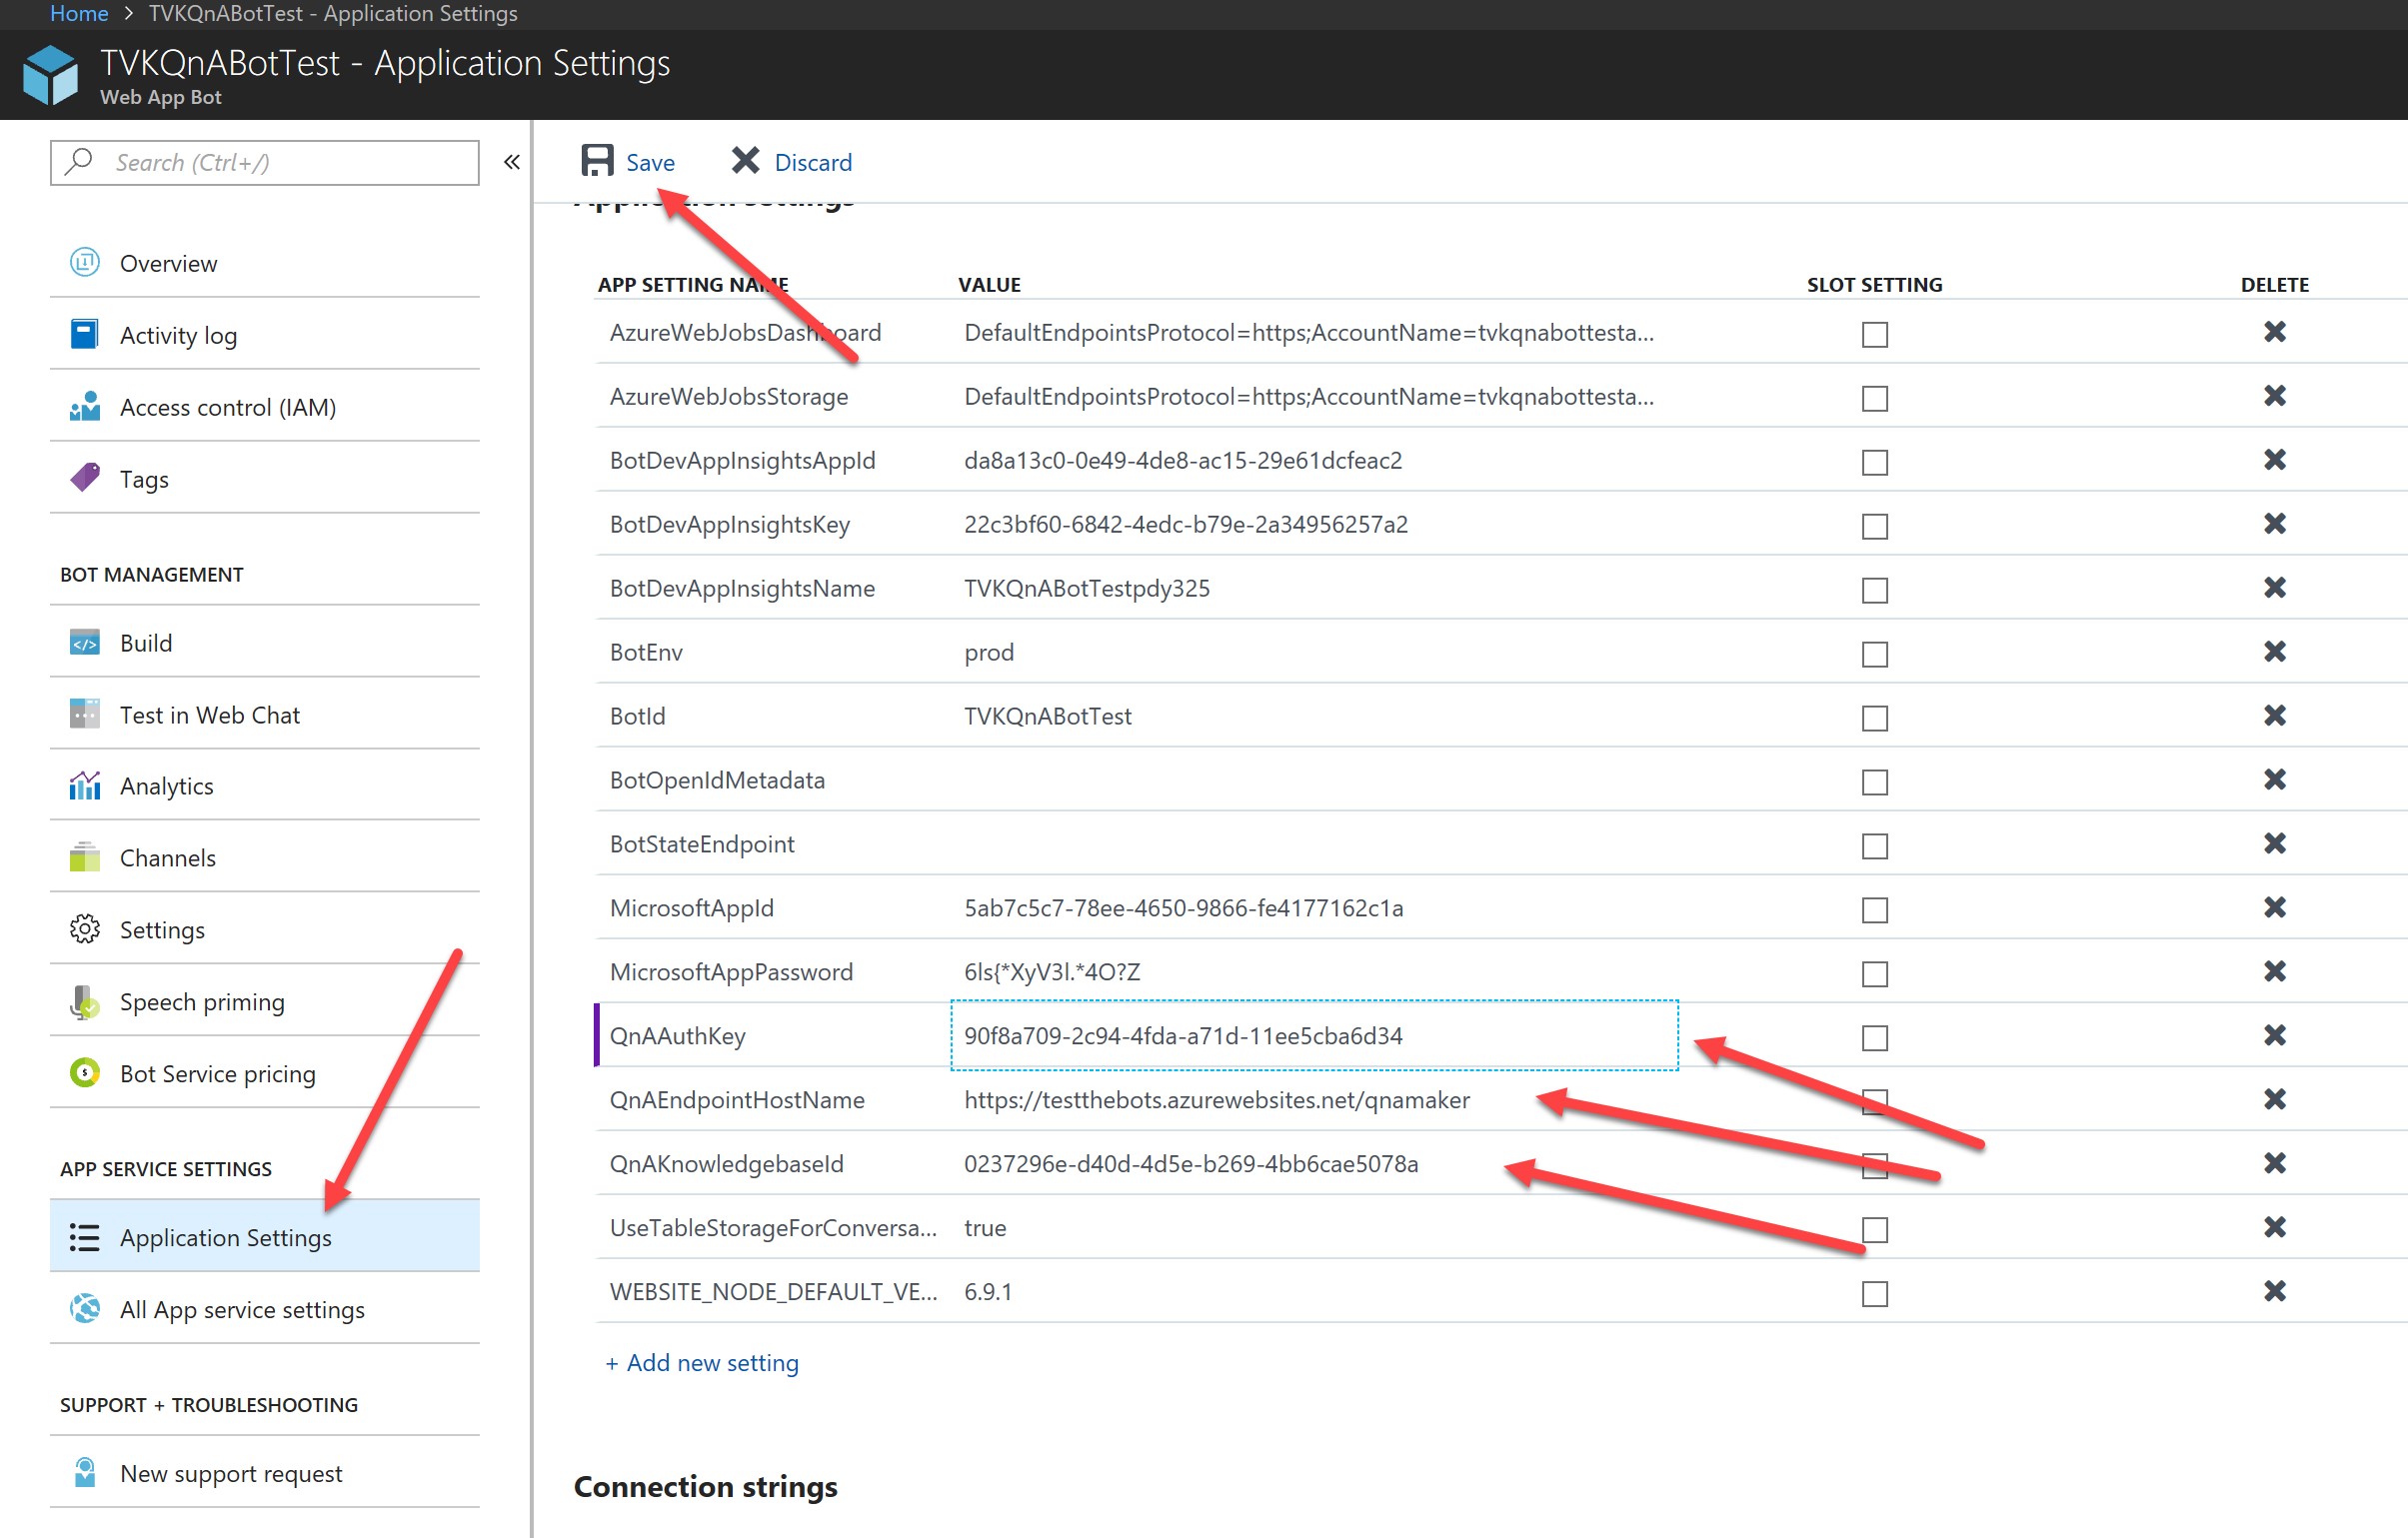
When deploying a web app bot, it is deployed as a “Web Chat” channel automatically (for deploying to other channels, e.g. Skype, Cortana, Slack and many others, see here). Go to channels and hit “get bot embed codes”:
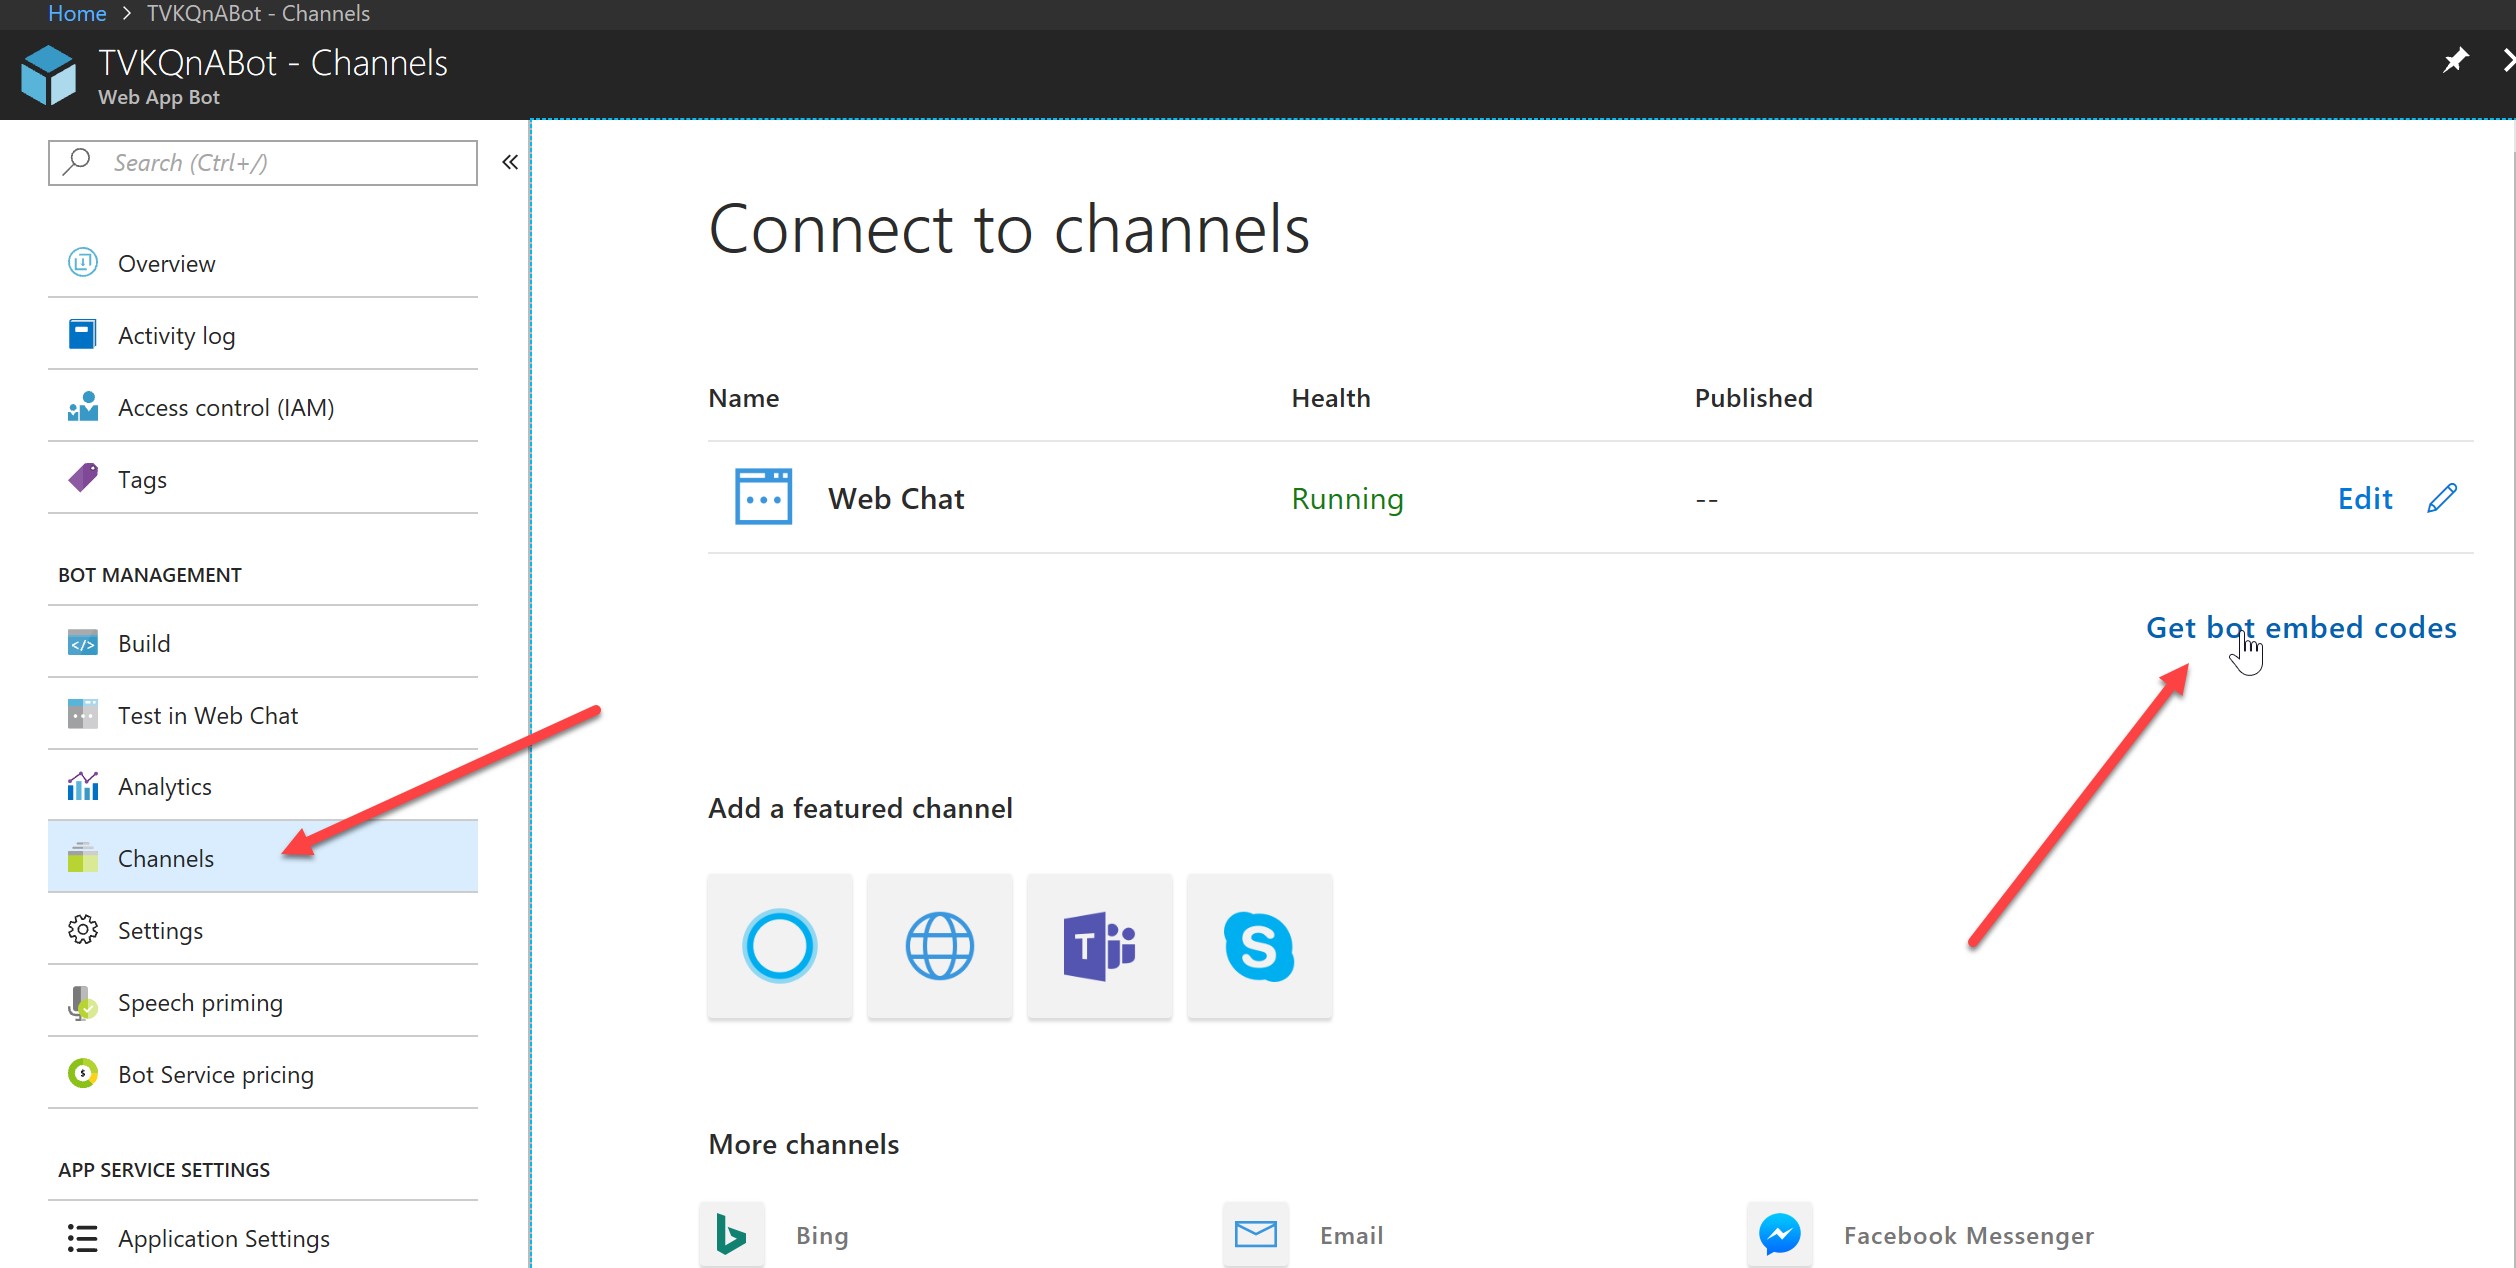
In the popup that appears, hit “Click here to open the Web Chat configuration page”:
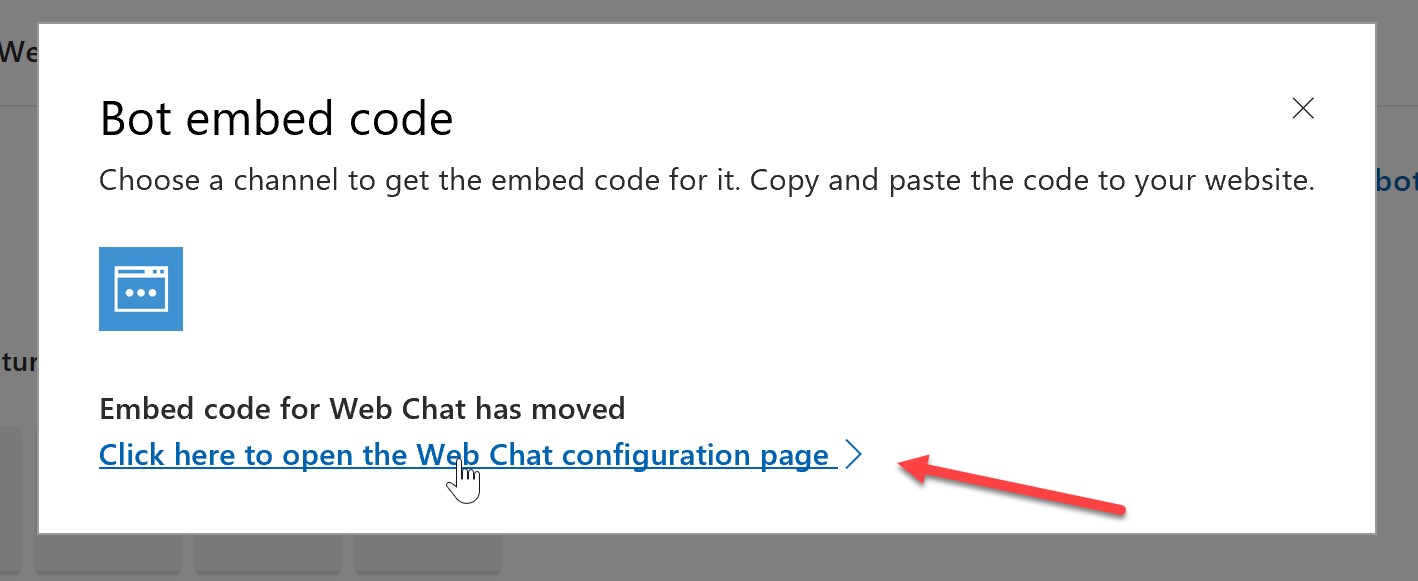
In the configuration page, click on “show” to reveal one of the secret keys (either will do). Copy the contents of the “embed code” text box to somewhere else, and replace “YOUR_SECRET_HERE” with the secret key:
You should end up with something like this:
<iframe src='https://webchat.botframework.com/embed/TVKQnABotTest?s=KPpdajqTxa4.cwA.unE.RBVjzlFalMNWFm3mUU6TLy0gfYc16gbpWKb1_us6F44'></iframe>
You can embed this in a web page, or you can simply take the url part to interact with your bot online:
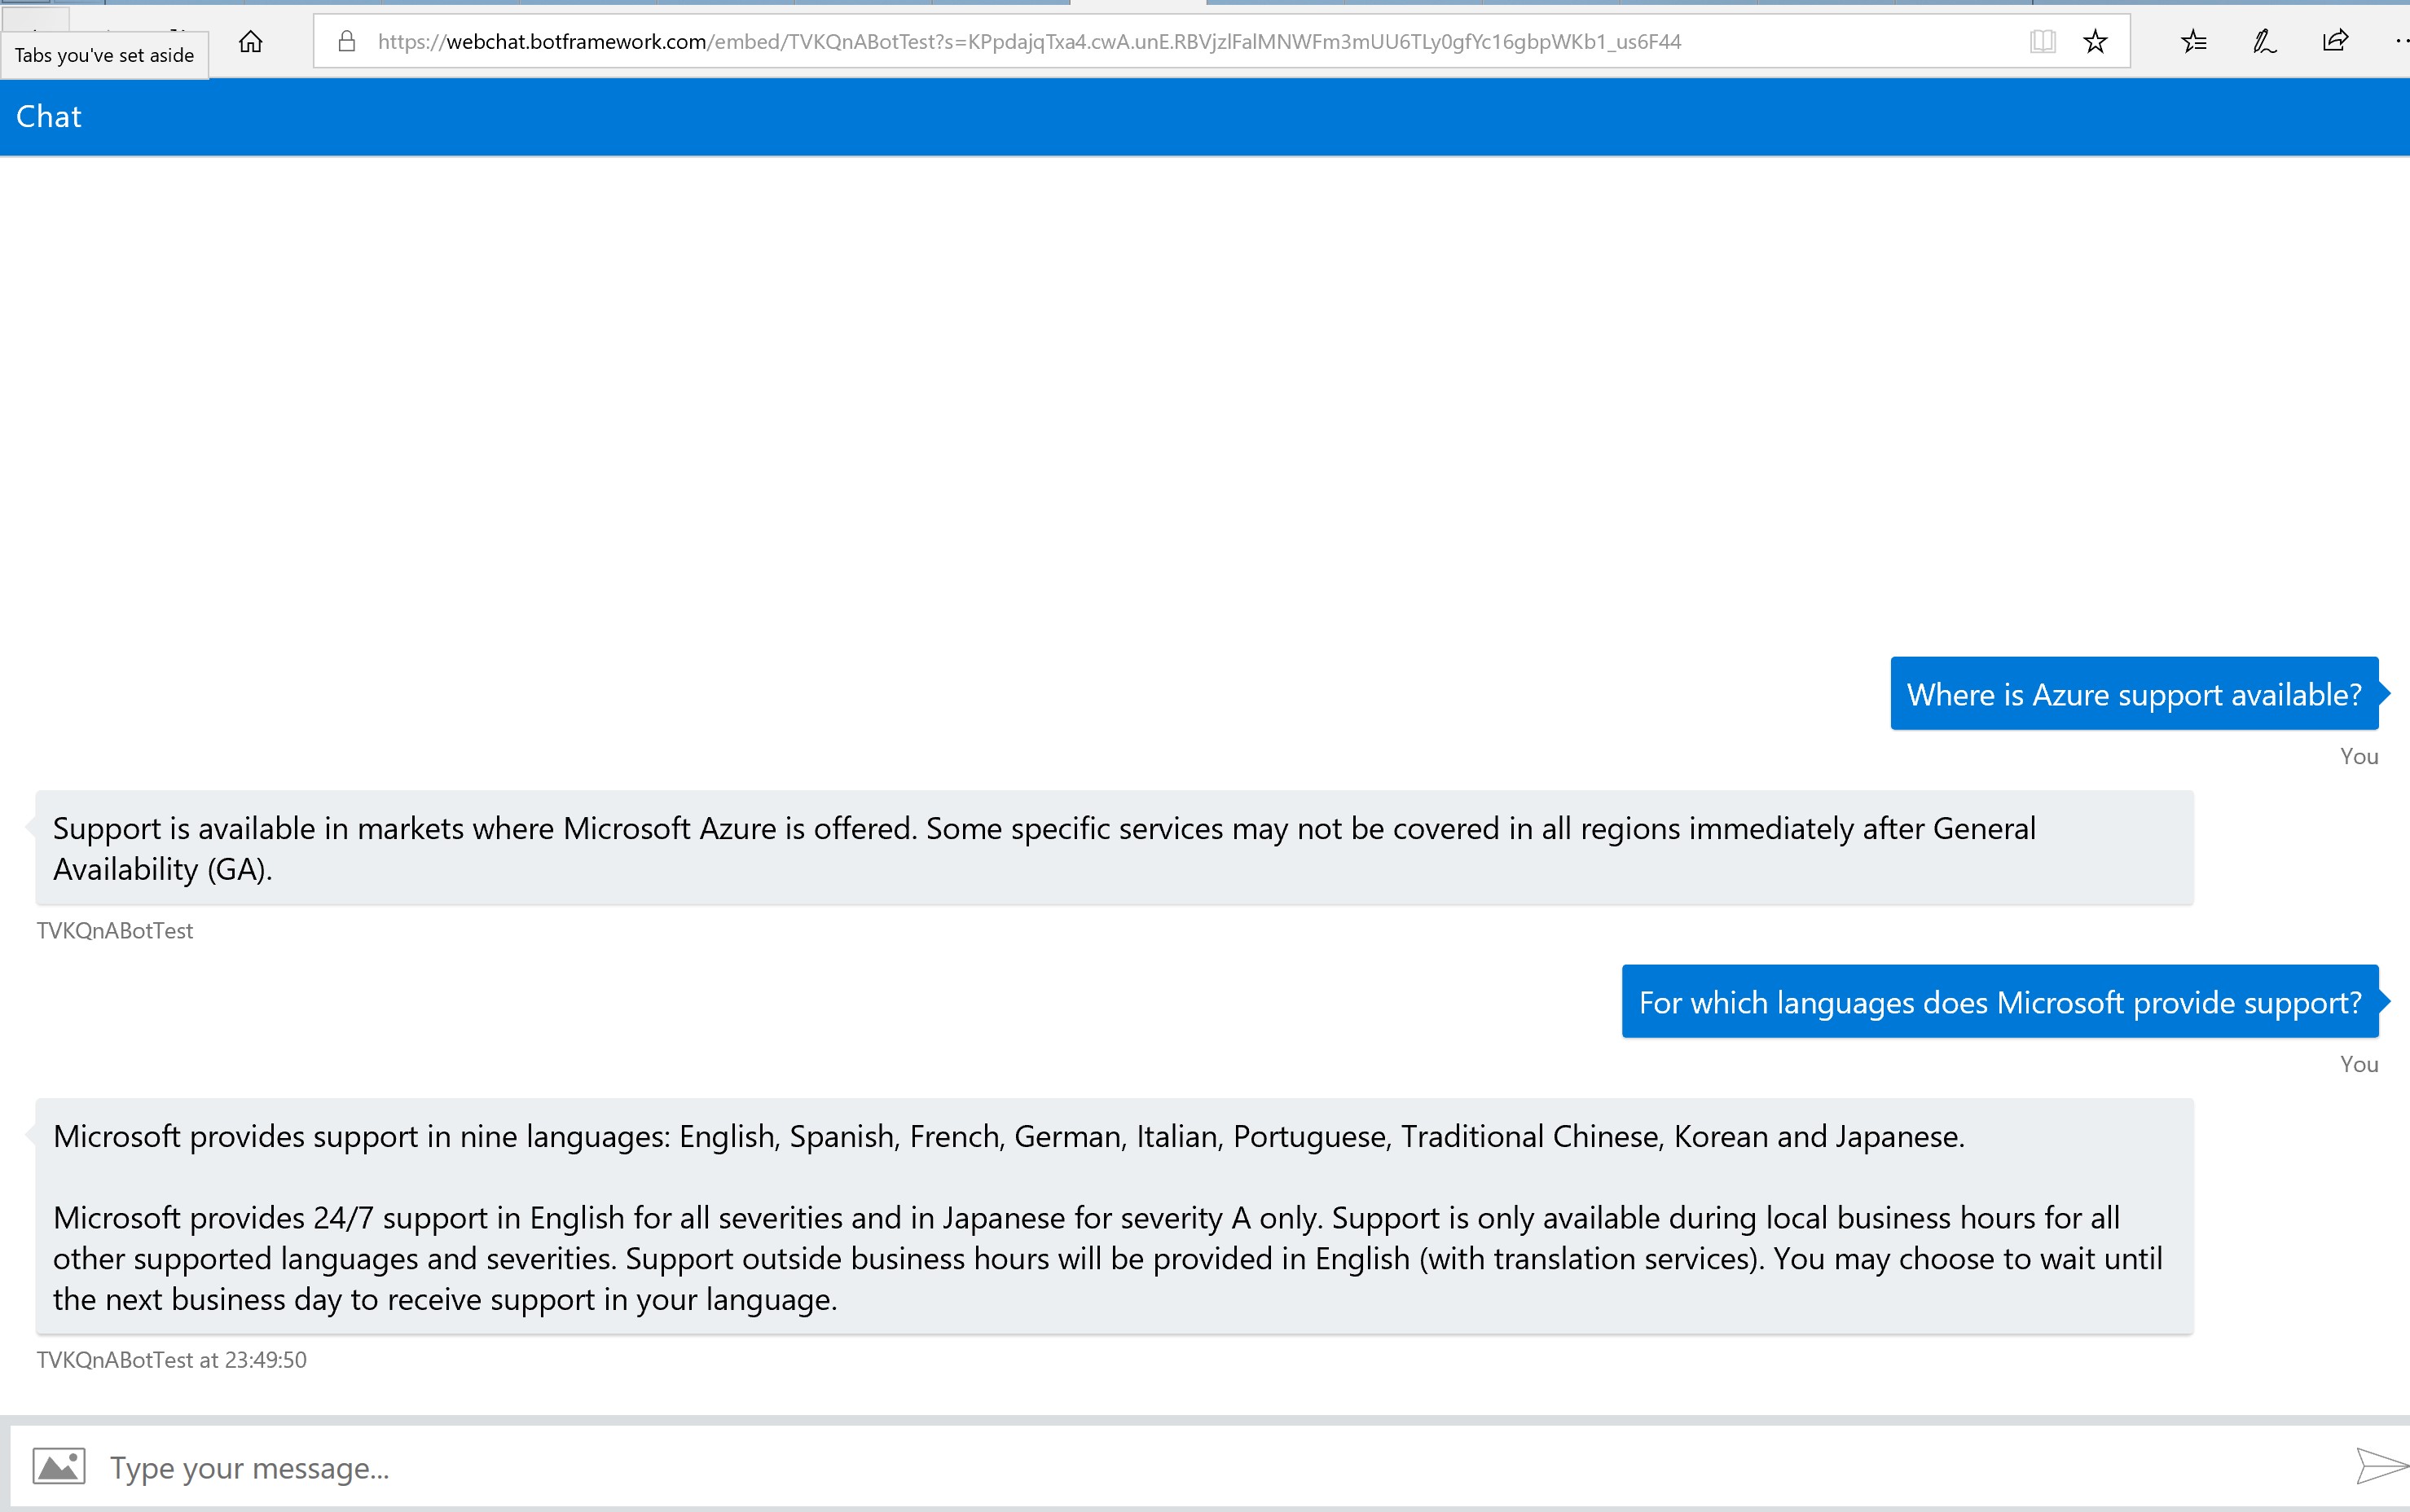
You've now set up your chatbot!
Resources
- Note: in production, the secret key should really be hidden. For more detail on this, see here.
- For adding encryption/authentication, see here.
- For more detail on QnA Maker, see here.
- For more detail on the Bot Framework and how to get started with building all kinds of bots, see here.
Comments
- Anonymous
August 17, 2018
It's great. A good way for the user to ask and receive automatic technical responses, links, procedures, etc. - Anonymous
April 18, 2019
This is excellent, things have changed (slightly) in the Azure portal since this was published but I managed to get there in the end. Thanks for Sharing.