Getting Started with Windows Azure Series 2. Building your first VM
The 2nd most common question I get is how can I build a VM on Azure
Well Step 1 is logging into Azure Portal
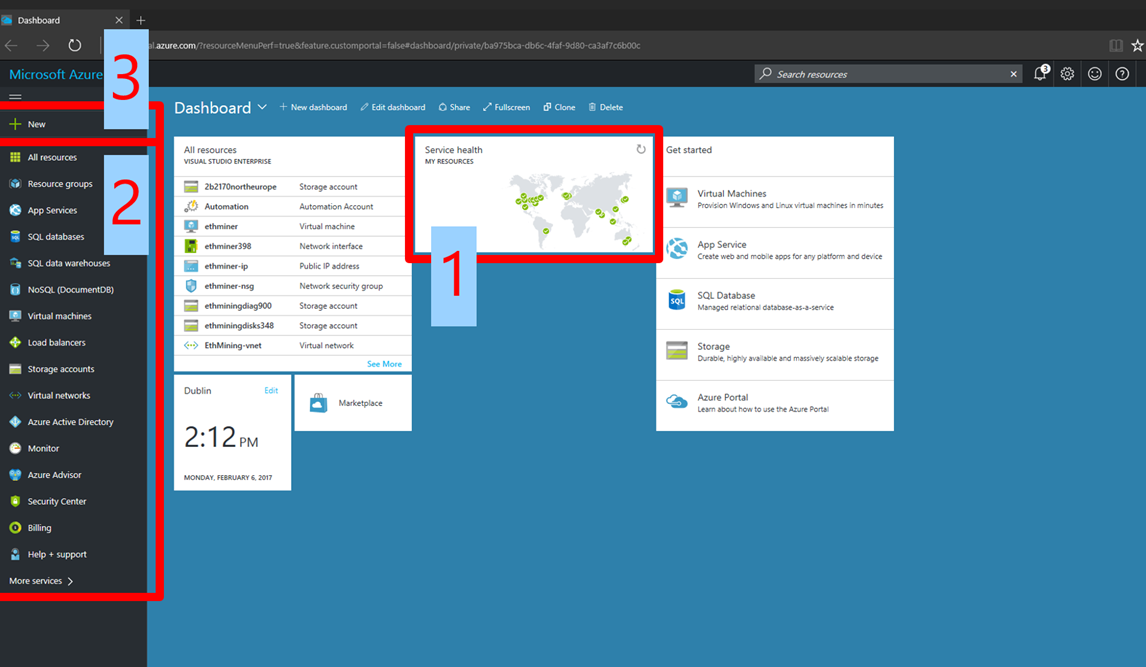
Once your logged in you will see a screen like this
No. 1
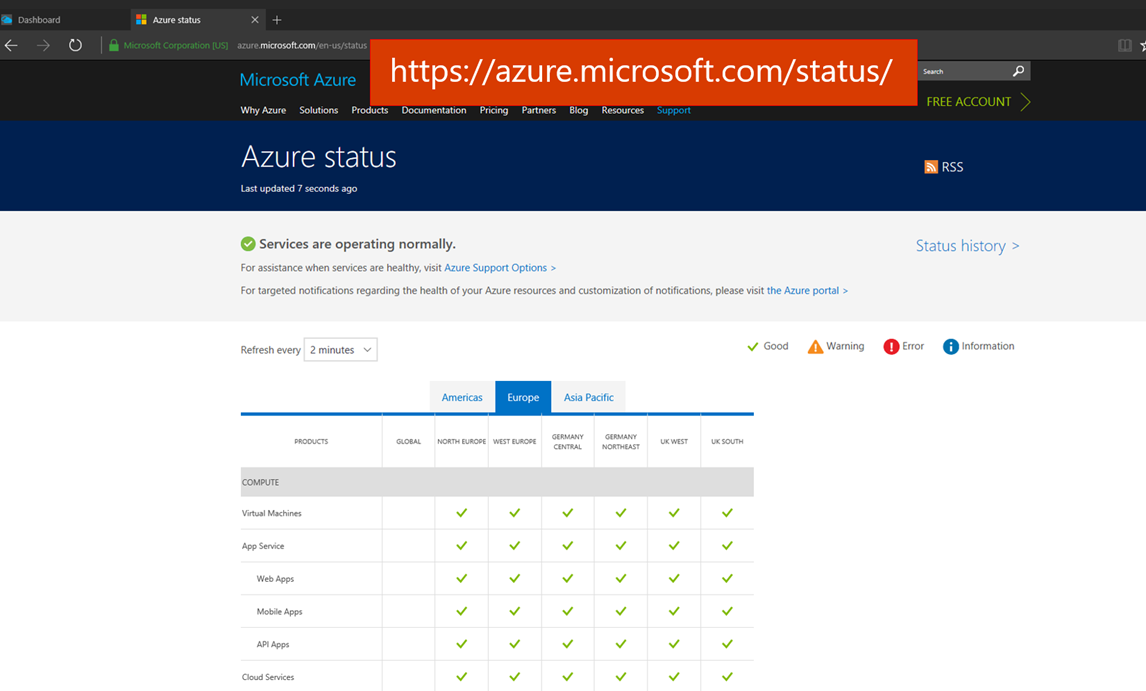
The Service Status of Azure – You can immediately see from this screen the current service status of all the World Wide Azure Data Centers
Services availability is key so we also have a dedicated site with APIs and RSS feeds to help you keep notified of Service Status https://azure.microsoft.com/status
No. 2
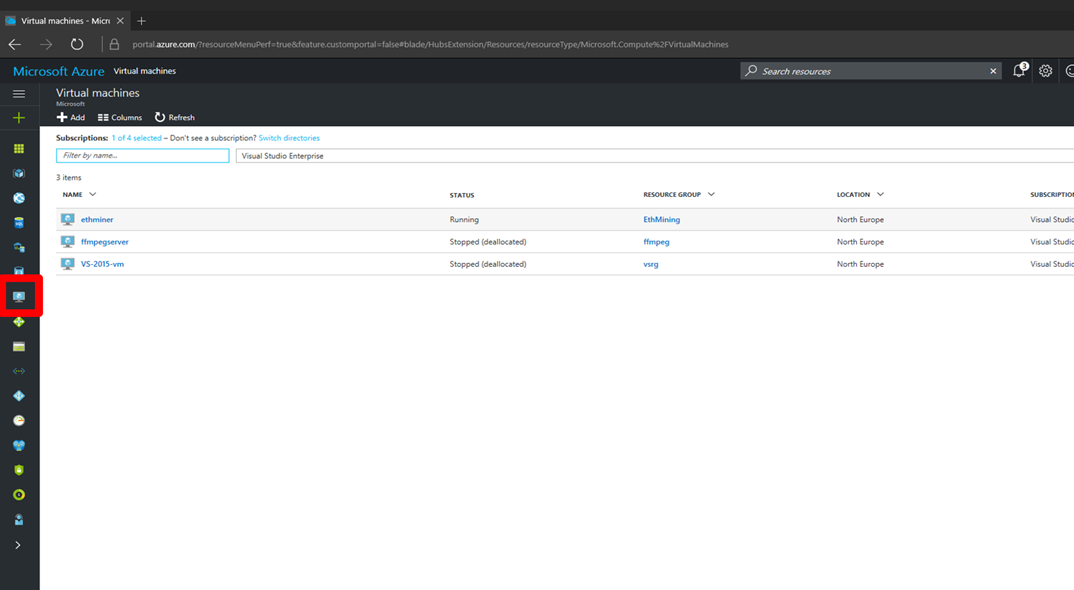
Azure Resources and Services these are displayed in the left hand column
Here is an example of clicking on Virtual Machine any virtual machines I have are clearly shown
No. 3
To create a new service or resource you can simply select new
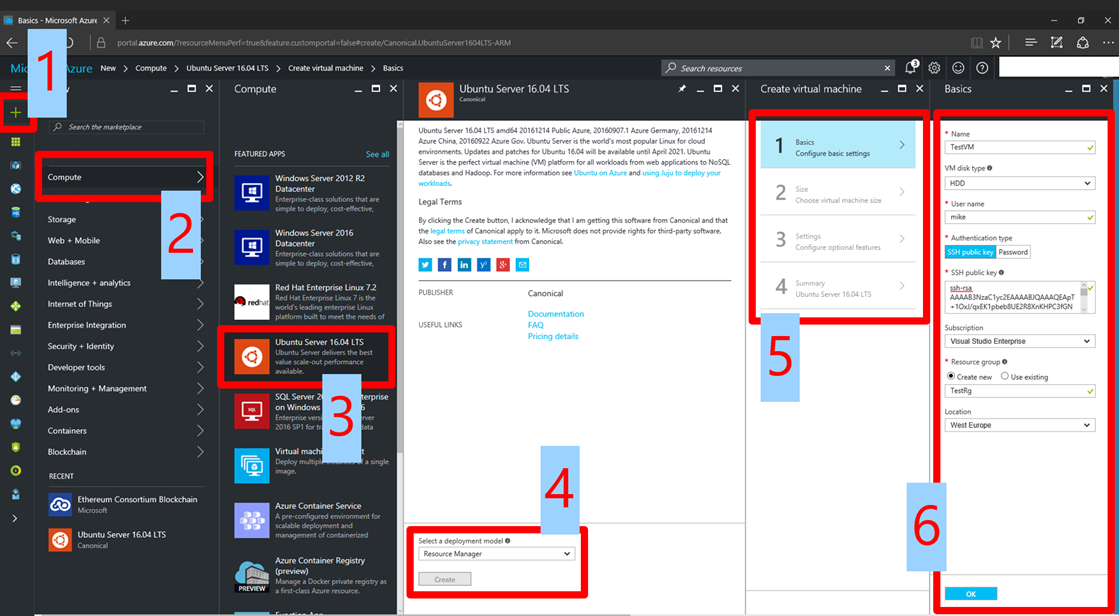
Creating a new VM
No. 1
So simply selecting new
No. 2
Select Compute
No. 3
Select the VM OS you wish to deploy, you can search using the search feature or deploy directly from https://azuremarketplace.microsoft.com/
No. 4
Select the resource group you wish to deploy this to, Resource groups are simply a grouping for resources so typically we suggest creating a resource group per your course. So all services related to that course are within a single resource group.
No. 5
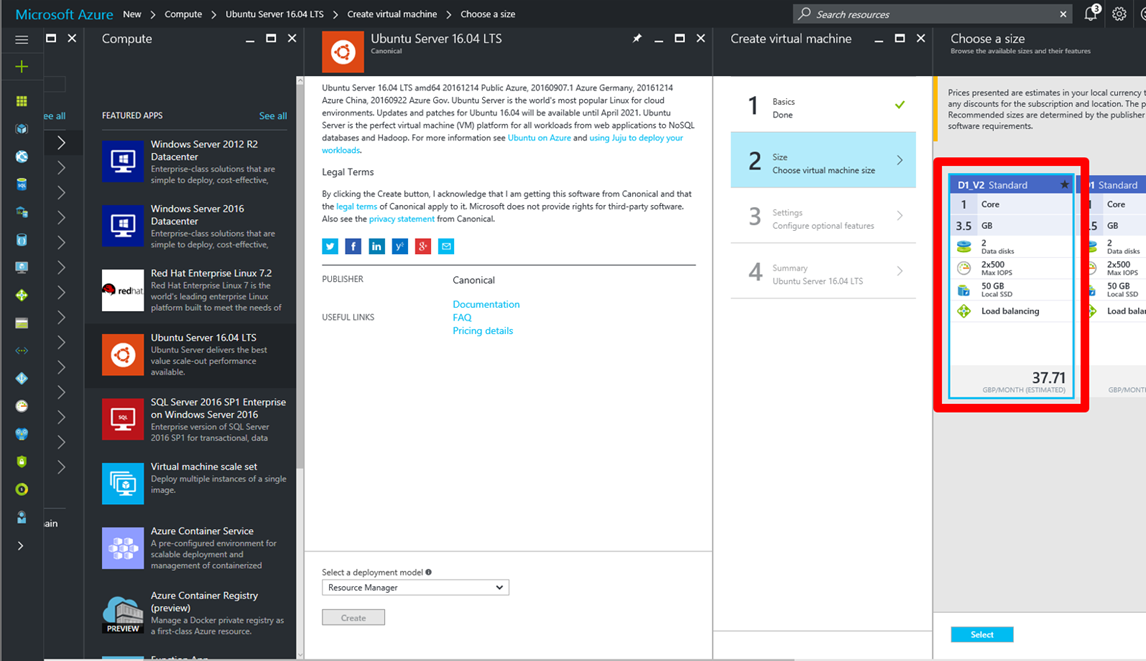
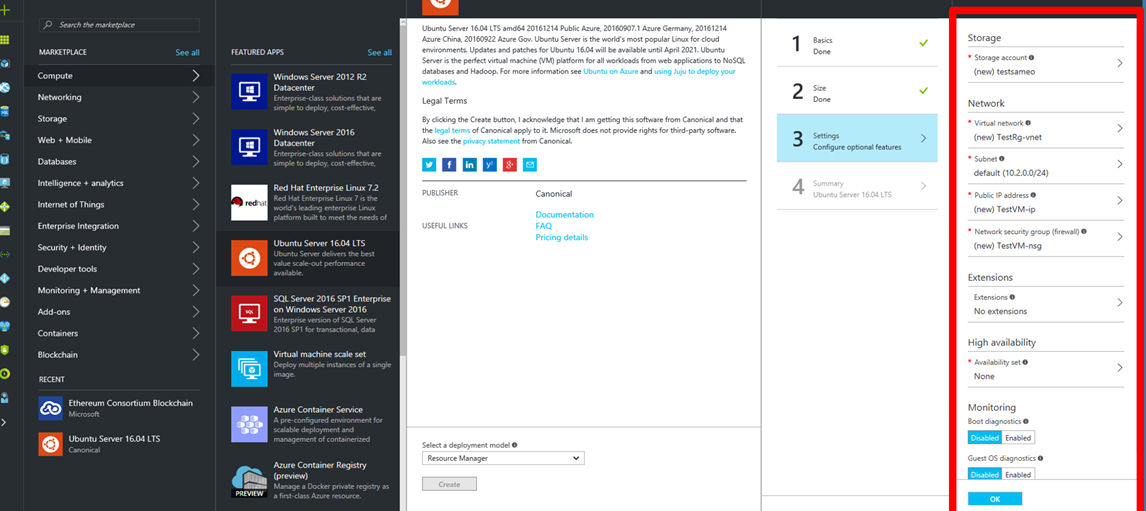
You now need to complete information about the VM you wish to deploy
No. 6
Compete the fields
The next option is simply selecting the VM instance you require so A – N instances are available typically for students you can pool students to VMs, again this depends on what services your running.
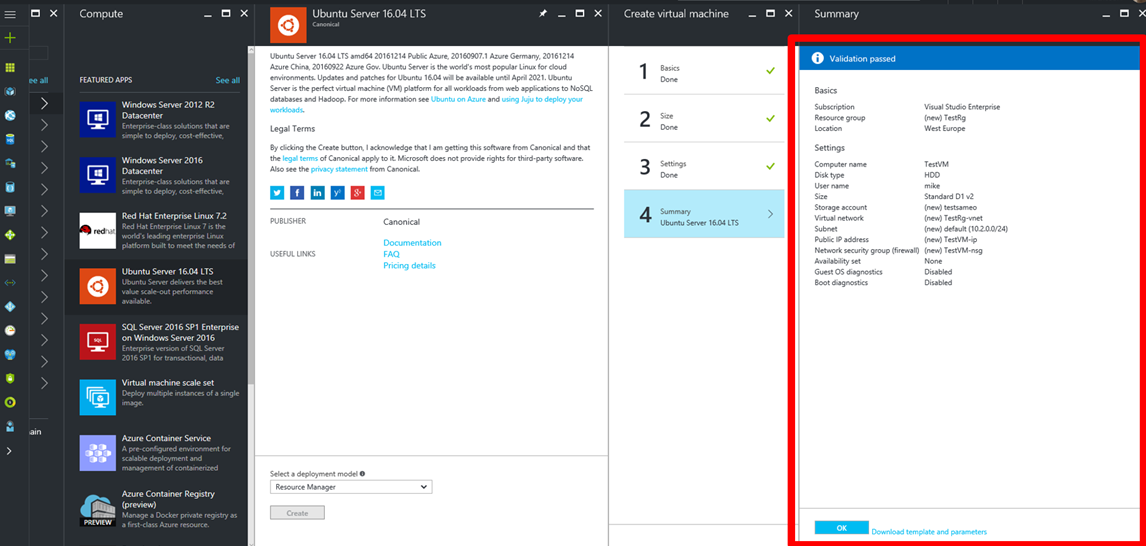
Once you have completed all the required field the Azure service request is validated
Once complete simply click ok and the service will start to deploy. Azure IaaS services typically take a max of 15 mins to deploy VMs. The deployment status is clearly shown.
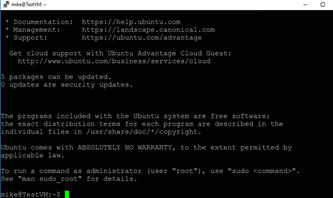
Once the machine has been deployed you can SSH in the server via username@ipaddress
You can then add new user accounts for your students and permission.
You then simply issues these and instructions of how to SSH into the server and allow students to run tasks and workloads.
Here is an example of of how Oxford University are communicating this to their students for undertaking deep learning using Azure GPU N Series instances.
Connect to your server
By this point you should have received an IP and a password in your college email. Using the ip and password provided you can connect to your server using ssh deepnlp2017@<your server ip>
tmux allows access multiple separate terminal sessions inside a remote terminal session. Using tmux you can keep sessions alive in the background (e.g. training your network) even when disconnecting, and reconnect to them the next time you login. Basic shortcuts:
list sessions
tmux lsdetach from session
ctrl+b - dchange name of session
ctrl+b - shift+4reconnect to session
tmux attach -t <session_name>
Install Cuda 8.0
 sudo apt-get install build-essential
cd ~
wget https://developer.nvidia.com/compute/cuda/8.0/Prod2/local_installers/cuda_8.0.61_375.26_linux-run
chmod +x cuda_8.0.61_375.26_linux-run
sudo ./cuda_8.0.61_375.26_linux-run
Answer the questions with y(es) or enter (default settings) for paths. To confirm successful installation run nvidia-smi.
Install CuDNN 5.1
 cd ~
wget https://developer.download.nvidia.com/compute/redist/cudnn/v5.1/cudnn-8.0-linux-x64-v5.1.tgz
sudo tar -xzf cudnn-8.0-linux-x64-v5.1.tgz -C /usr/local
rm cudnn-8.0-linux-x64-v5.1.tgz
sudo ldconfig
Add in references
append the following lines to your ~/.bashrc. You can edit it with nano ~/.bashrc.
 export CUDA_HOME=/usr/local/cuda-8.0
export PATH=/usr/local/cuda-8.0/bin${PATH:+:${PATH}}
export LD_LIBRARY_PATH=/usr/local/cuda-8.0/lib64${LD_LIBRARY_PATH:+:${LD_LIBRARY_PATH}}
export LD_LIBRARY_PATH=/usr/local/cuda/lib64${LD_LIBRARY_PATH:+:${LD_LIBRARY_PATH}}
Install framework
You are ready to install python and your favourite framework:
- PyTorch
- Tensorflow
- CNTK
Performance and Monitoring
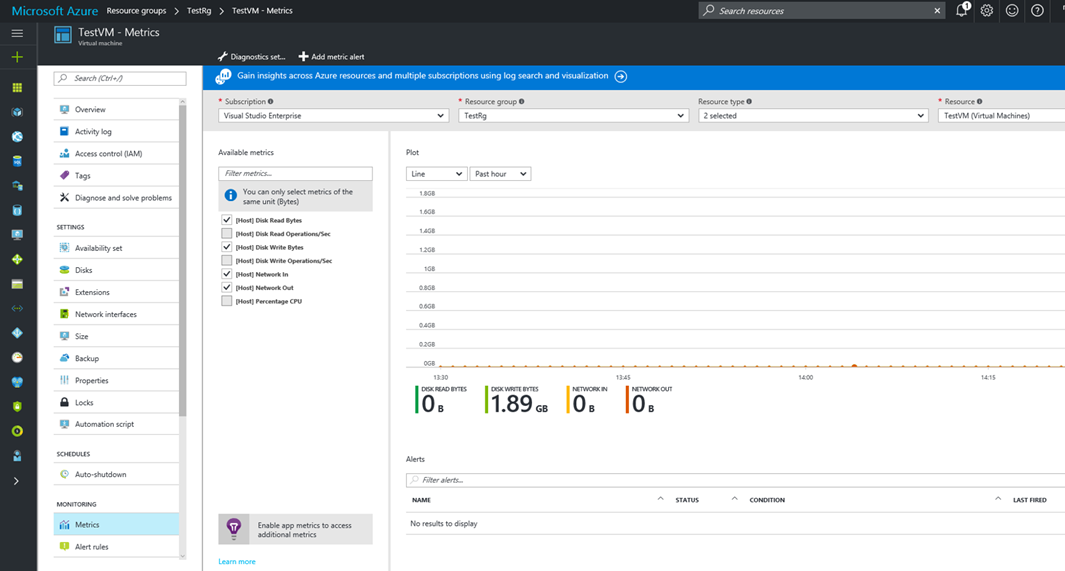
So now you have your servers live and students are using the services, what you need to do know is understand the utilisation.
Azure offers metrics for VMs so you can log into the Azure Portal https://azure.portal.com and select resources groups, select the resource group for your class and then the VMs you wish to view metrics for.
This is a an excellent resource as it ensure your doing right sizing for the VMs and workloads which are being undertaken by students.
Getting Help
So know we have our class infrastructure students are successfully utilising shared or dedicated VM instances and you know that you have right sized your VM and loading and performance is within acceptable preferences ranges.
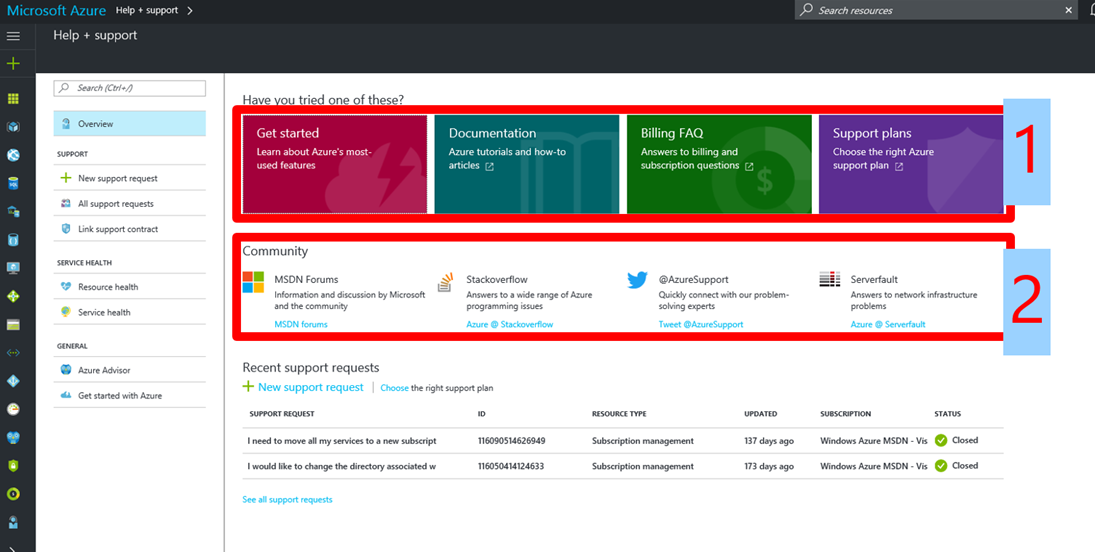
If you need help there lots of resources directly available within the Azure portal
Key resources
Msdn Forums - https://social.msdn.microsoft.com/Forums/en-US/home
Stackoverflow - https://stackoverflow.com/
ServerFault - https://serverfault.com/
Twitter @Azuresupport
Resources
azure.microsoft.com is your starting place
azure.microsoft.com/free for your free trial
channel9.msdn.com/shows/Cloud+Cover &
channel9.msdn.com/Shows/Azure-Friday for great videos
azure.microsoft.com/blog for latest news
Course resources https://github.com/msftimagine/computerscience
![image_thumb[2] image_thumb[2]](https://msdntnarchive.z22.web.core.windows.net/media/2017/03/image_thumb2_thumb1.png)
