A first step into Azure Functions and other Azure services
Guest blog by Johannes Goslar Microsoft Student Partner at Oxford University
About Me
Let me introduce myself first. I am Johannes – usually called Johnny – Goslar. I got into development around 2011 by programming iOS games and am currently reading for a MSc in Computer Science at the University of Oxford. More information can be found at my LinkedIn profile (https://www.linkedin.com/in/johannes-goslar-69b2943a/).
In this blog post will introduce you to the world of serverless computing with Azure Functions and other related Azure technology.
Function Introduction
Azure Functions are one implementation of the serverless computing paradigm, which is interesting to us for these main reasons:
· We can write simple JavaScript functions
· We only need to reason about their inputs and outputs
· We can use the integrations to CosmosDB and other service offerings on Azure
· We do not need to care about hosting
· We do not need to care about process management
· We do not need to care about deployment (just one git repo to push/pull from if wanted)
Summarized: We write the code we are interested in and the infrastructure will be handled for us. A comprehensive overview can be found at https://azure.microsoft.com/en-us/services/functions/
Mini Project Introduction
Keeping with the spirit of bringing back “old” features like function orientated programming, we will develop the most important feature of the 90s web, the hit counter – a dynamic image displaying the amount of page hits. Our solution will consist of two Azure functions, one message queue and one CosmosDB instance. This surely is over-engineered but will provide a great glimpse into a lot of technologies and how to connect them via Azure functions. Only the hit counting part will be handled this time, the image generation is left as an exercise for the reader.
Prerequisites
You should have signed up at https://azure.microsoft.com/en-us/ so you can access https://portal.azure.com the rest will be covered. Some knowledge of JavaScript is helpful.
Project
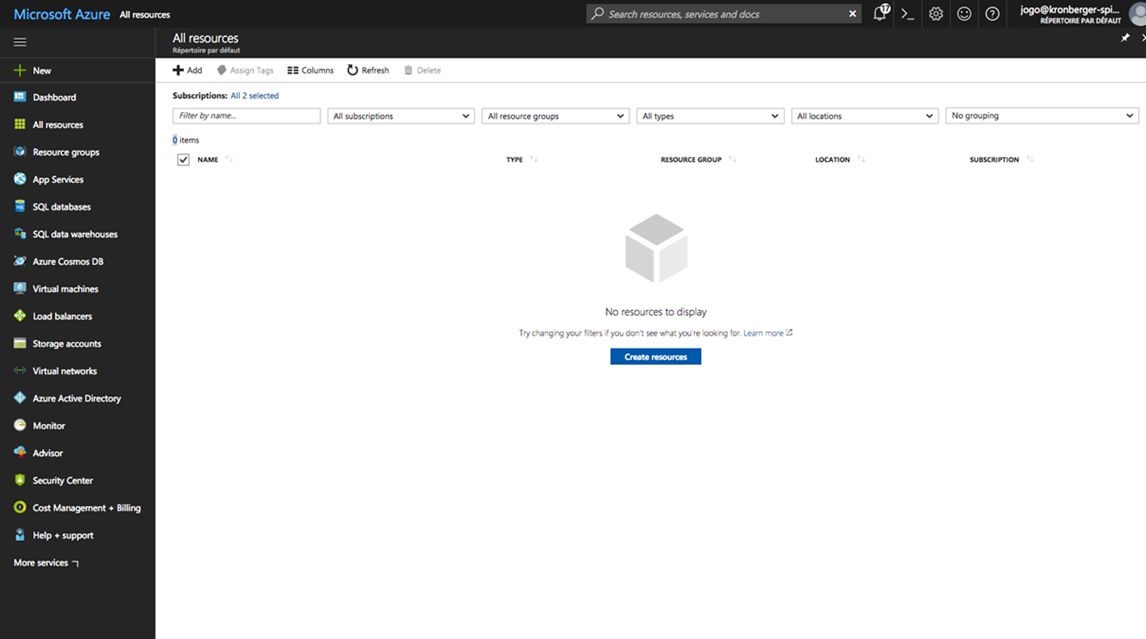
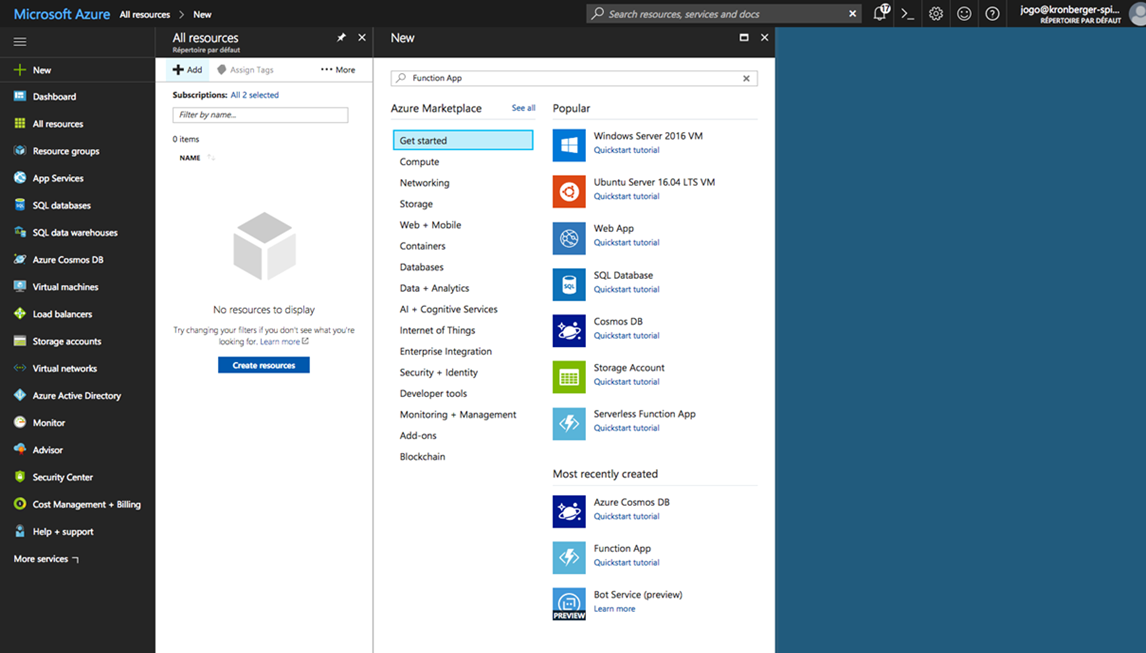
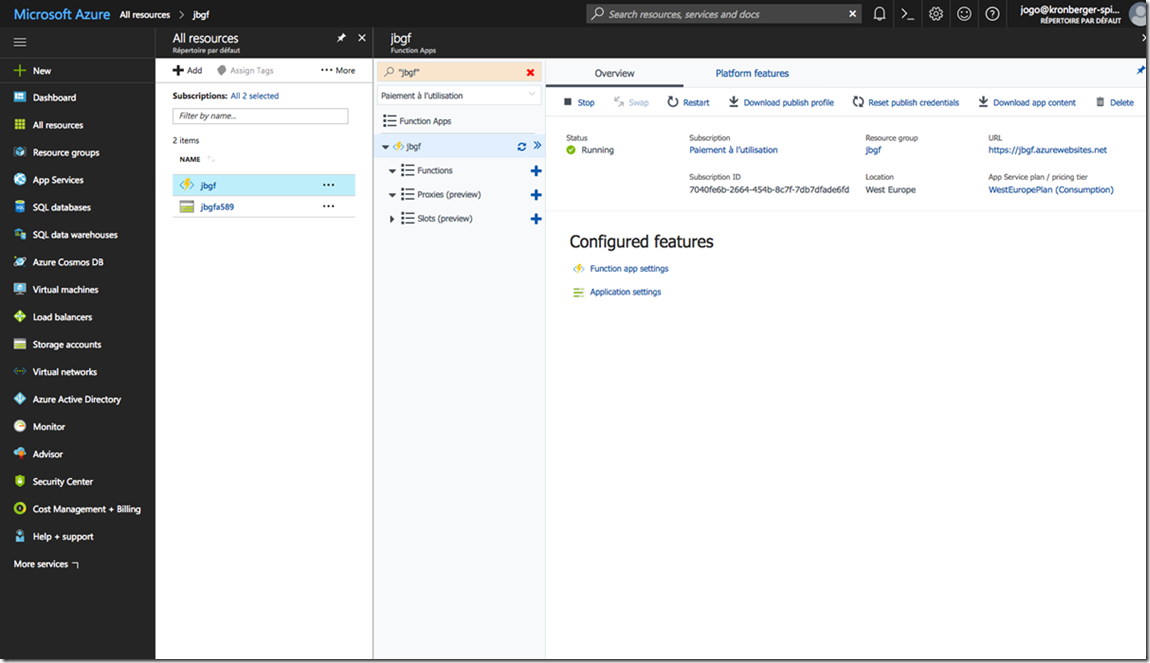
The first thing we need to use Azure Function is – surprisingly – one Azure Function app, so we click the plus button and search for function app in the examples.
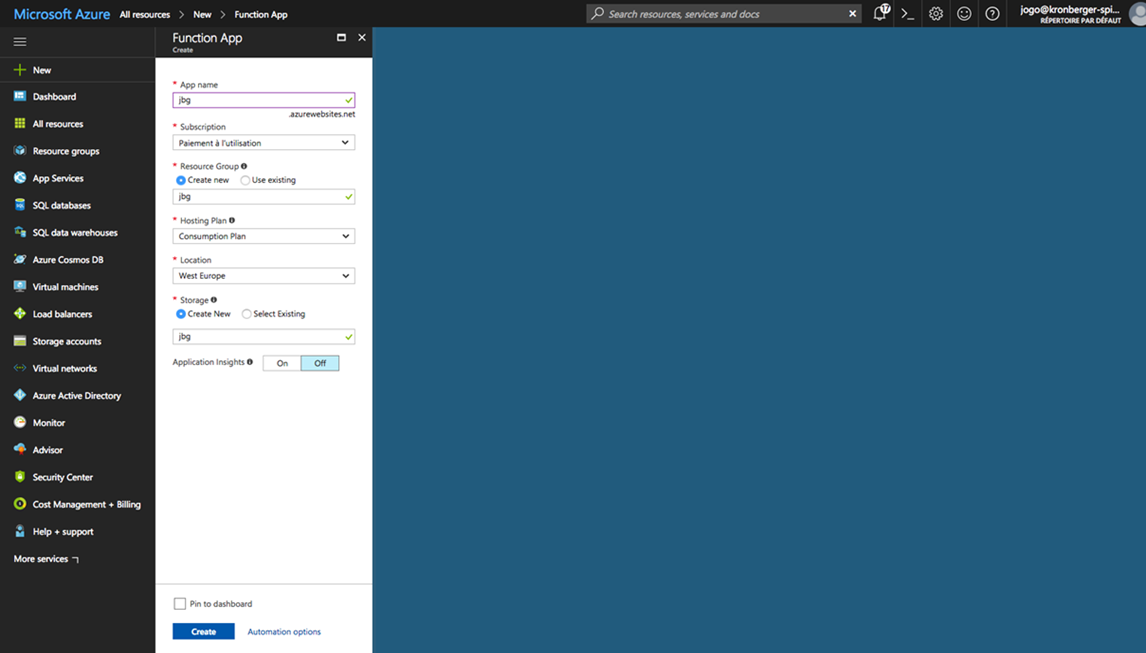
This Function app will contain all our code and configuration.
You are free to pick any free app name, the rest of the settings will be filled for you.
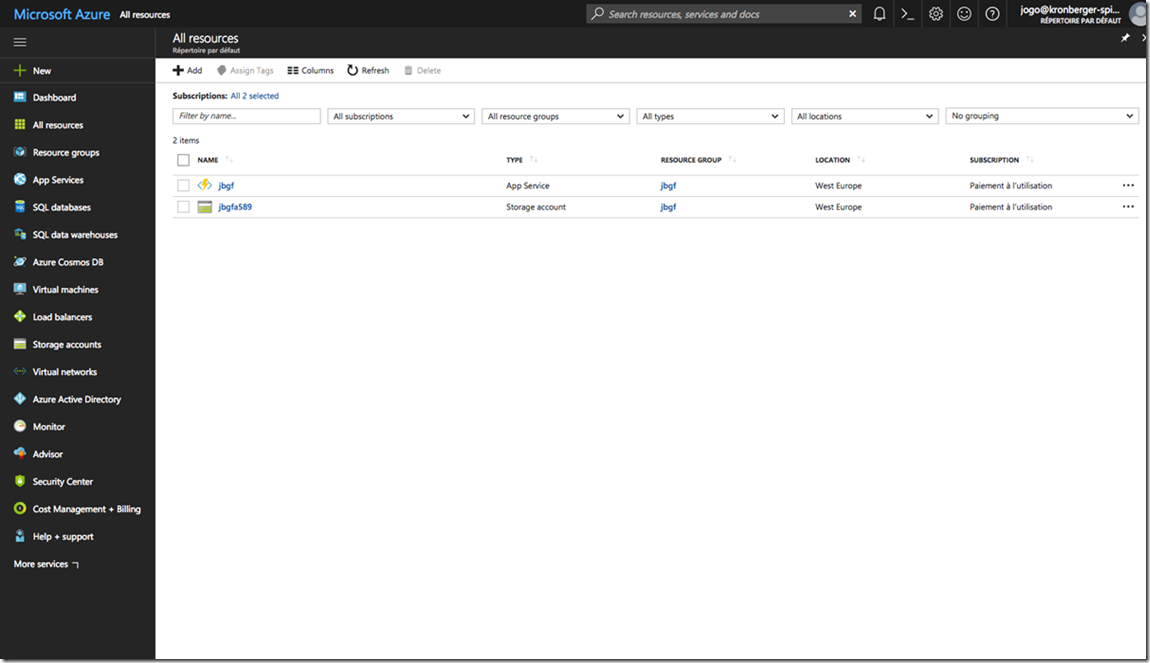
Afterwards you should see your app and the automatically generated storage for it. Clicking on the app name will lead us to the Function app interface where we will spend most of the time.
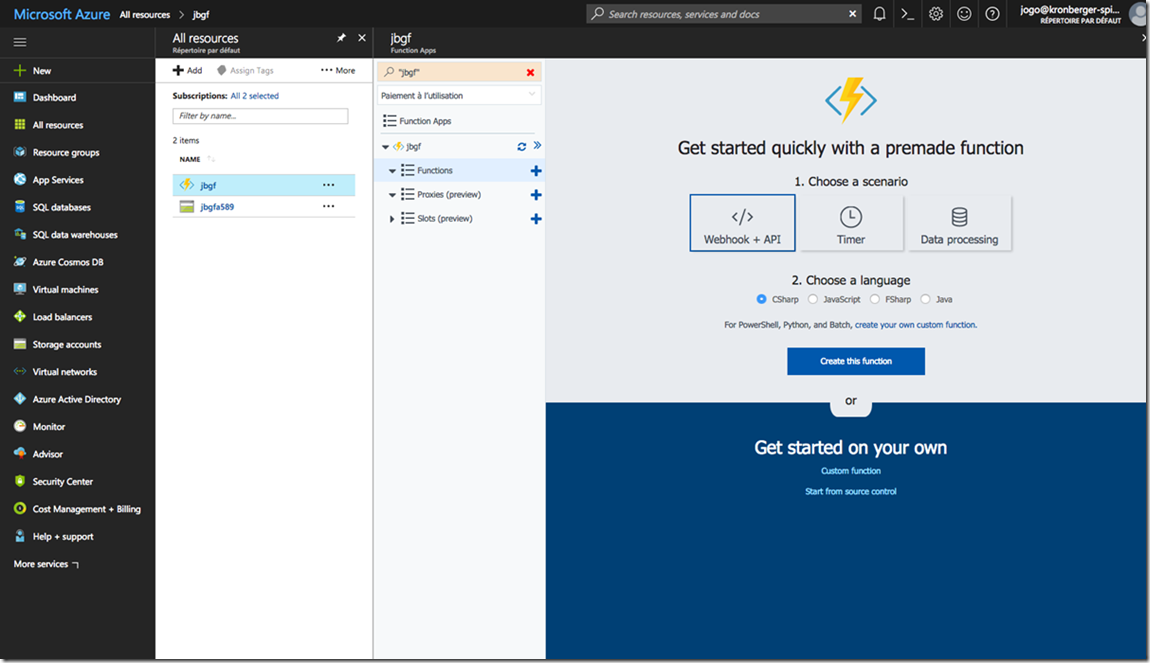
The next step is setting up our HTTP function which will handle the hits and return the current count. To create it, you press the blue plus next to Functions.
The wizard provides some options, we are interested in the webhook+API one and you need to switch to JavaScript to follow this blogpost.
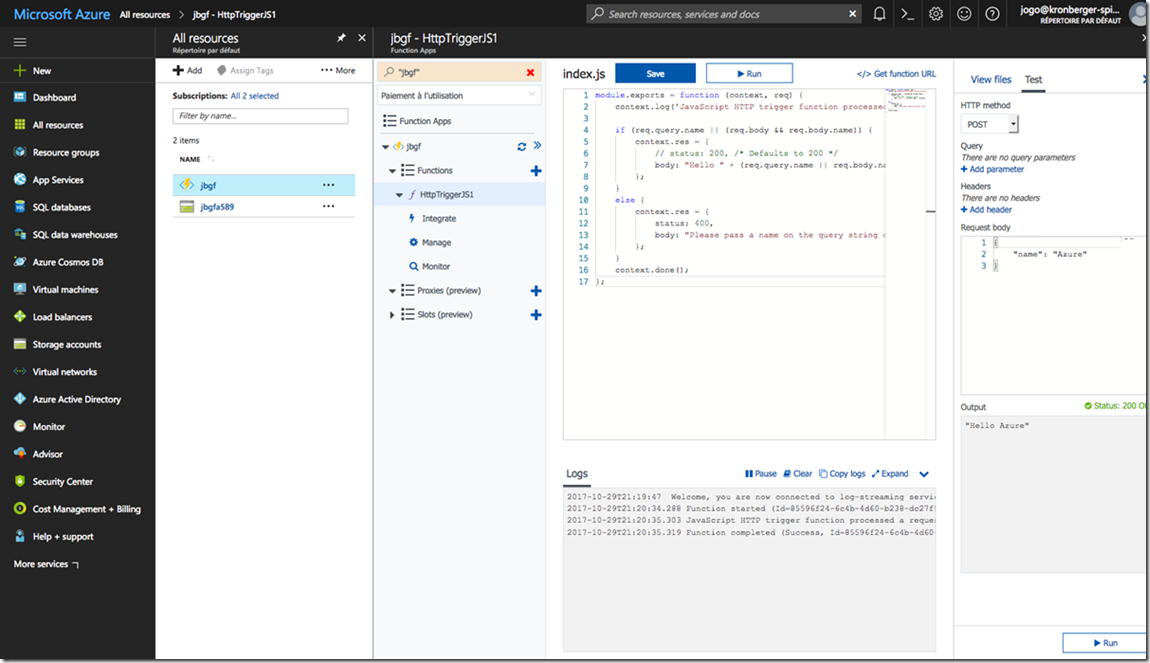
After “create this function” this screen will appear. You see your first Azure function and it is – surprisingly - a plain JavaScript function with two inputs: “context” and “req”. Context gives you access to the Function runtime and holds the connections to configured services. “req” is the current http request. “context.res” is the place to store our HTTP return value. This function is checking if the visitor provided a name, if so return a greeting else requesting one, not really needed for our use case but a simple example. It is possible to test this function directly from the interface, just press “run”.
You will the test environment on the right side. On top the request on bottom the response. Changing the code and/or request will give different results, try that to get accustomed to the interface.
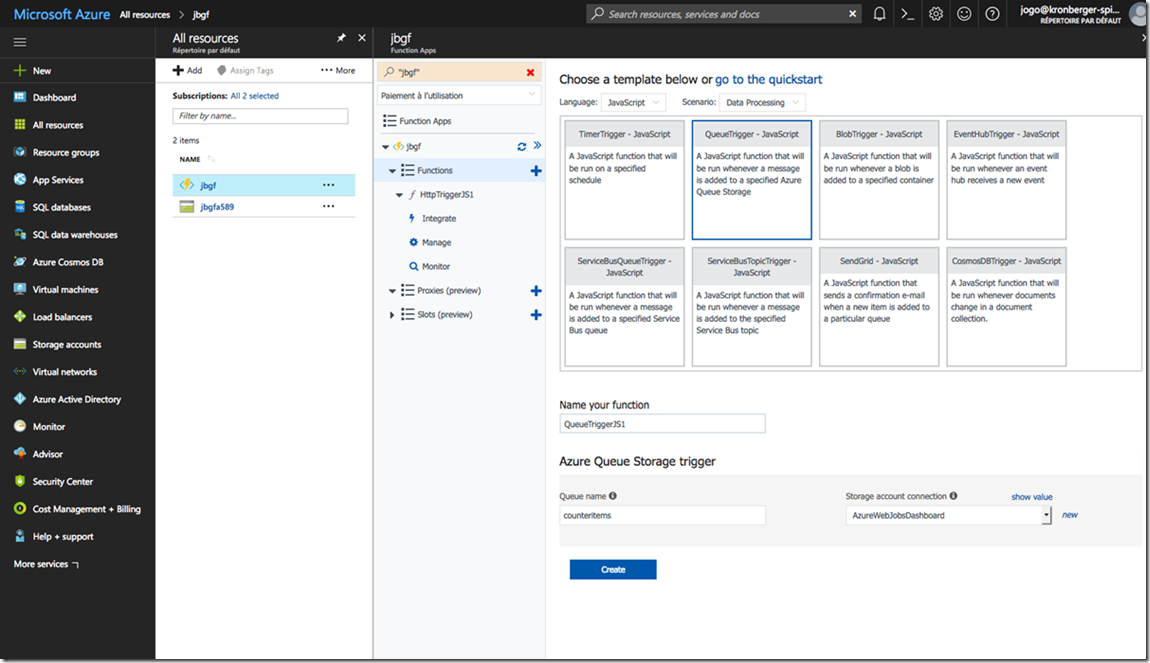
After this first hurrah it is time to think about how we actually want to handle our use case. We have a function responding to HTTP requests now (press “Get function url” if you want to try it from your browser) but no way to store how many visitors we had yet. Just having a database, connecting to it and incrementing some counter would be possible, but too old school and not showing possible Function integration. We will still have some database, with one document containing our counter, but not write directly, instead each visit will put one visitor message inside our message queue and another function will work on these messages one-by-one and steadily increase our hit counter. Let us create this other function first. Press the big blue plus again.
Pick JavaScript as language and pick QueueTrigger from the examples. Change the “Queue Name” to “counter”, then “create”. Afterwards click the “Integrate” button on the left, as we want to integrate our queue processing with database inputs and outputs.
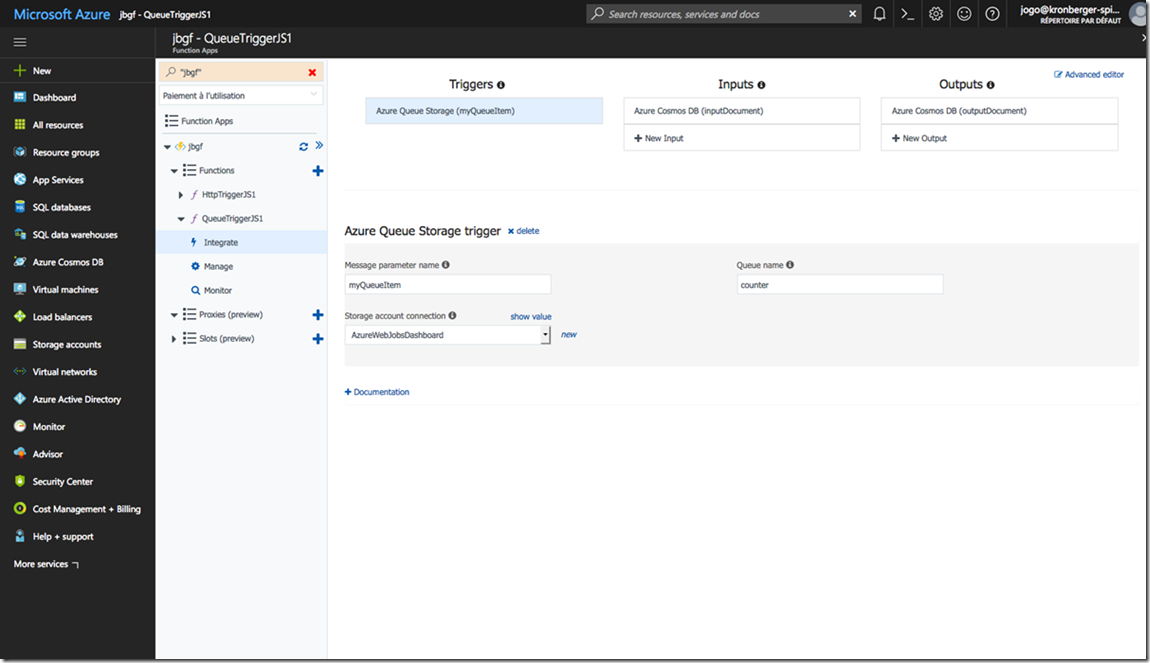
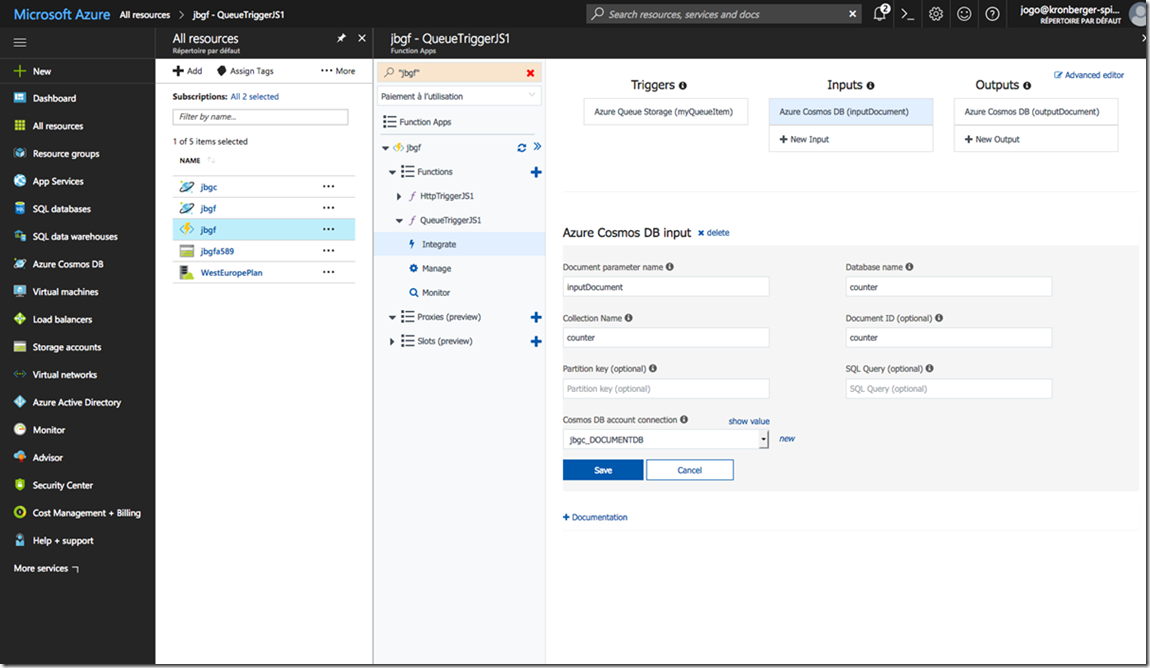
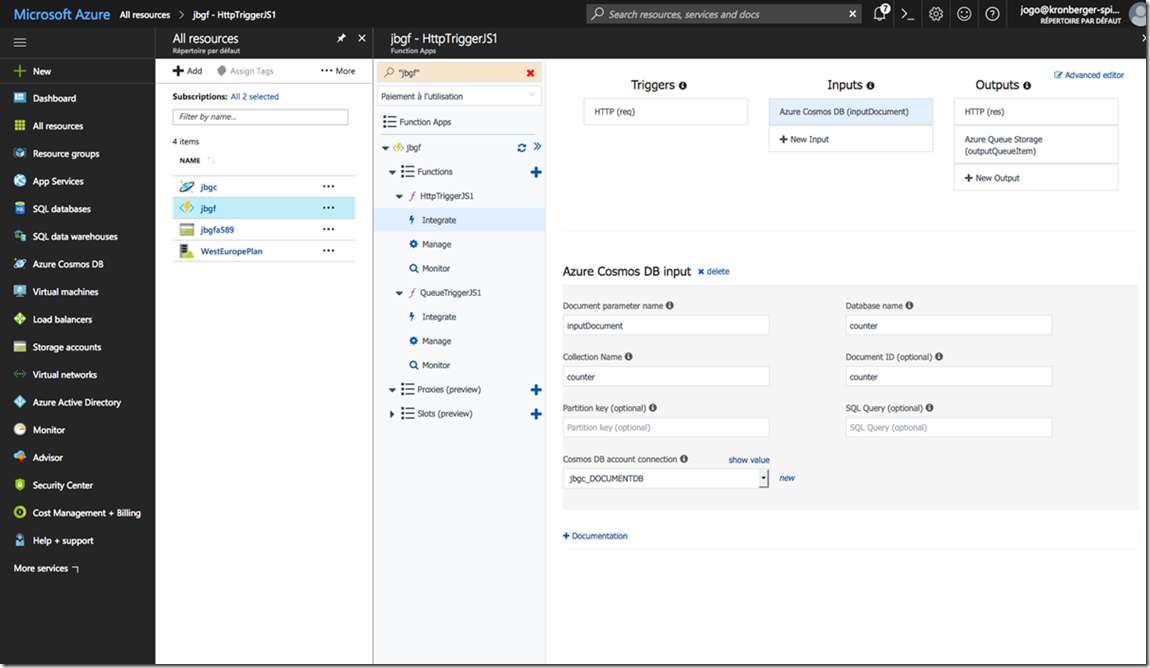
This view shows the final state of the integrations, to get there, you need to press the “+ New Input”-button under inputs first.
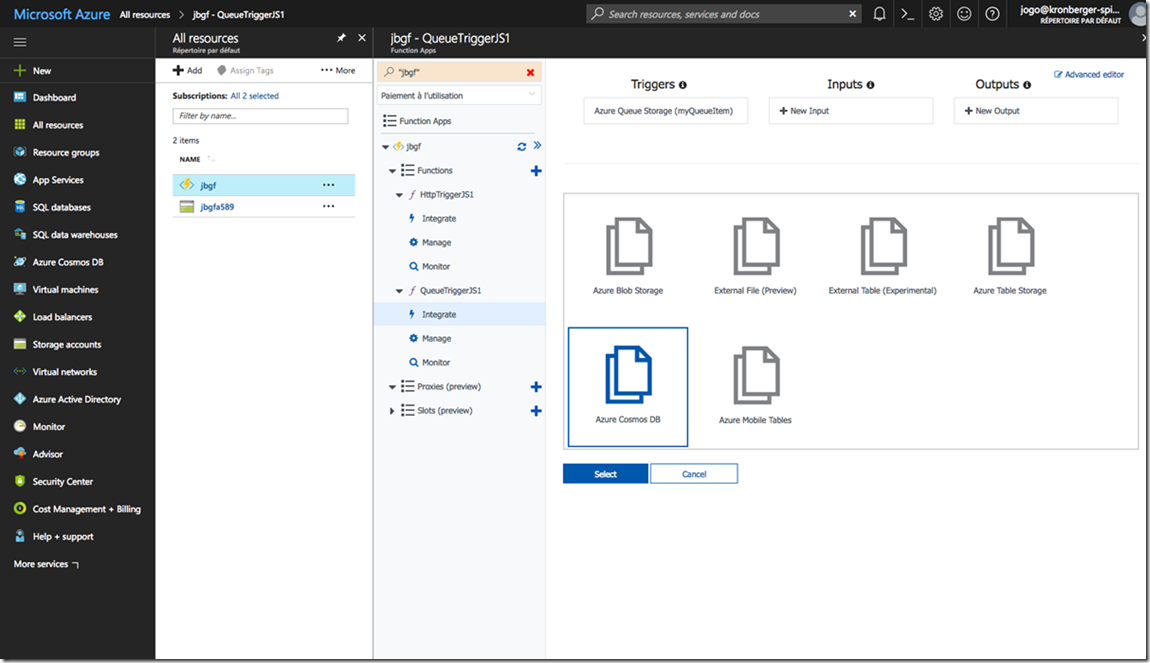
Pick Azure Cosmos DB and select.
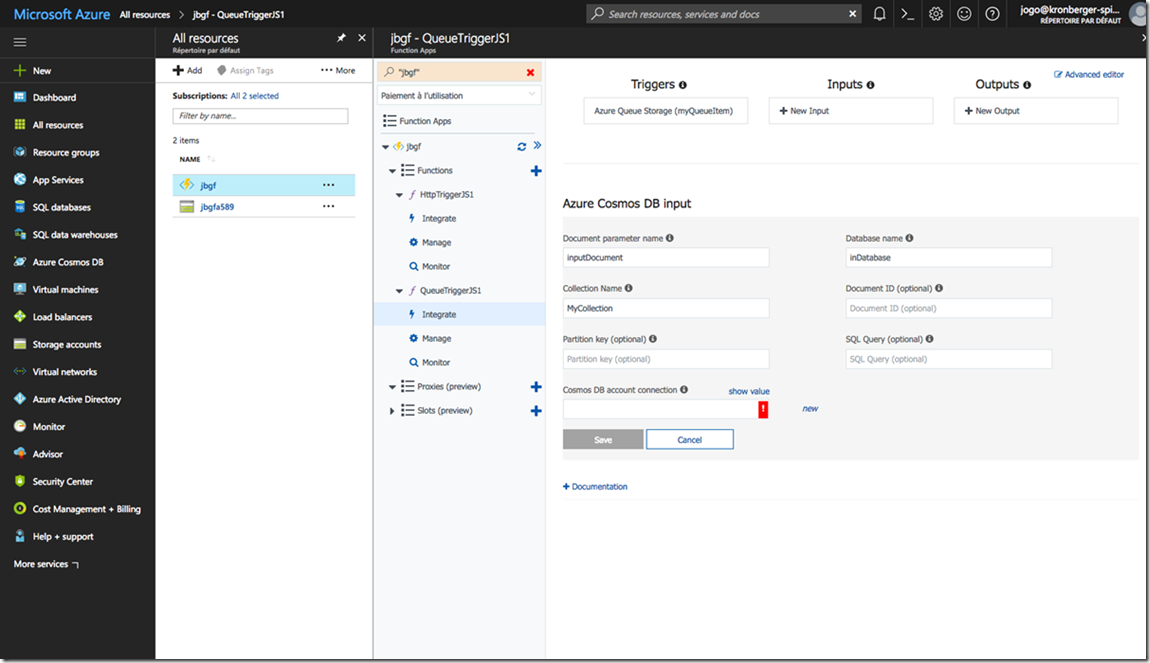
To be able to connect to the database we first need the database, thus you should click “new” next to the Cosmos DB account connection.
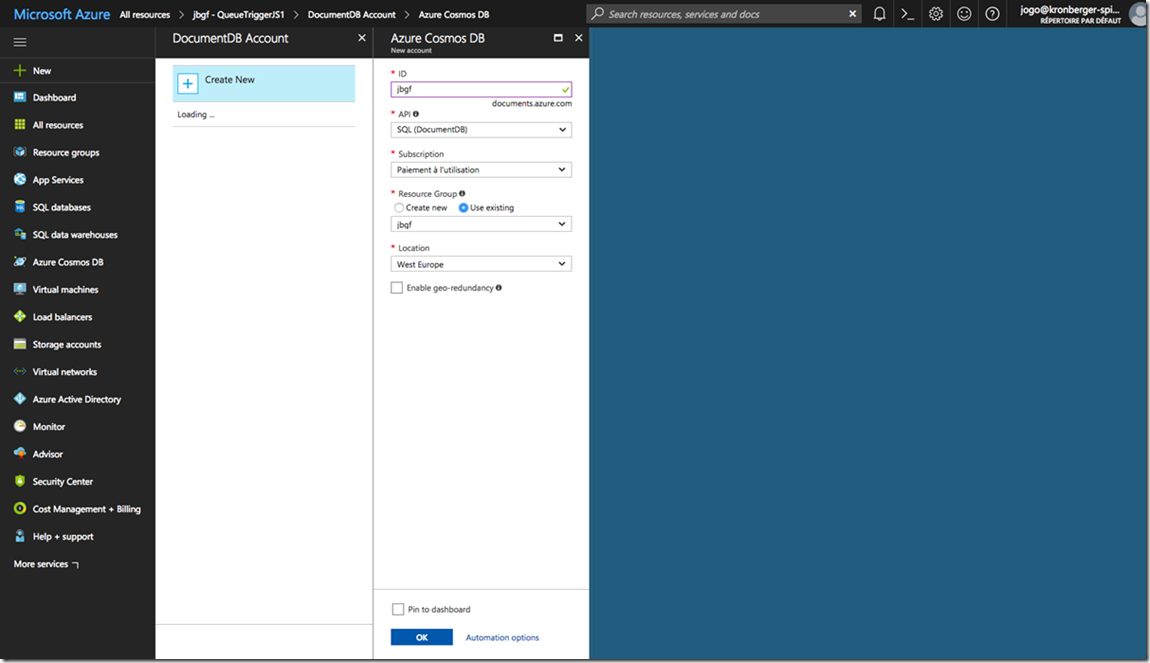
This will lead you to the DB setup screen, just input some name, let the defaults be and press “ok”.
After the database creation (might take some time) you will be led back to the input configuration, just insert “counter” for all the form values as shown in the screenshot. Press “save” and then “+ New output” to setup the write process.
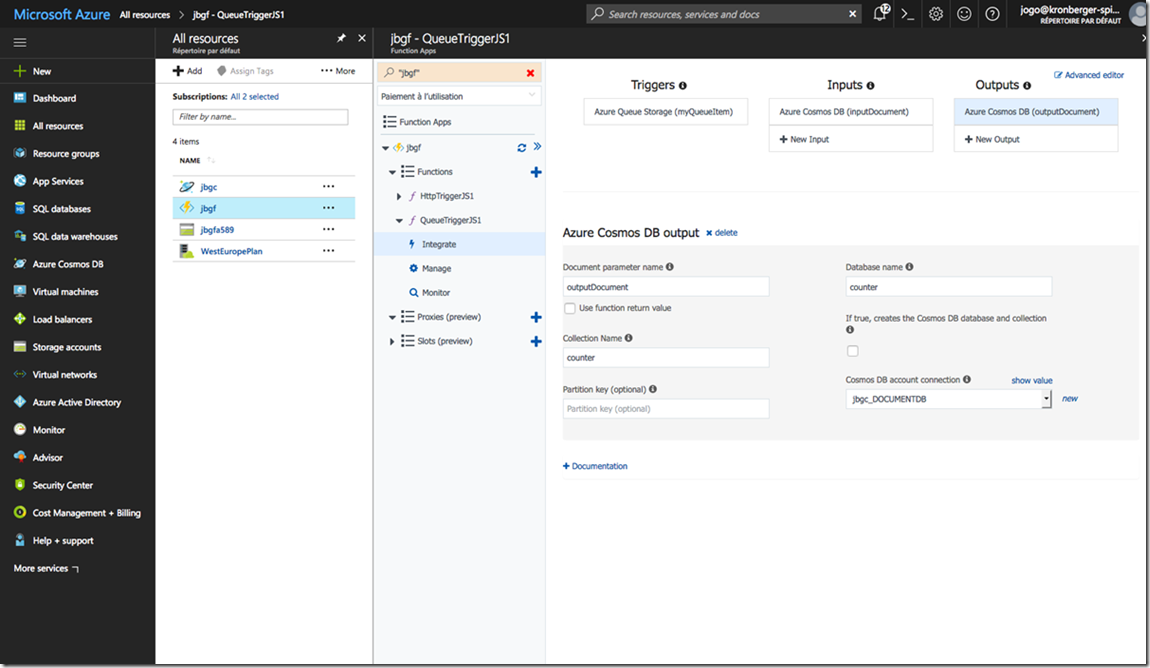
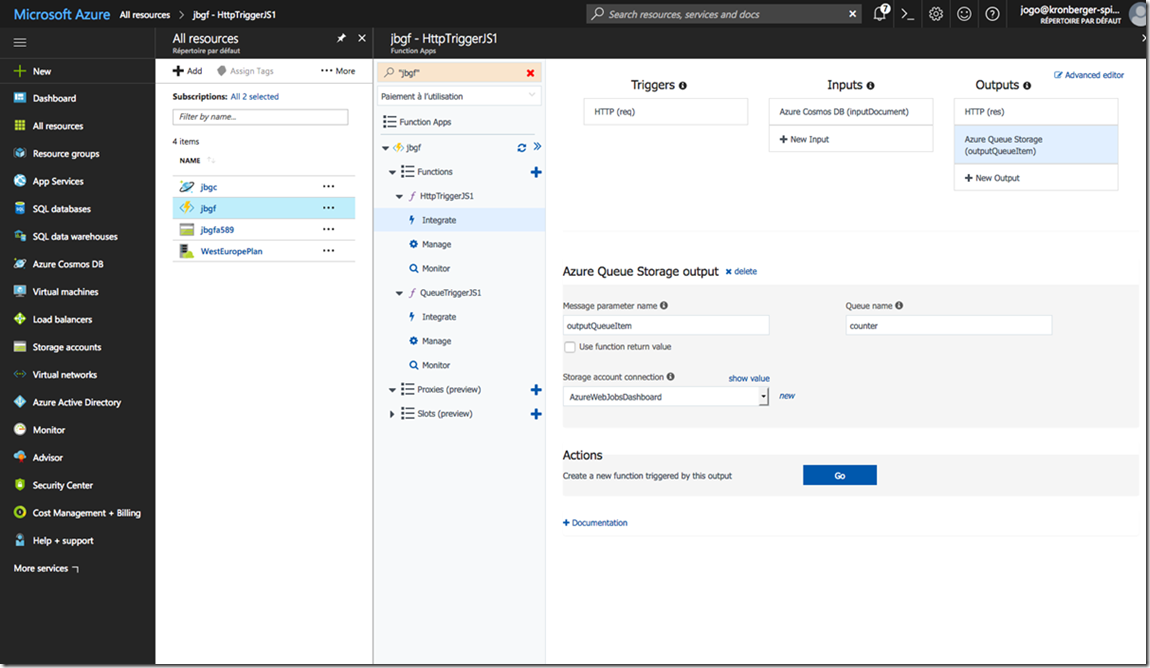
For the output configuration we again insert “counter” into Database name and Collection Name. Now we need a collection named “counter” inside a database “counter” containing a document “counter”, thus we go back to all resources.
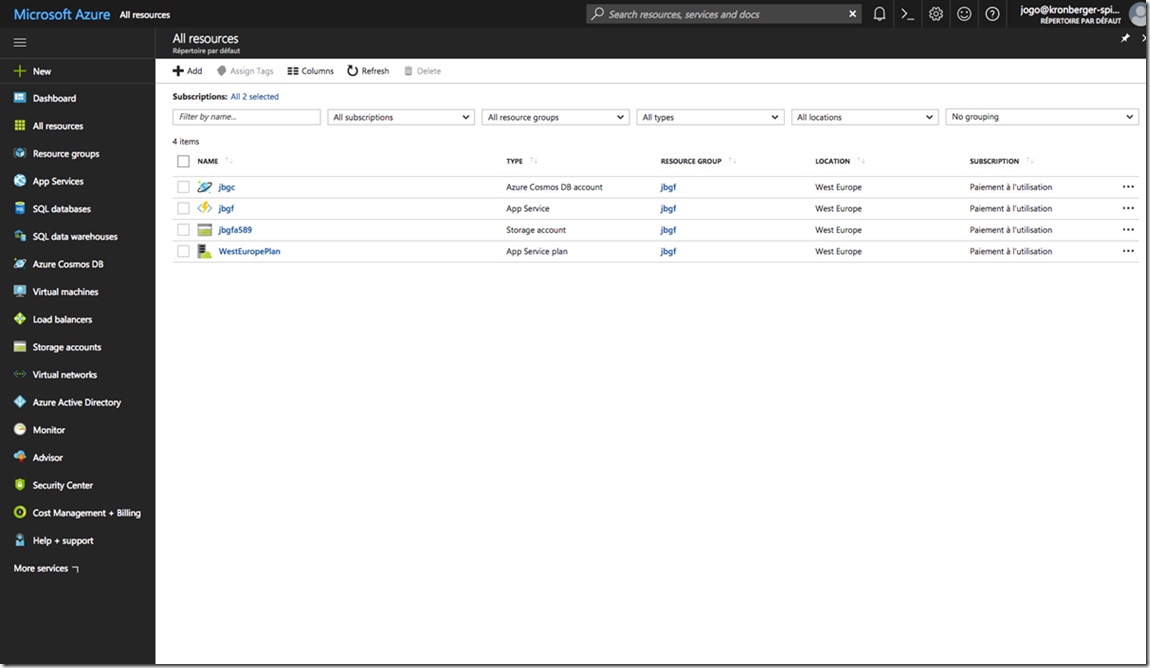
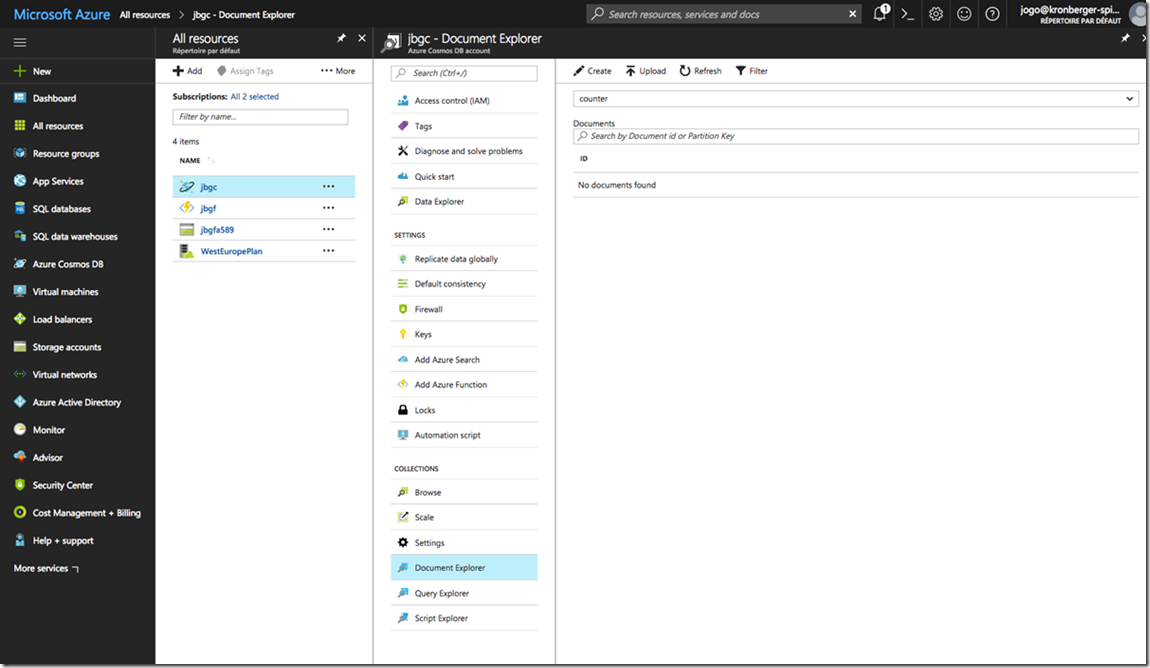
There you should see your Azure Cosmos DB account, click on it and then press the “add collection” button on top.
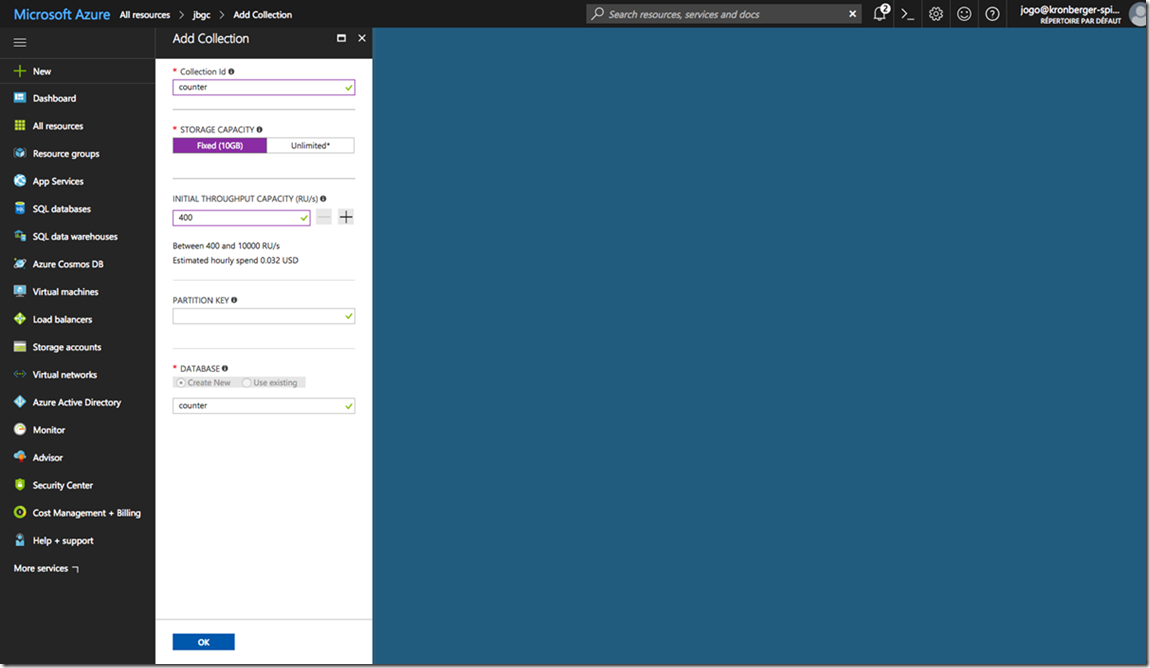
This form should pop up, insert “counter” into the name fields and press “ok”.
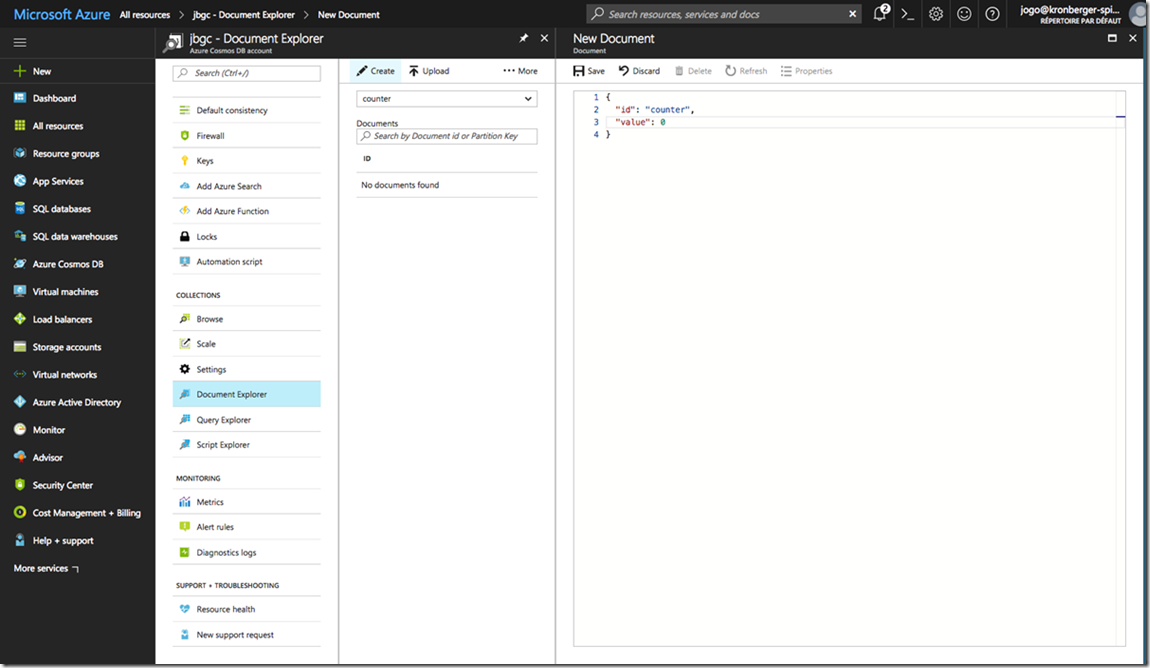
Then find the ”Document Explorer”. To create our initial document press “create”.
Insert the json as shown, so we have one document with the id ”counter” and a value of 0.
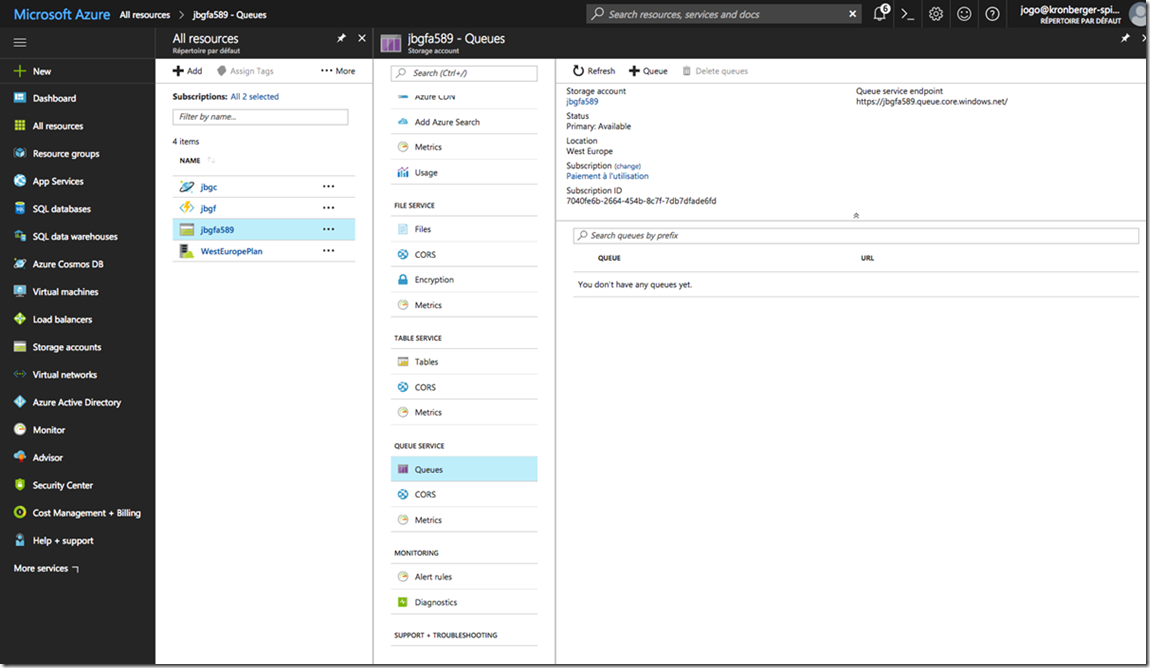
The database is ready to go, but we still need to setup our queue. For this go back to all resources as shown above and this time click on the “Storage account”.
Find the “Queue” menu and press “+ Queue”, name it “counter”. With that done, we need to set two queue config options in our function app, so go back to that one.
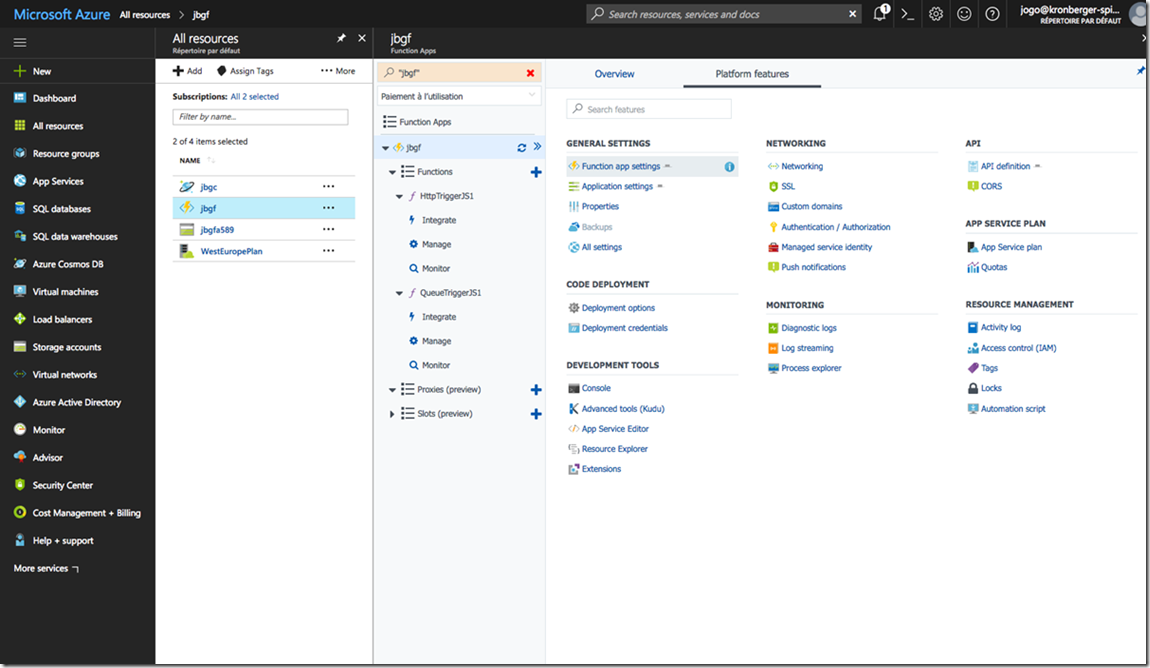
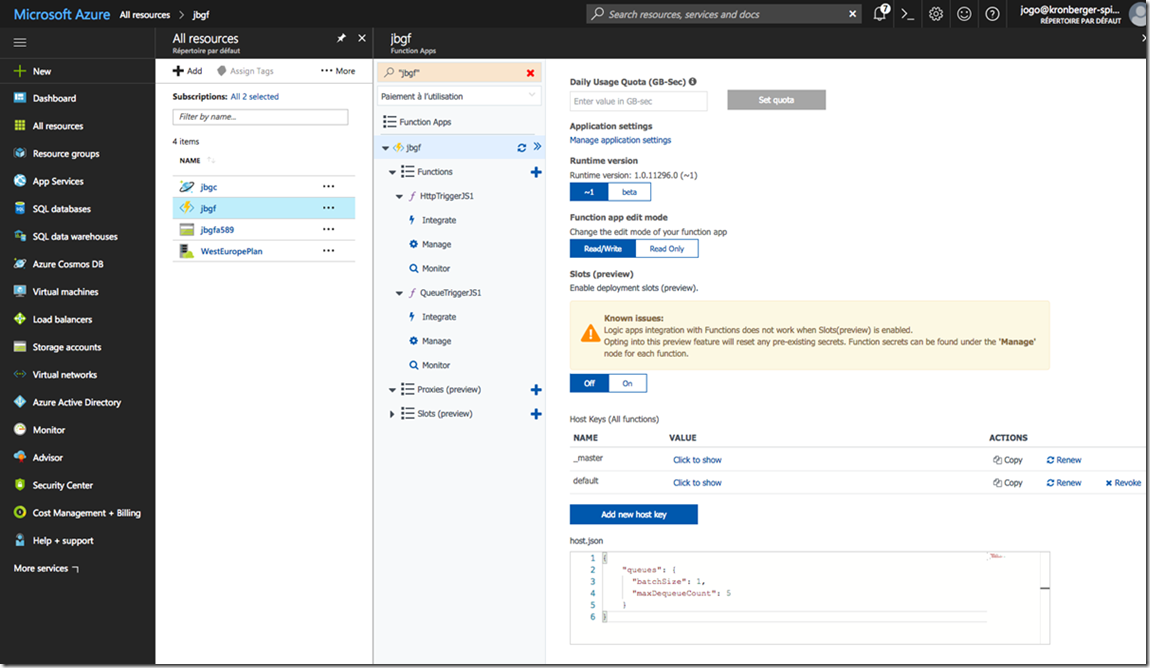
Find the “Function app settings” under the “Platform features” tab, then scroll down to host settings.
Add the host.json settings from above to throttle our queue to only handle one message at a time.
 {
   "queues": {
     "batchSize": 1,
     "maxDequeueCount": 5
   }
 }
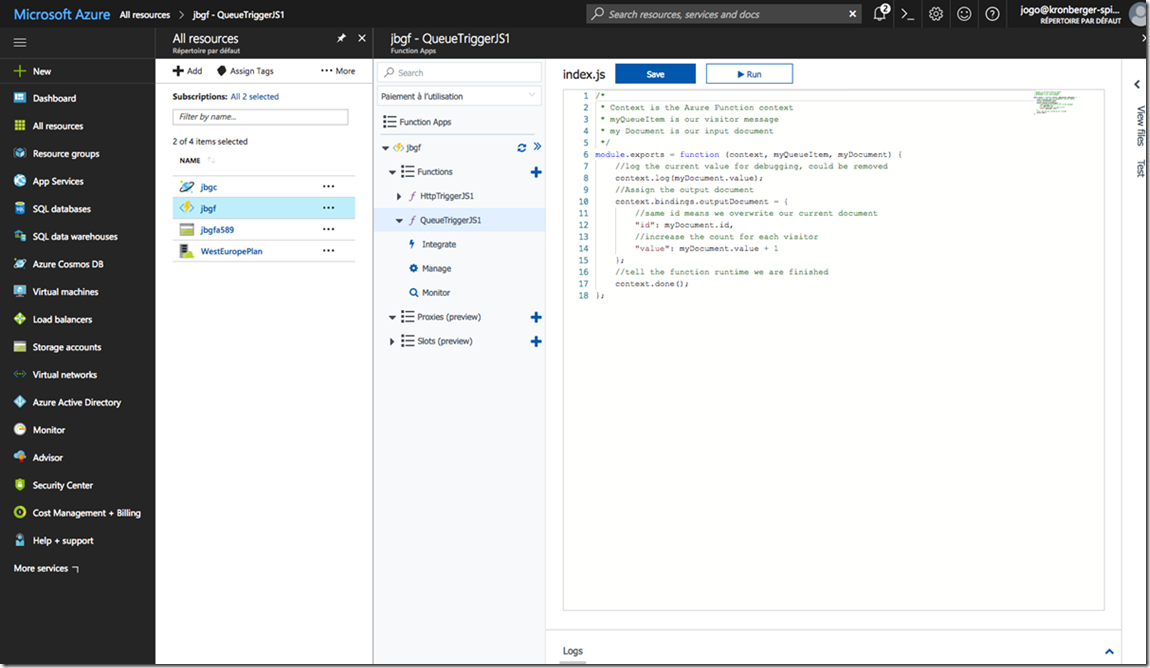
Now we can write our code, click “QueueTriggerJS1”.
Paste the given code into the editor and click run.
 /*
  * Context is the Azure Function context
  * myQueueItem is our visitor message
  * my Document is our input document
  */
 module.exports = function (context, myQueueItem, myDocument) {
     //log the current value for debugging, could be removed
     context.log(myDocument.value);
     //Assign the output document
     context.bindings.outputDocument = {
         //same id means we overwrite our current document
         "id": myDocument.id,
         //increase the count for each visitor
         "value": myDocument.value + 1
     };
     //tell the function runtime we are finished
     context.done();
 };
You should see an ever increasing counter for each time you click “run”. So our data backend works, the HttpTrigger remains to be finished. Go back to its “Integrate” menu so we can connect it to our document and queue. Press “+ New Input”.
Set it up exactly as the input of the queue trigger. Then press “+ New Output”.
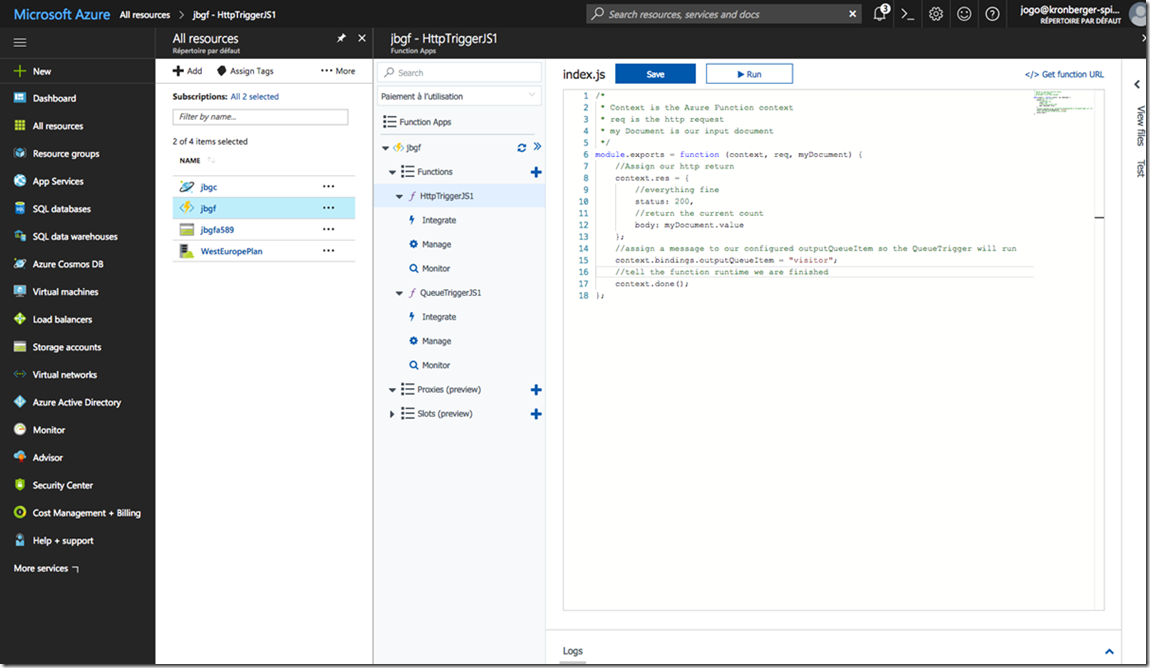
Set the Queue name to “counter” and leave the rest to the defaults. Only the final code remains to be finished, click “HttpTriggerJS1” and insert it.
Paste the following code:
 /*
  * Context is the Azure Function context
  * req is the http request
  * my Document is our input document
  */
 module.exports = function (context, req, myDocument) {
     //Assign our http return
     context.res = {
         //everything fine
         status: 200,
         //return the current count
         body: myDocument.value
     };
     //assign a message to our configured outputQueueItem so the QueueTrigger will run
     context.bindings.outputQueueItem = "visitor";
     //tell the function runtime we are finished
     context.done();
 };
Pressing “Run” will show the current count on the right side as HTTP response.
Time to test our function.
Get the URL from “Get Function URL” and test in your browser.
To test the response times and to check that no visits are missed I recommend the Apache Bench tool:
~/tmp λ curl "https://jbgf.azurewebsites.net/api/HttpTriggerJS1?code=4sO99S/PKIQM7PYc3zzpBpOo4yyRlHhz0NMX8urAv7IaDWj351eWQw=="
421⏎
#Current count was 421.
#Now start 200 requests with up to 50 parallel ones. ~/tmp λ ab -c50 -n200 "https://jbgf.azurewebsites.net/api/HttpTriggerJS1?code=4sO99S/PKIQM7PYc3zzpBpOo4yyRlHhz0NMX8urAv7IaDWj351eWQw=="
…
Concurrency Level: 50
Time taken for tests: 6.448 seconds
Complete requests: 200
Failed requests: 0
Total transferred: 55800 bytes
HTML transferred: 600 bytes
Requests per second: 31.02 [#/sec] (mean)
Time per request: 1611.884 [ms] (mean)
Time per request: 32.238 [ms] (mean, across all concurrent requests)
Transfer rate: 8.45 [Kbytes/sec] received
…
#good response times for our requests
~/tmp λ curl "https://jbgf.azurewebsites.net/api/HttpTriggerJS1?code=4sO99S/PKIQM7PYc3zzpBpOo4yyRlHhz0NMX8urAv7IaDWj351eWQw=="
560⏎
#some requests were missed? ~/tmp λ curl "https://jbgf.azurewebsites.net/api/HttpTriggerJS1?code=4sO99S/PKIQM7PYc3zzpBpOo4yyRlHhz0NMX8urAv7IaDWj351eWQw=="
613⏎
#no, the queuetrigger is caching up ~/tmp λ curl "https://jbgf.azurewebsites.net/api/HttpTriggerJS1?code=4sO99S/PKIQM7PYc3zzpBpOo4yyRlHhz0NMX8urAv7IaDWj351eWQw=="
624⏎
#all hits were accounted for
Our Function app could easily handle all requests and kept a consistent visitor count.
Summary
We created a first Function app and successfully connected it to a message bus and a database. I hope you had fun setting everything up and got a good quickstarter for implementing your own ideas with Azure Functions and other Azure services.
Further Reading
Azure Function documentation: https://docs.microsoft.com/en-us/azure/azure-functions/
DB bindings: /en-us/azure/azure-functions/functions-bindings-documentdb
Queue bindings: /en-us/azure/azure-functions/functions-bindings-storage-queue

