Site Definitions and the SharePoint Solution Generator 2008 Part 2
In the first part of this series I gave a quick intro in to the tools and went through the initial planning stage about creating a site definition.
Now the Next step…
Step 2: Installing the Software
Before any definitions can be created, you need to ensure that your environment is set up. To use either version of the SharePoint Solution Generator you will need to have Visual Studio installed and also a copy of SharePoint. This has to be installed on a server environment but van be either virtual or physical.
The Solutions Generator is packaged as part of the Visual Studio 2008 SharePoint Extensions (currently at version 1.2) and this can be downloaded at this Microsoft Site.
The system requirements for installation of the SharePoint extensions are:
- Supported Operating Systems: Windows Server 2003; Windows Server 2008
- The following is also required:
- Windows SharePoint Services 3.0 (Basic installation only), or any product built on Windows SharePoint Services 3.0, such as Microsoft Office SharePoint Server 2007
- Visual Studio 2008 (Standard Edition, Professional Edition, or Team System)
As an aside there are also some other parts of the WSS 3.0 Tools: Visual Studio 2008 Extensions that will be worth looking at later.
Step 3: Starting to build the the definition
Now that’s the software is installed we can get on with the definition.
The joy with the Solution Generator is that you work in a nice friendly environment that you will probably already know – SharePoint! What the the planning stage has given us is a list of content holders and columns that are eventually going to be in our New Site Definition which can be plugged into SharePoint. The first stage will create a new site in SharePoint, add the additional content holders and columns highlighted in the planning and then package it up.
The first step is to figure out which out-of-the-box site definition to use. In most cases the Team Site template can be used as this gives a lot of the functionality around what the custom solution will also need (for example, an announcements list for posting about new entries). Of course if this is to be a totally new type of site, then the Blank Site template may also be worth a look.
I will assume that you know how to create a site, add content holders and columns.
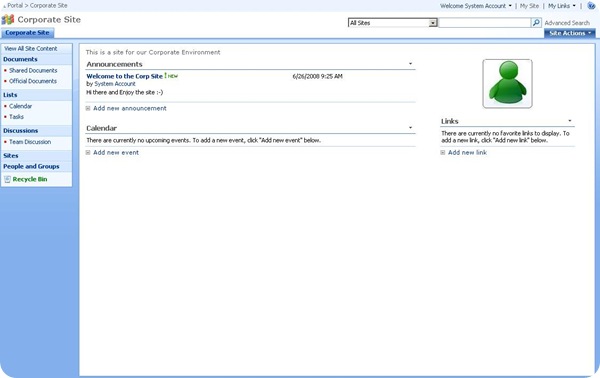
For the purpose of this walk through I’ve created a Team Site with a new Document Library called Official Documents with an added column, an Announcements List called Document Announce and an image on the homepage and an announcement added.
Now that the site is created we can break out the tool that does all the magic.
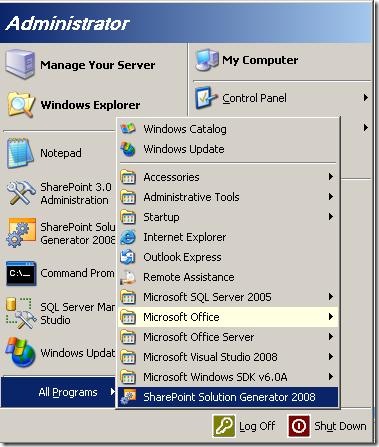 Go to your start Menu and select the SharePoint Solution Generator 2008
This will fire up a new window with two options available to you: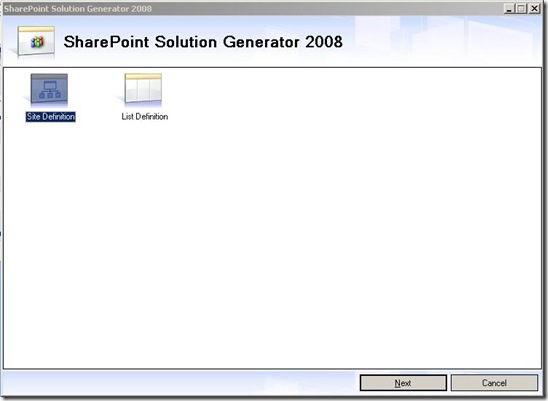
Make sure that the Site Definition option is selected and press Next.
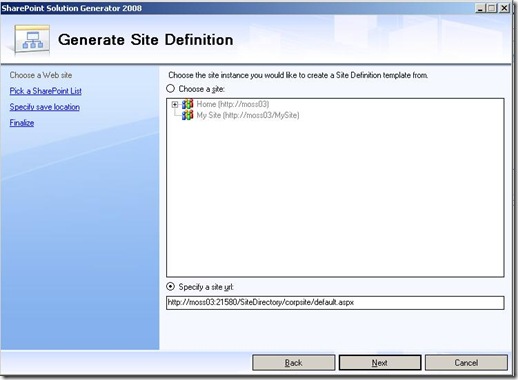
On the next screen you will need to select the radio button at the bottom and enter the web address to the SharePoint Site that you have created. It is always worth keeping your site open in case you need to refer to is. This will provide you with details for your site that you may need to refer to later. After this has been entered, select the Next button.
NOTE: if you make an edit to the site whilst in the generator, it will not automatically be set up. You will need to restart the Solution Generator.
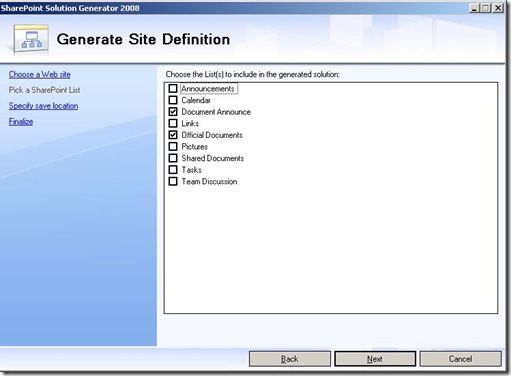
The next screen will provide you with the lists that can be taken as part of the Definition:
The key thing to remember here is to bear in mind the base Site Template that your site has been modelled on. For example, if a Team Site template is used you shouldn’t pick the lists that appear as part of this site by default. When you come to deploy the solution you will find it will generate errors.
In this case only the two custom lists (the Document Announce and Official Documents lists) are selected. Once this is done, press Next.
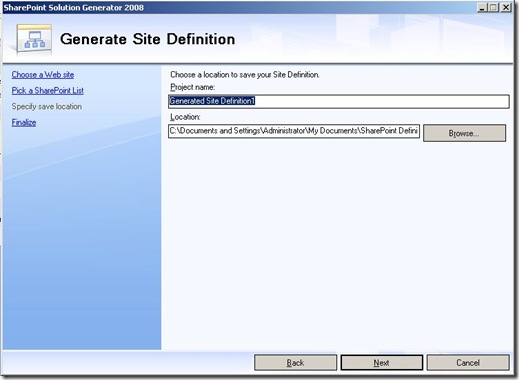
On the final screen you will need to provide the name for the solution. Enter this and then press Next.
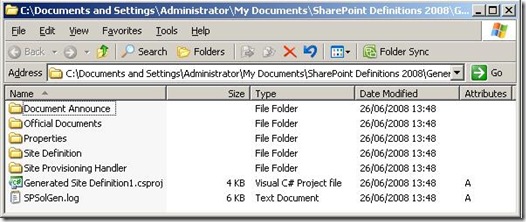
The final screen will provide a Summary of the solution. Check these and then press Finish. The Solution will then be generated and a link provided to view the files, and these look like this:
So there you have it! Your generated solution that is now ready to be deployed.
Comments
- Anonymous
September 06, 2010
The comment has been removed - Anonymous
January 11, 2011
When I looked into the Solution Generator for Visusla Studio 2008, here isn't one compatible with x64 OS development. Is there a way around it or is there a x64 compatible Solution Generator?
