Office 365: Dynamic distribution lists created by email domains.
Dynamic distribution lists offer excellent mechanisms to email groups of users based on their attribute rather than maintaining manual group membership. One request I often receive is how can we create a distribution list for everyone that has their primary SMTP address within a certain domain.
By their initial design a dynamic distribution list supports a recipient filter property. The recipient filter property allows administrators to specify a query of objects to ensure those objects are included in the dynamic distribution list. With this in mind many administrators will attempt to utilize the recipient filter in attempts to filter a domain to create the dynamic distribution list. Here is an example:
PS C:\> New-DynamicDistributionGroup -Name TestDynamicDL -RecipientFilter {PrimarySMTPAddress -like '*.consoto.com'}
Wildcards cannot be used as the first character. Please revise the filter criteria.
+ CategoryInfo : NotSpecified: (:) [], TaskArgumentException
+ FullyQualifiedErrorId : [Server=MWHPR06MB2446,RequestId=c6124483-2c49-4542-a783-4177dbe9119e,TimeStamp=1/29/2019
3:10:33 PM] [FailureCategory=Cmdlet-TaskArgumentException] AE6DCA3
+ PSComputerName : ps.outlook.com
In the recipient filter the wildcard character cannot be the first character. This effectively prevents us from querying everyone regardless of alias that contains the domain specified.
Without the ability to lead off with a wild card character we need to be more creative in how we approach this solution. I find the easiest and most common recommendation is to utilize a custom attribute that is not being utilized for another purpose. In an environment where directory synchronization is available the custom attributes are sourced from on premises Active Directory. Administrators have easy access to the custom attributes through the on-premises Exchange Management Shell. Utilizing powershell administrators could craft a script that would find all objects with a given primary SMTP address where the designated custom attribute is not set to the predetermaned value. The custom attribute can then be updated. The script to perform these operations could be scheduled. Here is an example:
#Gather all remote mailboxes where the primary SMTP address is *domain.com and where the custom attribute 10 is not already the domain attribute.
PS C:\> $mailboxes = Invoke-Command { Get-RemoteMailbox -ResultSize unlimited | where { $_.primarySMTPAddress -like "*domain.org" -and $_.customAttribute10 -ne "DOMAIN" } }
#Iterate through the array and set the custom attribute.
PS C:\> $mailboxes | % { Set-RemoteMailbox -identity $_.primarySMTPAddress -CustomAttribute10 "DOMAIN" }
#Iterate through all mailboxes where the custom attribute 10 is set to the defined value and where the primary smtp address is not at the designated domain.
#These are users whos primary SMTP address changed form the designated domain.
PS C:\> $mailboxes = Invoke-Command { Get-RemoteMailbox -ResultSize unlimited | where { $_.primarySMTPAddress -notlike "*domain.org" -and $_.customAttribute10 -eq "DOMAIN" } }
#Iterate through the array and NULL the custom attribute.
PS C:\> $mailboxes | % { Set-RemoteMailbox -identity $_.primarySMTPAddress -CustomAttribute10 $NULL }
There are some advantages to this approach.
- The script can be scheduled eliminating administrator intervention.
- The script pulls the smallest number of objects to be changed with each iteration through filtering.
- The script utilizes custom attributes which are included in the default replication set with AD Connect.
- The script changes the on premises value to match the replicated cloud value – ensuring that it is visually easy to determine how the values are derived.
There are some dis-advantages to this approach.
- Distribution list membership is only updated / modified after the script has executed leading to delays in group membership delays in Office 365.
An alternate approach is to utilize the Azure Active Directory Connect synchronization rules to populate the designated custom attribute. Using the ad connect rules editor we can create a low priority inbound rule. The rule type would be a join, operate on a user object in the local active directory, and translate to a person object in Office 365. We will transform the specified custom attribute using an expression searching for a field that contains a value. Let us take a look at how this would operate.
The first item to look at is what attribute will be base the filter off of. If we perform a metaverse search and locate a reference member, we can review the attributes of the user. In our instance the mail attribute reflects the primary SMTP address of the user.
Having identified the mail attribute as containing the information we want to filter on – we can begin creating the rule to modify the custom attribute. The synchronization rule editor is utilized for this operation.
The first step is to ensure that we have the direction is set correctly. In our instance the direction will be INBOUND.
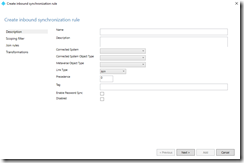
The second step is to select the “Add New Rule” button. This launches the create inbound synchronization rule editor.
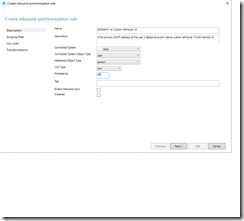
The third step is to establish the properties on the description page. I recommend a name field that accurate describes what the rule is going to do. I also recommend that we supply an accurate description that allows future administrators to understand what has changed. The connected system will be the local active directory. The connected system object type is “User”. The metaverse object type is “Person”. The link type is Join. The precedence should be lower than any of the default rules. In this case default rules begin at 100, so we will select a precedence of 50.
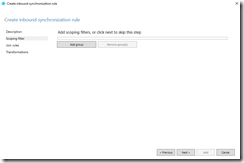
The forth step is to review a scoping filter. In this case there are no scopes that will be defined.
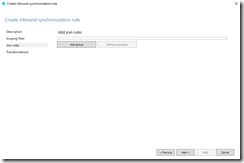
The fifth step is to review join rules. In this case there will be no join rules.
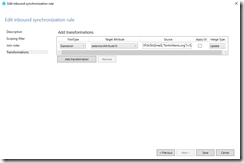
The last step is to create the transformation that will stamp the customer attribute 10. To begin this process select the add transformation button. Under flow type – select expression in the drop down menu. Under target attribute – select the target custom attribute desired. In this example extensionAttribute10. The source will be based off supported functions for expressions in transformation. In this case the following syntax:
IIF(InStr([mail],"fortmillems.org")>0,"DOMAINA","")
If the substring of the domain exists in the mail attribute the position within the string is returned otherwise 0. If the position is returned stamp DOMAINA otherwise stamp nothing.
There are some benefits to this approach:
- There are no scheduled tasks or scripts involved.
- The user is immediately added as a member of the dynamic DL upon replication.
There are some disadvantages to this approach:
- I generally discourage rule modification in AD Connect unless absolutely necessary. Modifying rules can have un-intended consequences, rule changes must be tracked, and build documentation prepared to ensure that any future builds of AD Connect have the same rules. IE – this can often introduce complications to installations.
- The on premises attribute no longer matches the cloud attribute for the custom attribute – since the attribute was transformed via a rule in AD Connect. This sometimes leads to confusion as to the source of values and how to handle future modifications.
- Modifying the rule set requires that a full ad connect sync cycle be initiated – which may cause outages in the overall sync cycle depending on the size and number of objects to be resynchronized.
- The proposed rule only works if there’s a single domain in question.
What happens if there are multiple domains. If there are multiple domains in play the rule expression must be modified. A switch statement must be utilized. The switch statement evaluates the mail attribute for each of the mail domains – and stamps the custom attribute with a value. As with an IIF statement there must be one results returned that is true. In this sample I set anyone without a domain that we’re interested in making a dynamic distribution group to NODOMAIN. Here is the example expression:
Switch(InStr([mail],"domainA.org")>0,"DOMAINA",InStr([mail],"domainB.com")>0,"DOMAINB",True,"NODOMAIN")
You could also have the custom attribute stamped with NULL if there was not a matching domain.
Switch(InStr([mail],"domainA.org")>0,"DOMAINA",InStr([mail],"domainB.com")>0,"DOMAINB",True,"")
These are some example methods to utilize on premises attributes to provision dynamic distribution lists in Office 365 based on email domain.


