Migrating SharePoint for TFS
Data can be migrated from server that hosts SharePoint products for TFS to a different hardware.
This articles walks you through the steps involved, during the migration of the SharePoint data for TFS, to a new or different hardware. The screen shots and examples used in this article are from 2013 version of TFS and SharePoint.
The migration involve detach and attach of the content database that is being used. When the content database is detached, the database reference for the project portal is removed. Within SharePoint, when a content database is detached, the list of sites in the content database is removed from the configuration database. When the content database is reattached, the list of sites that are stored in the content database is re-added to the configuration database of the new deployment of SharePoint.
Points to be kept in mind:
- The migration of SharePoint data does not need a TFS down time.
- However, the team project portals will be unavailable during the migration window.
- Avoid creating team projects during the window as SharePoint site settings will be unavailable.
- The version and edition of SharePoint and SQL server in the source and target servers should be the same.
Required Permissions:
You should be a member of the following groups to perform the migration:
- Administrators security group on Windows Servers
- Team Foundation Administrators and Admin Console Users in TFS
- sysadmin on the SQL server
- Farm Administrators on the SharePoint server
Prepare for the migration
- Install and configure SharePoint on the target server. SharePoint can be installed and configured either separately or from the TFS configuration tool.
- Install Extensions for SharePoint products on the new server.
Ø The option to install Extensions for SharePoint products is available on the main page of the TFS installation wizard.
Ø If SharePoint is not already installed on the server, Choose Install SharePoint Foundation 2013
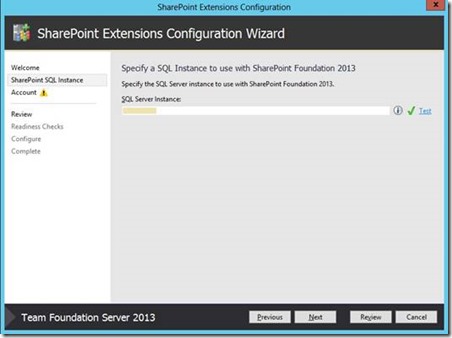
Ø Once the installation completes choose Next and type the name of the SQL Server or named instance that will host the configuration databases for SharePoint and choose Next.
Ø Type a user account and password for the service account for SharePoint and then choose Next
Ø Review the settings and configure.
- Once SharePoint is installed and configured, create a new web application to be used with TFS, from the SharePoint Central Administration page. This is available under Application Management à Manage Web Application à New
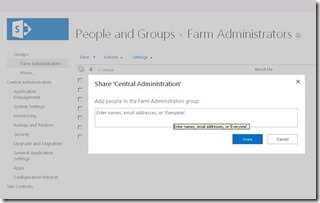
- Add the TFS service account to the farm administrators group on the new SharePoint farm. Navigate to Security à Manage Farm Administrators Group à New
- Detach the SharePoint content database for the newly created web application as we will be attaching the backup of the content database from the old server to this web application.
Ø From the SharePoint Central Admin, navigate to Application Management and then Manage content databases under Databases tab.
Ø Select the content database of the newly created web application and check the Remove content database option and click OK.
For more information on adding TFS service account as farm administrator and detaching the old content database, refer the link : https://msdn.microsoft.com/en-us/library/jj620931(v=vs.110).aspx
- Backup the content database that is being used for TFS, in the current deployment of SharePoint and restore it to the new SQL server.
Redirect SharePoint Products to the New Location of the content Database
- Open a Command Prompt as an administrator on the new hardware that is running SharePoint.
- Change directories to Drive:\Program Files\Common Files\Microsoft Shared\Web Server Extensions\<version>\bin and run stsadm.exe with the following parameters, where SharePointFoundationServerName is the name of the server where you installed SharePoint, and SQLServerName is the name of the server where you restored the WSS_Content database as part of restoring TFS databases:
stsadm.exe -o addcontentdb -url https://SharePointFoundationServerName/sites -databasename WSS_Content -databaseserver SQLServerName
- After that command completes successfully, type the following command, where Domain\UserName is the account you used to install and configure SharePoint for use with TFS:
stsadm.exe -o addpermissionpolicy -url https://SharePointFoundationServerName -userlogin Domain\UserName -permissionlevel "full control"
Redirect TFS to the New Web Application
- Open TFS Administration Console on the SharePoint server and navigate to the Extensions for SharePoint Products tab and click on Grant access
In the pop up window, add the URL for the Team Foundation Server and choose the web application we have configured to use with TFS in the SharePoint Web Application drop down.
- Open the administration console in the Application Tier server and navigate to SharePoint Web Applications. Click on the old web application, choose Change and update the settings. Enter the new central admin and web application URLs.
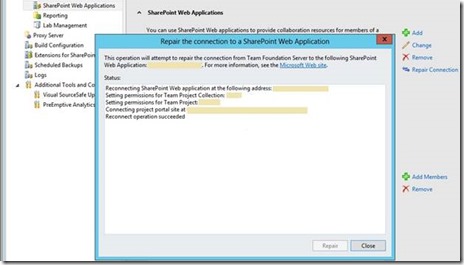
- After the information is updated, choose Repair connection. This will ensure that everything works properly.
- Validate the migration by browsing the project portals.
Content created by – Sreeraj Rajendran
Content reviewed by – Romit Gulati


