The IoT Journey : Getting Started with the Raspberry Pi 3
If you are involved with “Big Data”, “Advanced Analytics” or “Cloud Computing”, you’ve likely heard all the hype around the “Internet of Things” or “IoT”. It used to be that IoT meant things like the connected refrigerator, or networked thermostats. Now it seems like IoT is being applied to just about anything that can connect and share information, be it “wearables” that track fitness information, RFID tags that track objects, or more complex ideas like Smart Meters and connected buildings. In short, IoT is currently in the midst of a major hype cycle, and as such everyone seems to be talking about it, or wondering what it’s all about.
Simply put, IoT at it core is a connected device (it doesn’t have to be connected to the Internet) that shares some data about itself somewhere with something.
One of the most talked about devices over the last couple of years has been the credit-card sized computer, Raspberry Pi. The Raspberry Pi was originally designed to be used in the classroom to teach kids about programming and electronics, but due to its capability (there are those who use the Pi as their primary computer!) and price (you can buy a new Raspberry Pi for $35 in the US), an entire community of hobbyists and professionals use the Raspberry Pi for their work and play.
I have been working with a Raspberry Pi2 for the last year, but I had never gotten the WiFi adapter that I purchased to work properly, so I was really excited to hear that not only was the Raspberry Pi3 faster, it also had onboard WiFi. I want to utilize WiFi so that the device can be portable and used wherever I might be working.
If you want to learn how to develop IoT applications, there is no better place to start than with a Raspberry Pi and the Pi community. Be warned though, this community will suck you in, and you will find yourself immersed in a world of code, wires, sensors and frameworks before you know it!
The First Steps
One of the major announcements that Microsoft made with Windows 10 is that there is a version that will run on the Raspberry Pi. This version of Windows is called “Windows IoT Core” and is designed to be the OS layer for IoT devices. If you are a developer that focuses on Windows technologies, this is a natural platform for you to gravitate towards. Of course the “New Microsoft” embraces Open Source platforms as well as our own, so I thought it would be interesting to see how far I could extend my Windows development skills into the IoT world using the popular open source Linux Operating System. This post marks the beginning of that journey…
Step One – Obtain the Hardware
There are many places that you can buy a Raspberry Pi3, including Amazon, Fry’s Electronics (in the US) and RS-Online (in the UK). For this project, I decided to buy the kit offered by the Microsoft Store (I was already there, and had other things to buy, so why not?). The specific items I purchased are:
- Raspberry Pi3 – This kit comes complete with an SD-Card with the NOOBS installer already configured. In my case though, the SD Card was NOT a class 10 card, meaning it did not actually work properly with Windows. It was fine for Linux, which is what I ended up using for reasons stated above, but it is something to look out for. The Microsoft store has subsequently fixed that issue so any new orders will have the correct card.
- Raspberry Enclosure – I wanted to make sure that the little computer was properly protected and looked good, so I decided to buy the official enclosure. There are plenty of different cases available for the Pi, but this is the “official” one with the proper logo.
- Power Adapter – This is an important piece! It’s important to note that power is supplied to the Raspberry Pi via the ubiquitous micro-USB port. Most of us have tons of these just laying around. I wanted to make sure though that I had a proper adapter that supplied the full 2.5A that the Pi will demand.
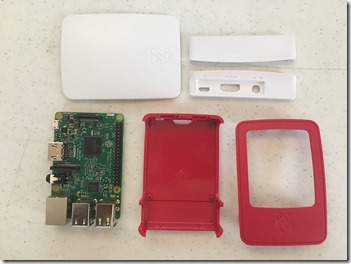
Once I returned home and unpacked everything, it all looked like this:
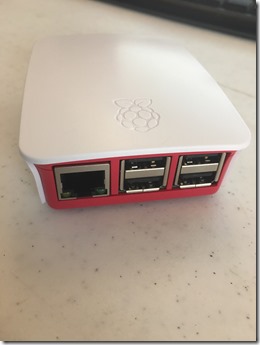
Once assembled (a very simple process, just drop the computer onto the posts in the case bottom, and then snap the rest of the pieces together around it:
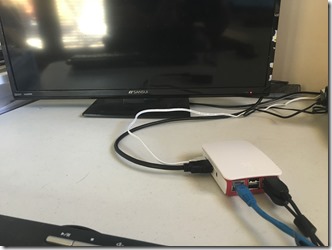
Once everything is assembled, you simply plug the SD card into the Pi, then attach a USB keyboard and mouse along with an HDMI cable to connect to the TV/monitor and you’re ready to go. You should also plug in a regular network cable if you can, it will give the setup utility the ability to download the latest OS.
There is no power switch on the Pi, so to boot it you simply plug the power adaper into your AC power.
Step Two – Boot and Configure
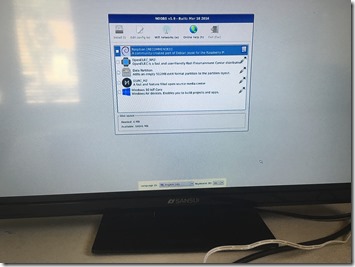
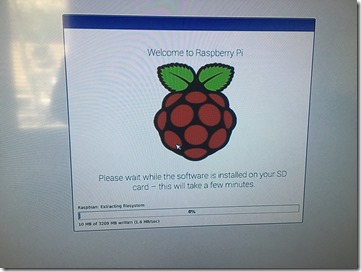
If you purchased a version of the Raspberry Pi with NOOBs included on the SD-card, you simply have to insert the SD card and boot. If not, you’ll need to first download a copy of the NOOBS installer and follow the instructions on how to set it up. It really is a simple process (you just format a new SD card and then copy the contents of the NOOBS archive onto the card), so nothing to be concerned about. Once the Pi boots, you’ll see the configuration page:
Once NOOBS has started and displayed the available OS images to install, make sure you select the appropriate region and keyboard settings at the bottom of the page, and then select the Raspbian image (should be the first one on the menu) and then select Install. This will start the installer (which will take about 10-15 minutes).
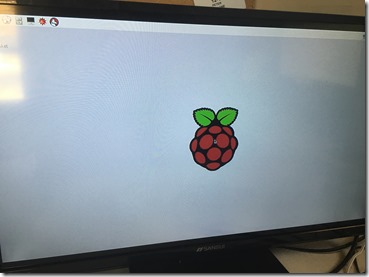
Once the installer completes, the Pi will reboot and then start Raspbian Linux and will then automatically login as the user “Pi”.
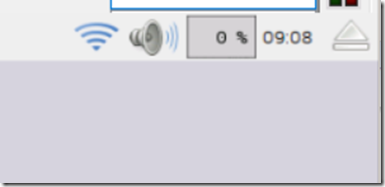
Once the Pi has restarted properly and Raspbian is up and running, you can configure the WiFi connection by clicking the network icon (upper-right of the screen, just to the left of the speaker icon) and joining an available WiFi network.
Once you are connected to the WiFi network, you’re ready to configure the remote access capabilities of the Pi, as well as changing the password of the Pi user.
Step Three – Configure for Remote Access
If you are a Windows-only person and haven’t spent much time using Linux, this is where things are going to get a little confusing. If you’re used to the Linux world, then most of what I put here is going to be extremely basic for you.
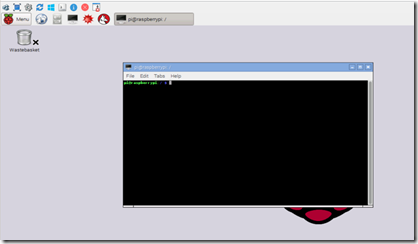
Linux was designed first and foremost to be a Server Operating System platform, and as such much of the work that you will do will be from a command line shell. The shell is accessed via the Terminal program, which is started by double-clicking on the icon (It looks like a monitor and is located to the right of the menu button in the GUI).
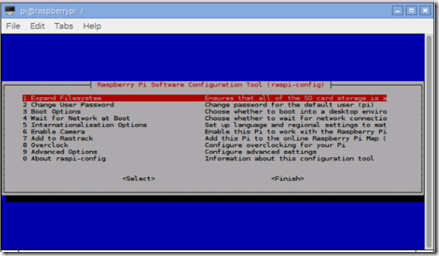
Once in the shell, execute the command (by the way, in Linux it’s important to note that case matters when typing commands. “Sudo” and “sudo” for example are not equal) sudo raspi-config which will start the configuration manager. The “sudo” command basically tells the OS that you want to execute the command as an administrator (“root” in linux terms).
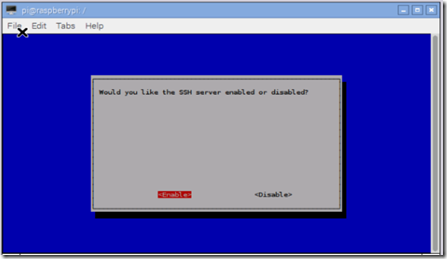
Use the arrow keys to navigate to Advanced Options, and then select the SSH option. Enable the SSH Server. (SSH is the remote access tool used to enable a secure shell from one computer to another)
Once the SSH Server is enabled, you will also want to change the time zone (located in the “Internationalisation settings” as well as the password for the Pi user. You can select the finish option at this point and then type “exit” to exit the terminal program/ shell.
Note: There is a very good guide located here that explains how to enable the remote GUI access as well, along with instructions on how to obtain and download appropriate programs for Windows to access the Pi remotely. For me, I don’t use the GUI that often, but when I do I use a program called Ultra VNC Viewer which is very lightweight and simple. For my remote shell, I’m using the Insider Preview of Windows 10, which includes the Bash Shell. For those not in the insider program, you can use the PuTTY tool mentioned in the article or any remote SSH tool. For file transfer, I’ve found that FileZilla is probably the easiest to use.
Configuring SSH to use Certificate Authentication
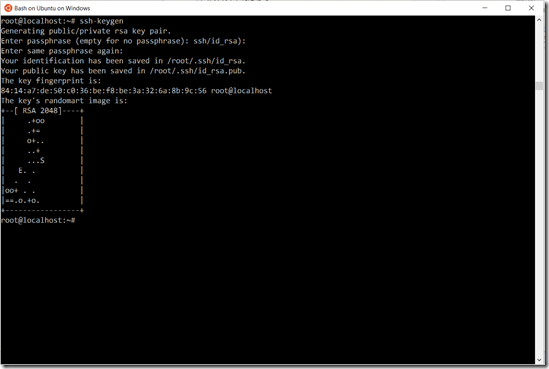
I hate having to type passwords, and tend to do the extra up-front work to enable any remote machine that I’m working with to enable certificate authentication instead of passwords. If you don’t mind typing passwords, you can skip this section, but if you’re like me and hate typing the passwords, then start your preferred shell on the remote machine, and execute the ssh-keygen command. Do not enter a passphrase for the key. This will create a new key pair and install it into the ~/.ssh folder.
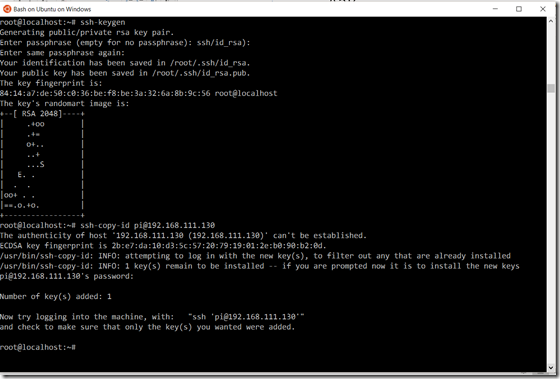
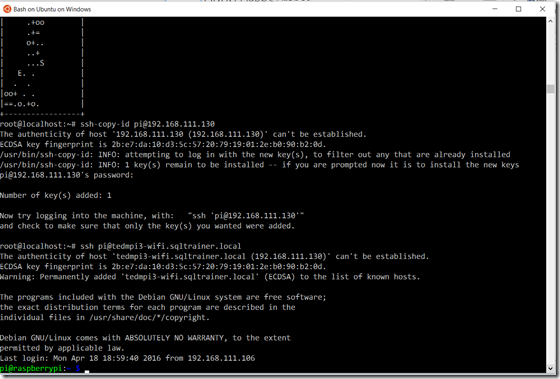
Once the key is generated, execute the ssh-copy-id command, using the IP address of the Raspberry Pi (either WiFi or Cabled, depending on which method you’re using to connect) as the destination and the user “pi” as the user. You will be prompted for the password of the Pi user, but after that you will not be prompted again.
Once this is done you are ready to test the ssh command to see if you can connect without password authentication. Type ssh pi@<ip address or name of remote machine> to connect:
Congrats! You now have a remote connection to the Raspberry Pi without using a password.
Step Four – Preparing the Development and Test Environment
Once remote access is configured and working, you are ready to prepare the Pi for Iot Development and testing. I am a big fan of Microsoft Visual Studio (which you can download for free)and since most of the development work that I do is related to the various demos and proof of concept projects that I build for customer presentations, I didn’t really want to learn a new environment to play with the Raspberry Pi, plus I thought that it would be an interesting test to continue to write code in C# on Windows, then deploy and execute that code on the Raspberry Pi. As you will see, this turns out to be an almost trivial task (for the simple applications, as later posts in this series will show, it does present some serious challenges as well).
The first step to enabling the execution of C# code on the Raspberry Pi is to download and install the Mono framework. The Mono project is an open source implementation of the Microsoft .NET Framework that allows developers to easily build cross-platform applications. It is very easy to install on the Pi, and uses built-in linux commands to implement.
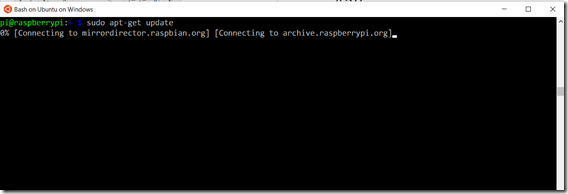
To install the Mono framework on the Raspberry Pi, first update all of the application repositories by using the apt-get update command. (remember to execute the command as root by using the sudo command)
Once the update is complete (depending on the version of Raspbian and the speed of your Internet connection, it can take as little as a minute or as long as 10 minutes) you can then install the complete Mono framework by executing the apt-get install mono-complete command. (again, don’t forget to run it as root by using the sudo command)
Once Mono is installed (This will likely take several minutes to complete) you are ready to develop and deploy your first simple application.
Step Five – Hello Raspberry Pi!
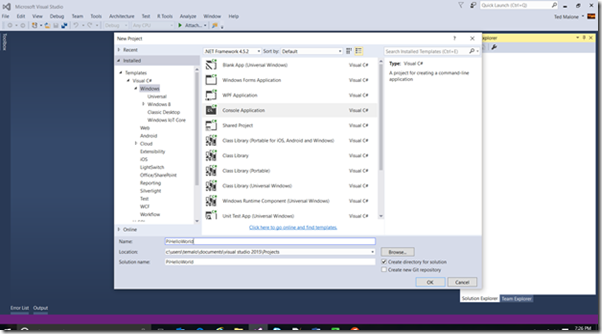
No “how to” article would be complete without a “Hello World” application, and I certainly don’t want to disappoint. To start, on your Windows PC, launch Visual Studio and create a new C# Windows Console Application. Title it “PiHelloWorld”.
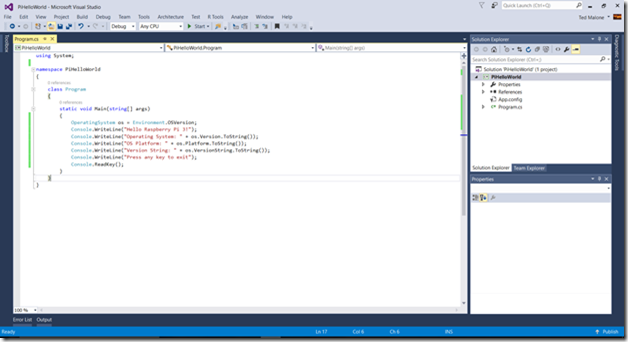
Then in the Program.cs file, add the following code. Note that you are targeting any CPU and using the .NET 4.5 framework.
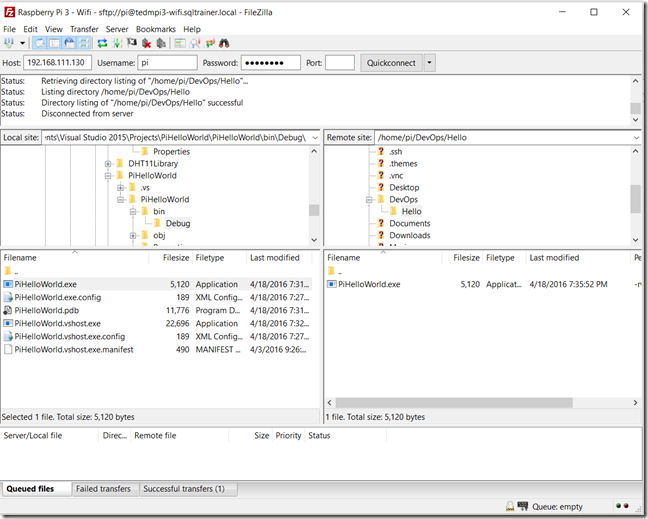
Then once you are happy with the code, select Build to build the application. Once the application builds without errors, copy the PiHelloWorld.exe file to the Raspberry Pi using a file transfer utility as discussed above. (I use FileZilla)
Once the file is copied, switch back to the Raspberry Pi and execute the code with the mono command. Remember that Linux is case-sensitive!
This will execute the application and prove that the app is actually running on Linux on the Pi, even though it was developed on Windows in C#.
Conclusion
This blog post details the start of a journey, and explains how to get a Raspberry Pi3 ready to develop and deploy IoT applications written in C#. Following posts in this series will explore some of the sensors available that can be connected to the expansion port of the Pi, and will also explain the process of connecting the Pi to Microsoft Azure and the Microsoft IoT Suite of tools available in Azure.
Comments
- Anonymous
May 30, 2016
What if you don't wan to know or lean C#. What other languages can be used?- Anonymous
May 30, 2016
Well, if you don't want to use .Net, you can use C or C++ as well as Python natively on the Pi. If you purchase the sensor kits that I recommended, most of the samples there are written either in C or Python.. - Anonymous
August 23, 2016
C# is an easy to learn language and far superior to C and C++. Not to mention, if you learn C# you get better paying jobs as a developer because a significant percentage of the corporate world uses C#. I have been a CIO for over 17 years and have supported large solutions in C# and .NET.
- Anonymous
- Anonymous
November 06, 2016
Ted i tht u can setup ssh without configuring by screen if you know the ip and have connected through lan - Anonymous
March 17, 2017
I recently got a job using C#/WPF to interact with sensors, cameras, and other hardware. I am a recent graduate of a coding bootcamp that only taught web applications using Java. The new job is patient while I fumble around the massive code base. I am hoping to do some smaller projects on my own using a RaspPi and some sensors. I hope you continue to add to this. If you have any resources please share. - Anonymous
May 26, 2017
Nice article, quite helpful. Thanks. - Anonymous
June 06, 2017
Hi Ted,Great article to start with. I was looking to get C# running on my RPi3 when I stumbled upon this one.Do you have some more articles on how to create a real IoT device from the RPi? Perhaps create a REST-API service?Additionally, what kind of C# code can run on the RPi3 this way? Just the Core .NET? or the full blown .NET suite?Kind regards
