Assess Your Network’s Readiness for Skype for Business Online
Introduction : Skype for Business Online has specific network requirements in order to provide end-users with an optimal experience. Customers will need to assess the readiness of their network to ensure it can provide the level of experience that both the business and end-users are expecting. The purpose of this blog post is to describe how to use the Skype for Business Network Assessment Tool and perform an "Essentials Assessment" to see if your network meets the Jitter, Packet Loss and Latency requirements that are needed to provide said experience.
IMPORTANT: Network readiness can be a very deep topic, therefore we will not cover it end-to-end in this blog post. Please refer to the Assess stage of Skype Operations Framework for additional information and a step-by-step process on how to conduct the full network readiness exercise and how to prepare your organization for such a project.
Note: Many of the images and diagrams in this post have been sourced from the Skype Operations Framework (SOF) website. You can download the full PowerPoint decks with these slides and other supporting documentation from the SOF website here.
Background:
The following diagram illustrates the requirements for an optimal audio/video and meeting experience when using Skype for Business Online. Note, these requirements are detailed further in this article.
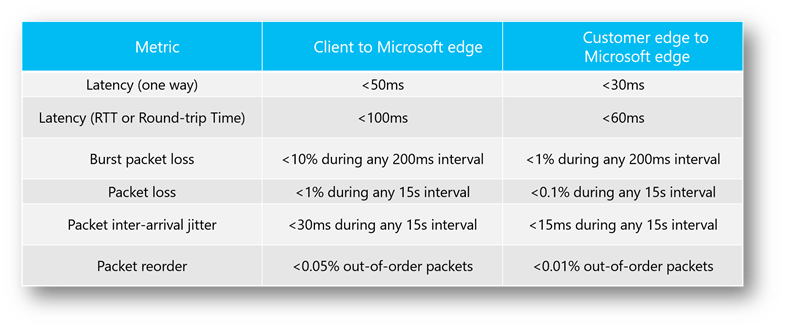
To understand if your network is able to meet these requirements, a Network Assessment will need to be performed. According to the Skype Operations Framework there are two assessments available: Essentials and Advanced. The idea is to first run thru the Essentials Assessment to get a baseline and identify any potential weak areas. If weak areas are identified or additional insight is needed (i.e. a wireless site survey or WAN analysis) then an Advanced Assessment is required. In this blog post, I will only be discussing the Essentials Assessment. The objective of a Network Assessment is the following:
Unveil risk areas
- Helps determine potential weak spots
in the network - Prevents congestion points before implementation
Network recommendations
- Provides recommendations for network configuration
- Guides through network optimization
such as QoS - Prepares for additional network activities
- Provides insight into network performance
Prepare for operations
- Readies customer to redeliver through lifecycle (remember, the assessment is not a one and done thing. Just like SOF, it is a continuous lifecycle as changes occur in your network the assessment will need to be re-delivered).
The following figure illustrates the differences between the two types of assessments.
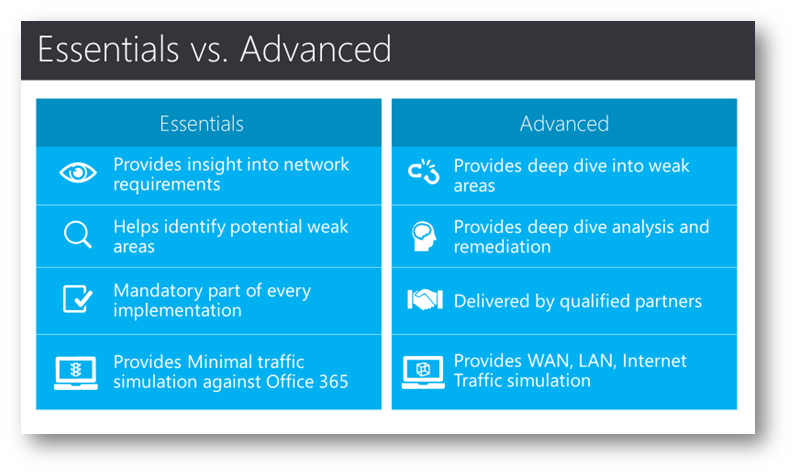
If you believe an Advanced Assessment may be warranted, review the following diagram to understand the triggers of the Advanced Assessment. Please note a list of qualified Advanced Assessment Microsoft Partners can be found here. Let's take a look installing the tool for the Essentials Assessment in the next section.

Installing the Skype for Business Network Assessment Tool:
The Skype for Business Network Assessment Tool will perform a traffic simulation on the network by measuring against our published networking targets found here, and must be run on every site that will be enabled for Skype for Business Online (on both client and edge machines if in Hybrid). This tool runs on any Windows laptop, desktop or server capable of running the Skype for Business Client (i.e. Windows 7+\Server 2008 R2+ Dual core 2,4 Ghz, 4GB RAM). It will use the same ports and protocols as the Skype for Business Client as documented here
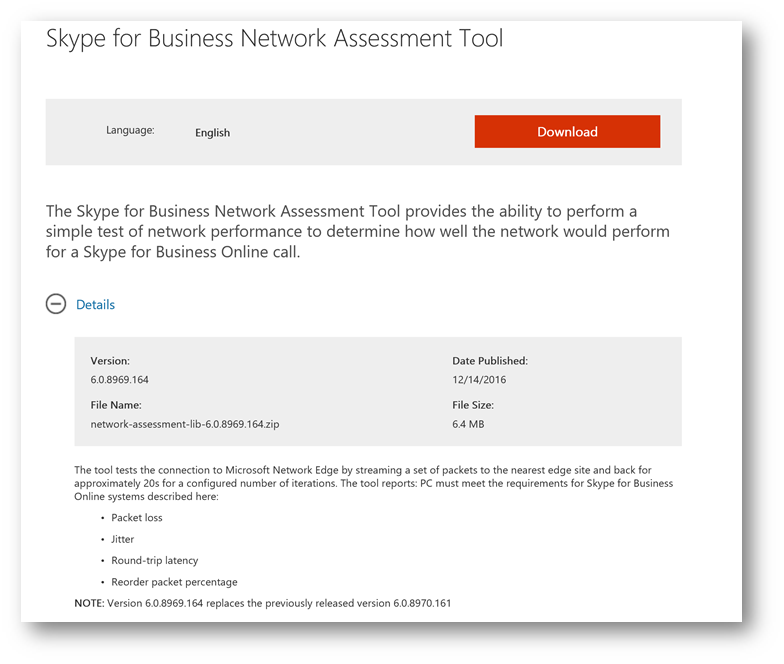
To download the tool, browse to https://www.microsoft.com/en-us/download/details.aspx?id=53885 and click Download:
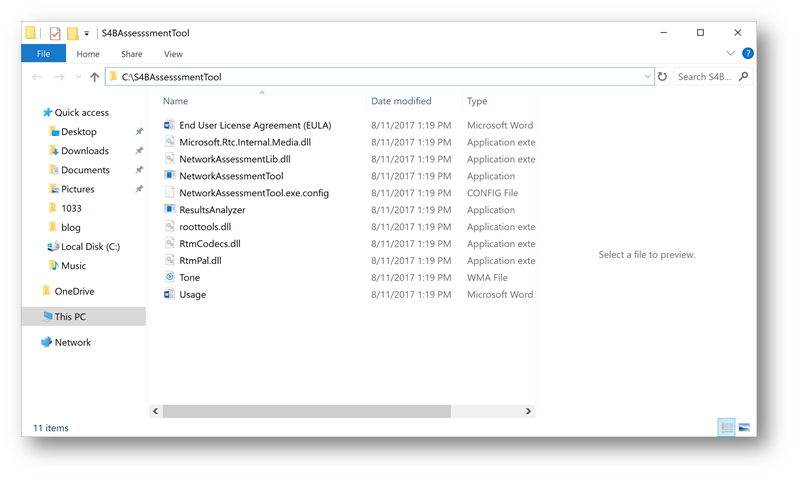
Once downloaded, unzip the tool to a folder that will be easy for you to access. In my example, I will unzip to a folder c:\S4BAssessmentTool
Run the Tool:
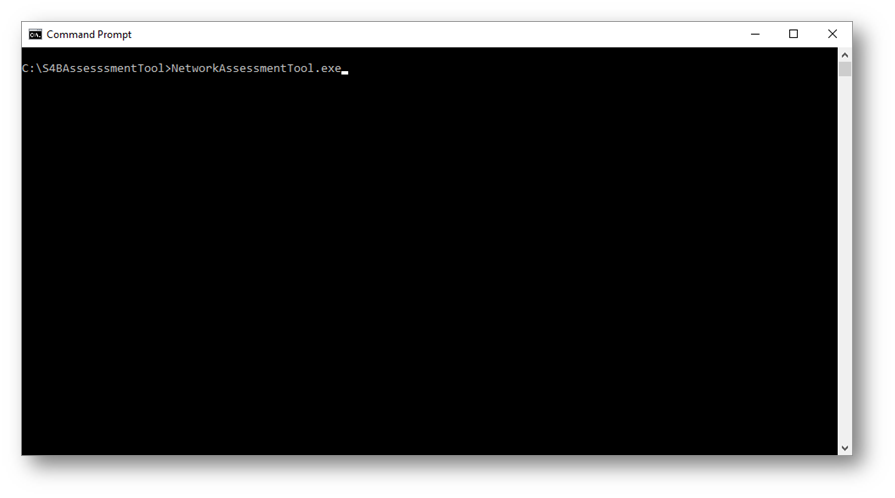
Next, to run the tool launch a command prompt, navigate to the directory of where you extracted the tool to, and type the following command: NetworkAssessmentTool.exe then press Enter
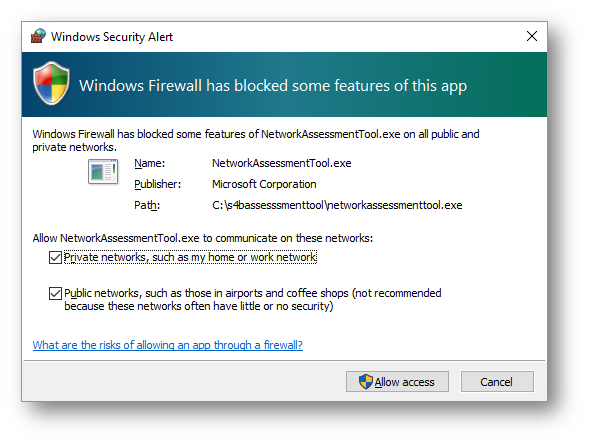
Windows Firewall may prompt you with the following dialog box, click Allow Access
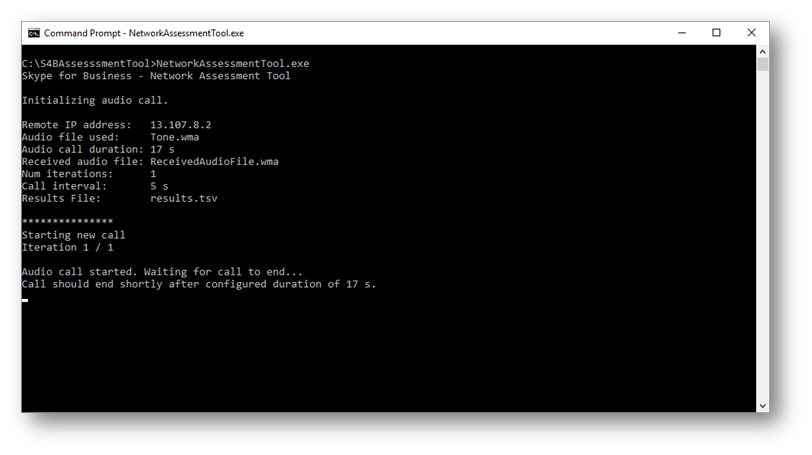
The simulation tests will commence. Allow ~17 seconds for this to complete:
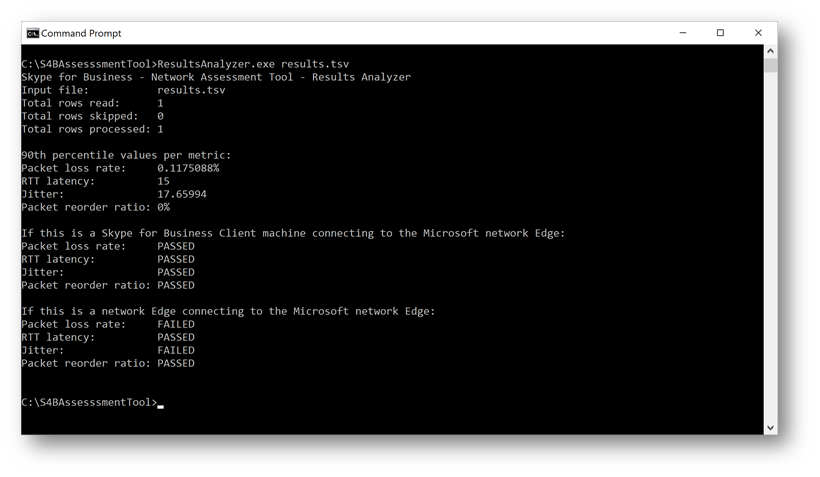
Once the tests are completed, the results are written to a CSV file, type the following command to retrieve the results ResultsAnalyzer.exe results.csv and press Enter. The results analyzer tool will then analyze the results and provide you with visual confirmation if the results passed or failed based on the information we discussed previously in this blog post. As you can see my results failed on Packet Loss and Jitter (intended for demonstration purposes):
Customize the Tool (Optional):
Based on your specific tests and environment you may need to manually specify ports, protocols, IP address, and where the results are written to. The tool can be customized by opening NetworkAssessmentTool.exe.config using a text editor such as Notepad and modifying the parameters in the XML document:
<?xml version="1.0" encoding="utf-8" ?> <configuration> <startup> <supportedRuntime version="v4.0" sku=".NETFramework,Version=v4.5" /> </startup> <appSettings> <add key="Relay.IP" value="13.107.8.2"/>
<!-- At least one of the following two protocols must be configured --> <!-- Configure only one if testing only one protocol --> <!-- If both are configured, UDP will be preferred if it is available --> <add key="Relay.UDPPort" value="3478"/> <add key="Relay.TCPPort" value="443"/>
<!-- WMAFilePath configures the WMA file to be streamed --> <!-- WMAOutputFilePath contains the received audio (for the duration of the call). --> <!-- If WMAOutputFilePath already exists, the existing file will be overwritten. --> <add key="WMAFilePath" value="Tone.wma"/> <add key="WMAOutputFilePath" value="ReceivedAudioFile.wma"/>
<add key="NumIterations" value="1"/> <add key="ResultsFilePath" value="results.tsv"/> <add key="Delimiter" value=" "/> <add key="IntervalInSeconds" value="5"/> </appSettings> </configuration> |
A description of the configuration fields that you can modify:
Configuration |
Description |
If Not Specified |
Relay.IP |
IP address to reach the relay server. MUST be a valid IP address string. |
Tool will fail. |
Relay.UDPPort |
UDP port to reach the relay server for relay allocations. MAY be omitted if the user wishes to test TCP allocations only. If both UDP and TCP are configured, UDP will be preferred if the relay is reachable via UDP. |
If UDP and TCP are not specified, tool will fail. Otherwise, allocate on TCP only. |
Relay.TCPPort |
TCP port to reach the relay server for relay allocations. MAY be omitted if the user wishes to test UDP allocations only. |
If UDP and TCP are not specified, tool will fail. Otherwise, allocate on UDP only. |
WMAFilePath |
Path to valid WMA file to be used as an audio file for the audio call. File MUST exist and MUST be a WMA file. |
Tool will fail. |
NumIterations |
Number of audio calls to make. These will be made serially (no concurrency). |
Takes value of 1. |
ResultsFilePath |
Location to output the results to. This is typically a tsv or csv. The delimiter is specified by the "Delimiter" setting. The first line of the output describes what each column is. |
Results will not be output to a file. |
Delimiter |
For the output file in "ResultsFilePath" (if specified), this is the separator for each column in the output file. |
Takes value of <TAB>. |
IntervalInSeconds |
Time to wait between consecutive calls. |
Takes value of 5.0s. |
WMAOutputFilePath |
Path to where the audio received will be written. If file exists it will be overwritten |
Tool will fail. |
Additional information about configuring and troubleshooting the tool can be found in the Usage.doc file in the tool's installation directory.
Next Steps:
Following the methodology in Skype Operations Framework, these tests should be conducted at every site to understand that individual site's readiness and determine if an Advanced Network Assessment is warranted. Enjoy!
As always, please leave your feedback, input and ideas in the comments below.
Comments
- Anonymous
August 11, 2017
Maybe good to mention that you can change some specific values in the NetworkAssessmentTool.exe.config.- Anonymous
August 11, 2017
Excellent feedback thank you! I just edited the post to add information on customization.
- Anonymous
- Anonymous
August 14, 2017
Could this tool also be used in a pure local environment (Skype for Business Server, no connection to O365)? If yes, would it be useful? - Anonymous
September 27, 2017
We have just started our operations and in a weeks time we are going to implement Office365 and Skype for Business in our office.Got almost all the relevant information at one place and I hope it will be helpful for us during the implementation.Thanks for the article.- Alex