Setting up Kerberos with a CAS Array Exchange 2010.
This document describes what needs to be done in order to apply the Kerberos authentication in addition to NTLM for Outlook users against Exchange 2010 CAS servers. This document is based on TechNet article: Configuring Kerberos Authentication for Load-Balanced Client Access Servers.
The problems around too many NTLM authentications and limitations, including theory around the solution for using Kerberos, are described at the next TechNet article: https://technet.microsoft.com/en-us/library/ff808313.aspx
Exchange environment architecture:
- DC01: Windows 2003 Domain controller.
- EX141: Exchange 2010 SP2 installed as HUB, CAS, MBX.
- EX142: Exchange 2010 SP2 installed as MBX (DAG member).
- EX143: Exchange 2010 SP2 installed as MBX (DAG member).
- The domain name is msft.net
Before you begin:
According to the official TechNet article regarding to the Kerberos authentication configuration, you should create only one ASA credential in case you are having a single DAG stretched across 2 Active Directory sites:
"Because this architecture includes a Database Availability Group (DAG) that’s stretched across both Active Directory sites, you must deploy a single ASA credential for use by members of the Client Access server arrays in ADSite1 and ADSite2. If you don’t use a single ASA credential, clients will have Kerberos authentication issues when you perform a datacenter switchover because the secondary datacenter Client Access server array members won’t be able to decrypt the Kerberos session ticket. For more information about activating the secondary datacenter, see Datacenter Switchovers."
The next steps describe the Kerberos authentication configuration:
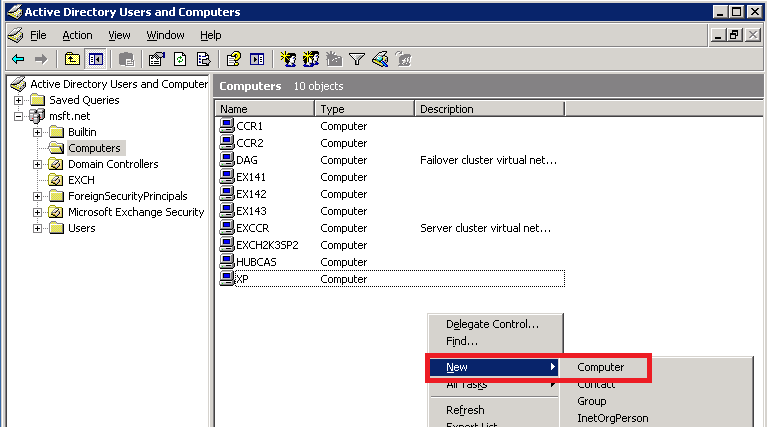
1. Creating the alternate service account (ASA) for the CAS ARRAY in the domain. This is being done, by opening the Active Directory User and Computers and creating new computer account:
2. Type your name for the ASA and click Next. In our example, the ASA named CAS-ARRAY-ASA. In Windows 2008 domain environment, the new computer account wizard will look slightly different.
3. Click Finish:
4. It is recommend to type a description for the ASA, in order to avoid deletion on this account by mistake in the future.
5. After creating the ASA (computer account), verify the account has replicated to all domain controllers within all Active Directory sites that contain the client Access servers that will use the ASA credential.
6. In order to continue, we need to verify the CAS array’s FQDN, since this name will be used for the SPN that will be attached to the ASA. In order to check the CAS Array’s FQDN, run the next command:
Get-ClientAccessArray
7. We also need to the check the InternalUrl & ExternalUrl names, which also needs to be configured for the SPN:
Get-ClientAccessServer ex141 | Get-OwaVirtualDirectory | fl ExternalUrl,InternalUrl
- In case that you want to check the InternalUrl & ExternalUrl names configuration for ALL of your CAS servers, run the next command:
Get-ClientAccessServer | Get-OwaVirtualDirectory | fl Server,Name,ExternalUrl,InternalUrl
8. Setting the SPNs for the NetBIOS & FQDN names. It’s recommended to add also the NetBIOS names (short names), since Outlook 2003 clients and maybe other MAPI applications works this way with short names.
- http Use this SPN for Exchange Web Services, Offline Address Book downloads, and the Autodiscover service. This data was provided at steps 6 & 7.
- exchangeMDB Use this SPN for RPC Client Access.
- exchangeRFR Use this SPN for the Address Book service.
- exchangeAB Use this SPN for the Address Book service.
9. Now create the SPN names using the setspn built-in command. The command can run using PS1 or a BAT file, but it is recommended to run the commands one by one in order to verify that all commands processed successfully.
setspn -s exchangeMDB/outlook CAS-ARRAY-ASA$
setspn -s exchangeRFR/outlook CAS-ARRAY-ASA$
setspn -s exchangeAB/outlook CAS-ARRAY-ASA$
setspn -s exchangeMDB/outlook.msft.net CAS-ARRAY-ASA$
setspn -s exchangeRFR/outlook.msft.net CAS-ARRAY-ASA$
setspn -s exchangeAB/outlook.msft.net CAS-ARRAY-ASA$
setspn -s exchangeMDB/mail.msft.net CAS-ARRAY-ASA$
setspn -s exchangeRFR/mail.msft.net CAS-ARRAY-ASA$
setspn -s exchangeAB/mail.msft.net CAS-ARRAY-ASA$
setspn -s http/outlook.msft.net CAS-ARRAY-ASA$
setspn -s http/mail.msft.net CAS-ARRAY-ASA$
setspn -s http/autodiscover.msft.net CAS-ARRAY-ASA$
10. To verify that all relevant SPNs have been assigned properly, run the following command from the Exchange's Powershell:
Setspn –L msft\CAS-ARRAY-ASA
11. In order to “attach” the ASA credentials to the CAS Array servers, we should run the next script from the following location: C:\Program Files\Microsoft\Exchange Server\V14\Scripts
.\RollAlternateserviceAccountPassword.ps1 –ToArrayMembers outlook.msft.net -GenerateNewPasswordFor “msft\CAS-ARRAY-ASA$" –Verbose
12. In case that the script was finished succfully, you will get the following message:
“THE SCRIPT HAS SUCCEEDED ":
13. To verify that the ASA credentials have been deployed properly use the following command:
Get-ClientAccessServer -IncludeAlternateServiceAccountCredentialStatus | fl name,*alter*
14. Download and run the ConvertOABDir.ps1 in order to create new application pool to support different authentication methods like Kerberos and Certificate authentication for the OAB virtual directory. This script should run on each of the CAS servers in the Outlook.msft.net CAS array.
15. Restart the MSExchangeOAB & MSExchangeRPC on all the CAS servers in the configured array:
Get-Service MSExchangeAB,MSExchangeRPC | Restart-Service
16. Verify that the services are up and running:
Get-Service MSExchangeAB,MSExchangeRPC | fl name,status
17.In order to verify that all the previous steps completed successfully and that clients can communicate using Kerberos, use one of the there ways:
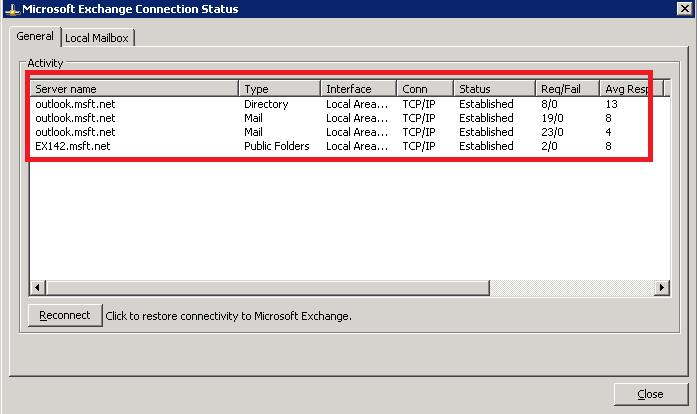
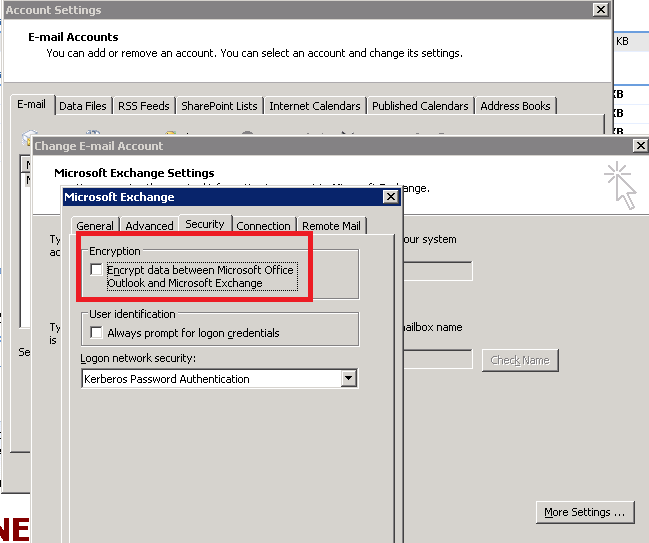
17.1 Configure the Outlook to connect using TCP/IP, while the “Encryption” is marked and that the "Logon network security” is configured to use the "Kerberos Password Authentication"
Now open Outlook and verify that you are able to connect your mailbox:
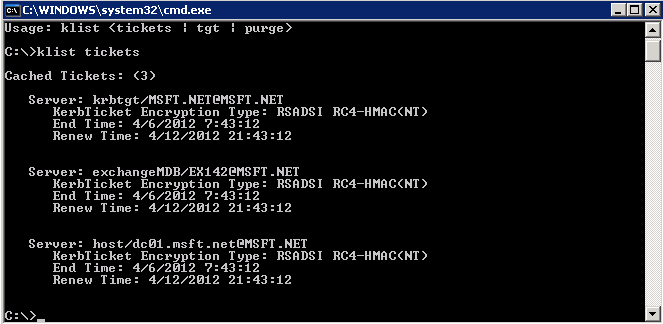
17.2 At one of the workstations that are installed with outlook, open the command prompt and type: Klist tickets (on Windows XP or Windows server 2003). On Windows 7 or Windows 2008 type: Klist
Klist tickets (Before Kerberos configuration):
Klist tickets (After Kerberos configuration):
17.3 From the Client Access Server, check the Address Book protocol logs. These logs are usually located at the following path: C:\Program Files\Microsoft\Exchange server\v14\Logging\AddressBook Service:
Now open one of the recent logs that were created after the Kerberos configuration you have made in the previous steps. In case you have configured all the steps in the right way, you should see the word
Kerberos inside the AddressBook Service log. That means that the server successfully created a Kerberos authentication connection, as we can see in the next screenshot:
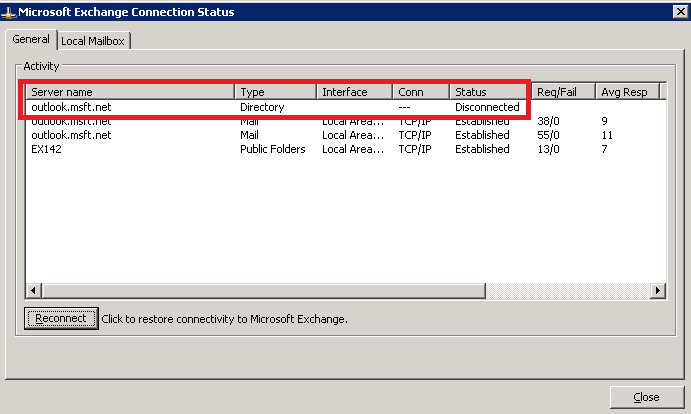
* Important: In case that your organization doesn’t work with encryption at the Exchange CAS & Outlook client side as the following example, you will not be able to use Kerberos to connect to the directory!
- The next example shows the directory disconnection status:
In order to check if your CAS server is configured with the “EncryptionRequired” parameter, run the command:
Get-ExchangeServer ex141 | Get-RpcClientAccess | fl EncryptionRequired
In order to change this value, run the next command on all the CAS servers and restart the MSExchangeRPC service:
Set-RpcClientAccess –server servername –EncryptionRequired $true
More information regarding to encryption configuration, you can find here:
https://technet.microsoft.com/en-us/library/dd439391(v=EXCHG.80).aspx
https://support.microsoft.com/kb/2006508
Rollback:
In order to roll back from the configuration above, run the next steps:
18. Delete all the SPNs we have created at step 9:
setspn -d exchangeMDB/outlook CAS-ARRAY-ASA$
setspn -d exchangeRFR/outlook CAS-ARRAY-ASA$
setspn -d exchangeAB/outlook CAS-ARRAY-ASA$
setspn -d exchangeMDB/outlook.msft.net CAS-ARRAY-ASA$
setspn -d exchangeRFR/outlook.msft.net CAS-ARRAY-ASA$
setspn -d exchangeAB/outlook.msft.net CAS-ARRAY-ASA$
setspn -d exchangeMDB/mail.msft.net CAS-ARRAY-ASA$
setspn -d exchangeRFR/mail.msft.net CAS-ARRAY-ASA$
setspn -d exchangeAB/mail.msft.net CAS-ARRAY-ASA$
setspn -d http/outlook.msft.net CAS-ARRAY-ASA$
setspn -d http/mail.msft.net CAS-ARRAY-ASA$
setspn -d http/autodiscover.msft.net CAS-ARRAY-ASA$
19. Delete the computer account you have created in step 1.
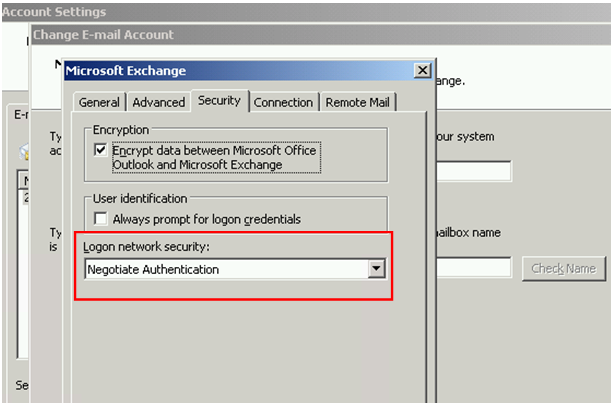
20. Verify that there are no outlook clients that are configured to use “Kerberos Password Authentication". Instead, they should use the “Negotiate Authentication” as the following example:
"Turning Kerberos Authentication Off
--------------------------------------------------------------------------------
To revert your Client Access server array so that it doesn't use Kerberos, remove the SPNs from the shared service account. If the SPNs are removed, Kerberos authentication won't be attempted by your clients, and clients configured to use Negotiate authentication will use NTLM. Clients configured to use only Kerberos will be unable to connect. Once the SPNs are removed you should also delete the shared service account. You can use the maintenance script to clean out credentials from all Client Access server array members by using the toEntireForest parameter and using the -copy from server parameter to specify a server that does not have any Kerberos credentials. In addition, you should eventually restart all client computers to clear the Kerberos ticket cache."
More info:

