Configuring, deploying, and monitoring applications using AppFabric Application Manager
In the previous blog post on developing AppFabric Applications, we showed you how to create a simple AppFabric application. This app was an ASP.NET web site that used a SQL Database. In this blog post, we’ll use the AppFabric Application Manager to configure, deploy, and monitor that application. Here is a breakdown of what we will cover:
- The AppFabric Player application has been imported (where the last blog post left off). Package can be downloaded here (AppFabricPlayer.afpkg).
- Update the connection string to point to a SQL Azure database
- Initialize the SQL Azure Database with application data
- Deploy and start the application
- View aggregate ASP.NET monitoring metrics at both web app and web page granularities
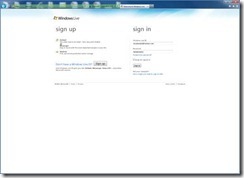
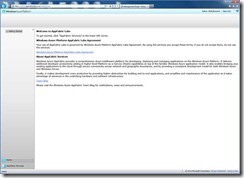
Before we can do those things, we’ll sign into the AppFabric LABS Portal at https://portal.appfabriclabs.com using our Live Id. Since this is a limited CTP, only approved users will have access to the service, but all users can try the SDK and VS Tools on your local machines. To request access to the AppFabric June CTP, follow the instructions in this blog post.
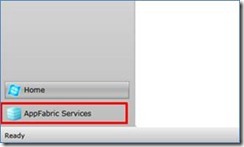
After signing in with an approved account, we click on AppFabric Services in the bottom left corner and then select Applications from the tree view.
Now we can start with our first task, updating the connection string to the SQL database that is used by the AppFabric Player app. Users of the AppFabric June CTP are provided with a SQL Azure database at no charge. We will use this database. To get access to our SQL Azure connection string, we’ll click on the database in the main panel and then click View under Connection String. The resulting dialog lets us copy the connection string to the clipboard.
Now we’re ready to go to the Application Manager. We select our namespace from the main content area and then click Application Manager on the ribbon.
We can also reach the Application Manager directly by using a URL in this format: https://yournamespacehere.appmanager.appfabriclabs.com.
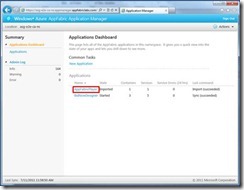
We click on AppFabricPlayer to manage that app.
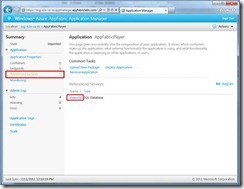
Then we’ll click on Referenced Services in the Summary area.
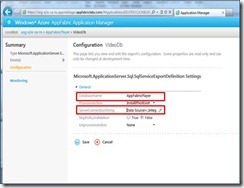
Then we’ll click on the VideoDb link to configure the database. Now we will update the connection string using the value we copied earlier. Note that the DatabaseName and the ServerConnectionString fields are separate so you will have to remove the database name from the value before pasting it in.
Before Data Source=myservername;Initial Catalog=mydatabase;User ID=myuserid;Password=mypassword
After Data Source=myservername;User ID=myuserid;Password=mypassword
We update both fields and select Save.
Next we will create and populate the SQL table that this app expects in the database. We’ll go to https://manage-sn1.sql.azure.com/ to do that. We login with the same credentials that appear in our connection string.
We’ll click on New Query from the ribbon and paste in the SQL script below. We execute the script and the database is initialized.
CREATE TABLE [dbo].[AppFabricVideos] ( [Id] [int] IDENTITY(1,1) NOT NULL, [Title] [nvarchar](256) NOT NULL, [Description] [nvarchar](2048) NOT NULL, [Uri] [nvarchar](1024) NOT NULL, CONSTRAINT [PK_AppFabricVideos] PRIMARY KEY ([Id] ASC) ) INSERT INTO [dbo].[AppFabricVideos] ([Title] ,[Description] ,[Uri]) VALUES ('ServiceBus HTTP / REST API' , 'Recently the ServiceBus team released some great new support for Queues and Topics, allowing you to access queues via a client library as well as HTTP. In this episode, I am joined by Will Perry, a tester on the ServiceBus team, who shows us how you can use the HTTP API with ServiceBus queues.Ron…' , 'https://media.ch9.ms/ch9/8f5a/e7dea0d6-f591-412b-8e75-9f0c012b8f5a/AppFabricServiceBusHTTP_low_ch9.mp4') INSERT INTO [dbo].[AppFabricVideos] ([Title] ,[Description] ,[Uri]) VALUES ('Announcing the Windows Azure AppFabric June CTP' , 'Today we are exciting to announce the release of the Windows Azure AppFabric June CTP which includes capabilities that make it easy for developers to build, deploy, manage and monitor multi-tier applications across web, business logic and database tiers as a single logical entity on the Windows Azure Platform.' , 'https://media.ch9.ms/ch9/9a4b/43794581-3dba-410a-bb0c-9f03017b9a4b/AppFabricTVCTPLaunch_low_ch9.mp4') Go |
Now that the database is ready we can deploy and start our application. We go back to the Application Manager and navigate to the AppFabric Player’s Application Page. From this page, we’ll click on Deploy Application and then accept the dialog.
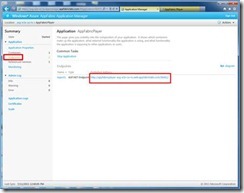
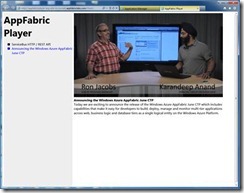
Once the application state changes to Started we visit the site. To do this, we’ll click on Endpoints in the Summary area and then select the app’s Published Address link.
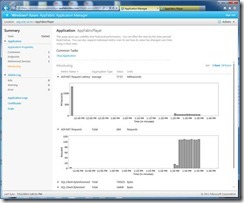
Now that the app is running we are able to monitor important activity. To simulate activity we wrote a load test that hits the web page once every second or so. If we go back to the application page and click on Monitoring in the Summary area, we’ll see some interesting metrics.
These metrics are aggregated at the application level, but if we drill down into the ASP.NET Web Application we can see more granular metrics. We click on Containers in the Summary area and then select Web1, which represents our one and only service group. We then click on PlayerWeb, which represents our ASP.NET Web Application. We then click on Monitoring from the Summary area.
Our breadcrumb bar now indicates that we have navigated into the PlayerWeb ASP.NET Web Application. From this view, we can see exactly how many times each file in the web application has been requested as well as the average request latency for each.
And just like we saw at the application page, we can expand each row to display a chart to see how each value has changed over time.
That’s it. In this post we showed how to configure, deploy, and monitor and AppFabric application using Application Manager. In future posts, we’ll cover troubleshooting, extensibility, and more. Stay tuned.

![clip_image010[4] clip_image010[4]](https://msdntnarchive.z22.web.core.windows.net/media/MSDNBlogsFS/prod.evol.blogs.msdn.com/CommunityServer.Blogs.Components.WeblogFiles/00/00/01/45/09/metablogapi/3252.clip_image0104_thumb_45D6F8DA.png)
![clip_image012[4] clip_image012[4]](https://msdntnarchive.z22.web.core.windows.net/media/MSDNBlogsFS/prod.evol.blogs.msdn.com/CommunityServer.Blogs.Components.WeblogFiles/00/00/01/45/09/metablogapi/7450.clip_image0124_thumb_6585D2A2.png)
![clip_image020[4] clip_image020[4]](https://msdntnarchive.z22.web.core.windows.net/media/MSDNBlogsFS/prod.evol.blogs.msdn.com/CommunityServer.Blogs.Components.WeblogFiles/00/00/01/45/09/metablogapi/0020.clip_image0204_thumb_2FA0DD88.jpg)

![clip_image024[5] clip_image024[5]](https://msdntnarchive.z22.web.core.windows.net/media/MSDNBlogsFS/prod.evol.blogs.msdn.com/CommunityServer.Blogs.Components.WeblogFiles/00/00/01/45/09/metablogapi/4810.clip_image0245_thumb_6AF44346.png)
![clip_image032[5] clip_image032[5]](https://msdntnarchive.z22.web.core.windows.net/media/MSDNBlogsFS/prod.evol.blogs.msdn.com/CommunityServer.Blogs.Components.WeblogFiles/00/00/01/45/09/metablogapi/1108.clip_image0325_thumb_350F4E2C.jpg)
![clip_image034[4] clip_image034[4]](https://msdntnarchive.z22.web.core.windows.net/media/MSDNBlogsFS/prod.evol.blogs.msdn.com/CommunityServer.Blogs.Components.WeblogFiles/00/00/01/45/09/metablogapi/5315.clip_image0344_thumb_3BC257AF.jpg)
![clip_image036[4] clip_image036[4]](https://msdntnarchive.z22.web.core.windows.net/media/MSDNBlogsFS/prod.evol.blogs.msdn.com/CommunityServer.Blogs.Components.WeblogFiles/00/00/01/45/09/metablogapi/5808.clip_image0364_thumb_2D83DEBF.jpg)


