Host Integration Server 2013 TI Assembly GAC deployment Walkthrough
Introduction
Host Integration Server (HIS) is used to integrate with Legacy Host technology. One of the Host integration scenarios is to call Mainframe programs or transactions using a component in HIS called Transaction Integrator (TI). The way to use TI is to create what is called a TI assembly and then use this to call the Host systems from the Windows System. The TI assembly can be either used in a folder or deployed to the Global Assembly Cache (GAC). I wanted to deploy the assembly to the GAC to make sure it is available from anywhere in the integration solution and because I had strong named assemblies in the solution that required to reference this assembly. This blog post will provide the challenge and problems faced while trying to do this and how these were resolved to finally deploy the TI assembly to the GAC and use it from there in a BizTalk solution.
Discussion
Host Integration Server (HIS) is used to integrate with Legacy Host technology. One of the Host integration scenarios is to call Mainframe programs or transactions using a component in HIS called Transaction Integrator (TI). TI technology has been around for a while (it was used to be called COMTI) but it went through many changes and updates. In HIS 2013 the TI component undergone major changes. There are two scenarios to use the TI, either Host Initiated Processing (HIP) where the call is initiated from the Host server to the Windows server, in this scenario the Windows server acts as the backend and the Host is acting as the channel or initiating system. The other scenario is Windows Initiated Processing (WIP) where the call is initiated from the Windows platform and it is routed to the Host system. The diagram below illustrates this scenario.
Figure 1: Windows Initiated Processing Scenario
To be able to implement a WIP scenario you need to implement what is called a TI assembly. This assembly actually governs the interface and mapping of parameters between the Windows system and the Host system. The way you create this assembly (as this is a special assembly type) is using the TI project template that ships with the HIS 2013. I am not going to describe how to create the TI assembly as you can find many references on how to do this in the HIS 2013 SDK here and on MSDN here.
Once you have created the TI assembly you will have the following view in VS 2012.
Figure 2: TI Assembly in VS 2012
Now to be able to deploy an assembly in the GAC you need to have that assembly signed with a key and then would have a strong name. If you click on the Library node (root node in the above figure) and check the properties you will see that it has the following properties:
Figure 3: TI Library Properties
The property I am interested in is the KeyFile property which is according to the documentation if you provide a Key file in this property then the generated assembly would be signed with this key and would have a strong name (sweet). Unfortunately for some reason this does not work as expected and I could not get it to work and the assembly generated is always not signed.
I have investigated many other options to sign the assembly after being compiled and this is doable but I wanted something more streamed and easier to be done if I needed to re-generate the assembly.
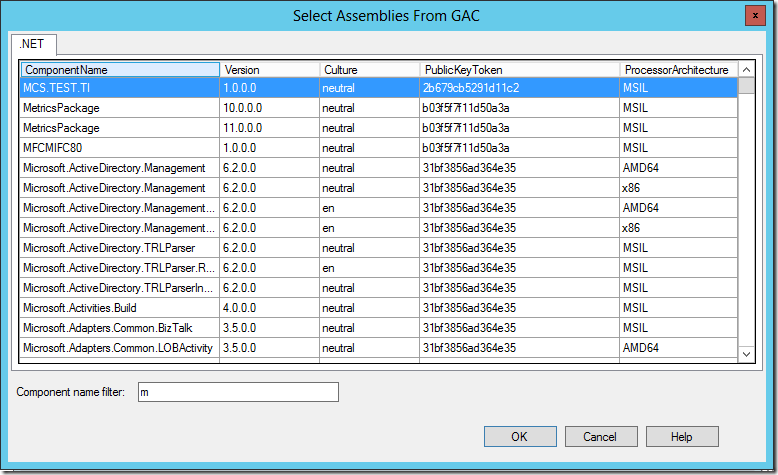
Once I signed the assembly (as I will show you in the next section) and GACed it. When I create a BizTalk port using the BAHA adapter and try to configure it with the GACed assembly I found that the dialog to select the assembly from the GAC is always empty! As per the below figure.
Figure 4: Select Assembly from GAC form
The way to resolve also this issue and finally to configure the GACed assembly will be also presented in the following section.
Solution & Walkthrough
So let’s get to the way to get this working. The steps are as follows:
Part 1: GAC the TI Assembly
1- Create the TI Assembly as you need and configure the calling model of the assembly to be “DirectCall, WCF, WS, BAHA”

2- Now in the same properties make sure you have set the Debug property to “True”

3- Now save the TI assembly and you will find the following are the generated artifacts in the output folder:

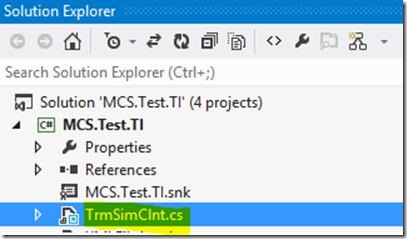
4- Now take notice of the generated CS file marked above. Now create a new class library project and name it as you see fit. In that Class library project make sure that the .NET version is set to 4.0 at least (as HIS 2013 is upgraded to .Net 4.0) and then add the generated CS file to that project ( you might even add it as a link to make sure if the CS file is re-generated it is automatically updated in the class library project)

5- Now make sure you add the following line to the AssemblyInfo.cs
[assembly: System.CLSCompliant(true)]
6- Now go to the properties of the class library and make this library a signed library as you do with any C# library

7- Add references to the following assemblies:

C:\Program Files\Microsoft Host Integration Server 2013\system\Microsoft.HostIntegration.TI.ClientContext.dll
C:\Program Files\Microsoft Host Integration Server 2013\system\Microsoft.HostIntegration.TI.TBGen.dll
C:\Program Files (x86)\Reference Assemblies\Microsoft\Framework\.NETFramework\v4.0\System.ServiceModel.dll
C:\Program Files (x86)\Reference Assemblies\Microsoft\Framework\.NETFramework\v4.0\System.Web.Services.dll
8- Now build the assembly it should build successfully and then add it to the GAC using Gacutil.exe as you would do with any other assembly. The TI assembly is now GACed and ready to be used.
Part 2: Use the GACed TI assembly from BizTalk
1- Since the TI assembly is a .Net 4.0 assembly it will be GACed in the .Net 4.0 GAC and hence will require the .Net 4.0 Gacutil to be handled. Which comes installed with VS 2012.
2- Now for some reason the HIS HostApps adapter is not linked correctly to the VS2012 installation folder and hence I had to change things a little to make sure it is able to see the TI assembly in the GAC.
3- Open the Regedit application and browse to the path “HKEY_LOCAL_MACHINE\SOFTWARE\Wow6432Node\Microsoft\.NETFramework”
4- Add a new string value with the name “sdkInstallRootv2.0” and set the value of this string to “C:\Gacutil4”
5- Now open the .net 4.0 tools folder “C:\Program Files (x86)\Microsoft SDKs\Windows\v8.0A\bin\NETFX 4.0 Tools” and copy all the contents of this folder to the folder “C:\Gacutil4\Bin” (just create this folder).
6- Now open the BizTalk administration console.
7- Create a new send port in BizTalk
8- Select the HostApps as the adapter and then click configure and configure the connection string

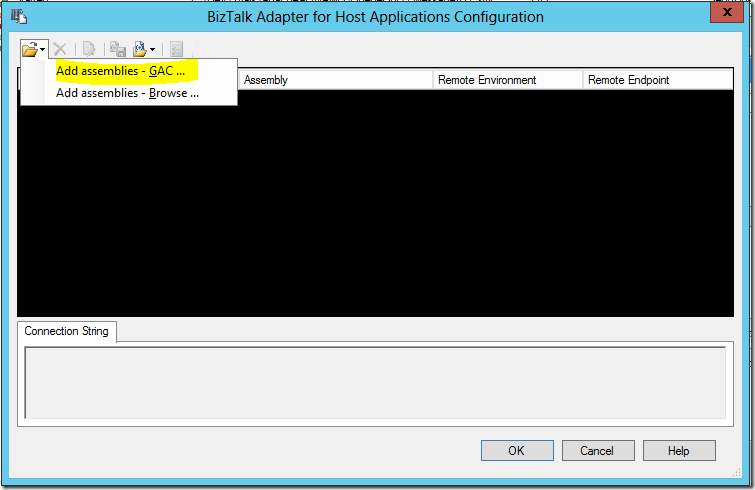
9- Now click add and then add assemblies (GAC) option

10- Now you will see all assemblies installed in the .Net 4.0 GAC and you can select your TI assembly that you installed in Part 1 above

11- Now complete the configuration as usual and click ok to configure the send port

12- Now if you check the connection string created and compaire the TI GACed assembly with a normal one you will find this as below:
<?xml version="1.0" encoding="utf-8"?>
<mappings>
<mapping>
<assembly><![CDATA[C:\Program Files\Microsoft Host Integration Server 2013 SDK v1.0\ApplicationIntegration\WindowsInitiated\InstallationVerification\TiHostDefinitions\NetClnt1\bin\NetClnt1.DLL]]></assembly>
<connectionString><![CDATA[CodePage=37;Name=TrmLink;TimeOut=0;SecurityFromClientContext=False;IPAddress=127.0.0.1;TCPPorts=7510;ConcurrentServerTransactionId=MSCS]]></connectionString>
</mapping>
<mapping>
<assembly><![CDATA[MCS.Test.TI, Version=1.0.0.0, Culture=neutral, PublicKeyToken=2b679cb5291d11c2, processorArchitecture=MSIL]]></assembly>
<connectionString><![CDATA[CodePage=37;Name=TrmLink;TimeOut=0;SecurityFromClientContext=False;IPAddress=127.0.0.1;TCPPorts=7510;ConcurrentServerTransactionId=MSCS]]></connectionString>
</mapping>
</mappings>
13- Now you can use this send port normally.
Conclusion
The HIS 2013 TI assembly can be installed in the GAC to simplify your deployment configuration. The walkthrough provided above can be used on the development machine to be able to configure the solution and build it but on the production environment no changes are required at all.


