Team Foundation Server 2015 CI/CD Pipeline for Web App in Azure Government
Azure Web Apps is a managed hosting environment for modern web applications in the cloud. An important part of developing and delivering modern web applications is Continuous Integration (CI) and Continuous Delivery (CD) using tools such as Visual Studio Team Services (VSTS), Team Foundation Server (TFS), Jenkins, Buildbot, etc.
As I have discussed in several other blog posts (here, and here), some development teams (e.g. in the Government) are restricted from using Software as a Service (SaaS) offerings such as VSTS for compliance reasons. Team Foundation Server (TFS) is a very good alternative to VSTS in those situations. Some teams already have significant investments in older/legacy TFS installations (e.g., TFS 2015) and would like to set up CI/CD pipelines to Azure Web Apps without needing to update their TFS installation. This is particularly challenging for developers deploying to Azure Government or other sovereign clouds because older versions of TFS (i.e., prior to TFS 2017 Update 2) are not able to support Service Connections to Azure Government.
In this blog post, I will show how to orchestrate deployment to Azure Government Web Apps using TFS 2015 and PowerShell scripts. The basic principle I will be demonstrating is that while there may not be a pre-packaged way to deploy into Azure Government Web Apps, it is very feasible to do it with a simple PowerShell script instead of the regular deployment tasks.
Another challenge with older versions of TFS is building .NET applications on newer build agents with Visual Studio 2017. I will also show how to make that work with a few changes to the typical build tasks.
For the purposes of this walkthrough. I have set of the following resources in Azure:
- A core network with domain controller.
- A Windows Server (2016) running TFS 2015 (with SQL Express).
- A Windows Server 2016 build agent with Visual Studio 2017 and the latest AzureRm PowerShell module. This agent machine was connected to the TFS instance with version 1 of the VSTS build agent. Prior to registering the build agent with the TFS instance, I defined the variables
VisualStudioandVisualStudio_15.0to point to the Visual Studio installation on the agent. - A Windows (Server) workstation with Visual Studio 2017 for editing and pushing code.
On the workstation, I created a new ASP.NET MVC project:

It is not really critical, which type of application it is, but to make it easier to follow along, I wanted to be explicit about what I did. We will need to modify the build to make this build on the agent.
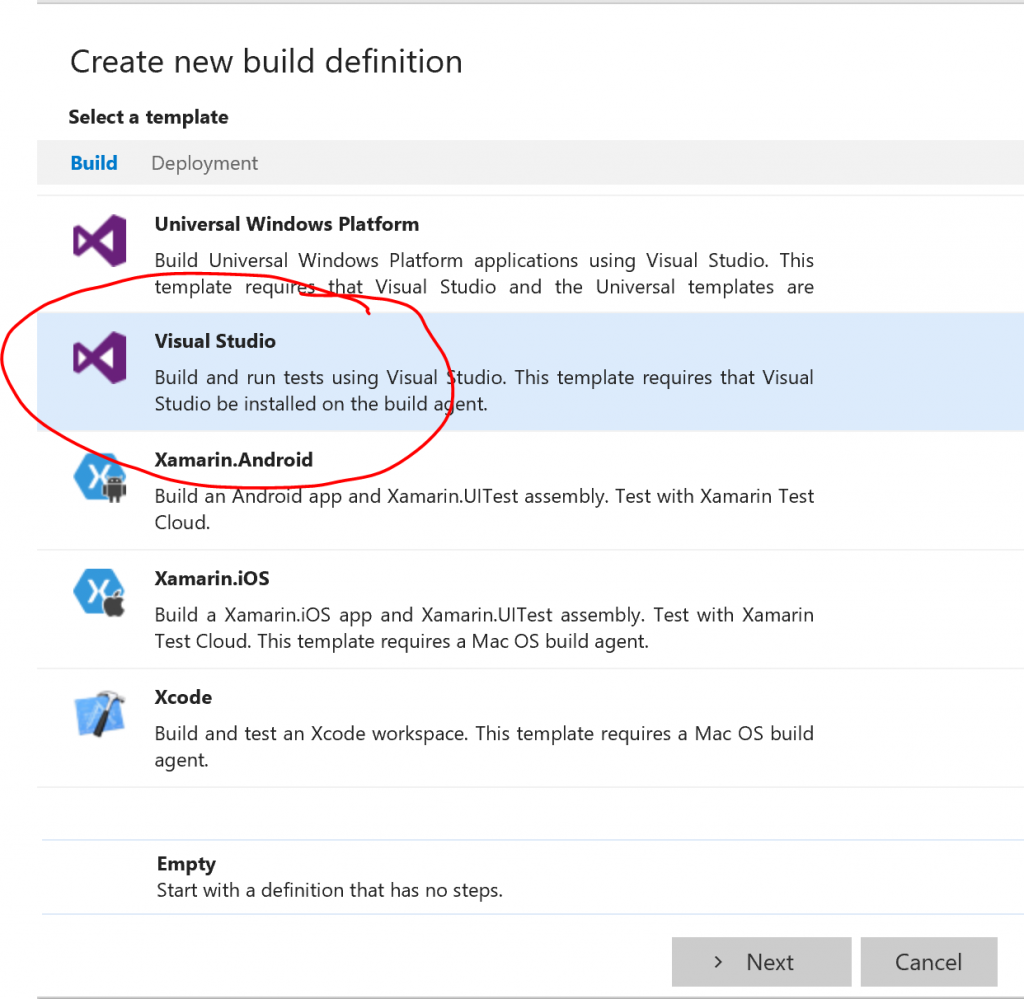
After creating the application in Visual Studio, I created a TFS 2015 project (with Git source control) and pushed the code to the TFS instance. I then set up a build definition:

I picked the Visual Studio build definition template and made some adjustments. Firstly, the "Visual Studio Build" will not work well on the Visual Studio 2016 build agent (it will not be able to locate your VS2017 installation), so I disabled it and added an "MSBuild" step instead.

On the MSBuild step, it is possible to specify the exact location of MSBuild (C:\Program Files (x86)\Microsoft Visual Studio\2017\Enterprise\MSBuild\15.0\Bin) on the agent. For MSBuild parameters, I used:
[plain]
/p:DeployOnBuild=true /p:WebPublishMethod=Package /p:PackageAsSingleFile=true /p:SkipInvalidConfigurations=true /p:PackageLocation="$(build.artifactstagingdirectory)\\"
[/plain]
Additionally, I set Platform and Configuration to point to the predefined variables as seen above. Depending on your application, you may need other adjustments. This is just one example. If you are following along, this is a good time to make sure your application builds.
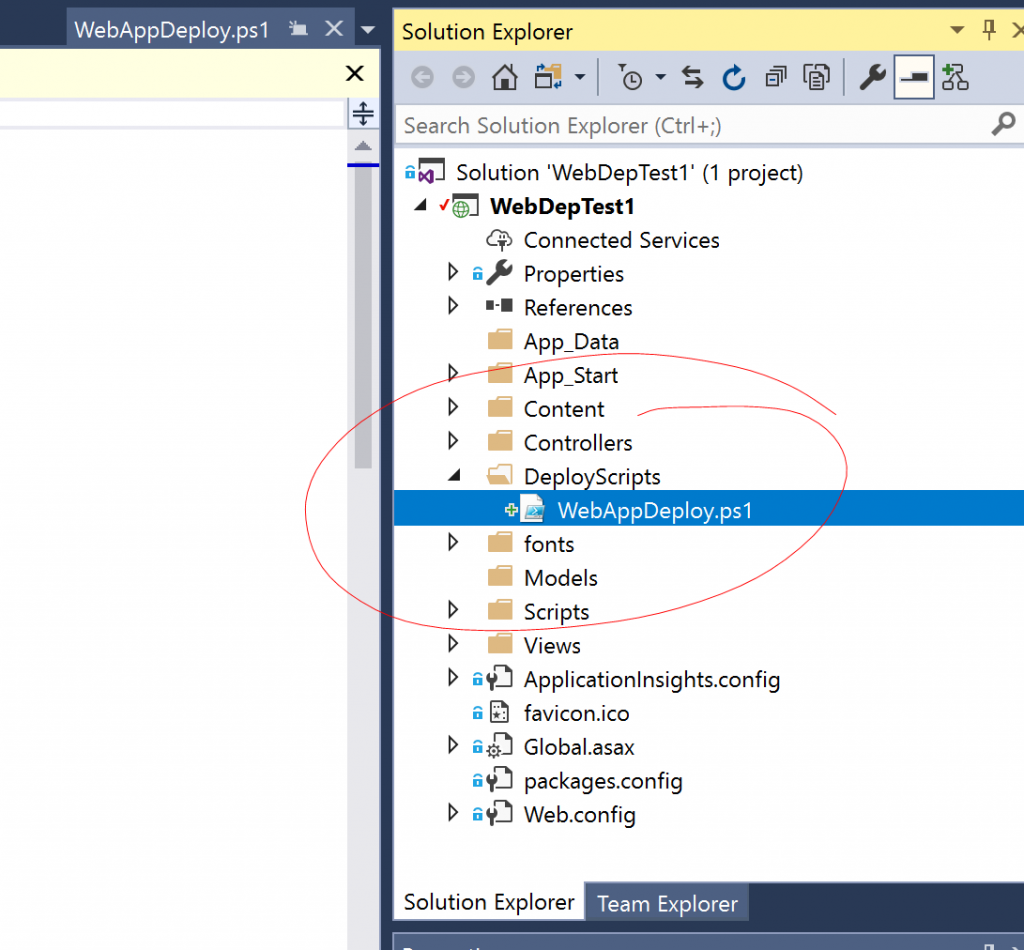
The next step was to add a PowerShell deployment script to the project. It makes sense to keep it with the rest of the project source since you may make project specific adjustments to it. I have made a somewhat generic script that can be used to deploy most .NET and .NET CORE Web Apps. It can be found in this GitHub repository. In the example here, I added this script without modifications to the project as seen below:

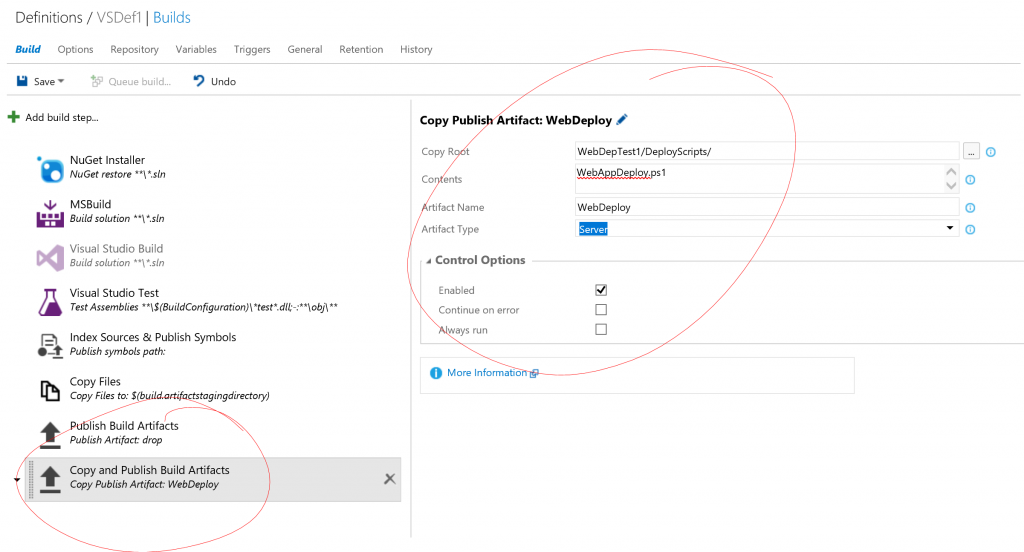
The basic idea of this script is to use an Azure Active Directory Service Principal to access an existing Web App and deploy into it. With the credentials, it retrieves the publishing profile from the web app and uses msdeploy (web deploy) to deploy the application. You will need to give the Service Principle access to the Web App where you would want to deploy. After adding the script to the source code, I added an extra build step to produce a build artifact containing the script:

After making those adjustments to the build definition, I pushed the code from Visual Studio to generate two built artifacts; one containing the web application itself and one with the deployment script.
Last step in the CI/CD pipeline is the release definition using the PowerShell Script.

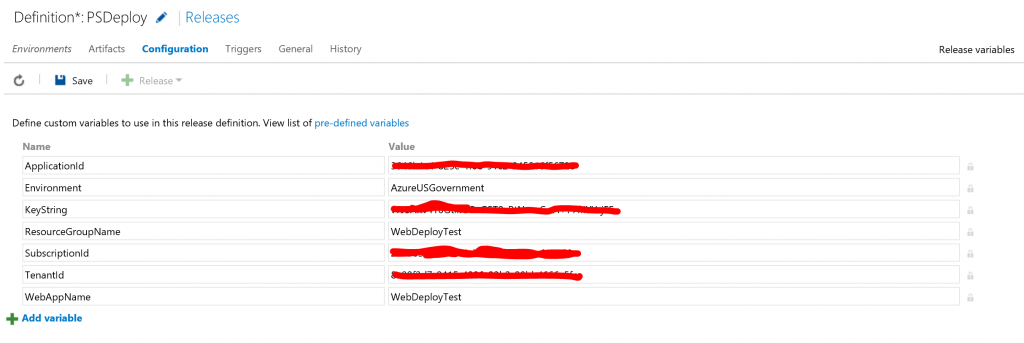
I picked the script from the build artifact and then specified the required parameters with a set of release definition variables:

The PowerShell script was then configured with the following command line arguments:
[ps]
-TenantId $env:TenantId -ApplicationId $env:ApplicationId -Key $(ConvertTo-SecureString -String $env:KeyString -AsPlainText -Force) -SubscriptionId $env:SubscriptionId -WebAppName $env:WebAppName -ResourceGroupName $env:ResourceGroupName -Environment $env:Environment -DeploymentPackage $(System.DefaultWorkingDirectory)/VSDef1/drop/WebDepTest1.zip
[/ps]
After this the CI/CD pipeline is complete, and with appropriate triggering between build and release, any code changes pushed to the git repository will automatically deploy. Since the deployment script is stored in the repository, it is possible to make changes to it specific to the project. Deployment slot swaps, etc. can easily be added with other PowerShell scripts.
And that is it. Let me know if you questions/comments/suggestions.