How to Use Azure ML with Azure SQL Data Warehouse
This post is by Simon Lidberg, Solution Architect at the Data Insights Center of Excellence at Microsoft.
In many machine learning projects, you want to consume training data coming from a relational database, and Azure ML has supported reading data coming from an Azure SQL Database (Azure SQL DB). Now, with the release of Azure SQL Data Warehouse (Azure SQL DW) many customers are moving their data warehouses to the Azure SQL DW service since it is a distributed database that is capable of processing massive volumes of relational and non-relational data. While it is interesting to read data stored in Azure SQL DW, when you look at the supported data sources for the Reader module in Azure ML you cannot find a special connection for it.
So how do you access information in Azure SQL DW?
This blog post shows how to access information in Azure SQL DW and also write data back to the database. It uses the Azure SQL DB provider and the only difference from connecting to Azure SQL DB is that you have to create the table you want to write to before executing the experiment and you have to specify that the number of rows that you should write at a single time is 1.
The first thing you need to do is create an Azure SQL DW server through the portal:
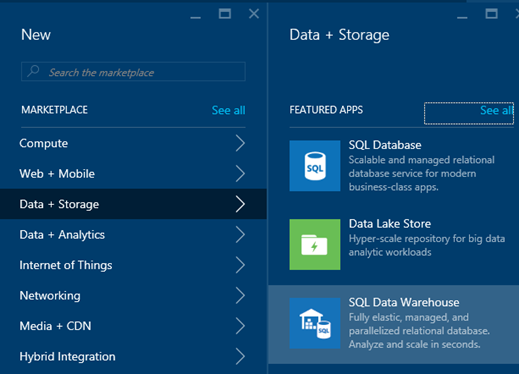
Figure 1: Create the Azure SQL Data Warehouse
To have some data to work with, add the sample database to the Azure SQL DW. This database contains information about the fictitious company AdventureWorks and their bicycle sales:
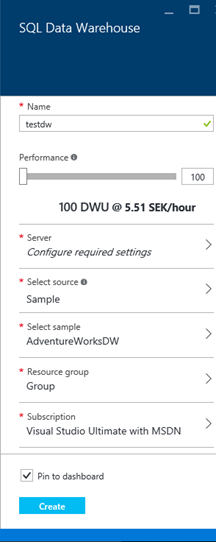
Figure 2: Add the sample database to the Azure SQL Data Warehouse
Using the Reader Module to Read from Azure SQL DW
The database contains a view called vTargetMail that we will use in the demonstration. This view contains information about customers and whether they have bought a bike or not. We will use this data to create a simple K-Means clustering model:
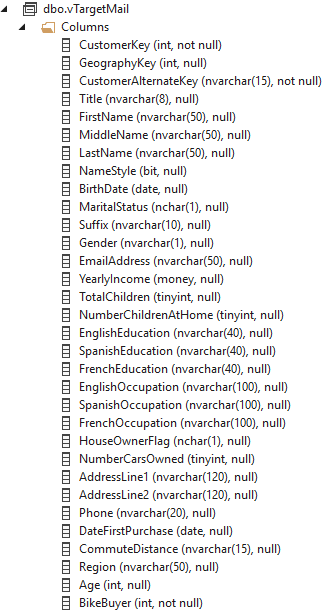
Figure 3: View definition of vTargetmail
In Azure ML, create a new blank experiment and add a Reader module. In the configuration for the Reader module, specify that the Data Source is of the type Azure SQL Database. Add the server, database, username and password for your Azure SQL DW exactly the same way as you would when connecting to Azure SQL DB:
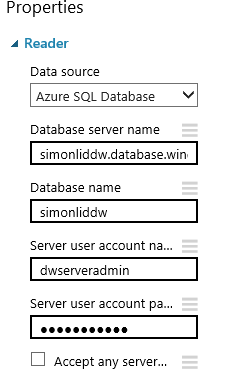
Figure 4: Configure the Reader module to connect to Azure SQL Data Warehouse
In the Database Query field type in the following query:
select CustomerKey,
MaritalStatus,
Gender,
cast(YearlyIncome as
bigint)
as YearlyIncome,
TotalChildren,
NumberChildrenAtHome,
EnglishEducation,
EnglishOccupation,
HouseOwnerFlag,
NumberCarsOwned,
cast(Year(DateFirstPurchase)
as
varchar)
+
cast(Month(DateFirstPurchase)
as
varchar)
as MonthofPurchase,
CommuteDistance,
Region,
Age,
BikeBuyer
from dbo.vTargetMail;
When writing queries against Azure SQL DW, you have to ensure that you follow the T-SQL syntax for Azure SQL DW – this differs in some ways from Azure SQL DB and SQL Server. For more information about the supported language constructs see the manual.
Add a K-Means Clustering module and a Train Clustering Model module and connect them as the picture shows:
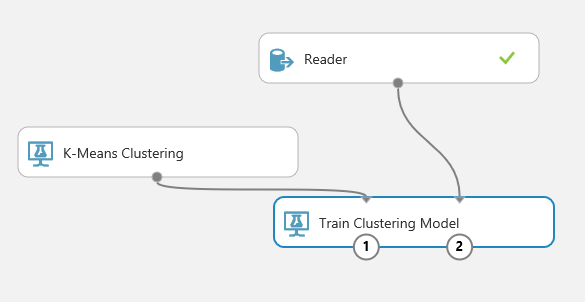
Figure 5: Connecting the Reader module to the K-Means clustering modules
In the properties for the Train Clustering Model module add the following columns using the column selector:
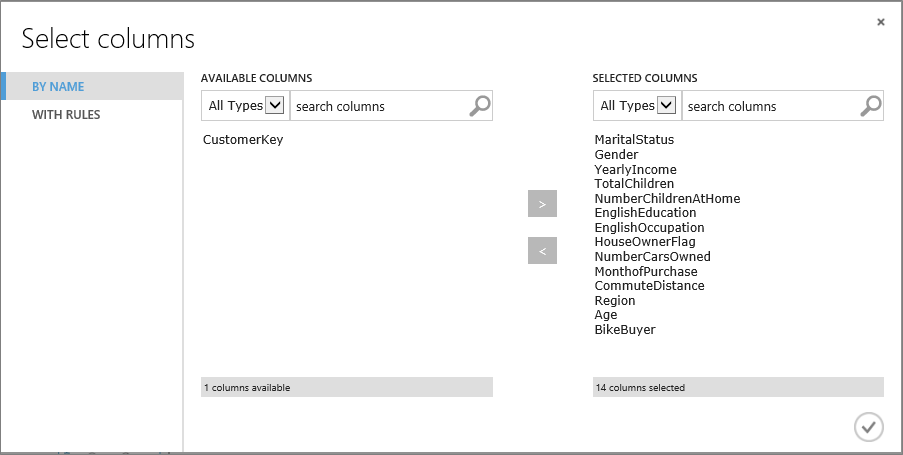
Figure 6: Select the columns that you want to use in the clustering calculation
In the K-Means Clustering module properties, change the number of centroids to 5 to create five clusters:
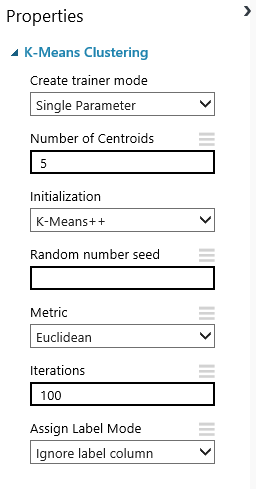
Figure 7: Specifying the number of clusters
Writing to Azure SQL DW with the Writer Module
The next step is to add a Writer module to the experiment and add a connection between the Train Clustering Model and the Writer module as shown below:
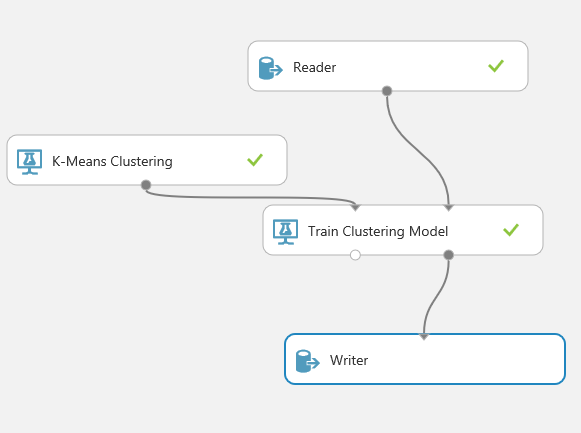
Figure 8: Add the Writer module and connect it
Add the necessary configuration to connect to Azure SQL DW:
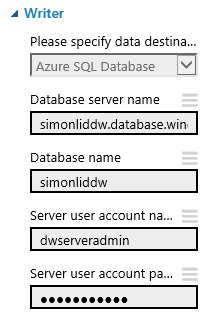
Figure 9: Specifying the username and password in the Writer module
The next thing you need to do is to create the table in Azure SQL DW that you want to write to. You cannot do this from the Azure ML GUI when you work with Azure SQL DW. In the case of the clustering algorithm you get the cluster assignment and the distance to the centroid for each of the clusters, so in this case we create a table in Azure SQL DW using the following code:
create
table ClusteringResults
(
[CustomerKey] int,
[Assignments] int,
[DistancesToClusterCenter no.0] float(53),
[DistancesToClusterCenter no.1] float(53),
[DistancesToClusterCenter no.2] float(53),
[DistancesToClusterCenter no.3] float(53),
[DistancesToClusterCenter no.4] float(53)
)
with (distribution=round_robin)
Note that you need to add how the table should be distributed. In this case, we specified that it should be distributed in a round robin fashion across the distributions in Azure SQL DW. More about the syntax necessary to create tables in Azure SQL DW can be found here.
Next you need to add the configuration to the Writer module specifying the columns from the data set that you are interested in and where to store it:
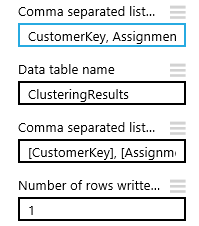
Figure 10: Configure the Writer module
The columns that we are interested in from the clustering module are the following:
CustomerKey, Assignments, DistancesToClusterCenter no.0, DistancesToClusterCenter no.1, DistancesToClusterCenter no.2, DistancesToClusterCenter no.3, DistancesToClusterCenter no.4
We then specify that we will write it to the ClusteringResults table and that we want to write it to the following columns:
[CustomerKey], [Assignments], [DistancesToClusterCenter no.0], [DistancesToClusterCenter no.1], [DistancesToClusterCenter no.2], [DistancesToClusterCenter no.3], [DistancesToClusterCenter no.4]
You can also specify the number of rows sent to the database at the same time. Note that when you write to Azure SQL DW with the Writer module you must specify that you should write 1 row at a time. The reason being, the Writer module uses table value constructors – a syntax that is incompatible with Azure SQL DW when it tries to write to the database. More information about the supported insert syntax can be found here.
When you write to Azure SQL DW it is good to write as large batches as possible to the database, but, as described above, this is something that the Writer module cannot do when you work with Azure SQL DW. This means that it can take time to write large datasets to Azure SQL DW directly from Azure ML. If you need to write large data sets it may be best to write to blob storage and then use the external table feature in Azure SQL DW to import the data.
After running the experiment, you should see the rows being written to the Azure SQL DW:
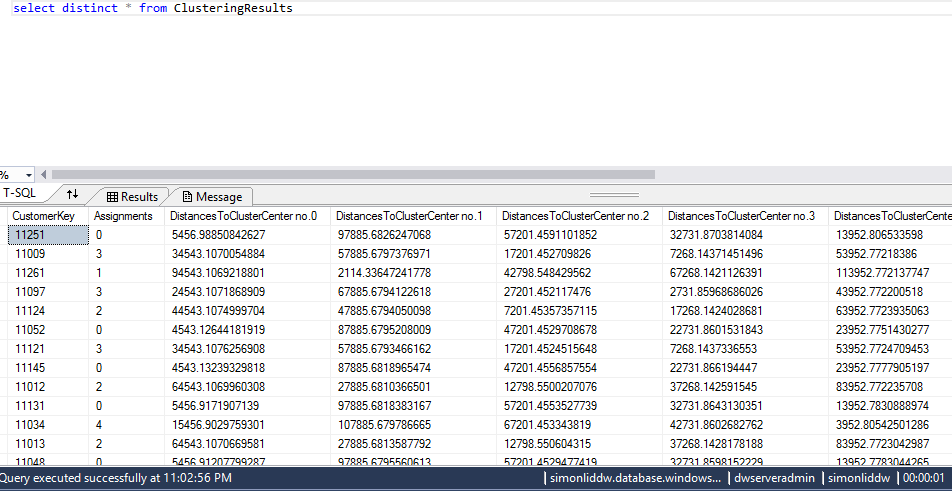
Figure 11: Looking at the results from Azure ML
Conclusion
Reading from and writing to Azure SQL DW from Azure ML works, and is supported using the Reader and Writer modules and using the Azure SQL Database data source configuration. The only thing that you need to ensure is that you create the table that you want to write to. Try it out and share your experience and feedback with us.
Simon