Getting started with Lab Management (Part 4)
In the last post, we created the “system under test” and ensured that the TCM server has information on how to run these tests in a test environment. This post explains how to get the tests run automatically as part of a scheduled build / deploy / test workflow.
Creating the deployment script
The first step is to create a deployment script that can deploy the build and tests from a build drop location to the virtual environment. Let us create a batch script file called “deploy.cmd”. The script below works on IIS7. IIS6 users would have to make changes to use iisvdir.vbs rather than the appcmd used below. Add the deploy.cmd to the calculator application and check it in.
set RemotePath=%1 set LocalPath=%SystemDrive%\Calculator if not exist %RemotePath% ( echo remote path %RemotePath% doesn't exist goto Error ) if exist %LocalPath% ( rmdir /s /q %LocalPath% ) REM Copy files to the local machine mkdir %LocalPath% copy /y %RemotePath%\* %LocalPath%\. xcopy /cseirhdzv %RemotePath%\_PublishedWebsites\Calc %LocalPath% @echo Copied the build locally REM Configure IIS and ASP.NET %windir%\system32\inetsrv\appcmd add app /site.name:"Default Web Site" /path:/Calc /physicalpath:%LocalPath% @echo added new IIS VDir %windir%\system32\inetsrv\appcmd set app "Default Web Site/Calc" /applicationPool:"ASP.NET v4.0" @echo set the app pool to run under ASP.NET v4.0 icacls %LocalPath% /grant "BUILTIN\IIS_IUSRS:(OI)(CI)(F)" icacls %SystemRoot%\ServiceProfiles\NetworkService\AppData\Local\VSEQT /grant "BUILTIN\IIS_IUSRS:(OI)(CI)(F)" :Success echo Deploy succeeded exit /b 0 :Error echo Deploy failed exit /b 1 |
Configure the build drop location:
Create drop directory where the output of build will go to, and provide permissions to accounts to write to the location.
|
Create the build definition:
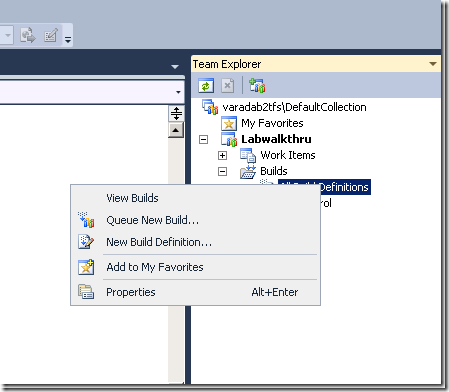
Back in Visual Studio, go to Team Explorer, and create a “new build definition”. This build definition will be used to compile the solution.
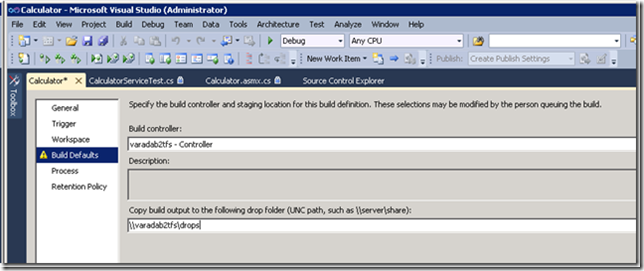
In the build defaults, configure the build drop location to use the drop location we created
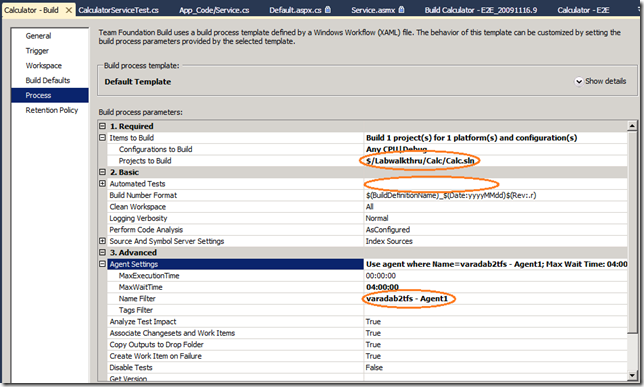
In the Process tab, select the agent to use to do the compilation as the agent in the TFS machine. (This requirement has been removed post Beta 2). Set the solution to build and remove running the unit tests as part of the build experience.
Call the build definition “Calculator – Build” and save the build definition. This is used to build the solution.
Create the E2E workflow definition:
Now that we have a build definition which can be used to build the solution, we will wrap that in a end to end definition which will build the solution, deploy it to the VM, test it and report the results.
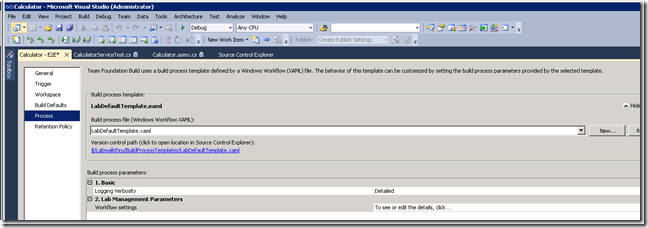
Create another build definition “Calculator – E2E” and after choosing the same set of entries, change the process tab to select “LabDefaultTemplate.xaml”
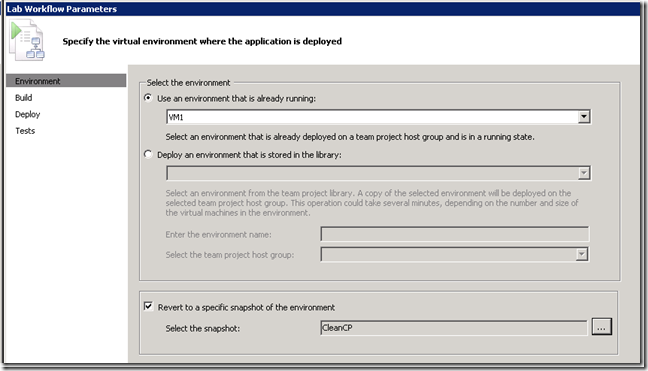
And click on the button associated with workflow settings.
Select the environment and the clean check point to revert to. The clean checkpoint helps avoid machine taint issues when running your tests, and thus is highly recommended.
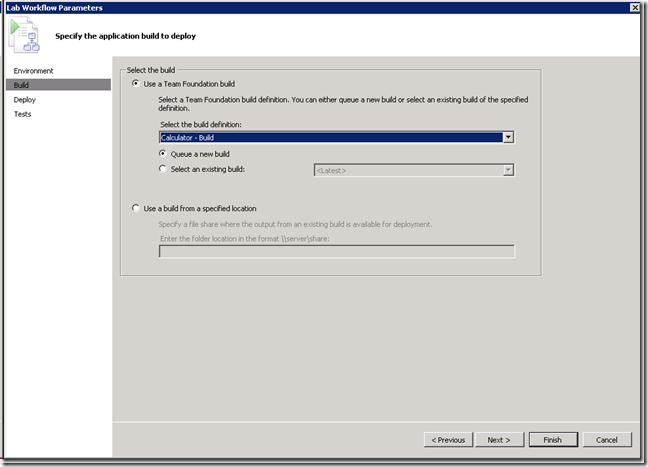
Use the “Calculator – Build” definition that we created before. This definition is used to build the solution.
On the deploy tab, we are telling the system, how to bootstrap the environment with the latest bits. We are using the Deploy.cmd we created earlier to deploy the bits to the VM.
Also note that I am taking a snapshot post the deployment. There are many scenarios where a bug is reported on a particular build. It is easy for a developer to restore to that build, and start debugging. A link to the snapshot file gets stored in the path provided. (\\varadab2tfs\drops – in my case)
We select the tests, the plan, configuration and settings and finish.
Queue the workflow:
Select the E2E template and “Queue New Build…”
And you should see that as part of the queued build, the latest solution is built (by the Calculator – Build definition), environment is restored to the clean snapshot, bits are deployed to the environment using our deployment script, a snapshot is taken post the deployment, our unit tests are run and the results are available for you to analyze in the “Microsoft Test and Lab Manager”.
This concludes the series of getting started with lab. Let us know how your experiments with lab go.
Comments
Anonymous
December 11, 2009
Having queued E2E, it states it is waiting for Calc-Build to complete, but Calc-Build is queued and not proceeding (presumably until E2E finishes); can you please provide more details on "and after choosing the same set of entries" for creating the E2E build definition? I'm thinking they shouldn't refer to the same solution file or server folders in their workspaces?Anonymous
January 06, 2010
Hi. Changing the md command in configdrop.cmd to "md c:drops" may eliminate a few errors for those of us not putting the code in the root. ThanksAnonymous
January 07, 2010
wendellp - good comment! We have fixed the script.Anonymous
June 25, 2010
I found the guide most informative, full of gaps and incosistencies compared to actual exercise. I give lot credit for effort, but the overall outcome is not similar and is never the same twice. Sounds a lot like how it's supposed to be in real life :) Thanks, Sandip
