In the Before of the Beginning: Custom Prerequisites for VSTO ClickOnce (part II).
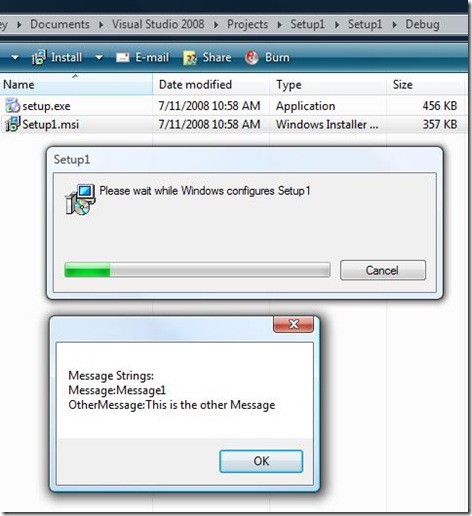
In my last post I talked about the first steps to building my Customer Prerequisite. In it, I built an MSI that would display a message box during the install phase. Here is what Setup1looks like when you run it:
It's nothing too ingenious but it gets the job done.
So...here we are with an MSI but I want to be able to somehow integrate this into the setup.exe file that gets created for my VSTO customization. The first step to doing this is to author some bootstrapper manifests. Specifically a package.xml file and a product.xml (for each supported language) needs to be created. Thankfully the is a powertool that will help you do this.
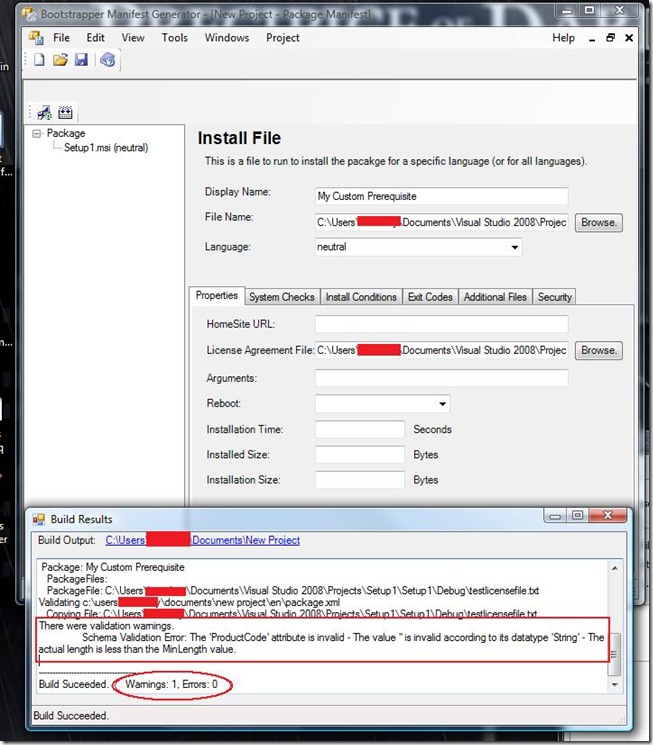
David Guyer has produced an exellent simple to use UI Tool to help with creating the bootstrapper manifest. You can get the VS 2008 version of the tool here: https://www.codeplex.com/bmg/Release/ProjectReleases.aspx?ReleaseId=10652 . This tool is currently listed as being in Beta and I still had to do some manual work to get everything lined up. Here are the steps I took:
- Open BMG for VS 2008 (installed it should show up under the Visual Studio 2008 folder).
- Create a new "Package Manifest" Project.
- Right Click on the left pane and select [Add Install File]
- Select the MSI file via the [Browse] button
- Set the Display Name (this will show up in VS)
- You can include a text License Agreement file (this will be displayed before the MSI is ran).
- Make sure to include a "Success" Exit Code on the Exit Codes tab.
- By Default the Hashing method is used under the Security, I did not change this, but you should be aware of it since it means that any changes to MSI after creating the Package Manifests may cause errors.
- Click Build.
As you can see, I get this warning about the Product Code. I talked to David Guyer about this and here was his comment:
I think once you enter a display name, I try to autogenerate a product code. Just to help clarify, the bootstrapper’s product code is not the same as the MSI’s product code… so you don’t need to enter the MSI’s product code… a bootstrapper product code is something typically like “Microsoft.VisualBasic.Powertoys.1.0”
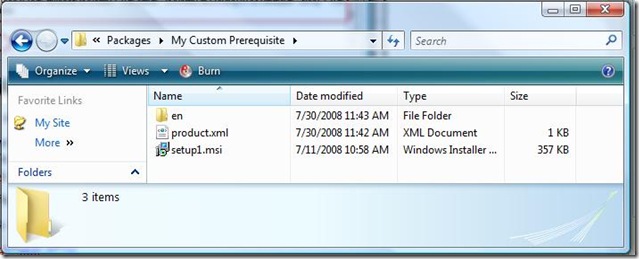
You can manually add this to the files. If you go to the build output folder you will see all of the files
So the Product.xml file should look something like this:
 <?xml version="1.0" encoding="utf-8"?>
<Product ProductCode="" xmlns="https://schemas.microsoft.com/developer/2004/01/bootstrapper">
  <PackageFiles CopyAllPackageFiles="false">
    <PackageFile Name="setup1.msi" Hash="DD8BF9497F8447128E4F6C72C8D30D8E2871E9BE" />
  </PackageFiles>
  <Commands Reboot="Defer">
    <Command PackageFile="setup1.msi">
      <ExitCodes>
        <ExitCode Value="0" Result="Success" />
        <DefaultExitCode Result="Fail" String="Anunexpectedexitcodewasr" FormatMessageFromSystem="true" />
      </ExitCodes>
    </Command>
  </Commands>
</Product>
The last steps are to add a Product code to this file and then copy the files in the Build Output folder to the prerequisites directory.
The path shown here would be: C:\Program Files\Microsoft SDKs\Windows\v6.0A\Bootstrapper\Packages\My Custom Prerequisite\
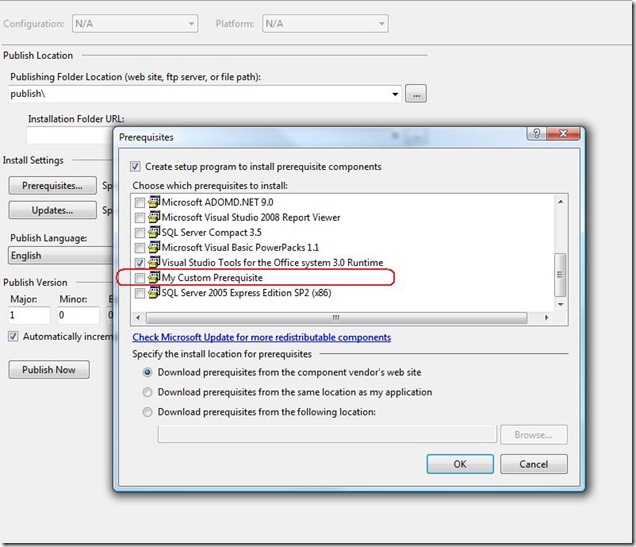
Once you've done that you should be able to include your custom prerequisite step as if it was just another standard part of your setup.
I'm going to end with that, it should be enough to get you started on deploying even more powerful and interesting VSTO solutions.
Thank You for reading.
Kris


