Bot Framework と Microsoft Graph で DevOps その 3 : AuthBot で認証して Graph を実行
前回は C# でボットのユニットテストができる状態にしました。今回は Microsoft Graph を呼ぶ個所を実装してみます。とりあえず自分の予定でも取得してましょう。
アプリ登録などもろもろ準備
AuthBot 追加
Microsoft Graph は OAuth 2.0 をサポートしていて、ボットアプリから認証するには AuthBot というものを使うのが一番簡単です。今回のシリーズではこの AuthBot を使います。
AuthBot: https://github.com/MicrosoftDX/AuthBot
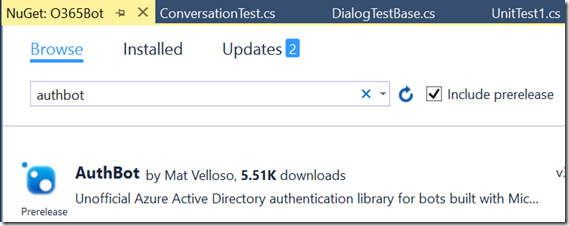
1. AuthBot NuGet パッケージをプロジェクトに追加します。Include prerelease にチェックしてください。
2. Web.config 内、appSettings 配下に以下を追加します。内容は後で埋めます。
 <!-- AAD Auth v1 settings -->
<add key="ActiveDirectory.Mode" value="v1" />
<add key="ActiveDirectory.ResourceId" value="https://graph.microsoft.com/" />
<add key="ActiveDirectory.EndpointUrl" value="https://login.microsoftonline.com" />
<add key="ActiveDirectory.Tenant" value="" />
<add key="ActiveDirectory.ClientId" value="" />
<add key="ActiveDirectory.ClientSecret" value="" />
<add key="ActiveDirectory.RedirectUrl" value="https://localhost:3979/api/OAuthCallback" />
3. Global.asax.cs の Application_Start メソッド内に以下コードを追加します。
 AuthBot.Models.AuthSettings.Mode = ConfigurationManager.AppSettings["ActiveDirectory.Mode"];
AuthBot.Models.AuthSettings.EndpointUrl = ConfigurationManager.AppSettings["ActiveDirectory.EndpointUrl"];
AuthBot.Models.AuthSettings.Tenant = ConfigurationManager.AppSettings["ActiveDirectory.Tenant"];
AuthBot.Models.AuthSettings.RedirectUrl = ConfigurationManager.AppSettings["ActiveDirectory.RedirectUrl"];
AuthBot.Models.AuthSettings.ClientId = ConfigurationManager.AppSettings["ActiveDirectory.ClientId"];
AuthBot.Models.AuthSettings.ClientSecret = ConfigurationManager.AppSettings["ActiveDirectory.ClientSecret"];
また using System.Configuration; も入れておきます。
Azure AD にアプリ登録
OAuth 2.0 を使うには Azure AD にアプリケーションを登録する必要があります。認証周りの詳細を知りたい場合はエバンジェリスト松崎さんのブログを見てください。
1. https://portal.azure.com にログインします。Office 365 E3 体験版を作っている場合、体験版を作ったユーザーでログインしてください。
2. Azure Active Directory を選択します。
3. ブレードが開くので、 「アプリの登録」をクリックします。
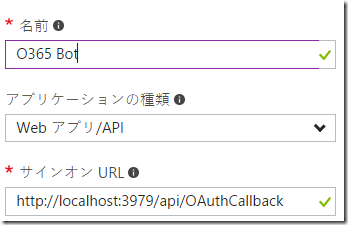
4. 「新しいアプリケーションの登録」をクリックして、適当に名前を付けます。サインオン URL は ”https://localhost:3979/api/OAuthCallback" とします。
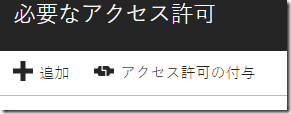
5. 作成したら、登録したアプリを選択して、「必要なアクセス許可」をクリックします。
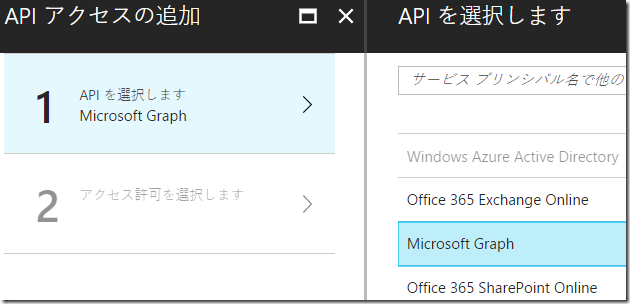
6. 「追加」をクリックして、「Microsoft Graph」を追加します。
7. アクセス許可から管理者権限の不要な権限にチェックを入れます。今回はテストですのですべてチェックを入れておいてください。
例)
8. 「アクセス許可の付与」をクリック。
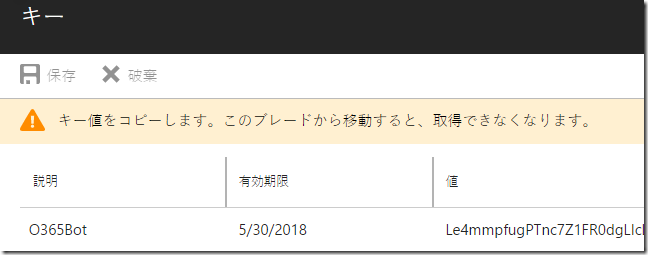
9. 次に「キー」を選択して、新しいキーを取得します。
10. 先ほど追加した Web.config の内容を埋めます。
 <add key="ActiveDirectory.Tenant" value="テナント名.onmicrosoft.com" />
<add key="ActiveDirectory.ClientId" value="登録したアプリのアプリケーションID" />
<add key="ActiveDirectory.ClientSecret" value="上記のキー" />
Graph クライアント追加
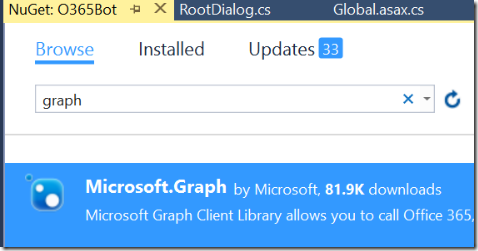
1. ボットのプロジェクトに、以下の NuGet を追加。
2. 新しいフォルダを追加。ここでは Services フォルダとしました。
3. GraphService.cs を追加し、以下のコードと差し替え。
 using AuthBot;
using Microsoft.Bot.Builder.Dialogs;
using Microsoft.Graph;
using System;
using System.Collections.Generic;
using System.Configuration;
using System.Linq;
using System.Net.Http;
using System.Net.Http.Headers;
using System.Threading.Tasks;

namespace O365Bot.Services
{
    public class GraphService
    {
        IDialogContext context;
        public GraphService(IDialogContext context)
        {
            this.context = context;
        }

        public async Task<List<Event>> GetEvents()
        {
            var events = new List<Event>();
            var client = await GetClient();

            try
            {
                var calendarView = await client.Me.CalendarView.Request(new List<Option>()
                {
                    new QueryOption("startdatetime", DateTime.Now.ToString("yyyy/MM/ddTHH:mm:ssZ")),
                    new QueryOption("enddatetime", DateTime.Now.AddDays(7).ToString("yyyy/MM/ddTHH:mm:ssZ"))
                }).GetAsync();

                events = calendarView.CurrentPage.ToList();
            }
            catch (Exception ex)
            {
            }

            return events;
        }

        private async Task<GraphServiceClient> GetClient()
        {
            GraphServiceClient client = new GraphServiceClient(new DelegateAuthenticationProvider(AuthProvider));
            return client;
        }

        private async Task AuthProvider(HttpRequestMessage request)
        {
            request.Headers.Authorization = new AuthenticationHeaderValue(
                "bearer", await context.GetAccessToken(ConfigurationManager.AppSettings["ActiveDirectory.ResourceId"]));
        }
    }
}
4. RootDialog.cs からこれらを使えるように、以下のコードに差し替え。
 using System;
using System.Threading.Tasks;
using Microsoft.Bot.Builder.Dialogs;
using Microsoft.Bot.Connector;
using AuthBot;
using System.Configuration;
using AuthBot.Dialogs;
using System.Threading;
using O365Bot.Services;

namespace O365Bot.Dialogs
{
    [Serializable]
    public class RootDialog : IDialog<object>
    {
        public Task StartAsync(IDialogContext context)
        {
            context.Wait(MessageReceivedAsync);

            return Task.CompletedTask;
        }

        private async Task MessageReceivedAsync(IDialogContext context, IAwaitable<object> result)
        {
            var message = await result as Activity;

            // 認証チェック
            if (string.IsNullOrEmpty(await context.GetAccessToken(ConfigurationManager.AppSettings["ActiveDirectory.ResourceId"])))
            {
                // 認証ダイアログの実行
                await context.Forward(new AzureAuthDialog(ConfigurationManager.AppSettings["ActiveDirectory.ResourceId"]), this.ResumeAfterAuth, message, CancellationToken.None);
            }
            else
            {
                // 認証済の場合のロジック実行
                GraphService service = new GraphService(context);
                var events = await service.GetEvents();
                foreach(var @event in events)
                {
                    await context.PostAsync($"{@event.Start.DateTime}-{@event.End.DateTime}: {@event.Subject}");
                }
            }
        }

        private async Task ResumeAfterAuth(IDialogContext context, IAwaitable<string> result)
        {
            context.Wait(MessageReceivedAsync);
        }
    }
}
動作確認
1. F5 を押下して起動。
2. Bot Emulator を起動して、https://localhost:3979/api/messages に接続。
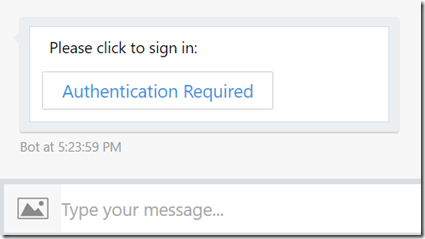
3. 適当にメッセージを送信して、認証要求が出ることを確認。
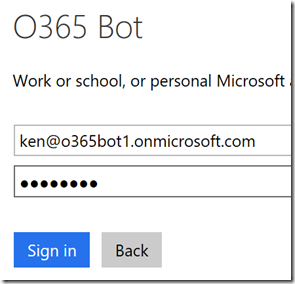
4. ボタンをクリックするとブラウザが起動するので、サインイン。
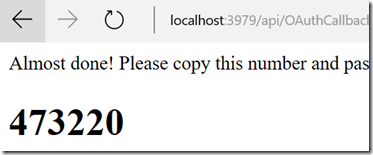
5. 番号が出るので、チャットで送信。
6. これで認証は完了するので、もう一度メッセージを送信。
7. 予定の一覧が取れることを確認。
まとめ
まず動くようになりましたが、このままではユニットテストができないため、次回は AutoFac や Moq を使ってその点を改善します。
