Microsoft Web Platform Installer: what is it and how to install it?
The Microsoft Web Platform Installer was officially announced at MIX09. The Web PI as it’s abbreviated is your best tool get access to Microsoft’s web platform runtimes, tools and database. It only installs free products, beginning with the platform tools but it also allows you to easily install ASP.NET community tools like DotNetNuke, Umbraco and others, but also PHP open source projects like Acquia Drupal, Wordpress, and more.
In this post I’m focusing on the platform and not using the gallery, which will be for a later post.
Just this weekend I re-installed my old laptop at home with the Windows 7 RC, so having a new clean install is really a good moment to try out the Web Platform Installer. No need to get several tools from several download sites, search for the latest version and so forth.
Before getting started: supported platforms
Web PI is supported on the following platforms: Windows Vista, Windows Vista SP1, Windows XP SP2+, Windows Server 2003 SP1+, Windows Server 2008
Note:
Here I’m doing the installation on a new Windows 7 RC version, which itself is not really a supported platform. Logical as Windows 7 is not released but I had no issues except a warning about SQL Server 2008 Express, for which I made sure to add SP1 after completing the Web PI installation.
Installing the web platform with the Web Platform Installer
microsoft.com/web
Download, choose either Web PI 1.0 (released) or 2.0 which is still in beta. Here I’m going to install version 2.0 since I want access to some beta stuff and also because at a later stage I would like access to the gallery.
Go to https://www.microsoft.com/web/downloads/platform.aspx and click Download and run. This will launch the installer.
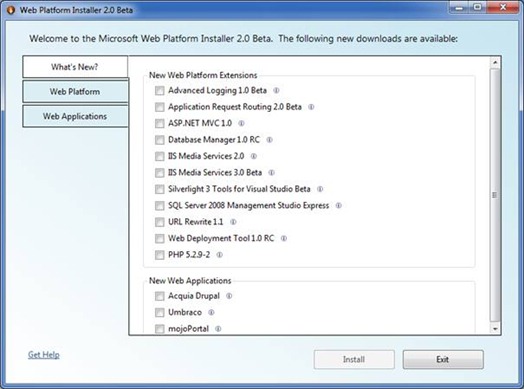
The first screen you’re presented with shows you the latest additions.
Note: this is exactly the same screen that is presented to you when you re-run the Web Platform Installer later on to add technologies.
Choosing which items to install is straightforward, and you get detail information about each of the detail options. For example, on the web platform section I’m installing the Web Server, Frameworks and Runtimes, Database and Tools. Under each of these there are extra options, that you can customize to your needs. By default, the most used and logical ones are selected but you may choose to add other features as well.
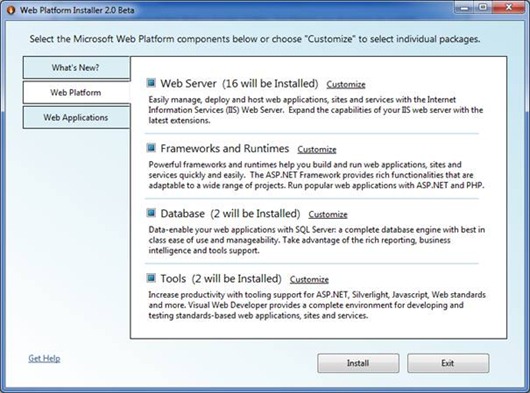
Let’s drill further on the Web Server section.
I surely want to run ASP.NET as well as have support for the latest Media services on Internet Information Server. To add those I choose to “Customize” the Web Server element.
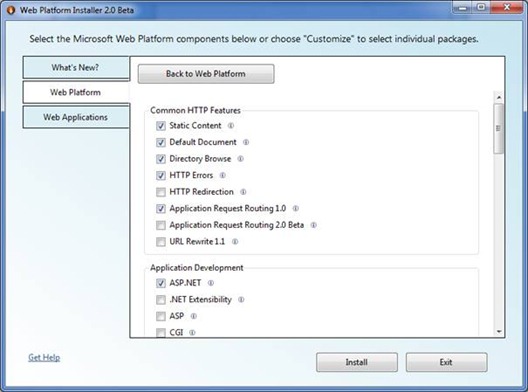
In case I’m not sure what a specific feature means I can click the  (i) icon. This gives you extra information and a link to even more details about the selected feature. In the screenshot below you can see I selected to know more about IIS Media Services 3.0 Beta:
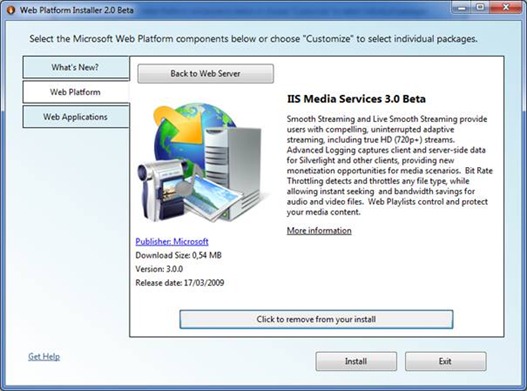
Since this is the Web PI 2.0 beta I do have a choice of some technologies still in beta like the Application Request Routing 2.0 Beta or the IIS Media Services 3.0 Beta.
Framework and Runtimes
In the framework and runtimes section you have the option to install ASP.NET MVC 1.0 (which I’m doing), .NET Framework 3.5 SP1 and PHP 5.2.9.-2.
Database
The proposed database is SQL Server 2008 Express, as well as the SQL Server 2008 Management Studio Express and SQL Server 2008 Management Objects.
Tools
In the tools section the free Visual Web Developer 2008Express with SP1 (the latest service pack already applied), and the Silverlight 2 Tools for Visual Studio. Since this is the beta one the option to install Silverlight 3 Tools for Visual Studio. I know the two sets of tools (Silverlight 2 and Silverlight 3 Beta) cannot be installed on the same machine. And yes, the Web PI correctly checks for this and warns you. I had to try it out and was glad the check is built in :-)
Now that I have chosen all items I wish to install I can either go ahead and get my machine setup, or also choose to install applications from the gallery. I’m skipping this part for now and go ahead and click on “Install”. The Web PI shows the items selected along with any specific license terms, which in order to install, well of course I do need to accept. Let’s do that.
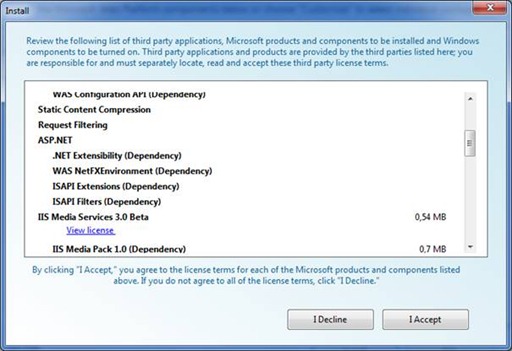
Once installation starts, depending on the items you have chosen there might be some extra configuration screens appearing. In my case I selected the SQL Server 2008 Express, for which I now get the chance to configure security settings.
Only after this does the installer start downloading the items I have chosen. Depending on the number of items this might take a few moments to complete.
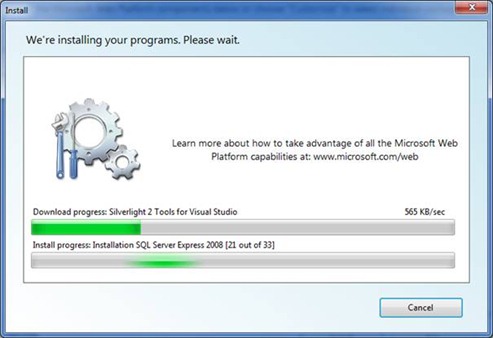
That’s it, all the chosen items have been installed.
Re-running the installer
Running the installer again is very easy, just launch the Web Platform Installer from the Start menu. At this stage the installer will connect and download information on any new items added or updated in the installer.
Uninstalling chosen items
One thing I noticed was that when re-running the Web PI I had no choice to unselect already installed items. At this stage the Web PI does not support this feature (at least that what seemed the obvious to me). The best solution now is to go through Control Panel > Uninstall a program. All the individual programs installed through the Web PI can be found there and uninstalled separately if needed.
So now I’m all set to start my development and testing on the newly installed machine. All without having to go through several downloads of framework, tools, IIS extensions, and so forth.
I’ll be blogging about the Gallery at a later stage as well, including the support for PHP applications delivered with the gallery.
And now to end this post you might want to sit back and watch this funny video: Cannon P.I., and see which Microsoft execs you might recognize ;-)
Comments
- Anonymous
May 10, 2009
PingBack from http://microsoft-sharepoint.simplynetdev.com/microsoft-web-platform-installer-what-is-it-and-how-to-install-it/