Create Service Principal in Linux for Azure Automation
Overview
There are lots of ways to do things in Azure. I could not find a current end to end sample of setting up and getting an Access Token using SSH on a Linux box. I chose the latest Ubuntu image up in Azure Virtual Machines for this overview. This is loosely based on this older blog which had you create a PEM certificate (which is no longer necessary) https://blogs.msdn.microsoft.com/arsen/2015/09/18/certificate-based-auth-with-azure-service-principals-from-linux-command-line/ .
Steps
Install Azure CLI 2.0
https://docs.microsoft.com/en-us/cli/azure/install-azure-cli?view=azure-cli-latest
I am installing on Ubuntu: https://docs.microsoft.com/en-us/cli/azure/install-azure-cli-apt?view=azure-cli-latest
Login with an account that can create Service Principals using the interactive login (works with MFA):
Select the Target Subscription:
In my case I have many subscriptions and I need to make active or select the one ending in ‘umption’. Here are the commands to do that:
Create Service Principal with Certificate
I used the default access and the --create-cert option like this: az ad sp create-for-rbac -n "ForMyAutomationApp" --create-cert
Copy all this information as you will need it to login using this Service Principle (to test access).
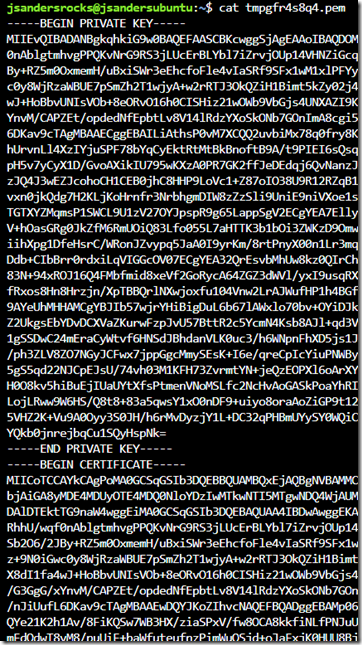
Note that location of the .pem file. Go there and you can list it out. You will need information from this certificate later to verify the signature of this token:
Copy the public key which is the entire section after -----END PRIVATE KEY-----
Like this:
-----BEGIN CERTIFICATE-----
MIICoTCCA
…..
Y32P5WwcaOfX1hkzMtTj4DAmAAlhudWhnRmVBRUvSx7RmWMl1Fhe
+ufr0jY=
-----END CERTIFICATE-----
You will need this to test the signature of your JWT later.
Log out and test the Service Principal login (optional)
Using the information you copied when creating the service principal you can test access. You may want to create your service principal with a certain role for access reasons. The default is Contributor which is fine for me:
Sign the JWT Token
Note: This is accurate at time of publication, but these are all 3rd party Open Source tools that may change. Also I removed this service principal and PEM file before publishing file so this information won’t work for anything.
You will need to first get the certificate thumbprint. You can get it using OpenSSL (which you may have to install) using this command. You will need to enter the path to the PEM file you generated earlier: echo $(openssl x509 -in /home/jsandersrocks/tmpgfr4s8q4.pem -fingerprint -noout) | sed 's/SHA1 Fingerprint=//g' | sed 's/://g' | xxd -r -ps | base64
The result is a small string which is the thumbprint: Pic3Y1tO/jwbLjppXwJdbiPAAro=
Create Token.js and run in node to create Signed JWT
I used VIM and created a file called token.js to create the signed JWT. Choose appropriate values for your token based on the library documentation here: https://www.npmjs.com/package/jsonwebtoken
In this script You need to add the highlighted portions from the data above to include the PEM file path to read the cert, the SHA1 thumbprint for x5t, the tenant ID in the aud field and finally the appId for iss and sub.
var jwt = require('jsonwebtoken');
var fs = require('fs');
var cert = fs.readFileSync('/home/jsandersrocks/tmpgfr4s8q4.pem');
var additionalHeaders = {
"x5t":"Pic3Y1tO/jwbLjppXwJdbiPAAro="
}
var myJwt = {
"aud": https://login.microsoftonline.com/72f988bf-XXXXXXXXXXXX-2d7cd011db47/oauth2/token,
"iss": "81ad91de-0844-4547-88ed-bffed69e45f1",
"sub": "81ad91de-0844-4547-88ed-bffed69e45f1",
"jti": "" + Math.random(),
"exp": Math.floor(Date.now()/1000)+7*8640000
};
console.log(myJwt);
var token = jwt.sign(myJwt,cert,{algorithm:'RS256', header:additionalHeaders});
console.log(token);
Install node.js if necessary and then the jasonwebtoken package using this command: npm install jsonwebtoken,
Finally run node pointing to your script file to generate the token!
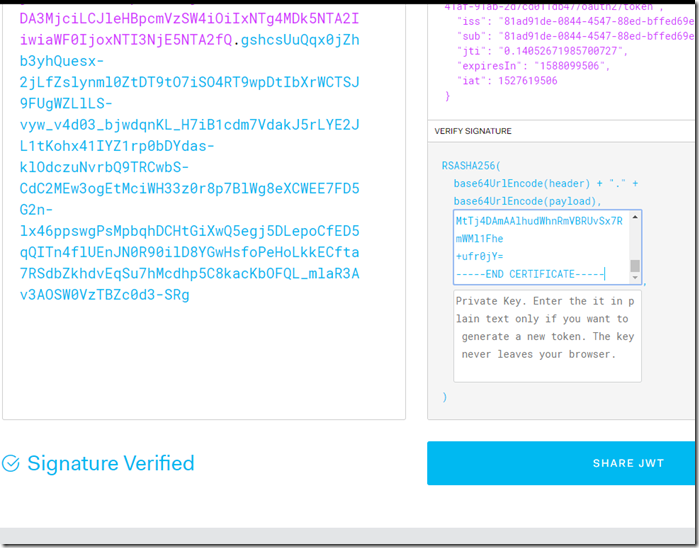
Copy the Token and Verify the signature:
The signed token is the text above starting with “ey” and to the end of the string (in this case –SRg).
Go to https://jwt.io/ and paste your token into the first field. Then past in the information from the public key (from the section above - Copy the public key ).
Next Steps
You can now use this JWT to get an access token and use this in REST APIs (see blog that inspired this in the opening statement).
Here is an example of me generating a token and using it in curl to get an access token. The actual access token is the field after “access_token” in the below output.
Note that there are so many different ways to use this token and you can generate this many ways. There are settings for expiration of this token and when it begins to be valid. I leave that research to you as it is adequately documented. A lot of these techniques are contained in the various libraries and APIs for different languages and I encourage you to use those whenever possible.
Please drop me a note if you found this useful!


