Using LucidWorks on Windows Azure (Part 2 of a multi-part MS Open Tech series)
LucidWorks Search on Windows Azure delivers a high-performance search service based on Apache Lucene/Solr open source indexing and search technology. This service enables quick and easy provisioning of Lucene/Solr search functionality on Windows Azure without any need to manage and operate Lucene/Solr servers, and it supports pre-built connectors for various types of enterprise data, structured data, unstructured data and web sites.
In June, we shared an overview of the LucidWorks Search service for Windows Azure, and in our first post in this series we provided more detail on features and benefits. For this post, we’ll start with the main feature of LucidWorks – quickly creating a LucidWorks instance by selecting LucidWorks from the Azure Marketplace and adding it to an existing Azure Instance. It takes a few clicks and a few minutes.
Signing up
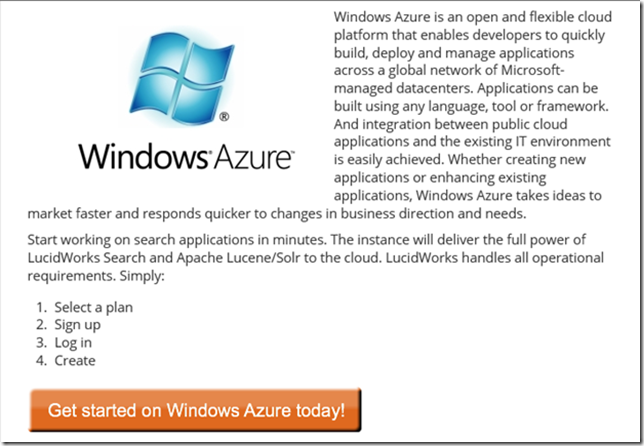
LucidWorks Search is listed under applications in the Windows Azure Marketplace. To set up a new instance of LucidWorks on Windows Azure, just click on the Learn More button:
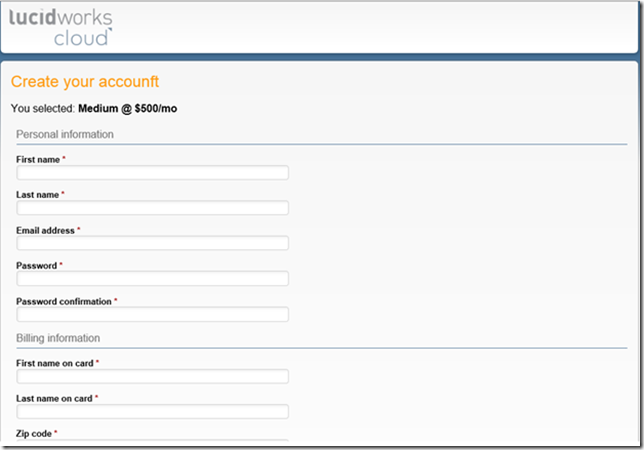
That takes you to the LucidWorks Account Signup Page. From here, you select a plan, based on the type of storage being used and the number of documents to index. There are currently four plans available: Micro, which has no monthly fee, Small and Medium, which have pre-set fees, and Large, which is negotiated directly with LucidWorks based on several parameters. All of the account levels have fees for overages, and the option to move to the next tier is always available via the account page.
The plans are differentiated on document limits in indexes, the number of queries that can be performed per month, the frequency that indexes are updated, and index targets. Index targets are the types of content that can be indexed – for a Micro, only Websites can be indexed, for small and large, files, RDBMS, and XML content can also be indexed. For large instances ODBC data drivers can be used to make content available to indexes.
Once the plan is selected, enter your information, including Billing Information:
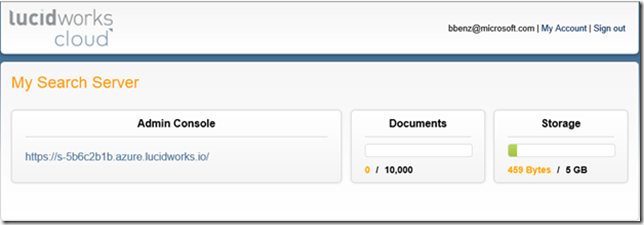
Once the payment is processed (Or in the case of Micro, no payment), a new instance is generated and you’re redirected to an account page, and invited to start building collections!
Configuration
In the next part of the series we’ll cover setting up collections in more detail, for now let’s cover the account settings and configuration. Here’s the main screen for collections:
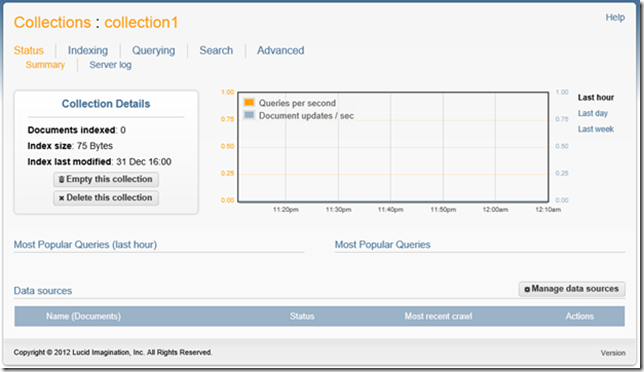
The first thing you see is the Access URL options. You can access your collections via Solr or REST API, and here’s where you get the predefined URL for either. When you drill down into the collections you see a status screen first:
This shows you the index size and stats about modification, queries per second, and updates per second, displayable by the last hour, day or week. This screen is also where you can see the most popular queries.
Data Sources
If you were managing external data sources, here’s where you configure them, via the Manage Data Sources button.
From here you can select a new data source from the drop-down. The list in this drop-down is as of this writing, and may change over time – check here for more information on currently supported data sources.
Indexing
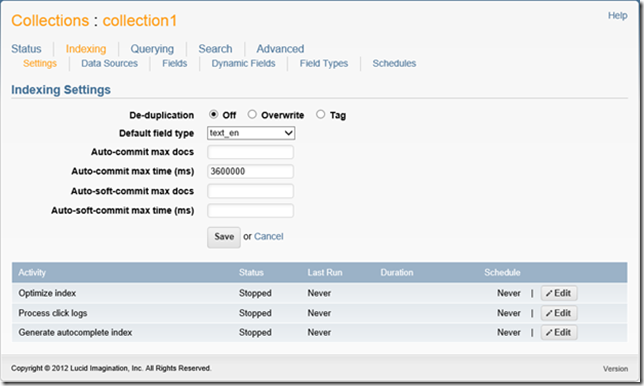
The Indexing Settings are the next thing to manage in your LucidWorks on Azure account. Here’s the Indexing UI:
Indexing Settings
De-duplication manages how duplicate documents are handled. (As we discussed in our first post, any individual item that is indexed and/or searched is called a document.) Off ignores duplicates, Tag identifies duplicates with a unique tag, and Overwrite replaces duplicate documents with new documents when they are indexed. Remember that de-duplication only applies to the indexes of data, not the data itself – only the indexed reference to the document is de-duplicated – so duplicates will still exist in the source data even if data in the indexes has been de-duplicated. Duplicates are determined based on key fields that you set in the fields editing UI.
Default Field Type is used for setting the type of data for fields whose type LucidWorks cannot determine using its built-in algorithms.
Auto-commit and Auto-soft commit settings determine when the index will be updated. Max time is how long to wait before committing, and max docs is how many documents are collected before a commit. Soft commits are used for real time searching, while regular commits manage the disk-stored indexes.
Activities manage the configuration of indexes, suggested autocomplete entries, and user result click logging.
Full documentation of indexing settings can be found here.
Field Settings
Field Settings allow configuration of each field in the index. Fields displayed below are automatically defined by data extraction and have been indexed:
Field types defined by LucidWorks have been optimized for most types of content, and should not generally be changed. The other settings need to be configured once the index has run and defined your fields:
For example, a URL field would be a good candidate for de-duplication, and you may want to index it for autocomplete as well. You can also indicate on Field Settings whether you want to display URLs in search results. Here is full documentation of Field Settings.
Other Indexing Settings
Dynamic Fields are almost the same as fields, but are created or modified when the index is created. For example, adding a value before or after a field value, or adding one or more fields together to form a single value.
Field Types is where you add custom field types in addition to the default field types created by your LucidWorks installation.
Schedules is where you add and view schedules for indexing.
Querying
Querying Settings is where you can edit the configuration for how queries are conducted:
The Default Sort sets results to be sorted by relevance, date, or random.
There are four Query Parsers available out of the Box for LucidWorks; a custom LucidWorks parser, as well as standard Lucene, dismax and extended dismax. More information on the details of each parser is available here.
Unsupervised feedback resubmits the query using the top 5 results of the initial query to improve results.
This is also where you configure the rest of your more familiar query behavior, like where stop words will be used, auto complete, and other settings, the full details of which are here.
Next up: Creating custom Web site Search using LucidWorks.
In the next post in the series, we’ll demonstrate setting up a custom Web site that integrated LucidWorks Search, and the configuration settings we use to optimize search for that site. After that, in future posts we’ll discuss tips and tricks for working with specific types of data in Lucidworks.
Brian Benz
Senior Technical Evangelist
Microsoft Open Technologies, Inc.

