Windows 7 Installation / Dual Boot: Boot from VHD is the best method.
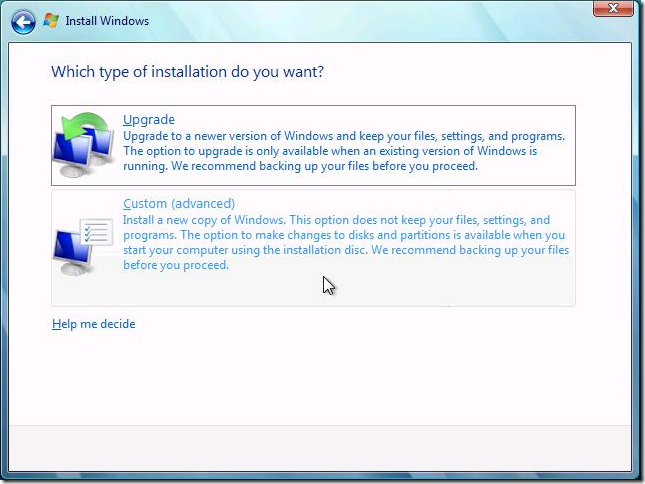
So you’ve got your Windows 7 DVD and aren’t too sure what to do with it. You’re happily running Windows Vista and when you run the Windows 7 setup you get as far as here and stop.
The problem is that you don’t want to do an upgrade or a clean install – you’d be quite happy having a dual boot scenario (Vista with all it’s applications for your day job and your Windows 7 installation for your “play” time).
Here’s the answer – Boot from VHD. A VHD is a Virtual Hard Disk – a single file on your file system that kind of emulates an entire disk drive (if you’ve been using any of Microsoft’s virtualisation solutions you already know what they are).
The quickest and easiest approach to get your dual boot Vista and Windows 7 is to follow these simple steps:
First boot your PC to the Windows 7 installation DVD (you might have to press the F12 key as your PC is booting to give you the choice – or even reconfigure your PC’s BIOS to boot from the DVD first).
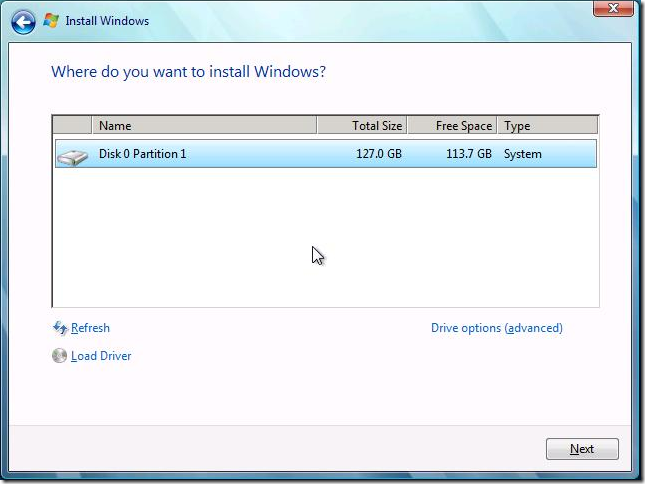
Setup starts and you’ll be asked to choose your locale, accept the EULA and enter your product key (you can leave this blank and put a product key into the system within the next month), continue until you’re prompted with this dialog (where to install Windows 7):
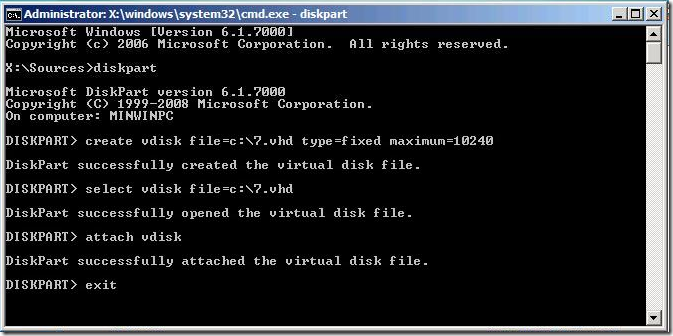
DON’T press Next. Instead press the Shift and the F10 keys – this will bring up a command prompt. Type diskpart to enter our disk partitioning and manipulation tool. Create a new Virtual Hard Disk, select it and attach it to the system:
create vdisk file=c:\7.vhd type=fixed maximum=10240
select vdisk file=c:\7.vhd
attach vdisk
Obviously you can change the file=c:\7.vhd to any filename in any location (it just has to be a .VHD file extension and can’t have the word windows in it). I’ve created a 10GB file (10240 MB) – it’s the smallest recommended for Windows 7 (you can make it bigger, but the bigger it is the longer it takes – 10GB takes a couple of minutes).
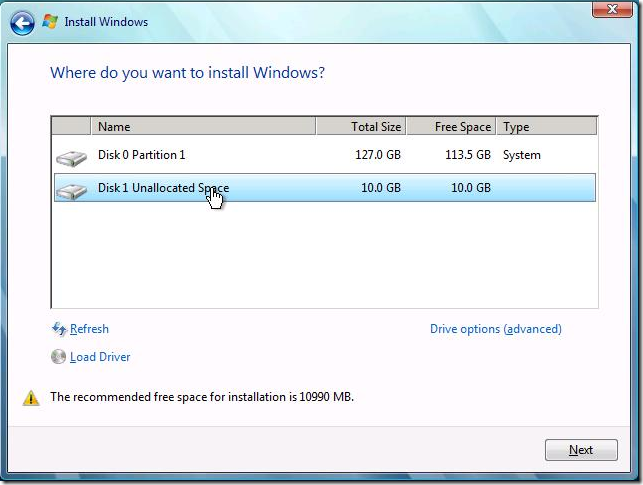
Exit diskpart and exit the command prompt. Now press the Refresh button and setup will offer you your new virtual disk as a location to install Windows 7.
Select your new drive and press Next. Setup will continue unattended for the next 20 minutes or so. Once finished, you’ll be asked for your username (Windows will create a computername based on your username, which you can change). If you’re connected to a network, setup will ask you if it’s Work, Home or Public and that’s pretty much it.
Once up and running, I do suggest that you connect to the Internet and run Windows Update (there’s a few updates already out there – most are newer device drivers).
Next time you boot your PC you’ll have 30 seconds to choose if you want to run Windows 7 of Windows Vista (dual boot).
Enjoy
| Share this post : |  Facebook it! Facebook it! |
Comments
- Anonymous
January 01, 2003
PingBack from http://www.windowsobserver.com/2009/03/20/windows-7-google-alerts-for-20-march-2009/
