Version Control with Git for MP Authors – part 2
Our little journey into Version Control for MP Authors continues. You can find the other part(s) here:
This part covers how to create a new MP with Visual Studio and integrate that into a local Git repository. It will also cover some basic actions like committing, comparing and resetting actions in Visual Studio using the local Git repository.
We do not use the Git shell at the moment or remote repositories. This might be covered in a future part of this blog series.
What requirements do we need for this part?
- a Windows machine with Visual Studio 2013/2015 and VSAE installed
- latest Git release installed (as described in part 1)
Before we begin, let’s take a look at some technical terms and how I use them:
Solution, project, repository – I am getting confused…
Me too in the first place, so let’s sort those terms out and simplify them (Dear Devs, please remember: don’t laugh!). When you start with a MP project in Visual Studio with VSAE you create a solution. Normally every new MP is a new Visual Studio solution, so you have a 1:1 relationship between solution and project. If you plan to create a big MP (like e.g. the SQL MP) you can split it into multiple separate smaller parts like a library MP, a discovery MP etc. In this case you can create multiple MP projects and store them into one Visual Studio solution.
A Git repository is a container containing all files which you want to track as a separate unit of development. I would recommend creating a new Git repository for every new Visual Studio solution.
In our scenario we will have a 1:1:1 relationship:
One MP project is stored in one Visual Studio solution whose versioning gets tracked by one Git repository.
Creating a new MP and adding it to Git
Before we start you should select a new root folder for all of your Git repositories. This is not mandatory, but I find it really helpful to have all my repositories in one place. You can pick whatever directory you like, no need for any other preparation. I choosed D:\Development\Git as my root folder.
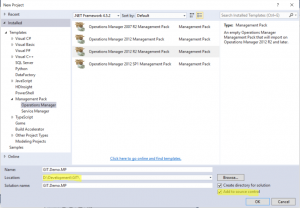
So, let’s fire up Visual Studio and create a new SCOM MP project:
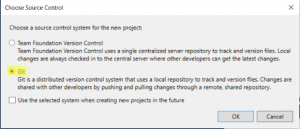
As location please pick your previously selected Git root folder and also select “Add to source control”. After clicking on OK, you will get another prompt regarding the Source Control system you want to choose. Select “Git”:
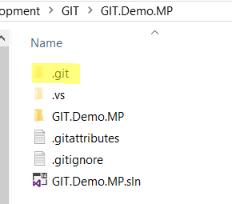
As soon as the base project structure is created by Visual Studio, you can see a hidden “.Git” folder in your newly created repository e.g. in Windows Explorer:
Integrating existing MP projects into Git
Ok, what if I want to integrate an existing MP project into Git? No problem, simply open your solution in Visual Studio, go to the Solution Explorer, right click on the solution and select “Add solution to SourceControl”. That’s it!
Configuring basic Git settings
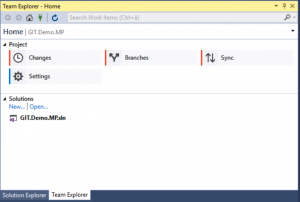
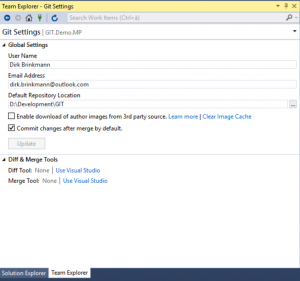
We haven’t configured any of the possible Git settings yet. You can control the basic Git settings straight out of Visual Studio by using the Team Explorer (select it from the View Menu if not visible):
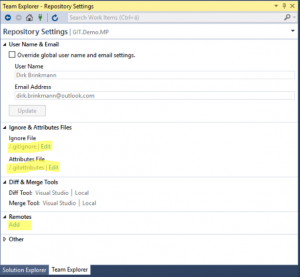
Git will be controlled by global and repository specific settings stored in configuration files, which you can configure straight out of Visual Studio to a certain extend:
In the global settings please make sure, that your User Name is correct and that your email address matches your Microsoft account (former Live ID). We will need these settings in upcoming parts of this blog series.
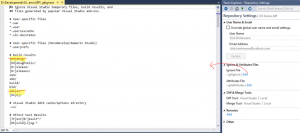
By default, all files in a repository will be tracked by Git unless not otherwise specified in a .gitignore file.
This file e.g. states, that all BUILD and DEBUG folder will be excluded from change tracking. In a normal software project that make sense, but I like my built result of a MP also tracked (.mp/.mpb./.xml). Therefore, I delete both lines from the ignore file:
Ok, that was all we need to get started.
Let’s start working with the MP and see how we can leverage Git.
Committing changes to Git
I create a folder called “Files” in my MP and one PowerShell script “DemoScript.ps1” with only one single line of code "write-host 'Hello World'". Once you have built your MP…
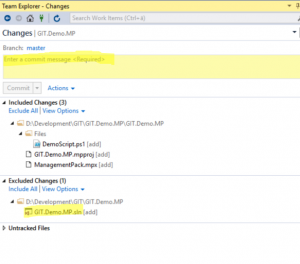
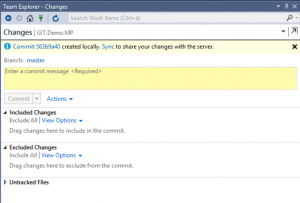
…you can use the Solution Explorer to right click on the Solution, select “Source Control” and then “Commit”. This will bring you into the Team Explorers Commit window:
You can see, which files will be included and excluded and you can change that manually (e.g. include the SLN file). Every commit must be accompanied by a describing message (e.g. “My initial commit”). You should choose a short, meaningful text, describing what this commit contains.
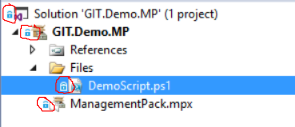
Visual Studio shows you that a file was committed (i.e. checked into the VCS) by using a little lock symbol in front of each file:
When should you make Git commits?
This is up to you. An accepted practice is to make separate commits for logically separate changes. Think of commits as entries in a logbook-whenever you've made a change that's worth noting, record it in a commit.
Committing and Comparing
One cool feature of version control is the compare feature, which lets you compare e.g. the current version of a file with previously committed ones. To demonstrate that I modify my PowerShell script by adding a new line to it:
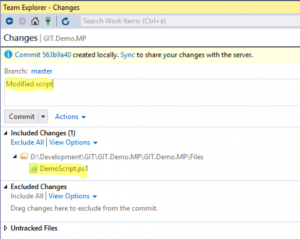
Notice the symbol in front of the file, showing that this file was changed. I then commit only this file by right clicking on it and selecting “Commit”:
Now you can right click on the file and select “View history…” which shows you the commit history:
By right clicking on one of the versions you can select “Compare with previous…” to compare it with other versions:
Making minor changes – modifying (amending) a commit
It might be that you noticed after making a commit that you had a minor issue (e.g. typo) in your code. Instead of creating a new full commit, you can amend that minor correction to the current commit. Commit you file, but instead of clicking on the “commit” button, click on “Actions”. There you find a menu called “Amend previous commit”. This will modify your previous commit (starting with the GUID 9d…), give it a new GUID (8…) and the new message “Typo”:
Reverting to a previous state
Another cool thing is of course the ability to revert any file to a previously committed state. In the history windows you can select a commit and click on “Revert” in the Team Explorer:
You will be asked if you really want to revert the commit and after clicking on “Yes” your file is back to the original state:
Summary
In this part we had a look on
- how to integrate a (new) MP into Git
- configure some basic settings of Git (like .gitignore)
- create commits and amend to a commit
- revert commits
You can find more detailed information about all these steps here: https://www.visualstudio.com/en-us/get-started/code/Git
Stay tuned for part 3 when we talk about using remote repositories.
Comments
- Anonymous
September 04, 2016
Thanks Dirk, well explained. I am working on SCOM last 3 Year. I want to learn SCOM in dept so review and read you all blocks. Please keep in post for future doc and articles. Thanks again.
