Developing Business Central Extensions (part 4) - Branch Policies
This is part 4 of a blog post series. Part 1 contains all the prerequisites, part 2 is about cloning the project and get your sandbox environment up running and part 3 is about build agents, and building your project in Azure DevOps.
Branch Policies
At this time, we have an Azure DevOps project with a build pipeline, which we can kick off manually. We have not setup any branch policies, meaning that anybody with write access to the repository can check in code, even code which will break the build and cause instability of your product.
It's time to setup branch policies to ensure quality.
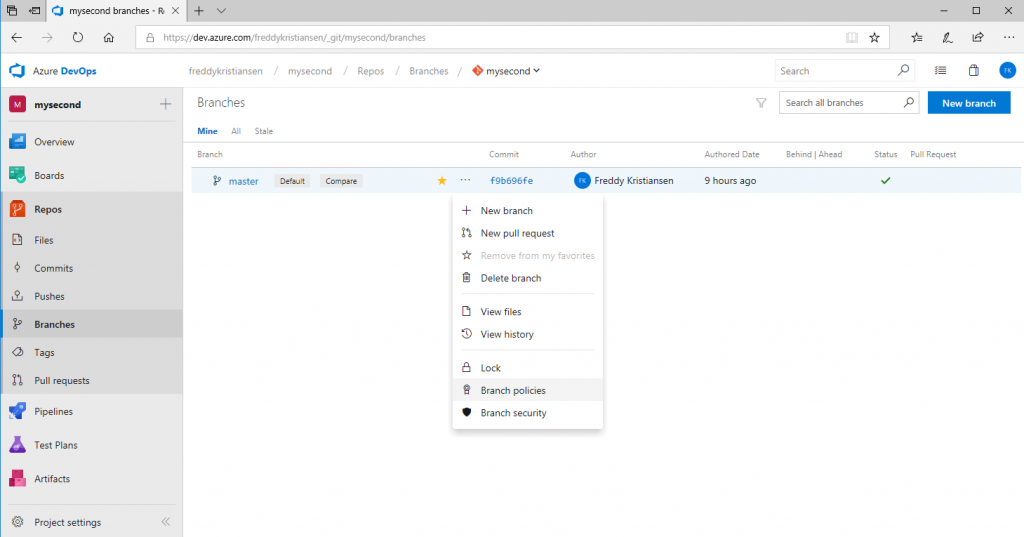
Open your Azure DevOps organization (eg. https://dev.azure.com/\<organization>/) and select Repos -> Branches. Select the master branch, click the more actions symbol ( ... ) and choose Branch Policies.
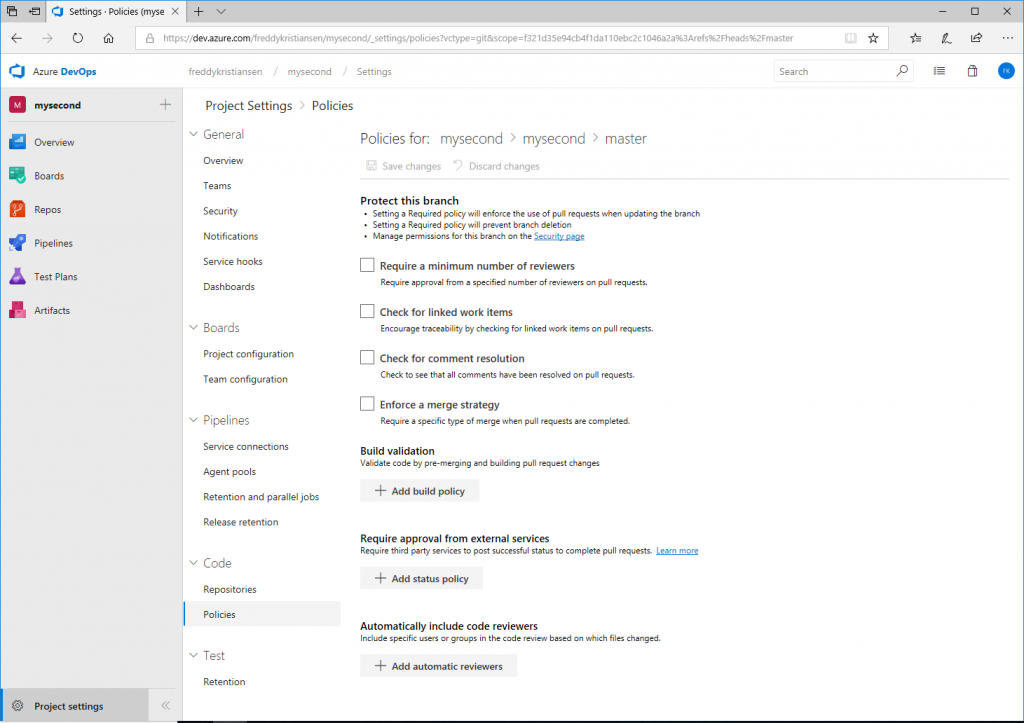
You should now be able to setup branch policies for your branch
The first thing you will notice is, that setting any required policy will enforce the use of pull requests and will disallow direct checkins to the master branch. It will also prevent the branch from unintended or evil deletion.
You can read much more about the policies here: /en-us/azure/devops/repos/git/branch-policies.
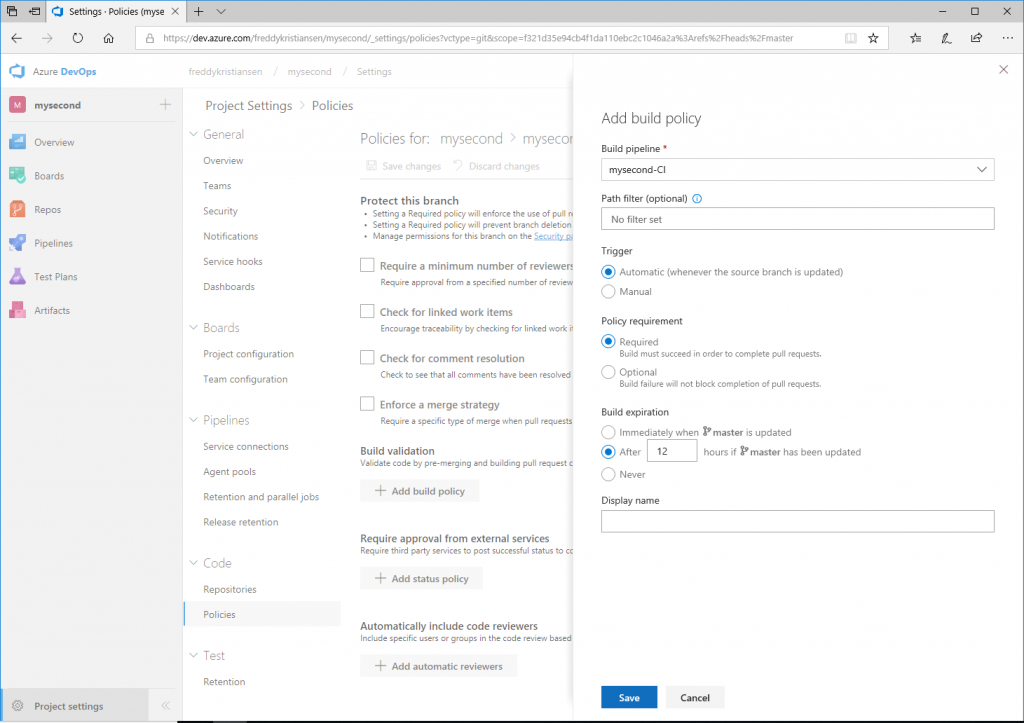
What I want, is to ensure that my CI build pipeline runs whenever somebody checks something in and that the checkin cannot be completed if the build isn't successful. This is called Build validation and by adding a build policy with our CI pipeline from part 3, we should be ready to go.
Working with VS Code and Git
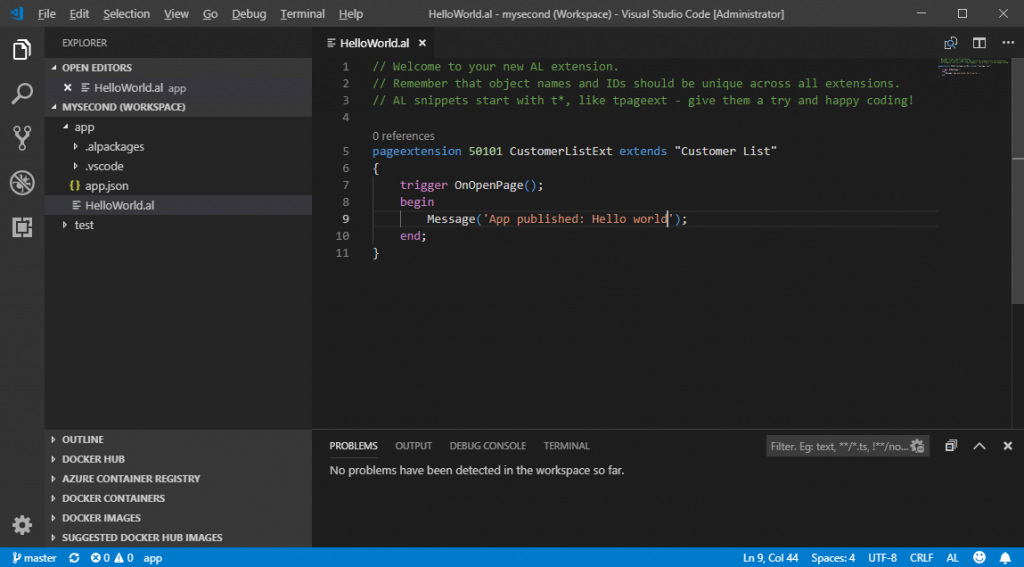
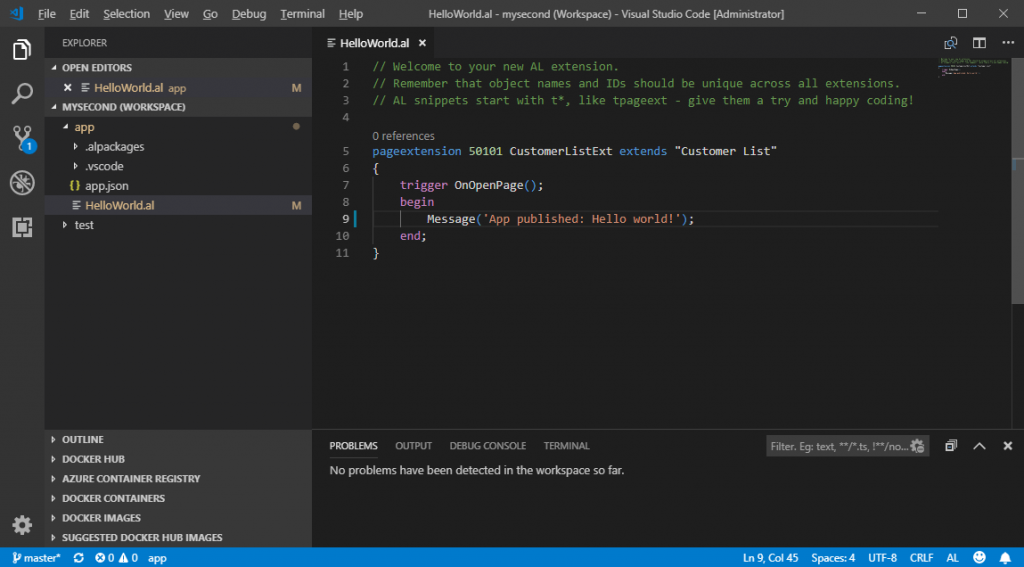
When working with a project under source code management in VS Code, you will notice some nice and very helpful features. I am using workspaces, meaning that I have added the app and the test folder to a workspace and I am opening that in VS Code, giving me a nice overview like:
Lets try to change the HelloWorld.al with a very simple change (add an exclamation mark to Hello World and Save the file)
You will see a number of things changing
- The Source Control symbol shows that there is one modification
- The HelloWorld.al file got a different color and is flagged with M (Modified)
- In the bottom left corner you can see that you are working directly on the master branch and the * marks that you have unstaged changes
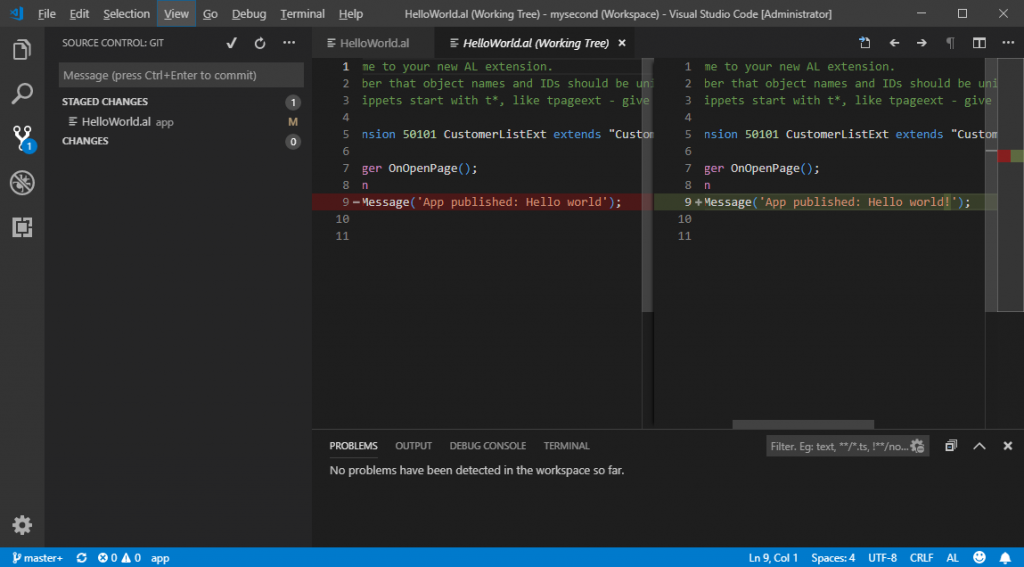
if you click the Source Control symbol to see your changes, you can select your changed files to see what changes you actually did
A few other things you could do to files
- If you create a new file, it will be flagged with U (untracked), which means that this file is unknown to the repository.
- If you delete a file, it will be deleted and disappear from the file list, but show up in the Source Control list of changes with a D (deleted)
The files listed under changes in the Source Control area are unstaged changed, meaning that you have not yet determined whether you want to checkin this change or not.
Clicking the + symbol next to the file will move the change to the staged changes. Clicking the + next to changes will move all changes to the staged changes.
Staged changes are changes you intend to commit, but haven't yet. The * marker next to the master branch (bottom left corner) changes to a +, meaning that you have staged changes.
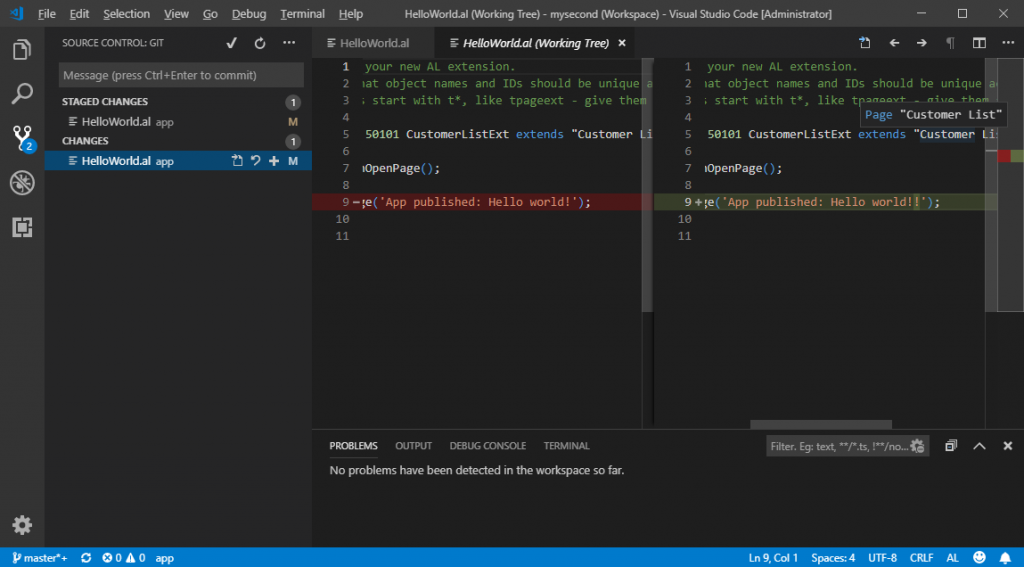
Note, that if I add another exclamation mark to the Hello World string and save the file, I will have the HelloWorld.al file in both staged and unstaged changes list:
This means that you are tracking changes - not files and now you have both a * and a + next to the master branch (bottom left corner).
You can now unstage your change, which will remove the change from the staged changes area, but not change your file. You unstaged change will just be both exclamation mark on the master branch and you will not have any staged changes.
You can also stage the second change, which will merge both changes and you will now have two exclamation marks in the staged changes area.
You can discard changes from unstaged changes. If you want to discard changes from staged changes, you will need to unstage the changes and then discard them.
So, staging or unstaging changes doesn't change any files, it only determines how Git looks at your changes.
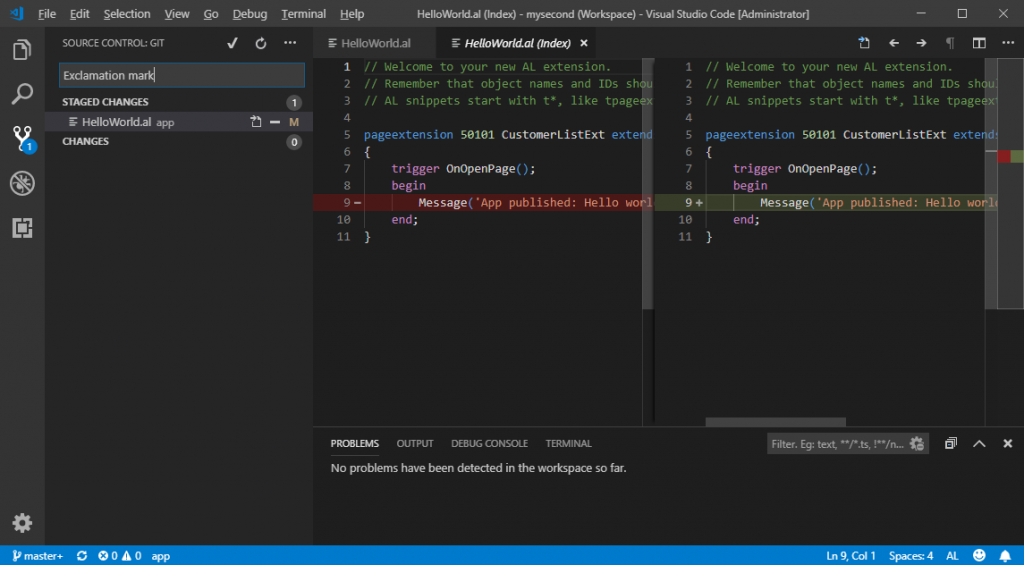
Having staged my changes and checked that my changes are indeed ready to be checked in, it is time to Commit. Write a message in the Commit Message bar and press Ctrl+Enter.
After committing the changes you can close the comparison window and you will see
But wait… - did I just commit changes to the master branch? I shouldn't be able to do that, right? What's happening???
The answer is simple. As you probably know, Git is a distributed source control system and every developer machine has a full copy of the source tree. What we did here was to commit to my local copy of the master branch, but I didn't push my changes to the Azure DevOps repository yet.
Actually, you can see that in the bottom left corner there is an indicator signaling that you have one change, which needs to be pushed to Azure DevOps.
If other developers have made changes to the project, there might also be a number next to the Down Arrow.
So, in order for me to push my changes and pull changes from other people is to click the Synchronize button. When trying to synchronize, I get a strange message
Clicking the Open Git Log reveals the reason for this: Pushes to this branch are not permitted; you must use a pull request to update this branch. 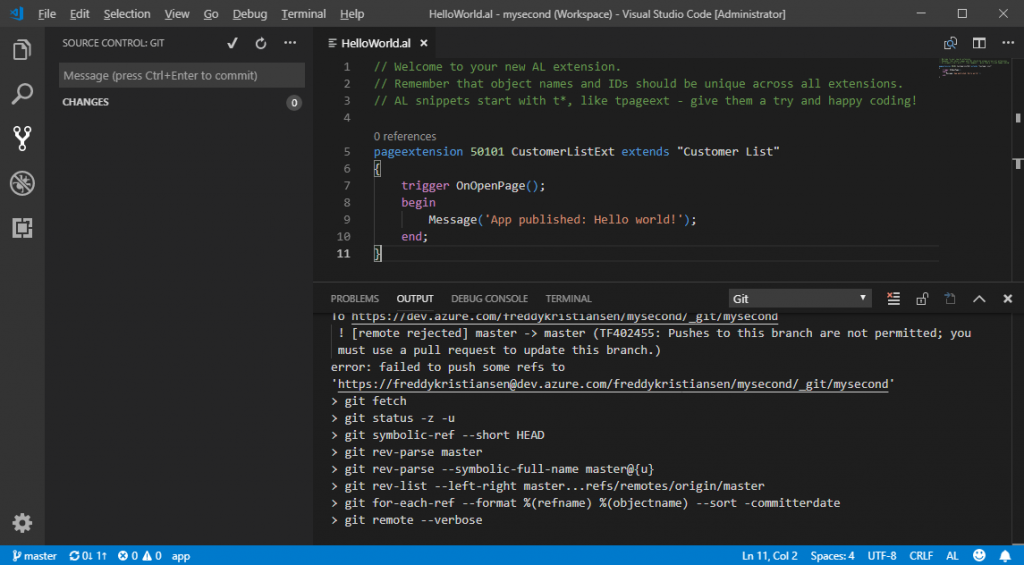
So how do I create a pull request???
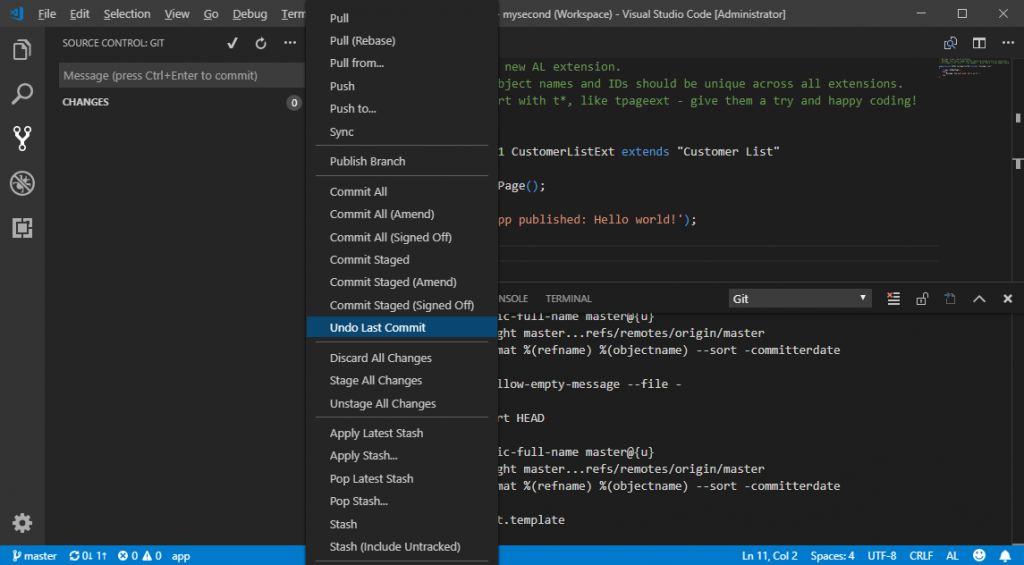
A pull request is a request to take changes from one branch and merge them into another branch. Problem is that I committed my changes to the local master branch. I need to uncommit those and put them in another branch. Fortunately, VS Code can help us here. In the Source Control section press the action menu ( … ) and select Undo Last Commit.
Undoing the commit will leave my changes unstaged again and my local master branch is clean.
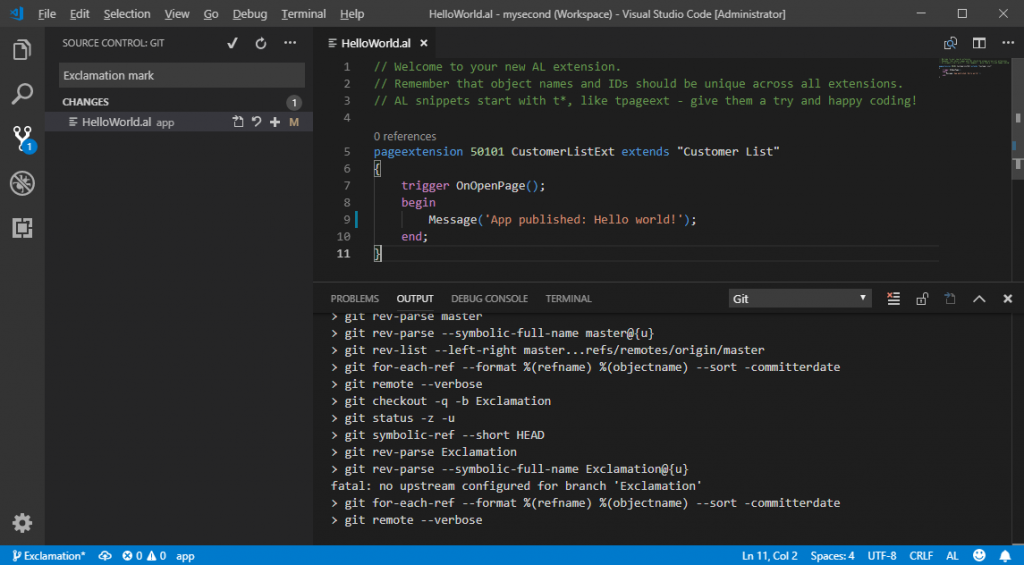
Now, I can click the master branch symbol in the lower left corner to open the list of existing branches and select Create new branch. Enter the name of the new branch, press Enter and you should see
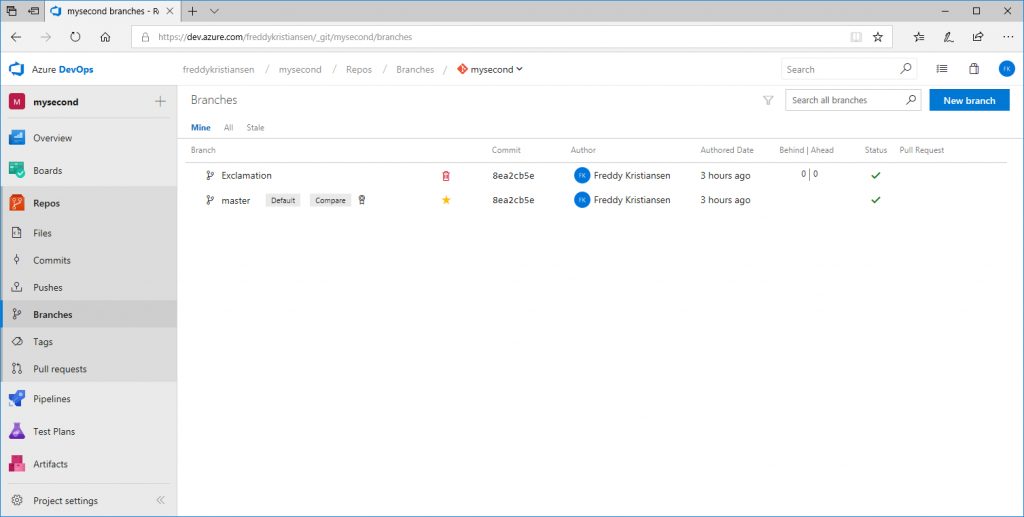
In the lower left corner you will now see that you are in the Exclamation branch and the icon to the right (an arrow into the cloud) means that your branch is purely local and have no representation in Azure DevOps. Clicking the arrow into the cloud symbol will create the branch in the cloud and you will now be able to see it in your Azure DevOps Repos -> Branches page:
We can now press the + symbol next to the file to stage the changes and commit the changes to our local Exclamation branch.
Still the changes are purely local, but now, you can synchronize your changes to Azure DevOps.
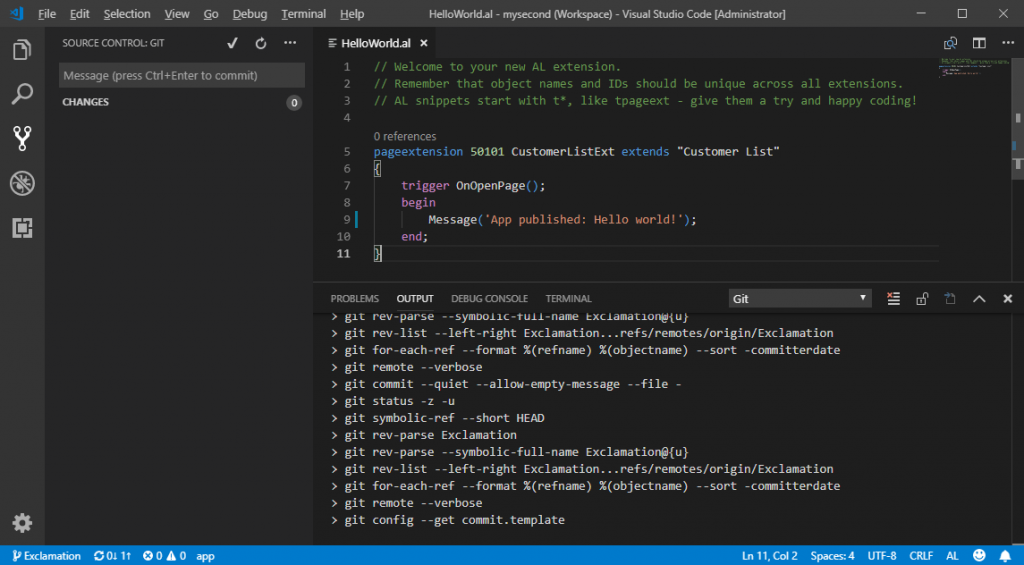
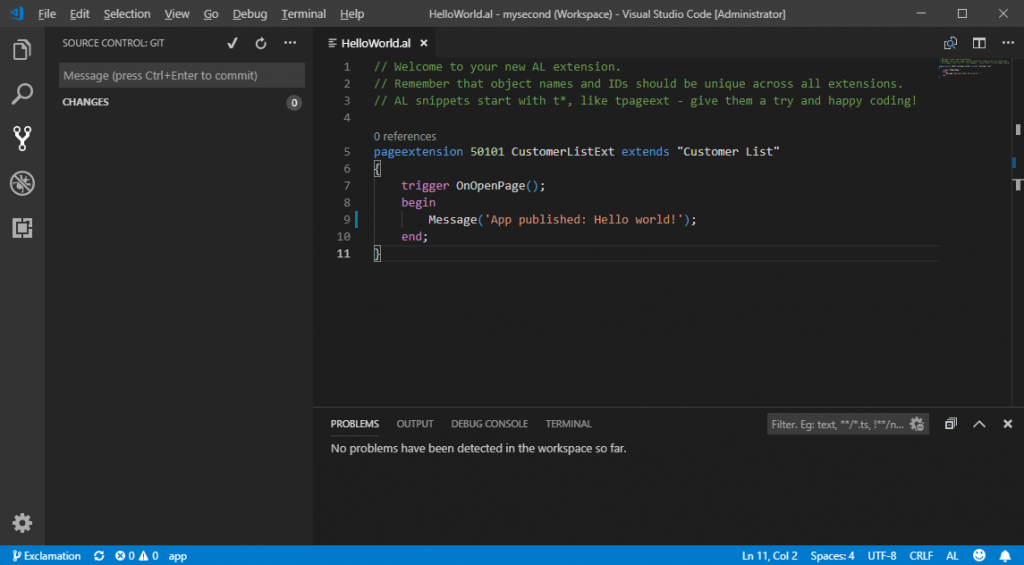
After synchronizing changes to Azure DevOps, VS Code will look like
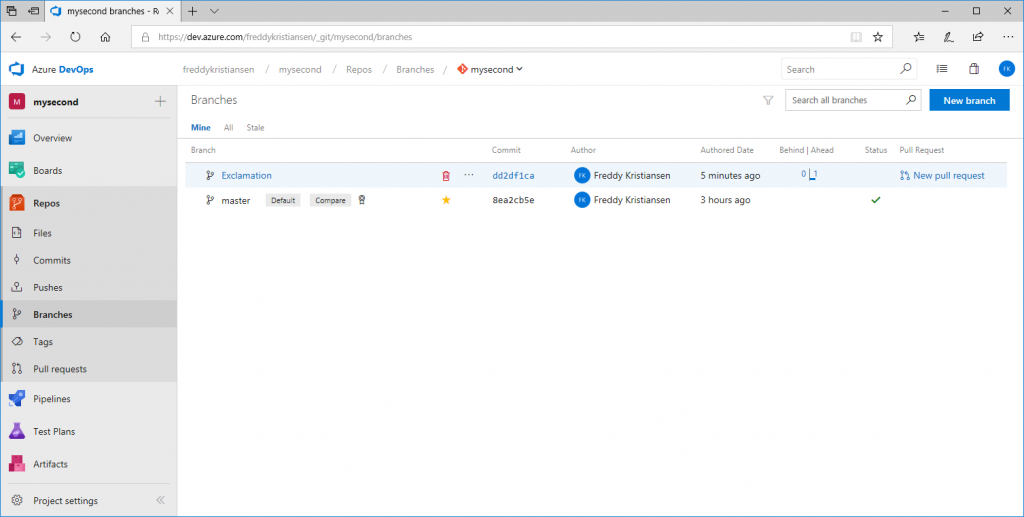
and viewing the branches again on Azure DevOps will show that our branch is one change ahead and we can now create a pull request.
There is an extension for VS Code, which allows you to do Pull Requests directly from VS Code, but I haven't tried this.
Read more here: https://code.visualstudio.com/blogs/2018/09/10/introducing-github-pullrequests
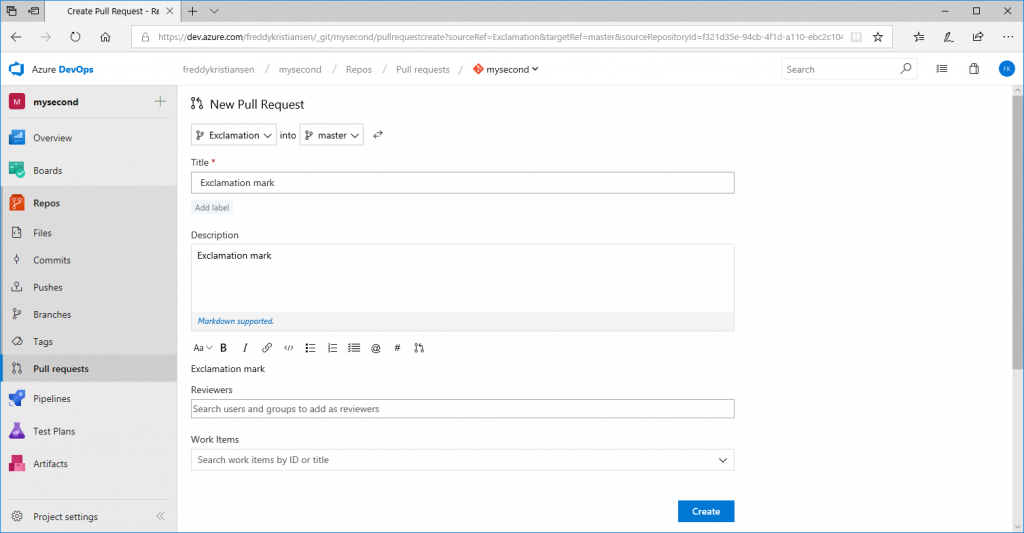
Creating a pull request allows you to add code reviews, assign work item etc.
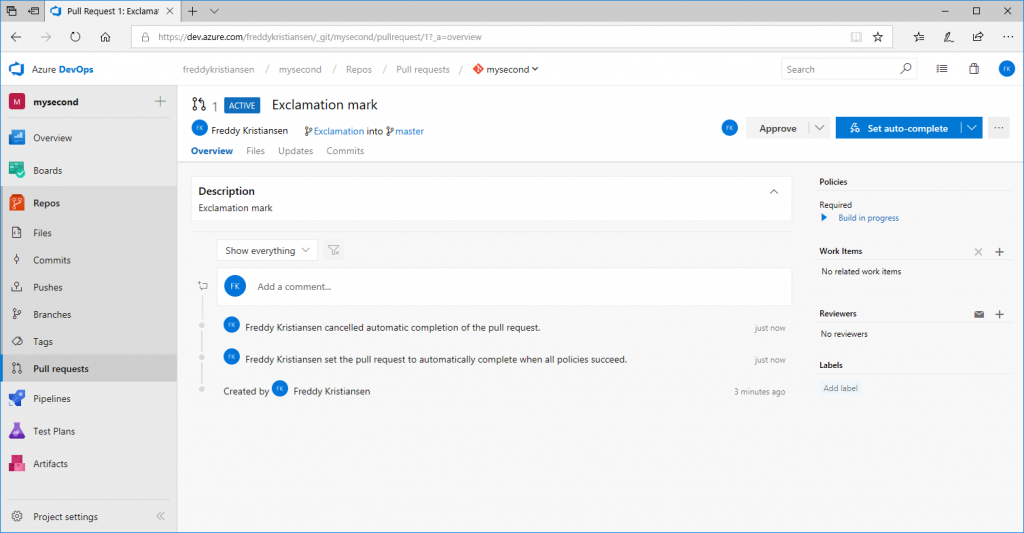
After creating the pull request, a build is kicked off and you can monitor that build by clicking the build in progress link on the right side (under required policies)
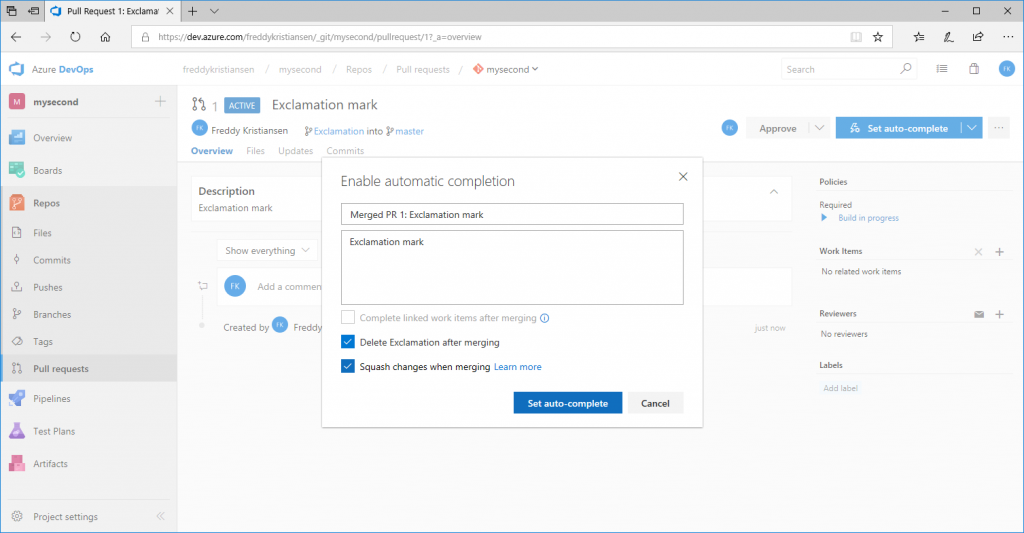
You can select to set Auto-complete, meaning that if all reviewers accepts the change and the build is successful, the pull request will be merged.
In the autocomplete window, you can select to remove the feature branch and squash changes (meaning that all the checkins in the feature branch will be checked into master as one checkin)
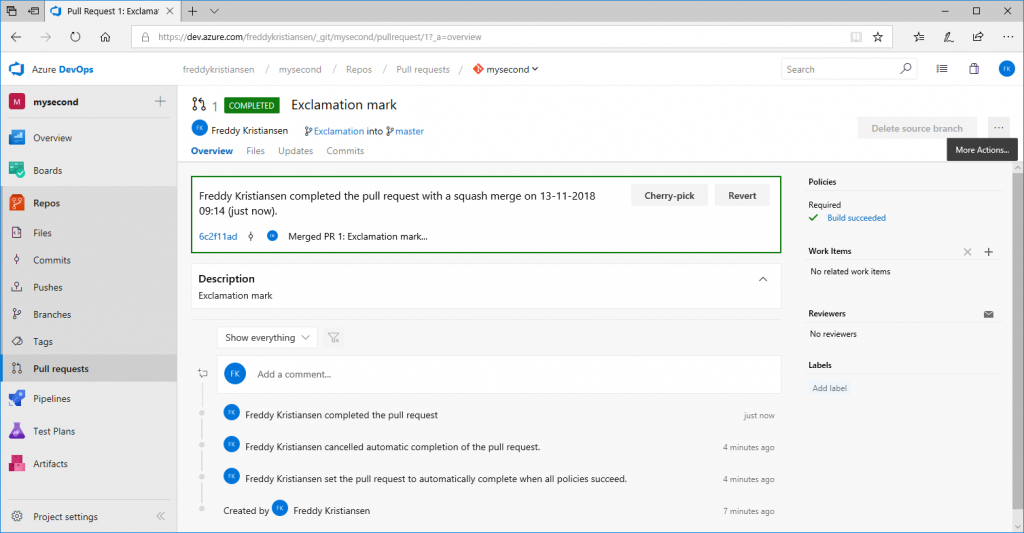
After completion we can see the status of the pull request and the build under Pull requests -> completed.
and if we look under branches, the Exclamation branch has been deleted.
In VS Code, we need to remove the orphaned Exclamation branch manually. Click the branch symbol in the lower left corner and checkout the master branch by selecting master.
Press Ctrl+Shift+P and choose Git Delete Branch… and delete the orphaned Exclamation branch.
You are now ready to create a new feature branch and work on the next set of changes.
What's next
Now we have setup branching policies and we have been through a very long and visual walkthrough of VS Code and Git, but if you are not used to Source Control and Git, it really shows how changes moves from untracked. staged, committed in your local repository to being pushed to the remote repository.
Next post is about YAML (I guess this stands for Yet Another Markup Language) and how pipelines are defined.
Enjoy
Freddy Kristiansen
Technical Evangelist
Comments
- Anonymous
November 13, 2018
"Originally YAML was said to mean Yet Another Markup Language,[10] referencing its purpose as a markup language with the yet another construct, but it was then repurposed as YAML Ain't Markup Language, a recursive acronym, to distinguish its purpose as data-oriented, rather than document markup" (Source:wikipedia.com) :-)- Anonymous
November 13, 2018
Love recursive acronyms - like the old WINE (Wine Is Not an Emulator).Didn't know and didn't look - thanks for educating me;-)
- Anonymous
- Anonymous
November 13, 2018
To move the commit to another branch you do not need to undo it (it will create just another commit), but rather just create new branch on it and push this. Than you can just reset the master branch based on the remote master.- Anonymous
November 13, 2018
Yes, that is how I demoed it at Directions, but I always find it hard to clean my polluted master branch afterwards.Maybe I don't know git well enough:-)- Anonymous
November 15, 2018
Used to do: "git reset --hard" in the powershell terminal to clean up my mistakes...
- Anonymous
- Anonymous
