Create a secure Url to a file
In the very last paragraph of this post, I talk about specifying a certificate pfx file as a Url for https://aka.ms/navdemodeploy:
The Url needs to start with https:// or https:// and today (while writing this post) this is the only parameter that you need to specify as a secure Url, but I am planning to create more parameters like this:
- License file
- Demo Database
- Extensions
All things that you want to have in a secure location and control access to it, while using it in deployments that need access to it using a secure Url.
I will describe 4 ways of creating a secure Url:
- Use a standard Web Page (Not recommended)
- Use OneDrive (Not recommended)
- Use DropBox (Recommended for quick-and-easy)
- Use Azure Storage (Recommended)
For professional usage I recommend option 4 - Azure Storage. For quick-and-easy Url, I recommend DropBox.
Use a standard Web Page (Not recommended)
The least secure way is to use a standard Web Page. A Url like this:
https://www.freddy.dk/files/certificate.pfx
would probably be one of the worst secret Url's you could imagine. No secure socket layer (https), no key, no secret name, no nothing.
If you want to make it a little harder for people to download your file, you could name it a guid.
https://www.freddy.dk/files/A46608EC-40D8-435B-B8FD-50606B52C52B.pfx
This name is definitely not something anybody would guess, but you are still using http:, so potentially could there be someone listening in the middle and downloading the same file while you do so. I would need to buy and apply a certificate from a trusted authority in order to make sure that people cannot get a copy of my certificate.
https://www.freddy.dk/files/A46608EC-40D8-435B-B8FD-50606B52C52B.pfx
You would also need to make sure, that you have turned off directory browsing and other ways, which would make it possible for users to enumrate the files on your website.
You should of course also make sure that you don't have any links on any website to this file. These links would very quickly be discovered by bots and your file would be compromised.
This would actually now be a pretty secure file, but there are a lot of things you need to do and a lot of things you need to remember. Also, if you do not cleanup, your files will be available forever if your Url is compromised.
Use Onedrive (Not recommended, but possible)
I was debating a lot with myself whether to document a way of creating a secure Url to a file in OneDrive as OneDrive doesn't really seem to be built for this purpose. All the various links you get from OneDrive seem to link you to a portal and not really get a direct download link. Searching the internet for OneDrive Direct Download also seems to give a number of results, and none of those that I tried really works.
But hey, it's possible and I decided to document how to.
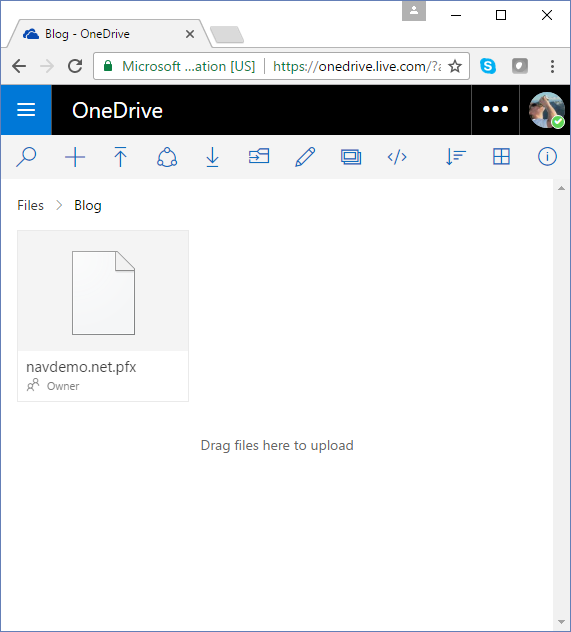
Place your file in your OneDrive and Select View Online to view your files in a browser:
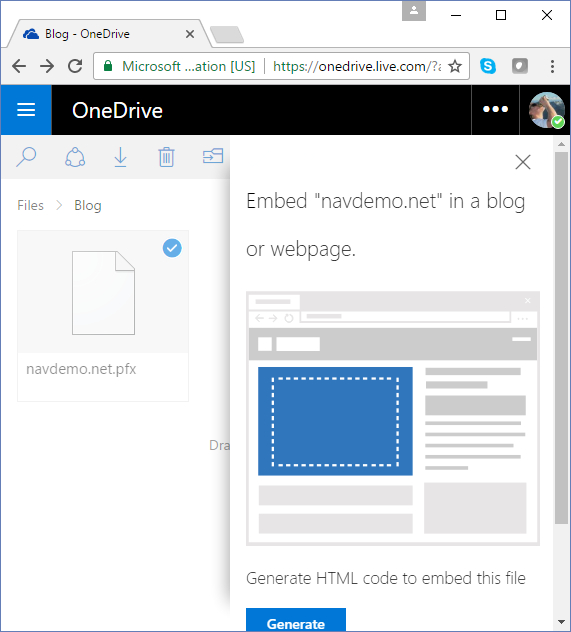
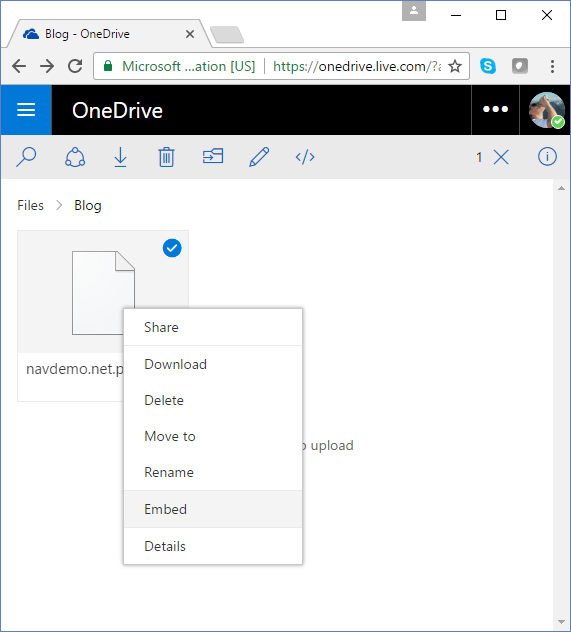
Select the file, right click and select Embed:
In the Embed pane, select Generate:
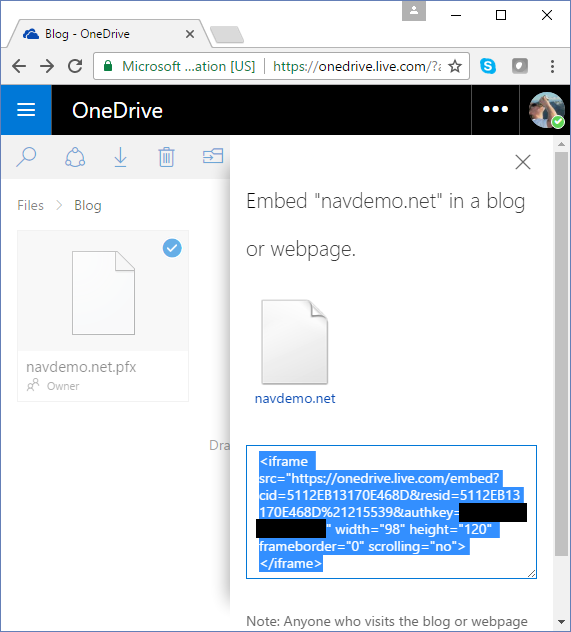
This generates a piece of HTML, which can be embedded in a web site:
Copy the HTML, paste it into Notepad, strip the HTML away from the Url and replace the word embed with download:
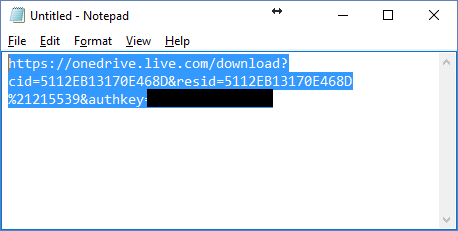
Now you have a Url, which works like a Direct Download link to your file in OneDrive. Example:
https://onedrive.live.com/download?cid=5112EB13170E468D&resid=5112EB13170E468D%21215538&authkey=<authkey>
A fairly cumbersome process and based on the number of articles found on the internet on how to do this (that doesn't work) I have little confidence that this will continue working.
Use Dropbox (Recommended for quick-and-easy)
DropBox is a service, much like OneDrive, which can hold a copy of your files in the cloud and normally your files would be private to your account or shared with other DropBox users and only viewed after successful athentication.
You can however create a download link to your private DropBox file fairly easy.
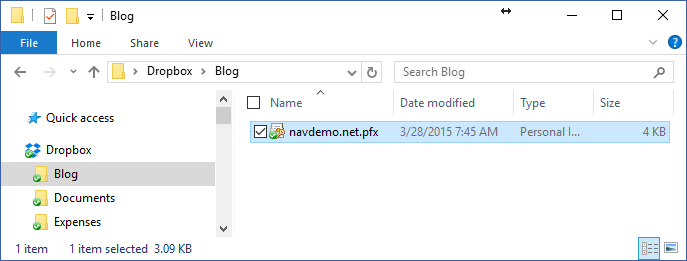
Place your file in a DropBox folder:
Right-Click the file and select Copy Dropbox Link 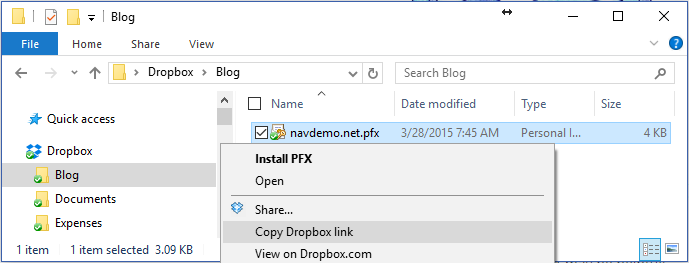
and now you have a link, which looks like this:
https://www.dropbox.com/s/9mpeg6dqyjsghcz/navdemo.net.pfx?dl=0
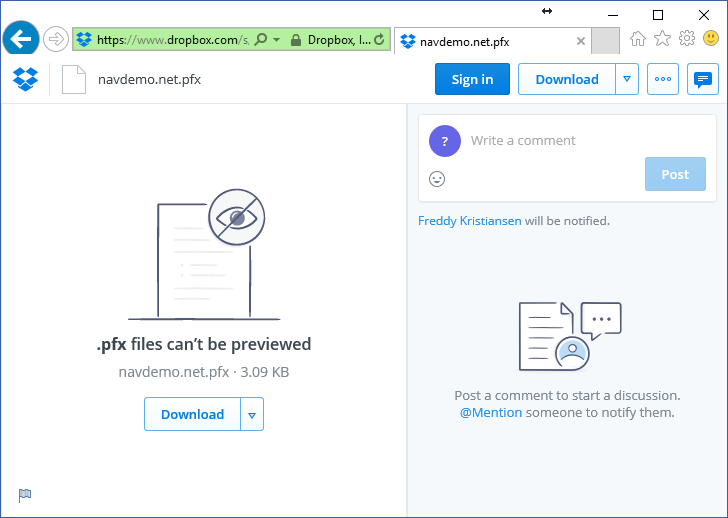
Much like the OneDrive link, this link will take you to a portal, where you can download, comment, copy, subscribe, link and d a lot of other good things with this file:
Which clearly is not what we wanted.
It is however fairly easy to modify the link to become a Direct Download link. Easiest way is to replace the dl=0 with dl=1.
https://www.dropbox.com/s/9mpeg6dqyjsghcz/navdemo.net.pfx?dl=1
The way most blog posts on the internet describes is to replace the host name with dl.dropboxusercontent.com (and remove the parameters):
https://dl.dropboxusercontent.com/s/9mpeg6dqyjsghcz/navdemo.net.pfx
Obviously none of these links works as I have deleted the link.
DropBox is much easier than OneDrive and you can remove the link after you use it - and then create a new link the next time you need to use the file. Every time you create a link, you should get a new Url and the old Url will not work anymore. It is still a manual process to remember to remove the link after you have used it, and even though it seems like DropBox supports this scenario it is still an undocumented mechanism.
Use Azure Storage (Recommended for professional usage)
Azure Storage is not an end-user facing tool like DropBox or OneDrive. Azure Storage might be the storage mechanism for any of those though and is a professional Storage System with all the capabilities you need to store files secure and access them securely.
There are a number of tools available for uploading and handling files on Azure Storage - and you can of course also use PowerShell.
Azure Storage supports a technology called a Shared Access Signature, which basically is a Url for a file or a folder, which will give the people who have this token a given set of permissions to that file or folder in a limited period of time.
Download the Microsoft Azure Storage Explorer and connect it to your Azure Account.
You cannot (at the moment) create Azure Storage Accounts in the Storage Explorer, but you can do almost anything inside existing Storage Accounts (if you have the proper permissions).
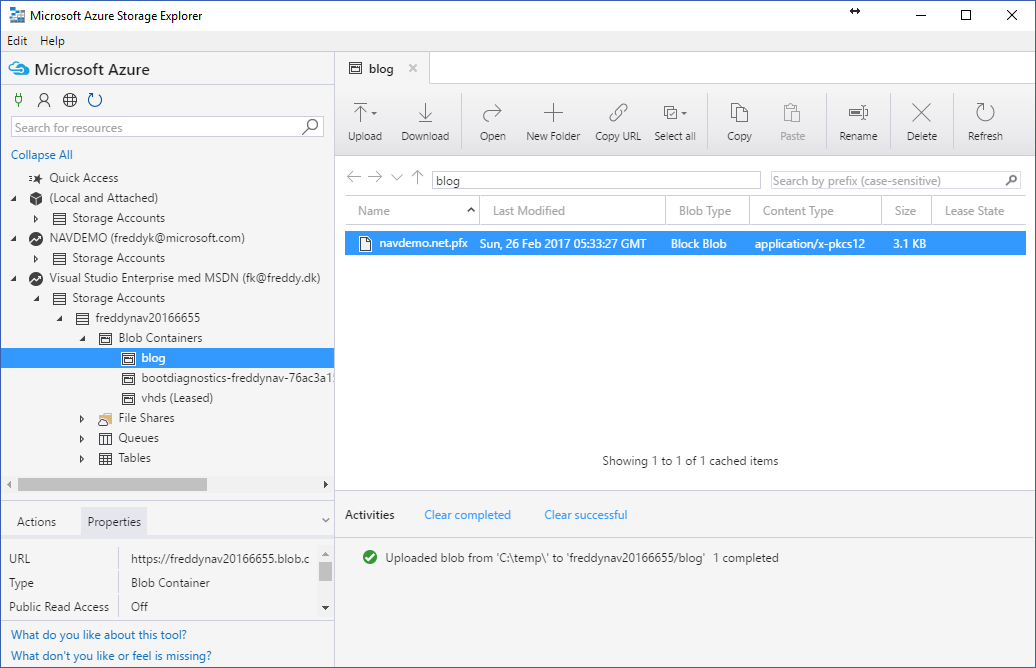
Below I have created a Blob Container called blog and copied my certificate to this container (drag and drop):
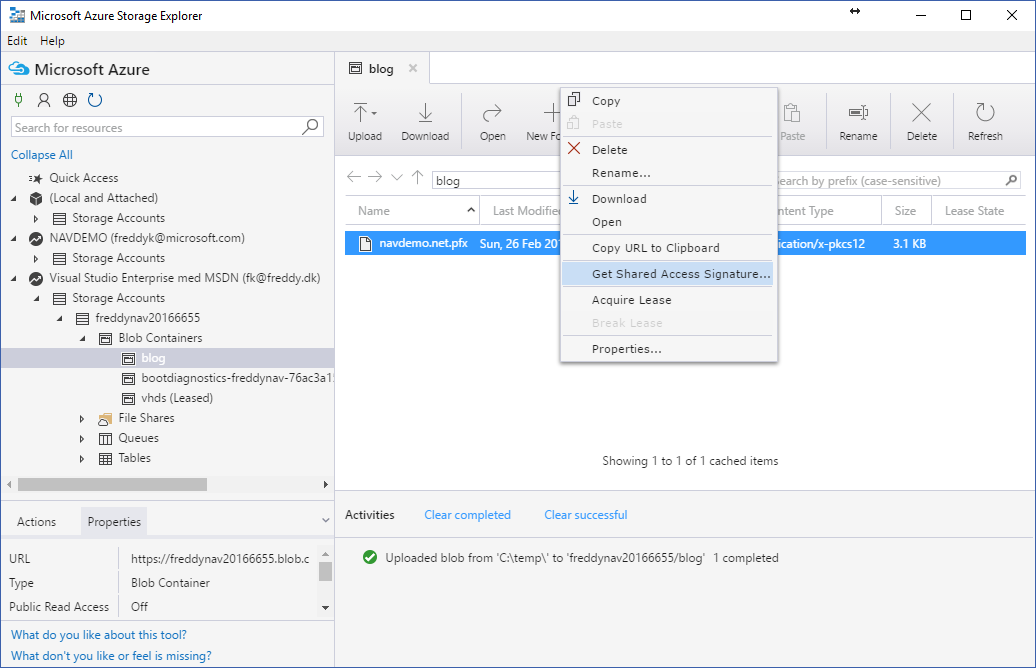
If you Right-Click your file and select Get Shared Access Signature:
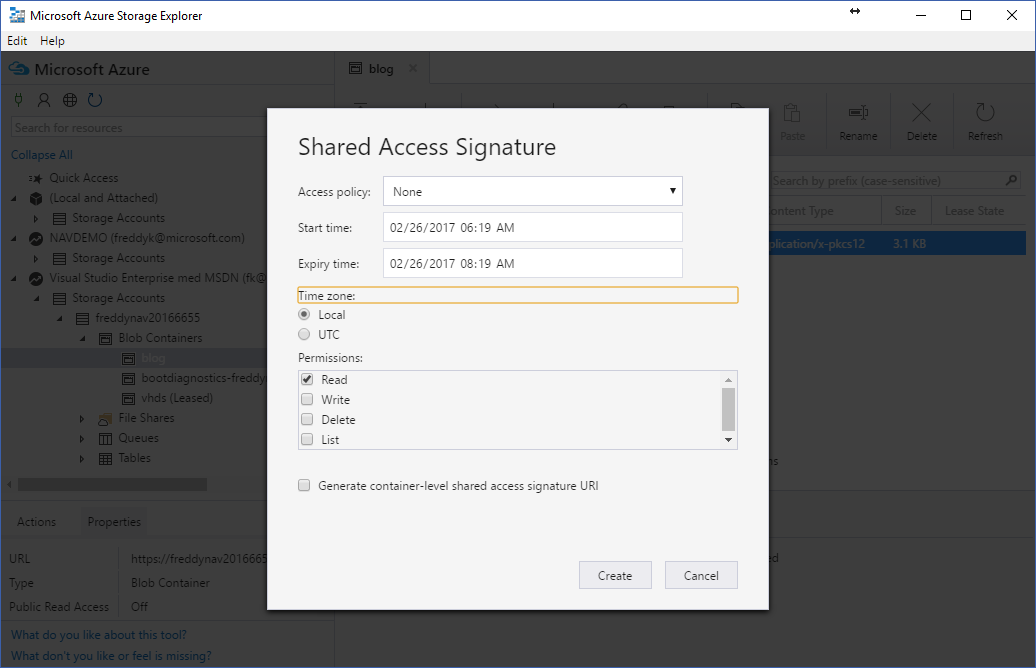
a Dialog will popup in which you specify what permissions you want to give the holders of this SAS token and in which period of time the token is valid:
Press Create and Copy the Url from the next window. Your SAS Url has this format:
https://freddynav20166655.blob.core.windows.net/blog/navdemo.net.pfx?st=2017-02-26T05%3A19%3A00Z&se=2017-02-26T07%3A19%3A00Z&sp=r&sv=2015-12-11&sr=b&sig=EehTUQeVKpo8HS0R%2F7EvIy5ok%2BcVjQPqKhNtOQvuLQ4%3D
and no, you cannot modify the TimeStamp to extend the validity of the token:-)
Azure Storage is clearly the most professional tool to use and has full support for what we are trying to do.
Azure Storage even supports to do this from PowerShell (of course):
 $VerbosePreference = "Continue"
$ErrorActionPreference = "stop"

# Subscription
$subscriptionId = "<subscriptionid>"

# License file
$MyCertificate = "<certificatefile>"

# Storage Info
$storageAccountName = "<StorageAccount>"
$storageContainer = "<StorageContainer>"

# Settings for SAS Url
$MyCertificateBlobName = [System.IO.Path]::GetFileName($MyCertificate)
$StartTime = Get-Date
$ExpiryTime = $StartTime.AddMonths(1)

Install-Module Azure -Force -AllowClobber
try {
  Select-AzureSubscription -SubscriptionID $subscriptionId -Current
} catch {
  Add-AzureAccount
  Select-AzureSubscription -SubscriptionID $subscriptionId -Current
}

# Get Key and Context
$storageAccountKey = (Get-AzureStorageKey -StorageAccountName $storageAccountName).Primary
$storageContext = New-AzureStorageContext –StorageAccountName $storageAccountName StorageAccountKey $storageAccountKey

# Upload certificate
Set-AzureStorageBlobContent -File $MyCertificate -Context $storageContext -Container $storageContainer -Blob $MyCertificateBlobName

# Get Sas Url
$MyCertificateSasUrl = New-AzureStorageBlobSASToken -Context $storageContext -Container $storageContainer -Blob $MyCertificateBlobName -FullUri -Permission r -StartTime $StartTime ExpiryTime $ExpiryTime

# Show
$MyCertificateSasUrl
Note that you need Azure PowerShell CmdLets (which the script installs from PowerShellGet). If you are running older versions of Windows/PowerShell you might need to install this manually.
Test your Url (Recommended)
If you want to know whether your Direct Download Url will work with the NAV Azure Deployment system, you can try it with this PowerShell snippet:
 function DownloadFile([string]$sourceUrl, [string]$destinationFile)
{
  Remove-Item -Path $destinationFile -Force -ErrorAction Ignore
  Invoke-WebRequest $sourceUrl -OutFile $destinationFile
}
DownloadFile -sourceUrl "<direct download url>" -destinationFile "<place to save your file>"
This PowerShell function will download the file and place it in the destinationfile (overwriting if this exists) and it is similar to the PowerShell which will be running on your machine during deployment when you write https://aka.ms/navdemodeploy. Remember to test that the content of the downloaded file indeed is as expected. If you use the wrong Url from OneDrive, the downloaded file will just be the HTML document which links to the file.
Enjoy
Freddy Kristiansen
Technical Evangelist
Comments
- Anonymous
February 27, 2017
The comment has been removed- Anonymous
February 28, 2017
I would only use DropBox for quick-and-easy access to a file and remove it afterwards (same with onedrive).But if you are concerned about the security of DropBox, my recommendation is Azure Storage Shared Access Signature with a limited lifetime.I am not concerned about the security of that (yet:-)) - Anonymous
February 28, 2017
As stated, I would only use DropBox as a quick-and-easy way and delete the file afterwards.If I am concerned, I would use Azure Storage with Shared Access Signature and a limited lifetime.I will have a look at Binfer when time allows, but I do think that my data is more secure in the cloud than it is on my local PC.
- Anonymous
- Anonymous
February 07, 2019
I discovered that Get-AzureStorageKey should be changed to Get-AzureRmStorageAccount and that you have add the parameter ResourceGroupName

