 Sometimes, news can pass you by and it’s only some time later when you are confronted by it, that you realise just what it all means. There’s been a lot of news in the UK of late (eg Larry the Downing St cat not only keeps his post as Chief Mouser to the Cabinet Office but is confirmed as one of the great survivors of modern British politics , outlasting the leaders of Labour, the Conservatives, Greens, Liberals, SNP and UKIP). Sometimes, news can pass you by and it’s only some time later when you are confronted by it, that you realise just what it all means. There’s been a lot of news in the UK of late (eg Larry the Downing St cat not only keeps his post as Chief Mouser to the Cabinet Office but is confirmed as one of the great survivors of modern British politics , outlasting the leaders of Labour, the Conservatives, Greens, Liberals, SNP and UKIP).
On a slightly more mundane front, a demo was shown  during the day #2 keynote at Worldwide Partner Conference, which drew mild gasps from the audience, even though the feature had been unveiled more than 6 months ago. The coolness in question was PowerPoint Designer, something available only if you’re running Office 2016 and have an Office365 subscription. during the day #2 keynote at Worldwide Partner Conference, which drew mild gasps from the audience, even though the feature had been unveiled more than 6 months ago. The coolness in question was PowerPoint Designer, something available only if you’re running Office 2016 and have an Office365 subscription.
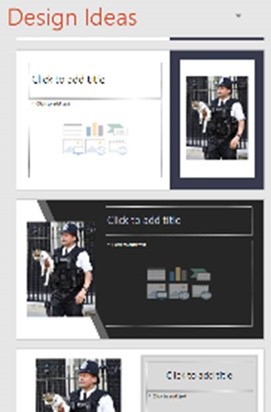
The Designer manifests itself as a selection of suggested layouts that will be displayed in the right-hand task pane of the PowerPoint app, after you’ve inserted some photos from your own collection or from the various online sources. A suitable colour scheme will also be found, depending on the predominant colours in the photo(s) you’ve pasted or inserted. It’s subtle and clever.
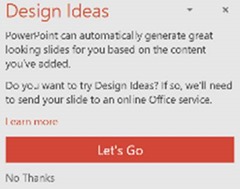
There’s a Design Ideas icon on the Design tab, if you want to manually invoke the Designer functionality too. When you start the Designer for the first time, you need to accept that the images you use within the designer will be sent to a cloud service for analysis. See here for more.
At the same time as the Designer appeared, another premium O365 service was also added, called Morph ( not to be confused with Tony Hart ). The Morph service makes animating slide transitions really easy, and it’s probably simpler to demonstrate than to explain. Try this:
- Create a new slide in PowerPoint, and paste an image, sized to a thumbnail in one corner of the slide
- Add a text box with any old text in it
- Now, in the slide thumbnails on the left side, right-click on the new one and choose Duplicate Slide.
- Move your image to a different corner of the 2nd slide, and make it bigger – try adding some artistic effects or recolouring if you like, and try moving your text box to a different place, and change the font size, type, colour etc
- Now select the 2nd slide, go to the Transitions menu and click Morph. Prepare to be amazed…
![clip_image002[5] clip_image002[5]](https://msdntnarchive.z22.web.core.windows.net/media/2016/07/clip_image0025_thumb.jpg)
For more details on Morph & Designer, see Kirk Koenigsbauer’s blog post from November 2015. |


![clip_image002[5] clip_image002[5]](https://msdntnarchive.z22.web.core.windows.net/media/2016/07/clip_image0025_thumb.jpg)