Web Authoring in SharePoint 2010
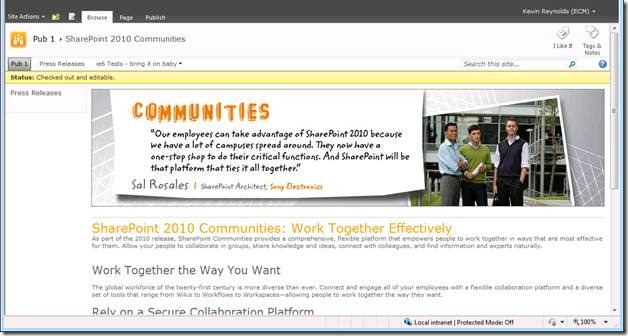
Hi, my name is Kevin Reynolds and I’m a Program Manager on the SharePoint team. Today I will walk you through the process for creating the page above, from creating the page to having it go live on the internet. I will show you the enhanced Web Authoring experience in SharePoint 2010, including editing content, applying styles, using the new UI, changing the layout of the page, and even applying themes to your site. I would highly encourage you to create your own Publishing site and follow along to get a personal feel for the SharePoint 2010 Authoring Experience.
Create New Page
Let’s begin with creating a new page. To create a new page click on the Site Actions menu and choose the New Page option, now in the dialog that comes up type in a name for the page – for this example we will use SharePoint 2010 Communities - feel free to insert your own name. Here is what you should currently see:
Now click Create on the dialog. A new page is created and you can see the Ribbon ( )at the top of the page that exposes the most common options that you will use while editing the page. The page should look a lot like this:
Add and Edit Rich Text
Now let’s add some content into the Page and then we’ll get back to exploring more options available in the Ribbon. For this example I’ll add in the following text:
SharePoint 2010 Communities: Work Together Effectively
As part of the 2010 release, SharePoint Communities provides a comprehensive, flexible platform that empowers people to work together in ways that are most effective for them. Allow your people to collaborate in groups, share knowledge and ideas, connect with colleagues, and find information and experts naturally.
Work Together the Way You Want
The global workforce of the twenty-first century is more diverse than ever. Connect and engage all of your employees with a flexible collaboration platform and a diverse set of tools that range from Wikis to Workflows to Workspaces—allowing people to work together the way they want.
Rely on a Secure Collaboration Platform
Let your IT staff rely on an enterprise-ready collaboration platform that is secure and easy to manage and will support your organization’s growing needs. SharePoint 2010 makes social safe with granular security and privacy controls, centralized management and policy setting, and robust reporting and analysis.
Extend the Value of Your Community Solutions
The SharePoint platform seamlessly integrates with the rest of the Microsoft Business Productivity infrastructure, including the Office applications, Exchange Server, Office Communications Server, SQL Server, and Dynamics. In addition, SharePoint provides Business Connectivity Services and adheres to open standards and protocols, making it easy to integrate third-party applications.
Feel free to copy and paste that text into your page as you follow along. We will use the text above to demonstrate the functionality of the editor on the page. Select the first line of text SharePoint 2010 Communities: Work Together Effectively, click on the font color drop down ( ), put your mouse over the red color, notice how the selected text turns red, now select the orange color, and notice how the text turns orange. We will change the font size now, choose the font size drop down (
 ), choose 18 from the list and notice that the selected text now becomes larger. Choose the text work together the Way You Want, click the Markup Styles menu (
 ), select Heading 1, and now do that for Rely on a Secure Collaboration Platform and Extend the value of Your Community Solutions. Now for those users savvy in HTML if you look at the markup of the page you will notice that the text is wrapped in a <H1> header tags, so you’ve applied a style and have well formed markup. If that last sentence doesn’t mean much to you, no worries, you can just use the menu as a set of styles on your text and leave the HTML markup thoughts to the experts. Now take a moment to play around with the text yourself, apply some fonts, apply some colors, highlights, font size, or adjust your paragraph alignment. No rush, I’ll wait…Really, it’s ok you can come back and continue the blog in a couple of minutes…Welcome back, here is roughly what the current page will look like depending on the formatting you’ve tried out:
Change the Page Layout
We will change the layout of the page, this will allow us to use a standard template that helps us to layout content in a consistent way across the site. Now to change the layout go to the Page ( ) tab, select Page Layout (
 ), and now you can choose a new layout for your page. For this demo I’ll be using a custom page layout – In a later blog I will show you how to create your own page layouts. Click on the Image on right layout and noticed all the new fields that show up and how the page is laid out differently now.
Insert a Picture
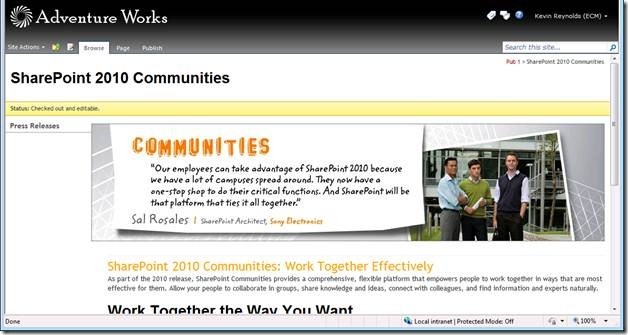
The new layout that we have chosen has a Page Image control that allows us to insert a picture onto the page in a specific location. To insert a picture click on the Click here to insert a picture from SharePoint text, then on the dialog that comes up click the first Browse… button, this launches the new Asset Picker, that allows you to choose an image that is already stored on SharePoint, if you haven’t uploaded any pictures don’t worry there are a few that come in the box, you can go to Site Collection Images, choose the Home picture, click OK, and click OK on the next dialog. You’ve inserted your first picture into a page in SharePoint 2010. The page should look like the following:
Insert a Video
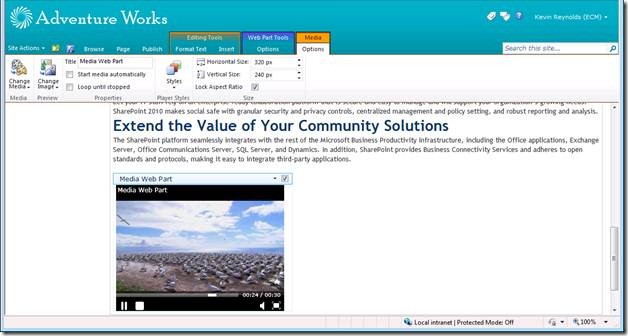
In SharePoint 2010 we have enhanced the richness of the media that is natively integrated into pages and now everyone can easily add video and audio files to their page. To add a video put your selection below the text on the page, click the Insert Ribbon tab ( ), click the Video and Audio button (
 ), now click on the Media Web Part (
 ) that is inserted into the page, and you will see a new contextual tab come up that contains commands specific to the Media Web Part:
Click the bottom part of the Change Media button to drop down a menu and choose from computer, this will bring up a new dialog where you can upload a video, click the Browse… button, choose a video on your computer, click OK, change the Upload to: box to be Images, and click OK, and Save on the dialog that comes up after the video is uploaded. You have now inserted your first video in SharePoint 2010, take a moment to use the player, watch the video, and play with the features. The video player will be covered in-depth in an upcoming blog post.
Theme the Site
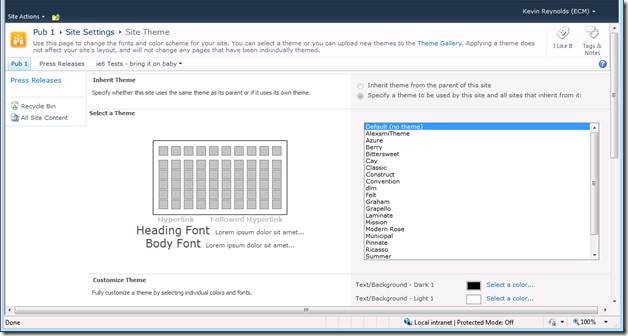
We have also enhanced the theming capabilities in SharePoint 2010 to make it easy to apply a new set of colors to your site. This will give your site an updated look and feel which can easily be created and updated as your needs change. To update the theme of the site go to Site Actions and choose Site Settings, this will bring up a new page with a bunch of links, click on the Site Theme link, and now you will be in the new theming UI for SharePoint 2010.
We will cover theming of the site and this entire UI in a later blog post, for now let’s update the theme that goes with our content, in the large box with a list of theme choose the Ricasso theme, and click OK at the bottom of the page. Now navigate back to your page and you’ll see that the colors of your page have been updated, according to the new theme that you had chosen:
Apply a New Master Page
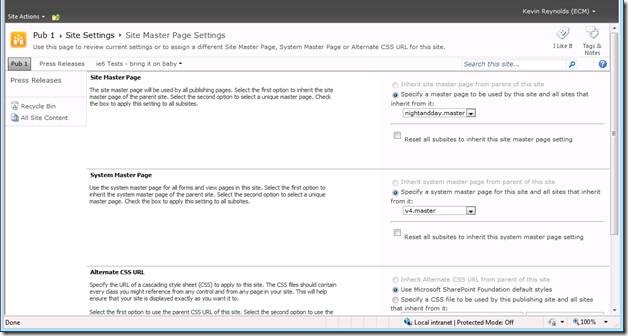
The page is really coming together, now we will see how easy it is to change our Master Page. The Master Page is the main component with theming that gives a site it’s look and feel. A master page defines where the company logo goes (or if there is one), where the Ribbon shows up, where the search box is, and all the common elements that should apply to every page. To update the master page go to Site Actions, choose Site Settings, and then on the Site Settings page click on the Master page link.
In the section labeled Site Master Page, click on the drop down box that currently says nightandday.master and change it to v4.master. This tells SharePoint that for this site you want all pages that you author to us the v4.master master page. Now navigate back to the page that you’ve been creating:
Now that you have all the right content and the page looks good, it’s time to get it live.
Go Live
To make the page available to others you will submit it for approval using the Ribbon. This will send the page off to the appropriate approvers for these pages and they will review it and then publish it to customers. To submit this page for approval go to the Publish tab and click the Submit button ( ), this will bring up a new dialog that will check the spelling and allow you to add comments for the reviewer of the page
 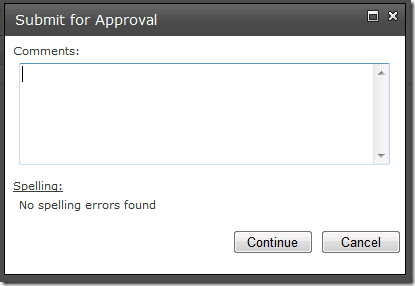 , add in a comment and click Continue, this will start the approval workflow for the page, a new form will come up, click Start, and now you will be taken back to the page. Now the approver will review the page and Publish it to go live.
You have now created your first page in SharePoint 2010 and you already know how to add pictures, insert videos, change the layout of the page, update the site theme, change the master page, and publish the page to go live. We will go deeper into each of these topics in future blog posts.
Thank you for reading and for following along,
Kevin Reynolds
Program Manager
Enterprise Content Management


