Adding analytical reports to Dynamics 365 for Operations
INTRODUCTION
This article provides a walk-thru for Application Developers seeking to add an analytical report to a Dynamics 365 application. For this scenario, we will extend the Reservation Management Workspace in the Fleet Management application to include a direct link to an analytical report authored against the Entity Store using Power BI Desktop.
OVERVIEW
Whether you are extending an existing application Workspace or introducing one of your own, analytical reports can be used to deliver insightful and interactive views of your business data. The process for adding an analytical reports is broken down into the following actions:
- TASK #1 - Add the PBIX file as a resource to your model
- TASK #2 - Introduce a Menu Item to control access to the report
PRE-REQUISITES
- Access to a Dynamics 365 developer environment running on Platform Update 8 or later
- Analytical report (.PBIX file) authored using Power BI Desktop with a data model sourced from the Dynamics Entity Store Database
- IMPORTANT: Use the steps described here to enable Analytical solutions in a 1Box environment
Note: For detailed instructions on authoring Analytical Workspaces & Reports using Power BI Desktop take a look at the article Authoring Analytical Workspaces & Reports.
WALK-THROUGH
TASK #1 - Add the PBIX file as a resource to your model
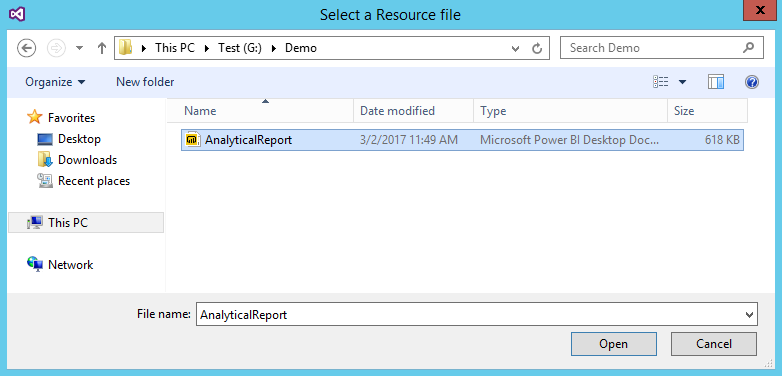
To begin, you'll need to author or obtain the Power BI Report to embed in the workspace. For more information on creating analytical reports, review the Getting started with Power BI Desktop literature.
Use the following steps to add a PBIX file as an Operations Resource artifact:
- Create a new project in the appropriate model
- Select the Project in the Solution Explorer, then right + click and select Add > New Item
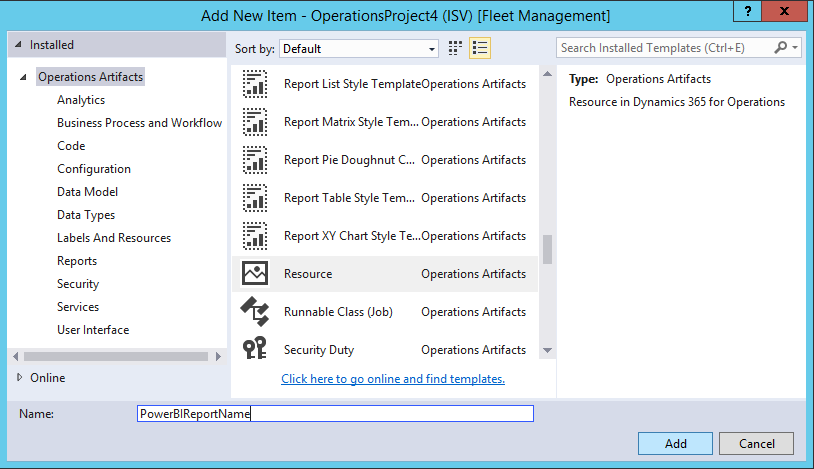
- In the Add New Item form, select the Resource template under Operations Artifacts
- Provide a Name to use when referencing the resource then click Add

Now that you've added the file named AnalyticalReport.PBIX as a model resource called 'PowerBIReportName' , you can begin adding menu items that reference the report.
TASK #2 - Adding link to Analytical Report from Reservation Management Workspace
Use the following steps to extend the form definition for the Reservation Management Workspace
- Select the Project in the Solution Explorer, then right + click and select Add > New Item
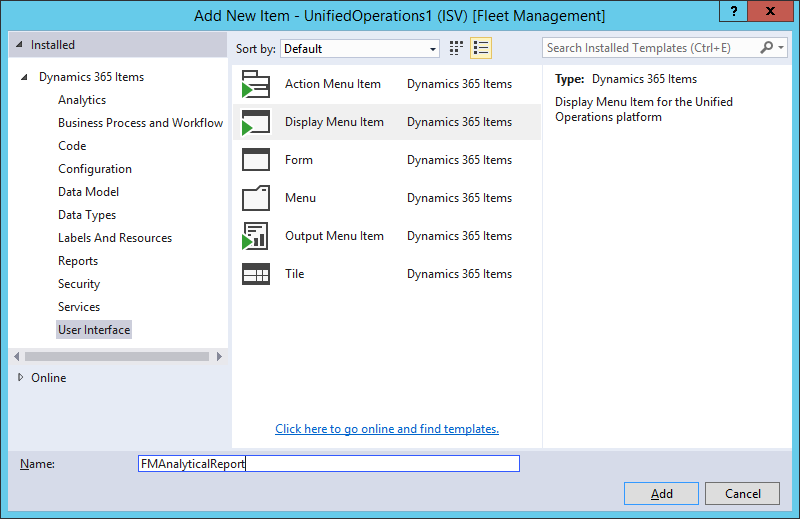
- In the Add New Item form, select the Display Menu Item template under User Interface
- Provide a name to use when referencing the report in X++ metadata then click Add

- Open the Menu Item designer for the new item
- In the Properties window, set the Object Type value to Class
- In the Properties window, set the Object value to PBIReportControllerBase
- In the Properties window, set the Parameters value to the name of the new Resource ( note: this item was created in Task #1 'PowerBIReportName')
- Now, rebuild the project and open the application

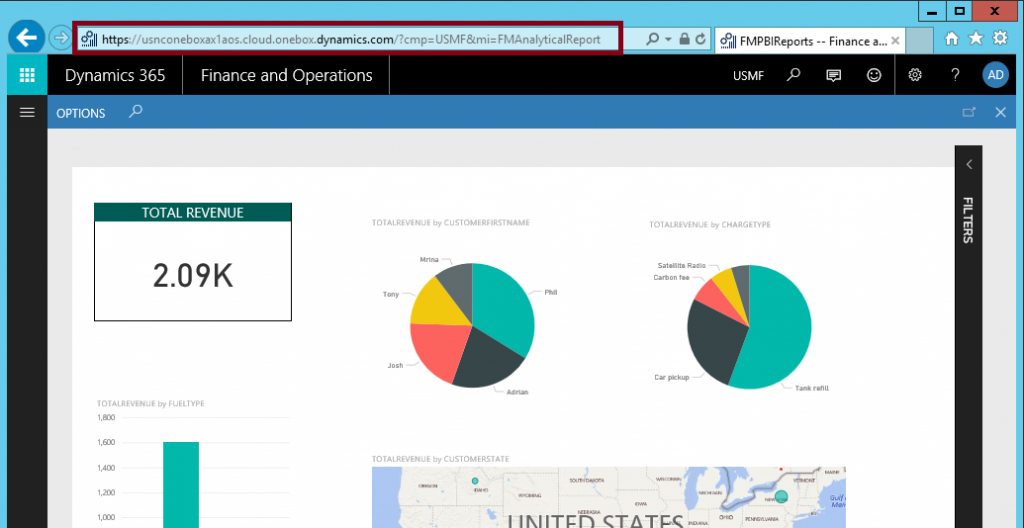
You're done. You can now access the Analytical Report directly using the new application menu item. Either add the Menu Item to an existing Application Menu or business logic to embed the solution into your application.
Comments
- Anonymous
November 03, 2017
Great Post TJ! I saw your presentation at Ignite about D365 Entity Store & Power BI. We have a full solution available now on the entity store with Power BI. On last step I have to take is to create an own workspace for the embedded page. The URL works, just an own workspace now in the navigation. Any advice on that!? Thanks in advance!Kind Regards,Ron Verhoeven- Anonymous
November 15, 2017
Own workspace is already done. One last question, how to extend/change a default Microsoft Report since they are now embedded as an Resource within the application. Does this still work through LCS?
- Anonymous
- Anonymous
December 19, 2017
If i understand you very well this metthod will work also for a local server that's another method to integrate the power BI file to a local server .right?
