Create an insane developer workstation in the cloud
In this blogpost I describe how to set up your perfect developer workstation running Visual Studio 2017 in the cloud without any installation steps required on your side.
Why?
As developers we always need more performance. A faster CPU or more RAM or more space. Sometimes our physical machines just aren’t powerful enough. On the other hand I often hear from developers who are owning an MSDN license already that they don’t know what to do with the monthly Azure credits which come with MSDN.
Here’s my proposal: Even if your company doesn’t build a cloud service yet and even if you are not very experienced with cloud computing at all – why not set up a powerful developer Workstation in the cloud – it will cost you nothing! 56GB of RAM. 8 Cores. Or more? Sounds good?
If you are licensed with MSDN you get a certain amount of monthly credit you can spend on Azure workloads. If you don’t spend it, it’s gone. If you do spend it, you can use Azure until your credits are gone and then your Azure service just stops working. Per default there’s a spending limit of 0 which makes sure you don’t have to pay and stay within the free credits. So as long as you don’t explicitly delete this limit, you’re save.
You haven’t activated your Azure credit yet? Here’s a tutorial I wrote how to do this.
In case you don’t have an MSDN license – go ahead and start an Azure trial. You can then follow the same process as described below and can set up a powerful developer VM (However your budget is different and your trial will expire at some point in time). You can activate your Azure trial here.
This is an awesome opportunity to get your hands on new software like Visual Studio 2017 which is provided within a VM template already for you. If you like it you might consider trying out the software with your current project and code files. And if you really fancy the experience, this might become your number one developer workstation you connect to every day. In case this is something you’re looking into you should definitely check out our Azure Dev/Test labs as well which is our service offering for exactly this scenario with some additional features. But I think I will cover this in another post.
So here’s my step by step tutorial. If you already know how to set up a VM – go ahead, do it, this is the procedure described here. But make sure you switch on Auto-shutdown to save your credits during the times where you’re not using your machine (see steps below). This is important!
Control cost by shutting down
You might wonder if this makes any sense – a powerful VM on Azure doesn’t come for free and if you take a look at the cost of a really powerful VM it might be a multiple of your free Azure credits. The thing is that the estimated cost per VM which you see in the Azure portal is estimated on a 24/7 basis. This means the estimated cost you see here is a good indication – but based on your usage you can control cost. This makes perfect sense and for our scenario it means if you run the VM just for a few hours every workday you can reduce the cost to a level where you stay within the free Azure contingent. Of course – if you find you like what you see you always have the chance to exceed the limit after you disabled it or you also can scale up or down the machine you are using after creation.
If you want to save credits, don’t just shutdown the machine from within the machine but make sure you stop the machine from the Azure portal. (see below)
Step by step – set up a powerful Azure VM running Visual Studio 2017
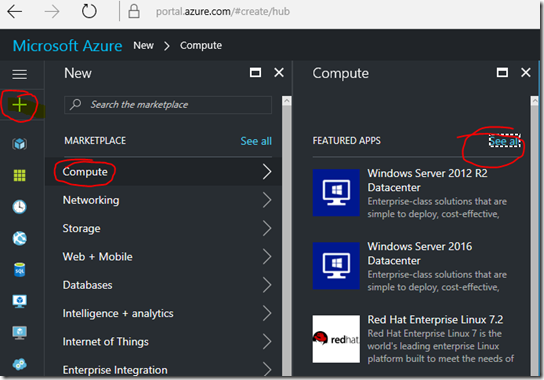
1. Visit the Azure portal (https://portal.azure.com) and create a new VM. To do so, click the + on the left, then select “compute” and “see all”.
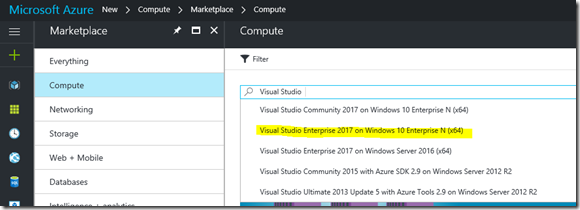
2. Search for Visual Studio, pick the template you want to use.
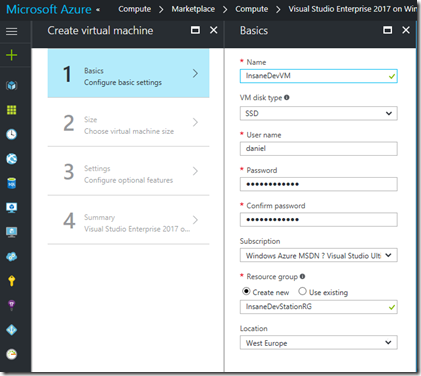
3. Click Create. A configuration blade will open. Provide the basic information like machine name, user, password, your Azure subscription and a resource group. A resource group is logical construct which holds some Azure resources (like the VM we are creating). You can pick any name to create a new one or use an existing.
When it comes to Location pick one which is close to you to avoid unnecessary latency.
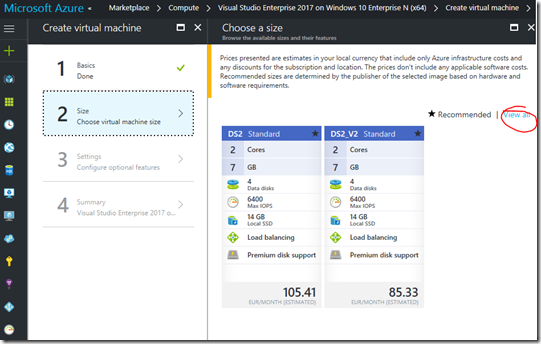
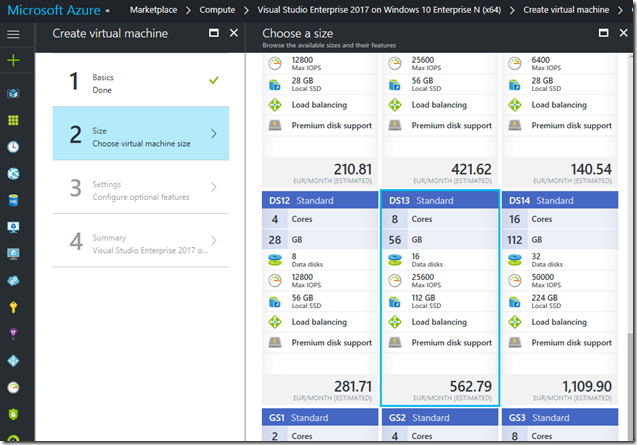
4. Confirm this dialog at the bottom of the blade. No the fun starts. We can pick a size of the VM. This means we can configure stuff like RAM and cores. Pick “View all” to see more available configurations.
5. Go and find a configuration that should work for you. As said before – you can control actual cost of the VM by reducing unnecessary uptimes. A DS3 machine will offer you 8 cores and 56GB RAM. This is somewhat faster than my laptop. As said before - you can’t exceed the zero spending limit if you’re licensed via MSDN as long as you didn’t remove the limit manually.
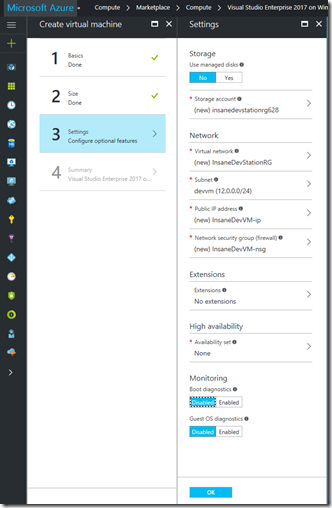
6. Confirm your configuration and provide the necessary setting in the next blade. See a sample configuration below. The only thing where you really have to provide some values is the networking part. For all others you can keep the defaults. Provide an adresss space (e.g. 12.0.0.0/24) and a subnet address range (e.g. 12.0.0.0/24) and pick a name for your subnet.
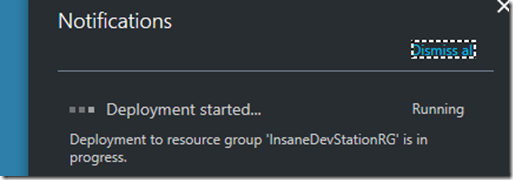
7. Confirm you configuration. You will get a summary and your configuration will be validated. Click OK to start the deployment. In the portal a notification will show up.
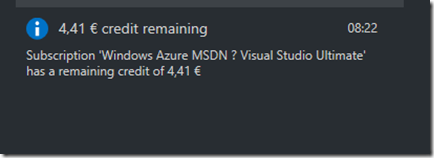
8. In the notification era you will find information on how much credit is left as well. Here’s a sample screenshot from my credits. Thank got the month is almost over and I will get a new credit in a few days.
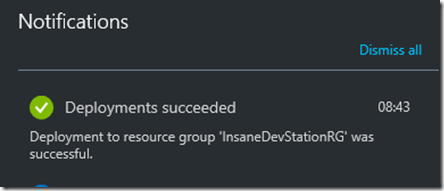
9. After a few minutes you’ll see the message that the deployment was successful. This means your machine is running.
10. Click the “Connect“ button to download an *.rdp file. Click the downloaded file to start an RDP session with your brand new machine.
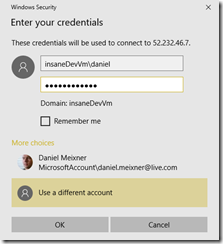
11. Enter your credentials. Make sure you provide your name as machinename\username! In case your machine can’t be found it might still be booting. So give it another try in a few seconds.
12. As soon as you are connected you’re done. You have set up a virtual machine running Visual Studio 2017 – go ahead and start it, connect it with your account and your source code repositories in VSTS or on Github.
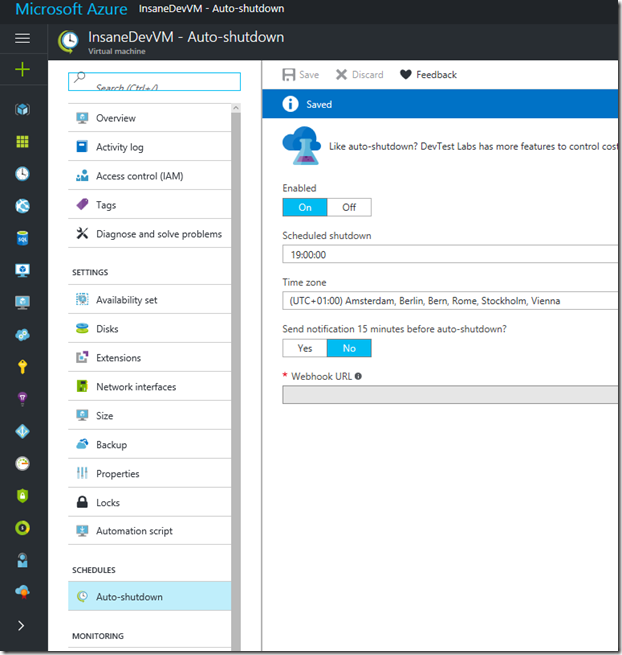
13. This last step is important: I recommend you configure auto-shutdown. Your VM will always be shut down automatically at a point in time you choose. Every day. This will save you some credits when you don’t need the machine.
15. If you want to start or stop the machine manually, do it from the Azure portal using this menu bar:
Check your spending limit
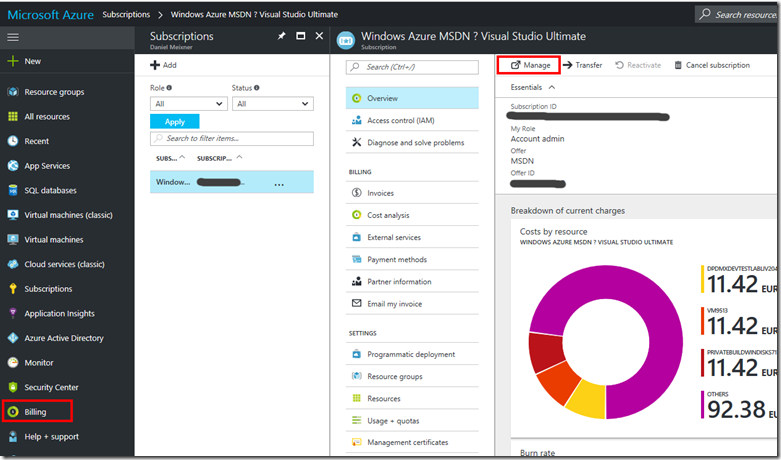
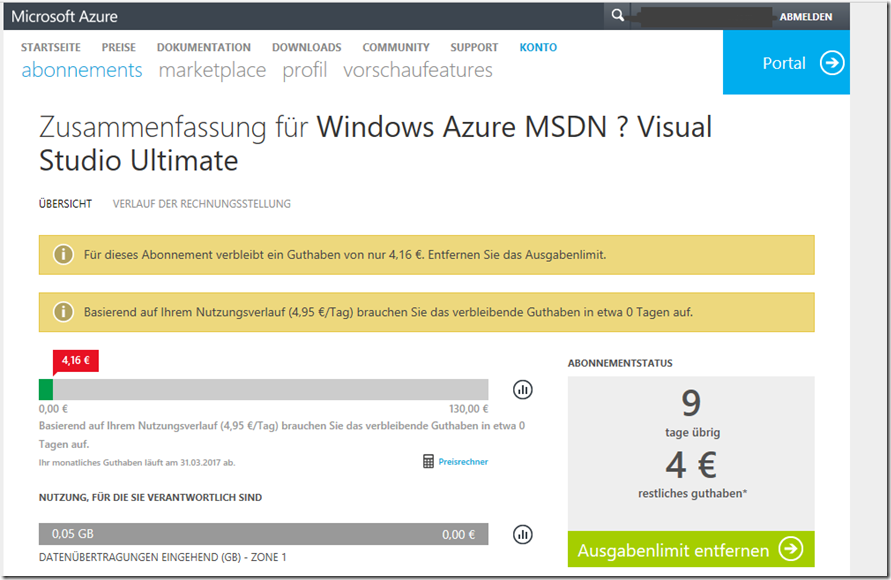
1. You may want to check if your spending limit is still active. You can do this by navigating to “Billing” in the portal. Then click “manage” in the upper menu.
2. This will forward you to the “old” Azure portal. You will see that whether you still have set the limit and you can deactivate the limit here.
Comments
- Anonymous
March 24, 2017
Funktioniert eigentlich Hyper-V innerhalb einer Azure VM. Beispiel Mobile Emulatoren für Windows Mobile, Android Emulator?
