Using Chef to Manage Azure Virtual Machines - Part 1
You have probably heard of the term Infrastructure as Code. But what does it mean? In summary, Infrastructure as Code is a set of techniques and practices which help IT Pros remove the burden associated with the day to day build and management of modular infrastructure. It allows IT Pros to build and maintain their modern server environment in a way that is similar to how software developers build and maintain application code.
By defining a set of policies which contains your "code", you can provision infrastructure so it resembles your desired state. You can test on one system then deploy to many. You don't have to worry about manually installing and configuring individual components or consistency across the fleet. You can push these policies out to thousands of servers and have the peace of mind that servers which fall outside the desired configuration state will automatically be remediated.
A great tool to deliver infrastructure as code is Chef which has the ability to manage Azure VMs right out of the box! Chef is also cross platform and can manage Windows, Linux, Mac OS and more.
In this two part blog I will show you how to setup your Chef environment to provision Azure Virtual Machines and then walk you through creating a policy or "cookbook".
Part one of the blog will cover the setup of the Chef environment and provisioning of an Azure VM. Part two will cover policy creation and policy application.
Let's begin!
Chef Basics
I'm not going to go into detail about Chef as there is great material here and I recommend you have a quick read to familiarize yourself before you attempt this walk through. I will however recap the basics before we get started.
This diagram depicts the high level Chef architecture.
Chef has three main architectural components. The Chef Server, Chef Client (Node) and the Chef Workstation.
The Chef Server is our management point and there are two options for the Chef Server, a hosted solution or an on-premises solution. We will be using a hosted solution.
The Chef Client (node) is the agent that sits on the servers you are managing.
The Chef Workstation is our admin workstation where we create our policies and execute our management commands. We run the "knife" command from the Chef Workstation to manage our infrastructure.
There are also these things called "Cookbooks" and "Recipes". These are effectively the policies we define and apply to our servers.
Now that we have that out of the way let's get started!
Preparing the Workstation
First lets prep the workstation. I am using a standard Windows workstation.
We need to create a directory to store our config files and cookbooks.
First create a directory called C:\chef.
Then create a second directory c:\chef\cookbooks
We now need to download our Azure settings file so Chef can communicate with our Azure subscription.
Download your publish settings from here: https://manage.windowsazure.com/publishsettings/
Save the publish settings file in C:\chef
Creating a managed Chef Server account
Sign up for a hosted Chef account :
During the signup process you will be asked to create a new organisation.
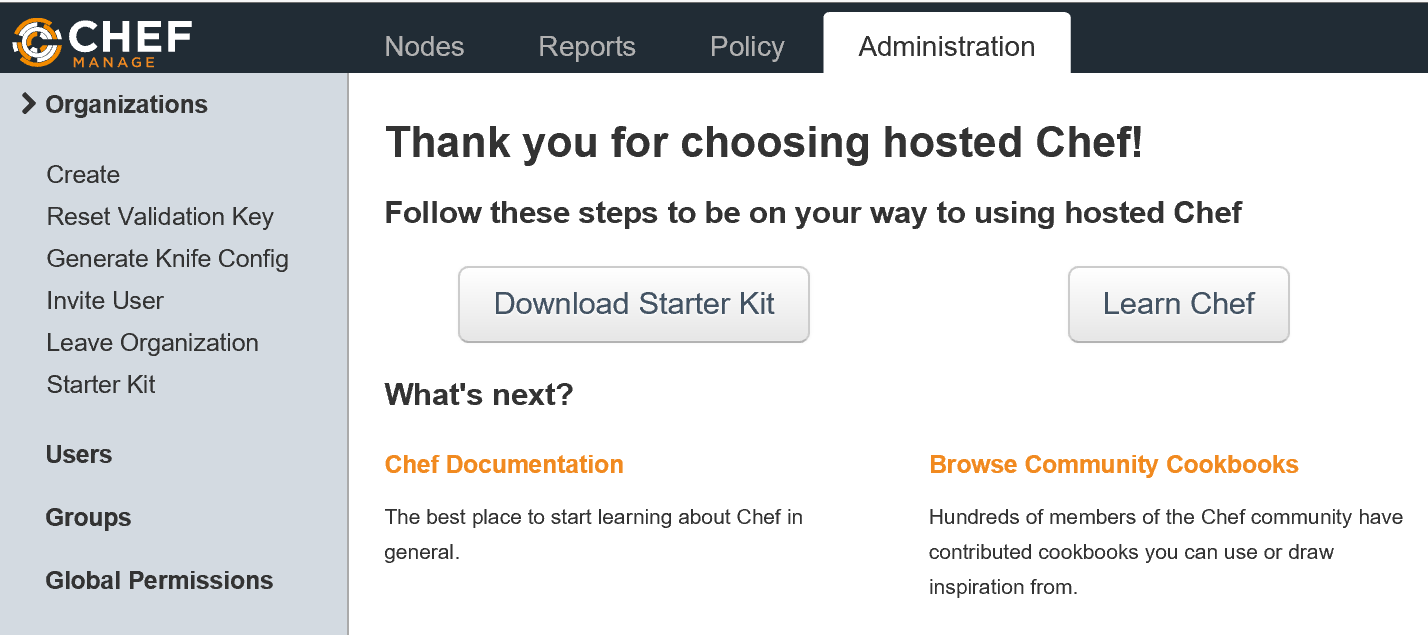
Once your organization is created download the starter kit.
Note: If you receive a prompt warning you that your keys will be reset it is ok to proceed as we have no existing infrastructure configured as yet.
This starter kit zip file contains your organization config files and keys.
Configuring the Chef Workstation
Extract the content of the chef-starter.zip to C:\chef
Copy all files under chef-starter\chef-repo\.chef to your c:\chef
Your directory should now look something like this:
You should now have 4 files including the Azure publishing file in the root of c:\chef
The PEM files contain your organisation and admin private keys for communication. The knife.rb file contains your knife configuration. We need to edit the knife.rb file.
Open the file in your editor of choice and modify the "cookbook_path" by removing the /../ from the path so it appears as below:
cookbook_path ["#{current_dir}/cookbooks"]
Also add the following line reflecting the name of your Azure publish settings file.
knife[:azure_publish_settings_file] = "yourfilename.publishsettings"
Your knife.rb file should now look similar to this:
These lines will ensure Knife references our cookbooks directory under c:\chef\cookbooks and also uses our Azure Publish Settings file during Azure operations.
Installing the Chef Development Kit
Next Download and install the ChefDK (Chef Development Kit) to setup your Chef Workstation.
https://downloads.getchef.com/chef-dk/windows
This is straight forward. Let it install in its default location of c:\opscode.
This install will take around 10 minutes.
Confirm your PATH variable contains entries for C:\opscode\chefdk\bin;C:\opscode\chefdk\embedded\bin;c:\users\yourusername\.chefdk\gem\ruby\2.0.0\bin
If they are not there make sure you add these paths!
NOTE THE ORDER OF THE PATH IS IMPORTANT! If your opscode paths are not in the correct order you will have issues.
Reboot your workstation before you continue.
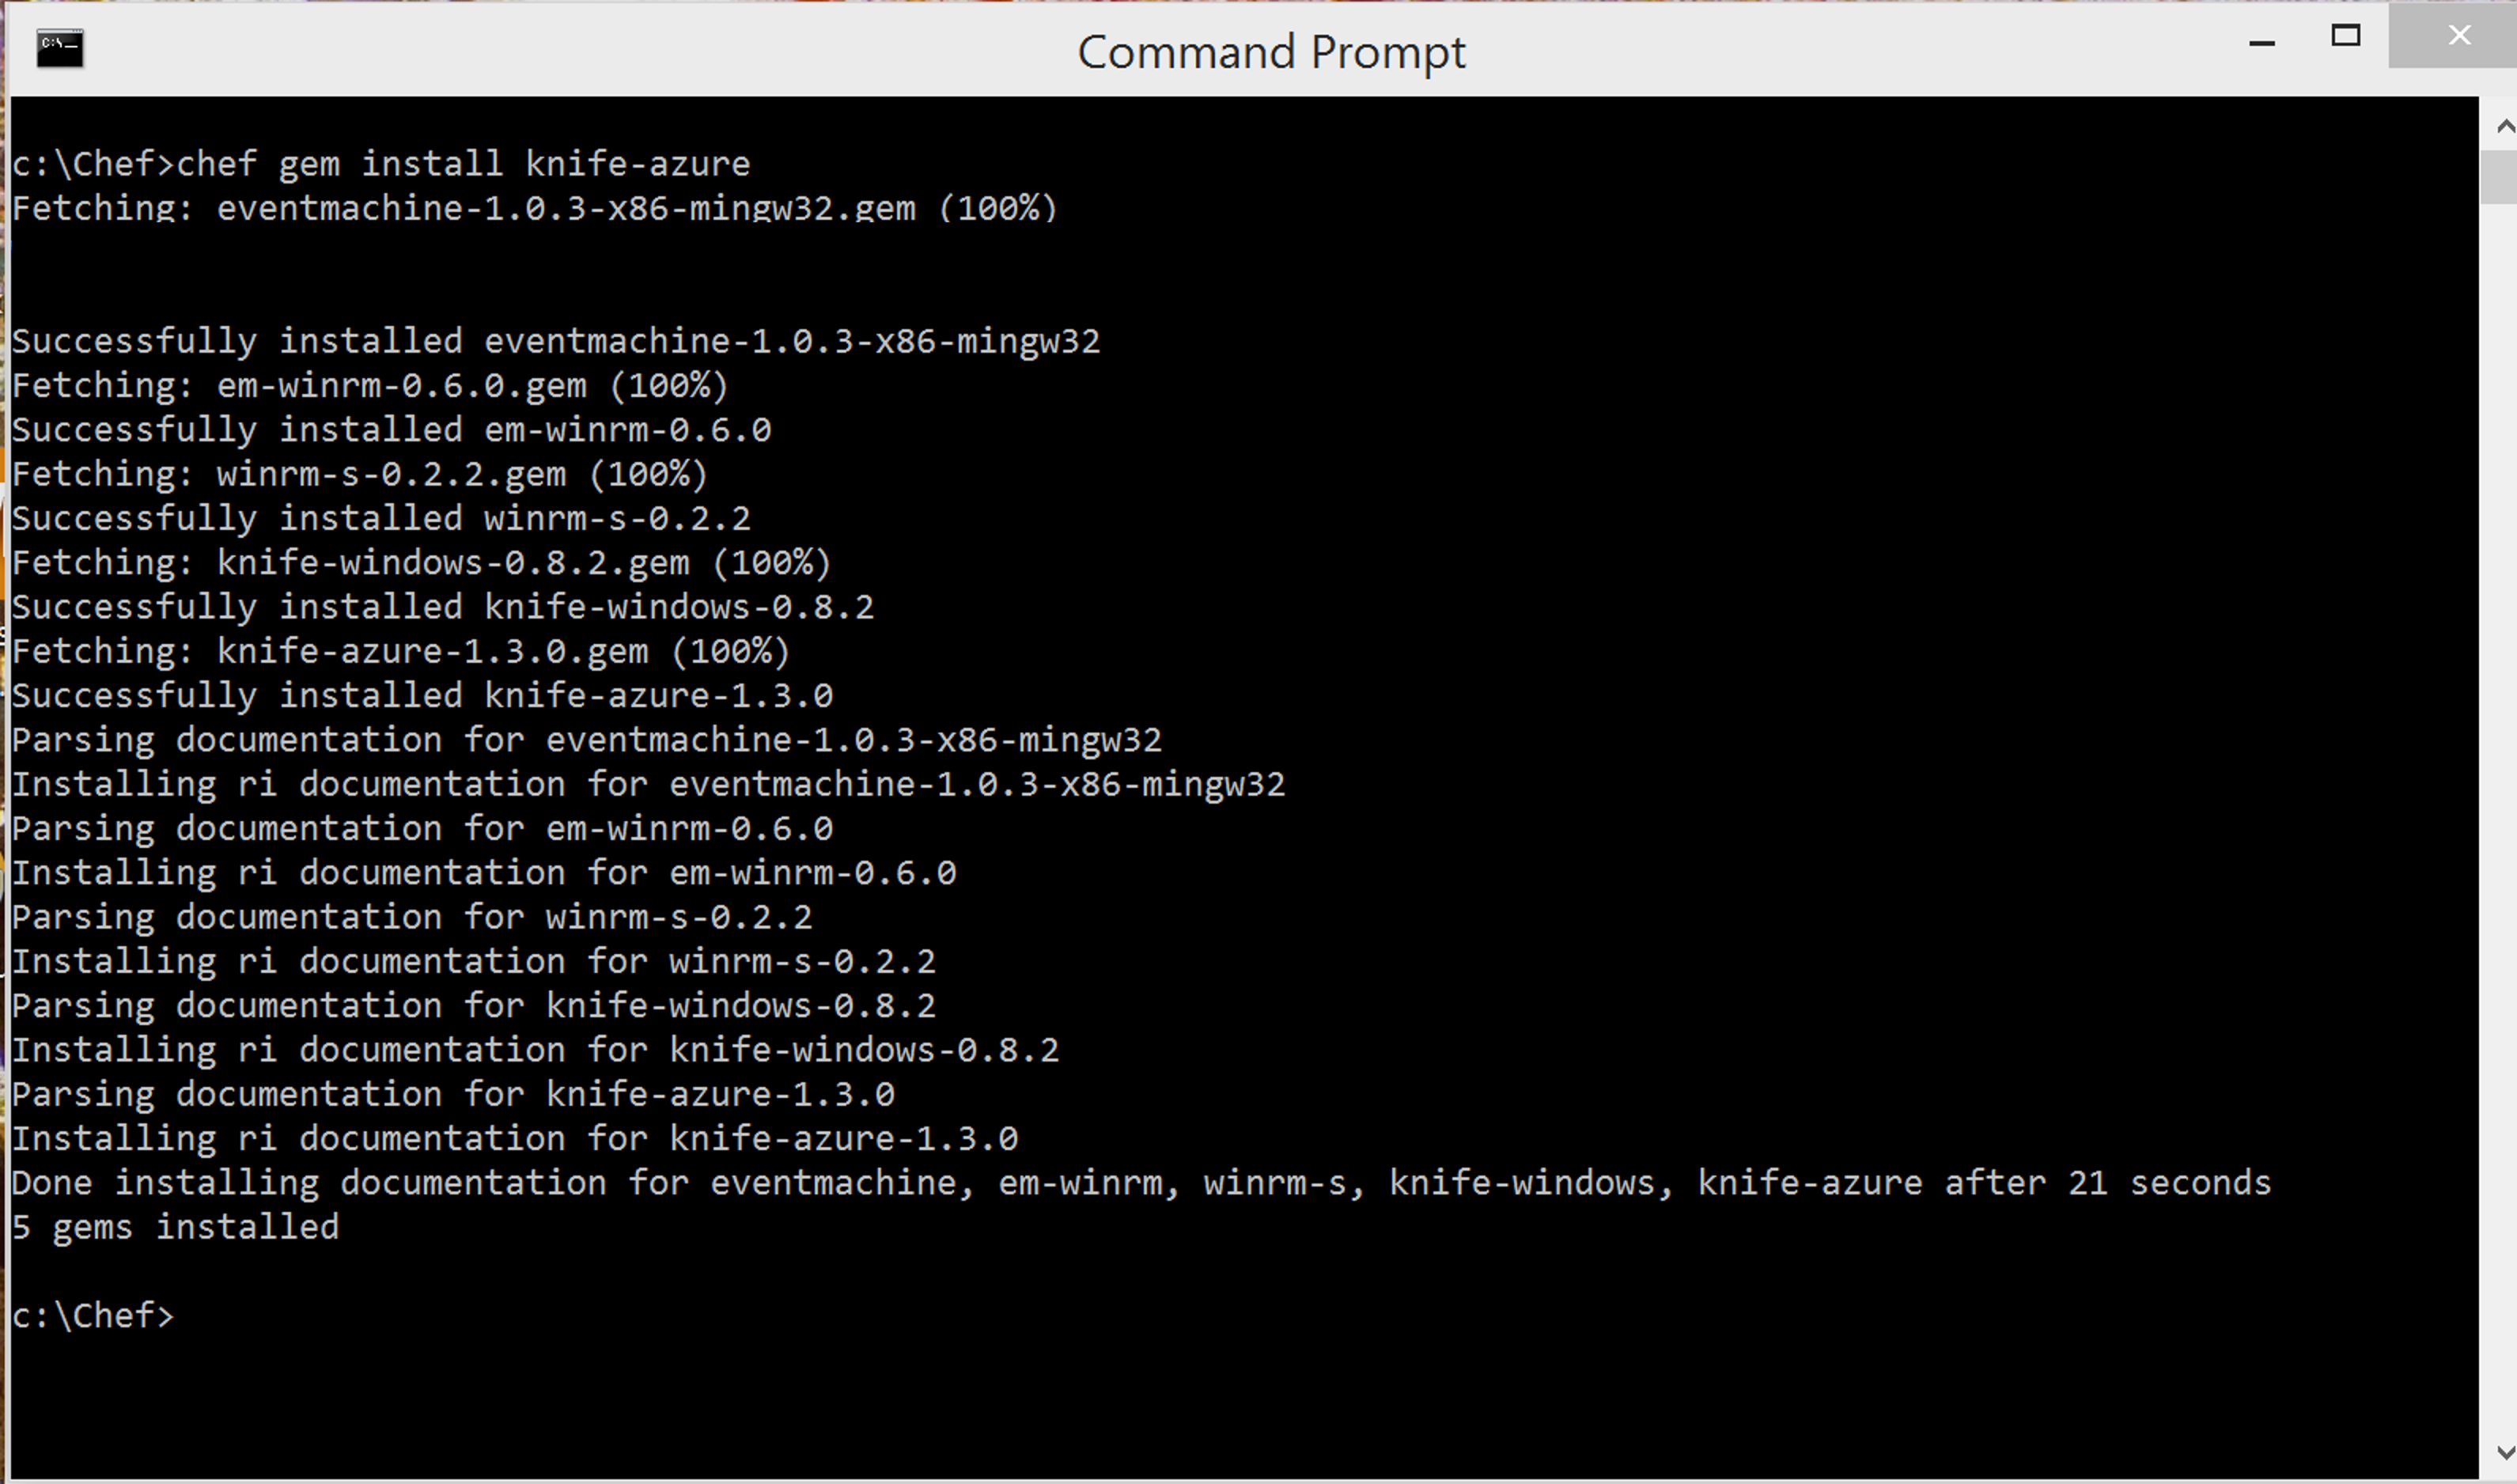
Next we install the Knife Azure extension. This provide Knife with the "Azure Plugin".
Run the following command:
chef gem install knife-azure
To ensure everything is configured correctly run:
knife azure image list
If everything is configured correctly you will see a list of available Azure images scroll through.
Congratulations. The workstation has been setup!
Creating a Virtual Machine with Knife Azure
We will now create an unmanaged VM with chef:
In order to do this we need to use the knife azure server create command.
Here is an example with the parameters highlighted in bold:
knife azure server create --azure-dns-name 'diegotest01' --azure-vm-name 'testserver01' --azure-vm-size 'Small' --azure-storage-account 'portalvhdxxxx' --azure-source-image 'a699494373c04fc0bc8f2bb1389d6106__Windows-Server-2012-R2-201411.01-en.us-127GB.vhd' --azure-service-location 'Southeast Asia' --winrm-user azureuser --winrm-password 'myPassword123' --tcp-endpoints 3389:56798
The parameters are self-explanatory. Substitute your particular variables and run.
Once you run the command, pop over to the Azure Portal, you will see your machine begin to provision.
Back at the command prompt:
This winrm error is expected as we have not enabled winrm on the server.
We can then go ahead and initiate an RDP connection from the Azure Portal and Bam!
This completes part one of the two part blog. Stay tuned for the next blog where we will configure Chef to deploy an Azure Virtual Machine and then automatically provision IIS!
Cheers
Diego
Comments
- Anonymous
January 01, 2003
Hi Daniel,
Part 1 and 2 has been combined on our Azure Blog website here : http://azure.microsoft.com/blog/2015/01/28/automating-azure-virtual-machine-deployment-with-chef/
Thanks for reading! - Anonymous
January 09, 2015
It's been one month and still no part 2 =( - Anonymous
July 14, 2016
The comment has been removed- Anonymous
July 24, 2016
The comment has been removed
- Anonymous


