How to install cool, custom fonts (like PDC09) into Windows and use it in your Silverlight application (or even Microsoft Word)
Whether you are someone who leans more towards design or coding you have probably come across the need for some interesting fonts. Typography is a fascinating area with a long history dating back to the origins of print. When we look at creating an engaging user experience today we are often trying to make a connection with our audience. We “empathize” with our users needs and look to invoke certain feelings. Fonts can do that in amazing ways and its pretty easy to add them to your own applications.
The Microsoft Professional Developers Conference (PDC) site has a great art section where you can download wallpapers, blog bling and the font that they used. Maybe its because I’m such a video gamer but the font really connected with me and brought back memories of playing Wipeout and Star Trek.
Installing the Font into Windows
I keep a local folder in my documents directory of all the fonts I have found intriguing. Most of these go into my applications or demos I do for that extra sparkle. You can keep them anywhere you would like however I just find this method the easiest to use. That way I can zip up all my fonts if I need to use them on a different machine.
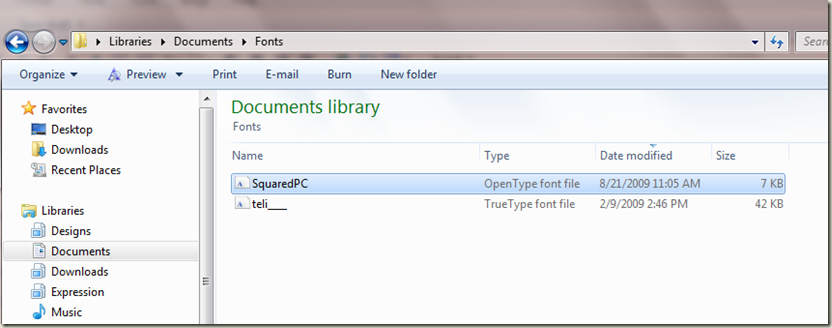
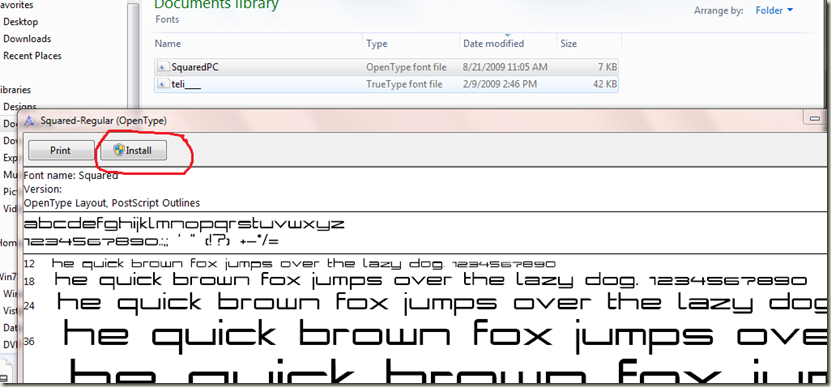
Adding a font to Windows is as easy as double clicking on the filename. The Font Manager window will them pop up (Windows 7 is pictured) and you will be given some typography information as well as samples of the font at different sizes. Just click the install button and windows will register the font for use.
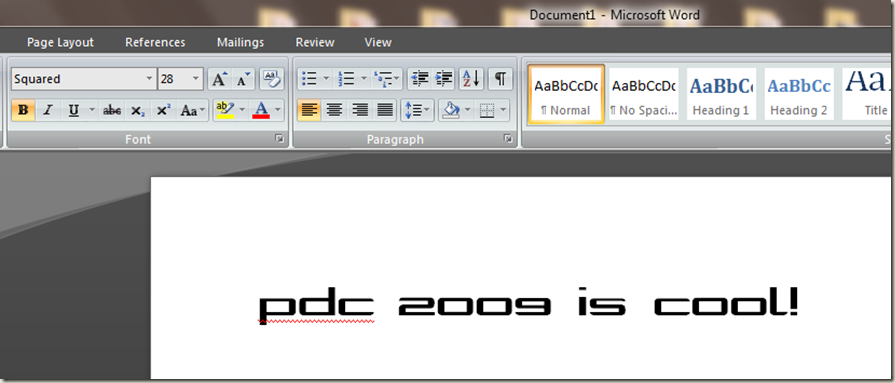
This means ALL windows programs will now have access to that font such as Microsoft Word. Keep in mind that custom fonts are not required to include both uppercase and lowercase. The PDC09 font (it’s official name is Squared) only includes lowercase for example. So don’t scratch your head when word tries to capitalize at the beginning of a sentence and you see invisible letters.
Using the new font in your Silverlight application
Now that we have made sure the font installed correctly it is time to add it to a Silverlight Application. In this example I am opening up Expression Blend 3, adding a simple gradient to the default grid layout and creating a TextBlock control. I then selected the newly installed squared font from the textbox text properties and added some colors I thought to be pleasing.
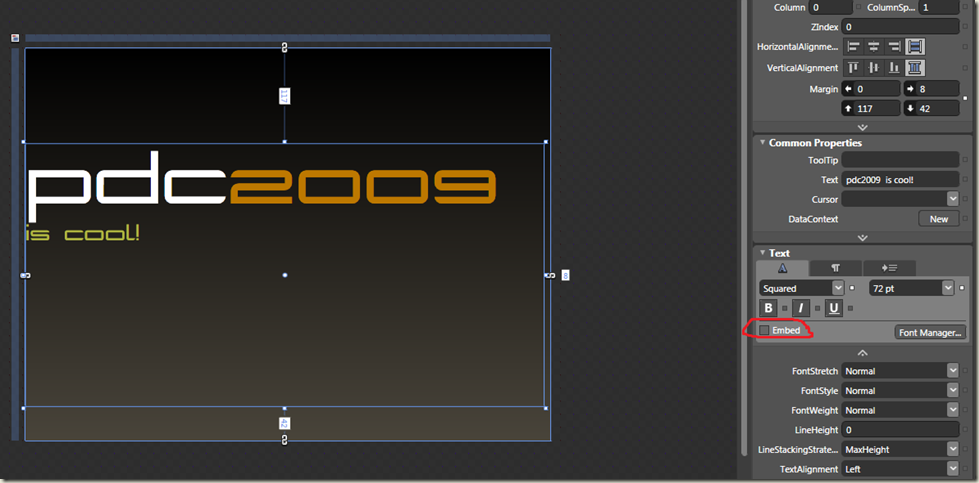
Keep in mind one of the amazing things about Blend is we are seeing in real time what our application looks like. This means for Silverlight the artboard is being rendered in Silverlight. While we are in design time it understands the selected fonts and displays them correctly. However if we run the application you will notice something happens.
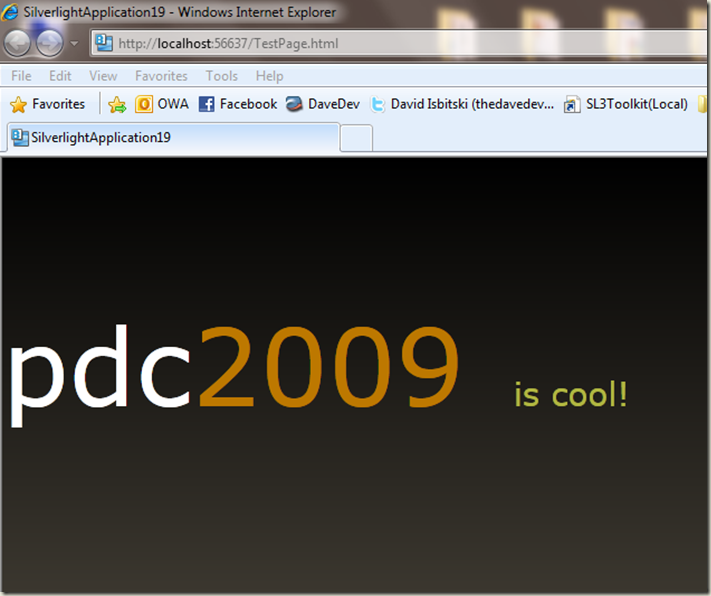
This is where a lot of people get tripped up. The application compiled, the browser opened up and it looks nothing like what it did in my Blend design surface. So what is up?
Font Embedding - it’s all about the download size!
It is important to remember one of the core design principles of Silverlight is a small download size. Every time you add a resource such as an image, a font, or a video the initial the size of your application will increase.
Luckily, Silverlight is really smart about this. It gives you the choice of not only which Fonts you wish to include in your application but also which parts of those fonts (Uppercase, Lowercase, etc.) giving you even more control over the size of your downloads. To bring up this menu simply click on the Font Manager button in the TextBlock text properties. As mentioned above the squared font doesn’t use any uppercase which is why you will see the “S” missing. Blend tries to capitalize the first letter of all the fonts being listed.
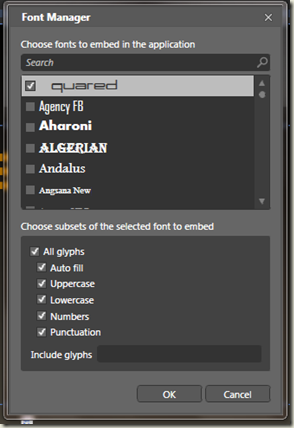
You can see both the Font Manager button and the Embed checkbox (I circled it in red) in the artboard screenshot above. Keep in mind you do not have to select which pieces of the font to use Blend will automatically include all subsets of that font for you. It is only necessary to check off the Embed checkbox for the font to be included in your application.
Once you click the checkbox two things will happen. A new Fonts directory will be created in your application and the selected Font source file will be copied into it for you.
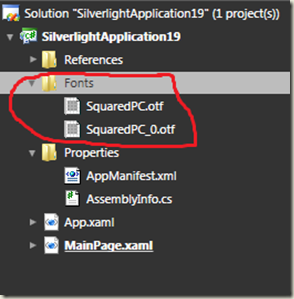
Blend will then modify the XAML source for your TextBlock to point to the newly installed Font resources in your project.

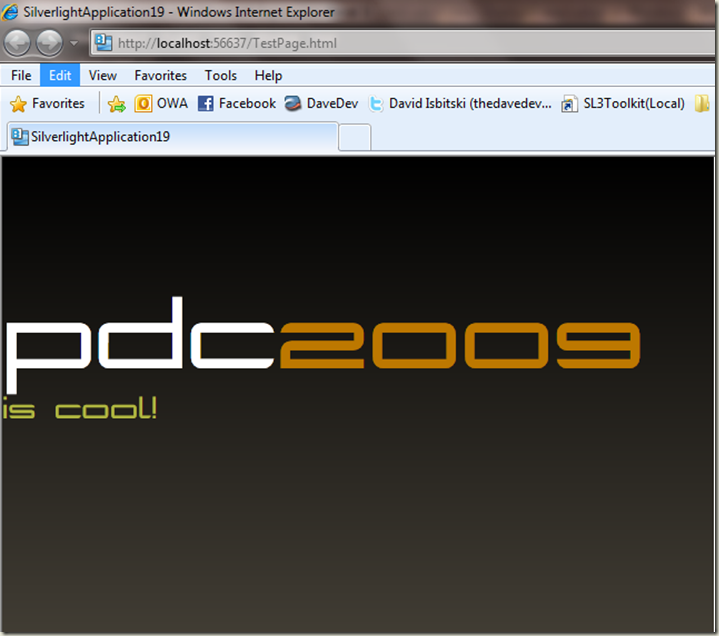
Looking cool with just a TextBlock thanks to Fonts!
We are now ready to show off our finished product. Running the application will now show a correctly displaying TextBlock with the selected square font. Amazing how much of a difference fonts can make even on a plain piece of text.
This is a trick you can use in all of your applications moving forward whether it is WPF or Silverlight based Blend and Fonts have got your back.
Want more information like this? The Microsoft Professional Developers Conference is coming up in less than 3 months!
If you register by September 15th you can also save $500 bringing the cost of a ticket down to only $1,595. Be sure to check out the PDC site here for more details.
