Step-by-Step: First steps with Azure Container Instances
Hello Folks,
It’s been a while since I last posted but it’s not because there has not been developments in the Microsoft Azure world. One in particular I wanted to talk about is Azure Container Instances or ACI for short. That capability was announced on July 26, 2017.
An Azure Container Instance is a single container is extremely quick to deploy and start. And it’s also billed by the second. These ACI allow you to specify sizing allowing you to match the requirements of your application perfectly.
There is no VM management you need to think about or cluster orchestration to setup. As Corey Sanders put it….
“It is simply your code, in a container, running in the cloud.”
In this post to show you how easy it is to get started, I will create a container in Azure and expose it to the internet with a public IP address in only two commands without any dependencies needed to be installed. All I need is a browser and an Azure Subscription.
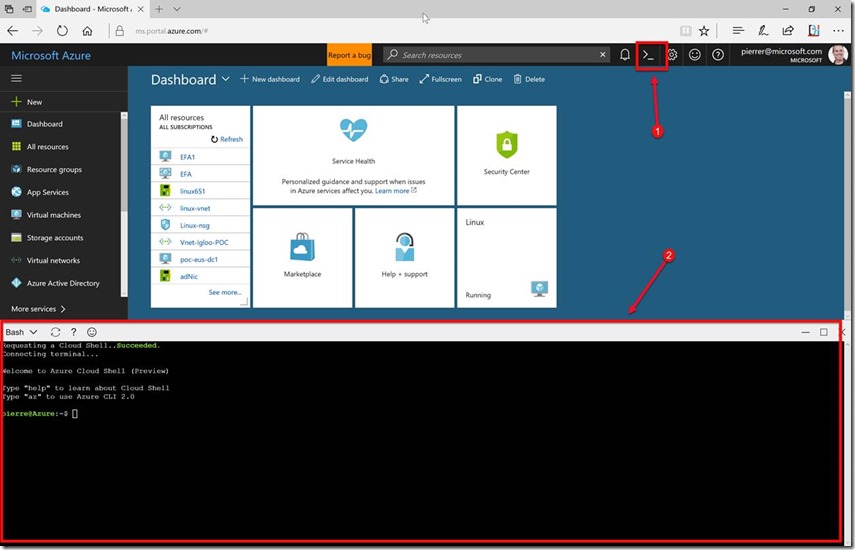
Step 1 – Access the Cloud Shell Interface
The Cloud Shell enables access to a browser-based Bash command-line experience built-in the Azure portal. The Cloud Shell comes pre-installed with popular command-line tools and language support so you you can get right to it and not worry about installing/updating packages.
Step 2 - Create a resource group
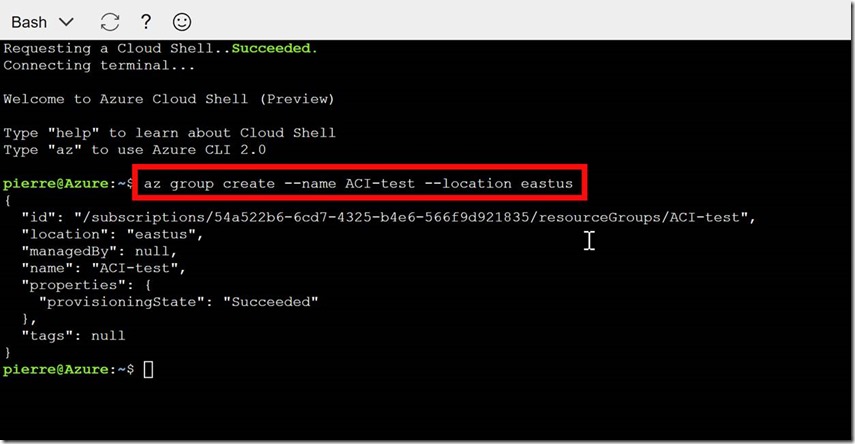
Azure Container Instances are Azure resources and therefore must reside in an Azure resource group, so our next step is to create a resource group with the az group create command.
az group create --name ACI-test --location eastus
Step 3 – Create a container
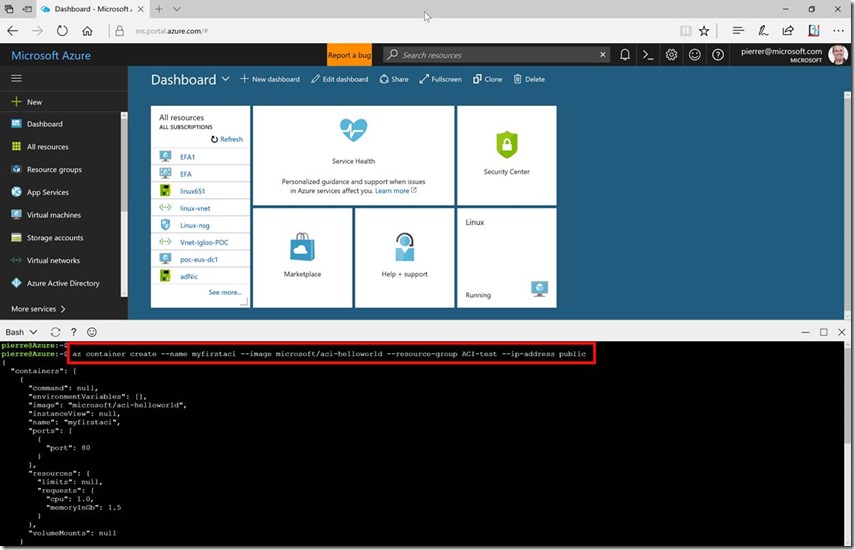
Now that we have the Resource Group, we will create a container by providing a name, a Docker image, and the Azure resource group we created in the last step.
You can optionally expose the container to the internet with a public IP address.
az container create --name myfirstaci --image microsoft/aci-helloworld --resource-group ACI-test --ip-address public
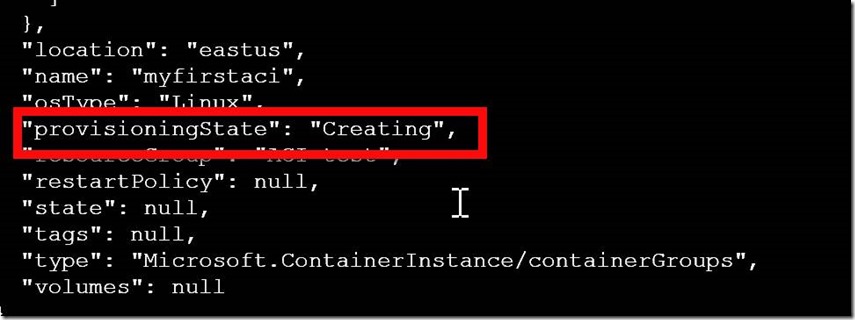
Within a few seconds, you will get a response to your request. Initially, the container will be in a Creating state,
but it should start within a few seconds. You can check the status using the following command.
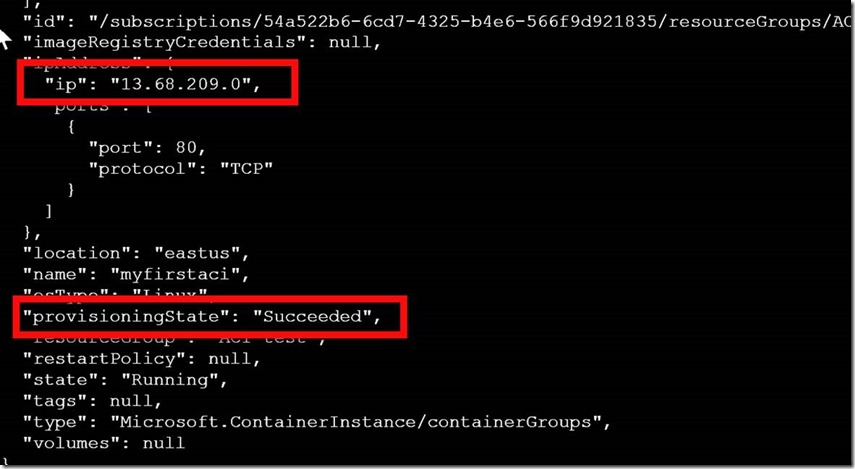
az container show --name myfirstaci --resource-group ACI-test
and you will get the new provisioning state which should change to “Succeeded”. You will also notice the public IP address of the conatainer.
Step 4 – Test Access to the Container
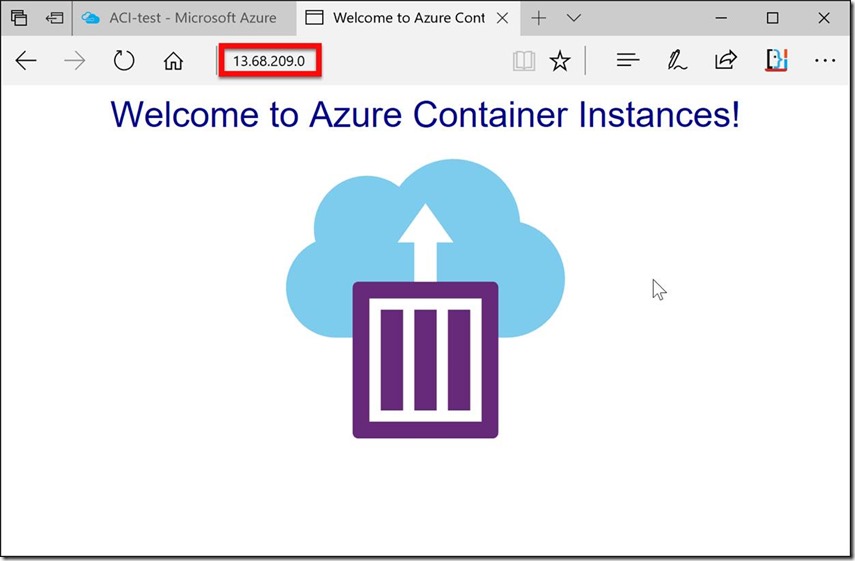
To test the instance I opened a web browser and navigated to the IP address found above.
That’s it! Our container is up and running. When you are done testing you can delete the container with the following command.
az container delete --name myfirstaci --resource-group ACI-test<
There you go!
Cheers!
Pierre Roman
Pierre Roman
@pierreroman
Comments
- Anonymous
August 01, 2017
Hi Pierre,Great article, but the title mentions ACS and the article describes the deployment of a container on ACI.A typo with all those acronyms is easily made :-)Cheers,Stijn- Anonymous
August 16, 2017
Updated :)Thank you Stijn for the heads up.
- Anonymous
