Migrating Applications to Windows Azure – The Silverlight 3 Client
New GUI
Even though I created a new UI for the application, I reused much of the code as the functionality was nearly identical. I changed the color, location and size of the elements and added a few new ones. The new user interface is built using a both Expression Blend 3 and Visual Studio 2010.
In order to organize several screens in one application, I decided to use the new Silverlight 3 Tab Control. Creating the UI for each TabItem was very easy to do as Expression Blend allows you to click the tab of interest and then drag controls onto that TabItem to create the layout. I created 3 unique TabItem views, one for listening to music, one that lists the various pieces of gear I use in the studio and a virtual studio view that leverages a Deep Zoom composite image.
The Music Tab
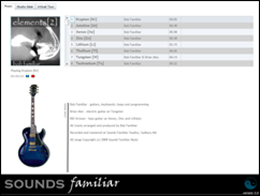
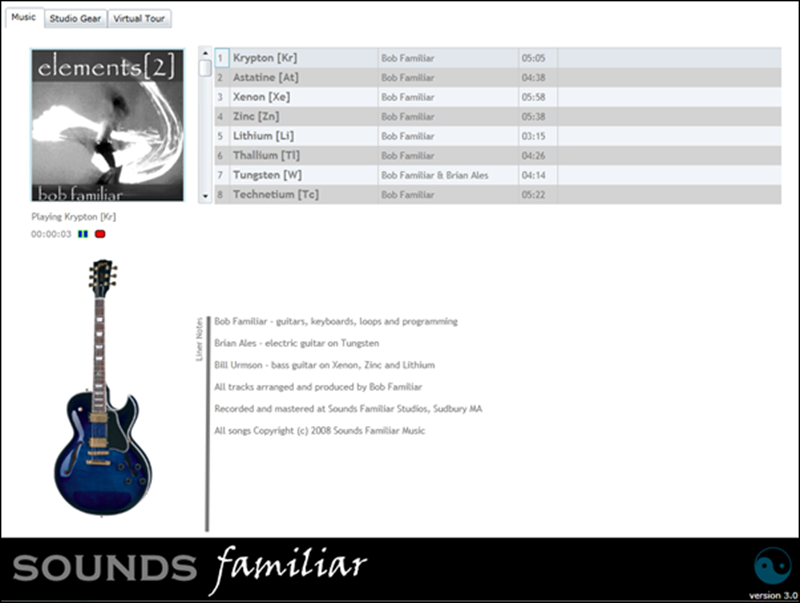
The Music TabItem is the first screen you see when you run the application. The first track of the showcased CD will start to play. The user can select a different track, use the scroll bar to move to another CD and stop, start and pause the music. The liner notes for the selected CD are displayed below the track grid.
The controls used on this screen are a <ListBox> for the CD images and a <DataGrid> for the CD Tracks. The key code pattern used here is an asynchronous service invocations to retrieve the CD list and the Track list.
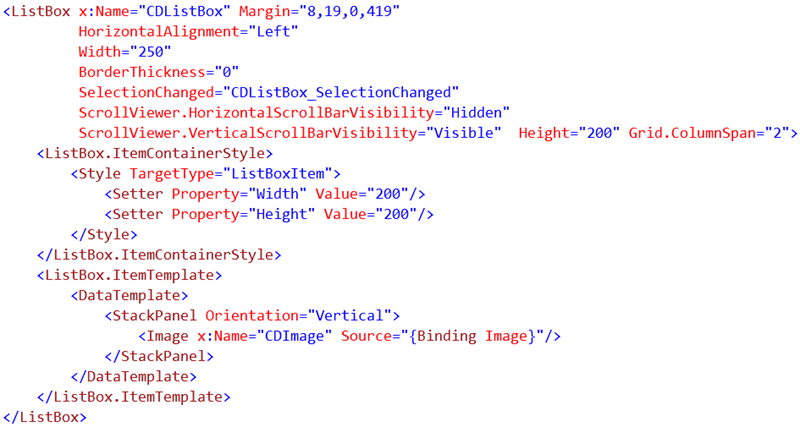
Here is the XAML that defines the <ListBox> with the name CDListBox . The key part of this XAML is the <ListBox.ItemTemplate> section. The <Image> XAML tag has its Source property set to “{Binding Image}” . To trigger data-binding, you set the CDListBox.ItemSource in code to an object or list of objects that have a property called Image that is a Uri to an image file.
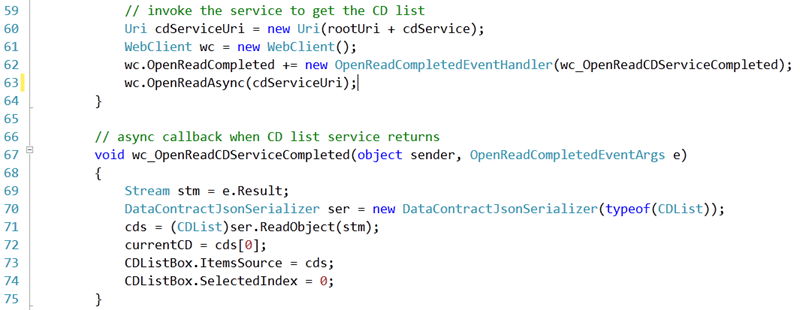
Now that the UI Component is configured, lets implement the UI Processing. Below is the code that invokes our RESTful CD service The code sets up a call to the service that returns a JSON formatted list of CD objects . The call to the service is asynchronous so a callback function is supplied. In the callback method, the result from the service call is serialized to a type called CDList using the DataContractJsonSerializer and then is bound to the CDListBox.ItemSource.
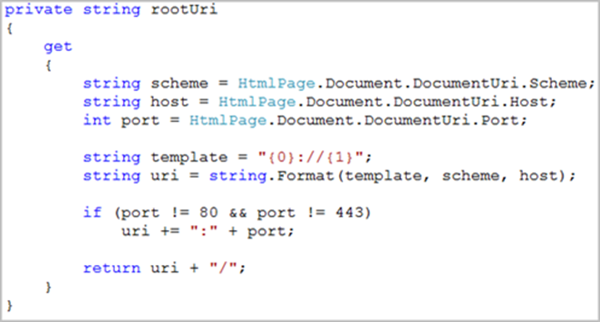
The Uri to the service will be different depending on whether you are running locally in your development environment or running in the cloud. In order to support both environments, I have defined a property called rootUri. The rootUri property returns the correct base Uri based on whether we are running locally or from the cloud.
Below is a very useful implementation I lifted, sorry borrowed, from from Rob Bagby. The only issue with this code is if you want to leverage the Out of Browser feature of Silverlight you can’t use the browser DOM classes in your code. You will get a runtime exception when running out of browser. If this is not an issue for you, then use this implementation.
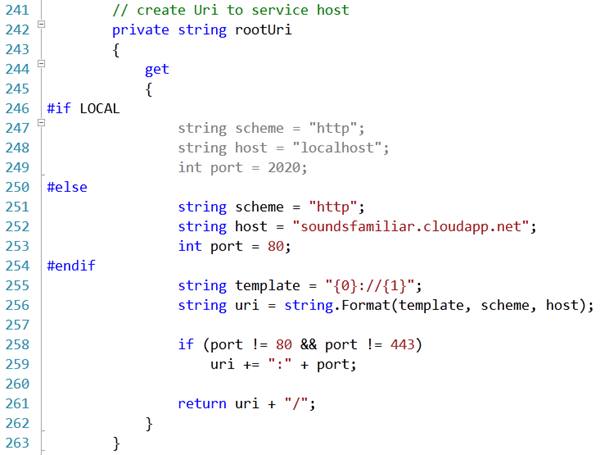
Since I am using the Out of Browser feature, I can’t use this code. My much less elegant implementation simply passes back hard coded development and deployment URI’s.
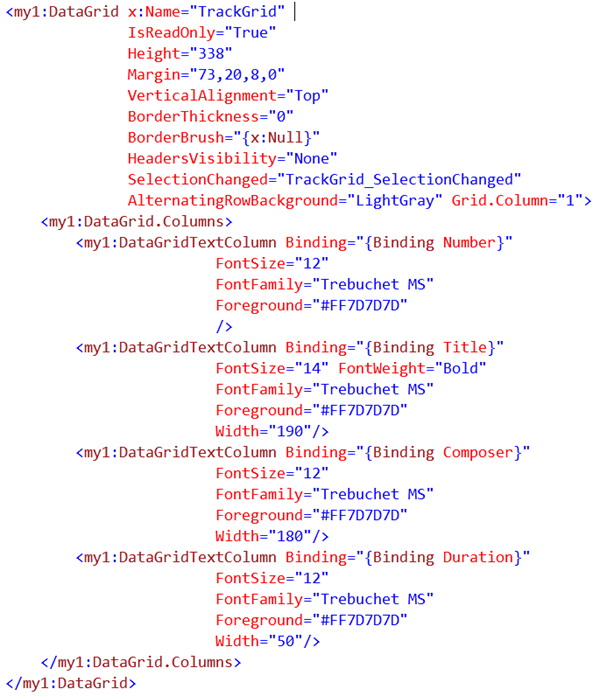
The XAML that defines the track grid is below. The key to this code is the use of the DataGrid column templates each with it’s own data binding definition. The code to invoke the service and bind the data follows the same pattern as above. The Track list will contain objects that have Number, Title, Composer and Duration properties that will be bound to the DataGrid.
The Studio Gear Tab
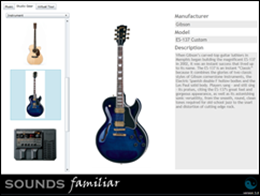
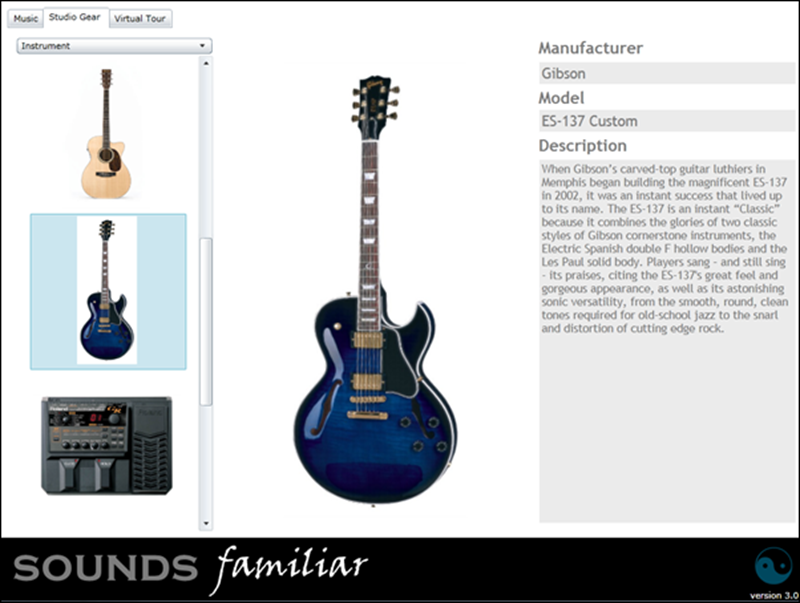
This screen displays a ComboBox that allows the user to filter the GearListBox. The GearCategory ComboBox will list 3 filter choices; instruments, audio hardware and software. When the user selects an item in the GearListBox, a large picture and product data detailing Manufacturer, Model and Description are displayed.
The GearCategory ComboBox is loaded in code. A list of strings is created with the possible choices and then that list of strings is data-bound to the GearCategory ComboBox. The gear category choice becomes a parameter to the Gear service.
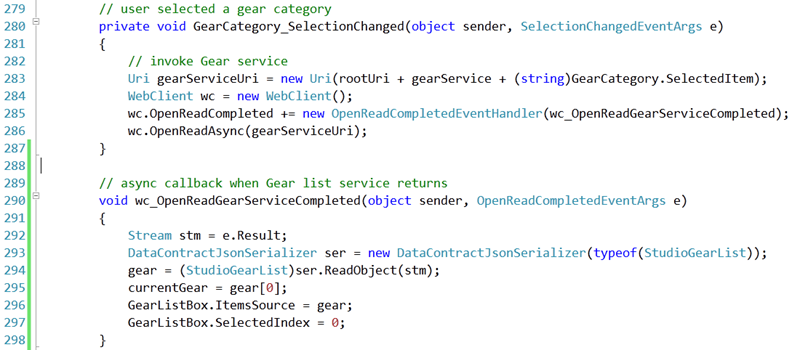
The same async service invocation code pattern is used to load the GearListBox and perform the data binding.
The Virtual Tour Tab
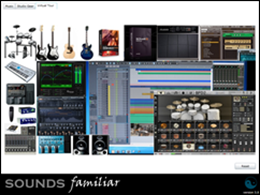
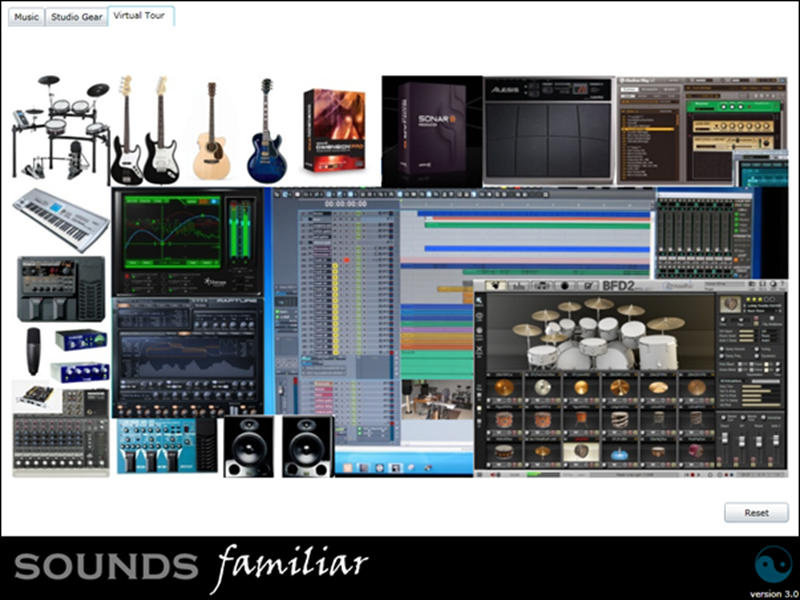
This screen was very easy to implement. It is a reuse of the Deep Zoom image that was implemented in the previous version of the site. The image contains shots of all the studio gear and even has a shot of the actual studio. Can you find it?
I moved the code that implements this view as a Silverlight User Control and then embedded it on the Virtual Tour TabItem. The user can Click to zoom in and Shift-Click to zoom out. There is a rest button to put the image back to its original position.
The XAML is really trivial. The control simply uses a <MultiScaleImage> element and a button to link to the reset function.
The code is also trivial. Simply set the Source property for the MultiScaleImage to the XML output file from the Deep Zoom Composer tool.
OOB Oh Yeah!
OOB stands for Out of Browser a new feature of Silverlight 3. Visual Studio 2010 makes it trivial to implement. In fact there is no code, just configuration.
Here is a screen shot of the application running out of browser. Not the desktop shortcut to launch the application.
To configure your application to run out of browser, right click on your Silverlight project and select Properties. Note the new configuration settings ‘Enable running application out of browser’ and the button that brings up the Out of Browser settings.
The Out of Browser settings dialog allows you to set the Window Title, size of the window, the application description and point to 4 application icons. You can also specify the use of GPU acceleration. This is useful if your application make use of advanced graphics such as animations, 3D perspective, video, etc.
To create the Sounds Familiar ICONs, I used Expression Design. I was able to export all the size variations from the same design. You will need to create an images folder in your Silverlight project to store the images so that they are packaged up with the Silverlight application.
One thing to be aware of is that if your application makes use of the browser DOM, it will throw an exception when run out of browser. The reason is that the browser DOM is not available when running out of browser. Classes from the namespace System.Windows.Browser will cause the problem, such as Html.Document.
When you run the application in the browser, you can right click on the window and you will see a new option to install the application out of browser. Selecting this option will bring up the Install Application dialog:
Note the use of the application logo. Click OK and it is done.



![clip_image001[6] clip_image001[6]](https://msdntnarchive.z22.web.core.windows.net/media/TNBlogsFS/BlogFileStorage/blogs_msdn/bobfamiliar/WindowsLiveWriter/MigratingApplicationstoWindowsAzureSilve_113AD/clip_image001%5B6%5D_040e641c-3356-4693-9e59-93c1c4260251.png)
![clip_image002[6] clip_image002[6]](https://msdntnarchive.z22.web.core.windows.net/media/TNBlogsFS/BlogFileStorage/blogs_msdn/bobfamiliar/WindowsLiveWriter/MigratingApplicationstoWindowsAzureSilve_113AD/clip_image002%5B6%5D_510c01de-44bf-410c-9cc7-bfe7455ed5cc.png)
![clip_image003[6] clip_image003[6]](https://msdntnarchive.z22.web.core.windows.net/media/TNBlogsFS/BlogFileStorage/blogs_msdn/bobfamiliar/WindowsLiveWriter/MigratingApplicationstoWindowsAzureSilve_113AD/clip_image003%5B6%5D_f833a41c-14a2-4b82-8b28-bcf85abd362a.png)
![clip_image004[6] clip_image004[6]](https://msdntnarchive.z22.web.core.windows.net/media/TNBlogsFS/BlogFileStorage/blogs_msdn/bobfamiliar/WindowsLiveWriter/MigratingApplicationstoWindowsAzureSilve_113AD/clip_image004%5B6%5D_b688d5d8-256f-41ee-9bbd-437248cc909f.png)
![clip_image005[6] clip_image005[6]](https://msdntnarchive.z22.web.core.windows.net/media/TNBlogsFS/BlogFileStorage/blogs_msdn/bobfamiliar/WindowsLiveWriter/MigratingApplicationstoWindowsAzureSilve_113AD/clip_image005%5B6%5D_606b04c0-1ec0-4388-978b-1b8ddaeb17b0.png)