Choosing the right Kubernetes object for deploying workloads in Azure - Part 2
This material has been added to a full eBook, Kubernetes Objects on Microsoft Azure.
Introduction
The last post in this series covered setting up a single-node Kubernetes cluster locally. While it is a good way to get started with development using Kubernetes, to run in production, a multi-node Kubernetes cluster is typically needed. This post will cover how to create a multi-node Kubernetes cluster in Azure.
Getting started with Kubernetes in Azure
Azure Container Service (ACS) is an Azure service that enables running containerized workloads. It provides an option to choose between multiple container orchestrators, such as Mesos DC/OS, Docker Swarm, or Kubernetes. This post is going to use ACS to deploy and manage a Kubernetes cluster in the cloud.
Creating a Kubernetes cluster on ACS
A Kubernetes cluster on ACS can be created by using the Azure portal or by using Azure CLI (command-line interface). Detailed instructions on how to set up a Kubernetes cluster using Azure CLI are available here. While it is a good idea to use the switch --generate-ssh-keys to auto-generate SSH keys, many enterprises prefer having their operations or security teams generate and provide SSH keys to the development teams. This post uses that approach and instead of auto-generating SSH keys, I use existing SSH keys. This scenario is supported by using the switch --ssh-key-file instead of --generate-ssh-keys. For a more detailed description of the various switches available while creating a Kubernetes cluster, refer to this article. Due to a current known issue, please compact the SSH public key by completing the following procedure on Windows 10 using PuTTY.
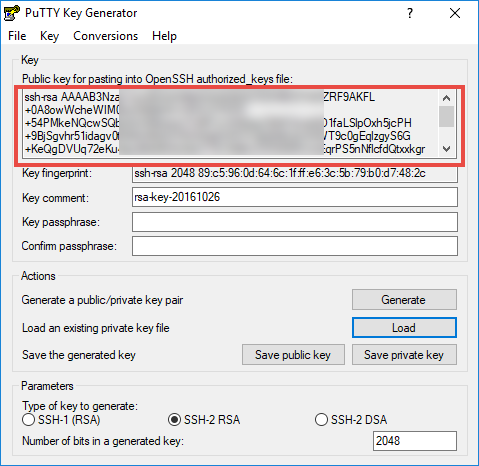
Open PuTTYGen and load a private SSH key.

Figure 1. Loading a private SSH key.
Copy the contents of the public key, create a new text file, paste the content into a new text file, and save it. Note that there are no comments at the beginning or the end of this public key, which you would generally see if you open it as is. Use the full path of this file to create a new Kubernetes cluster, as shown in Figure 2.

Figure 2. Creating a new Kubernetes cluster.
After a while, the message in Figure 3 appears and indicates a successful deployment in Azure.

Figure 3. A successful deployment in Azure.
At this stage, a Kubernetes cluster is successfully deployed in Azure.
Managing a Kubernetes cluster in Azure
Kubectl (the Kubernetes command-line interface) is used to manage the Kubernetes cluster in Azure. To interact with an Azure-based Kubernetes cluster, run the get-credentials command (see Figure 4).

Figure 4. Running the get-credentials command.
When the command completes, run another command to check if the current context of kubectl is pointing to the Azure cluster (see Figure 5). It must have been pointing to the local minikube context before that. 
Figure 5. Checking if the current context is pointing to the Azure cluster.
As can be seen, the current context is pointing to the Azure cluster.
Run the command in Figure 6 to get more details about the nodes.

Figure 6. Getting more details about the nodes.
These nodes match with corresponding VMs in Azure, as shown in Figure 7.

Figure 7. The nodes match with corresponding VMs.
Run the cluster-info command to understand the various endpoints of the Kubernetes cluster in Azure (see Figure 8). 
Figure 8. Running the cluster-info command.
To access the Kubernetes dashboard of the Azure-based cluster, run the kubectl proxy command, as shown in Figure 9.

Figure 9. The kubectl proxy command.
The command returns an IP address and port on which various services are available on proxy. Navigating to that address returns a list of all the endpoints of the Azure-based Kubernetes cluster (see Figure 10).

Figure 10. A list of the endpoints.
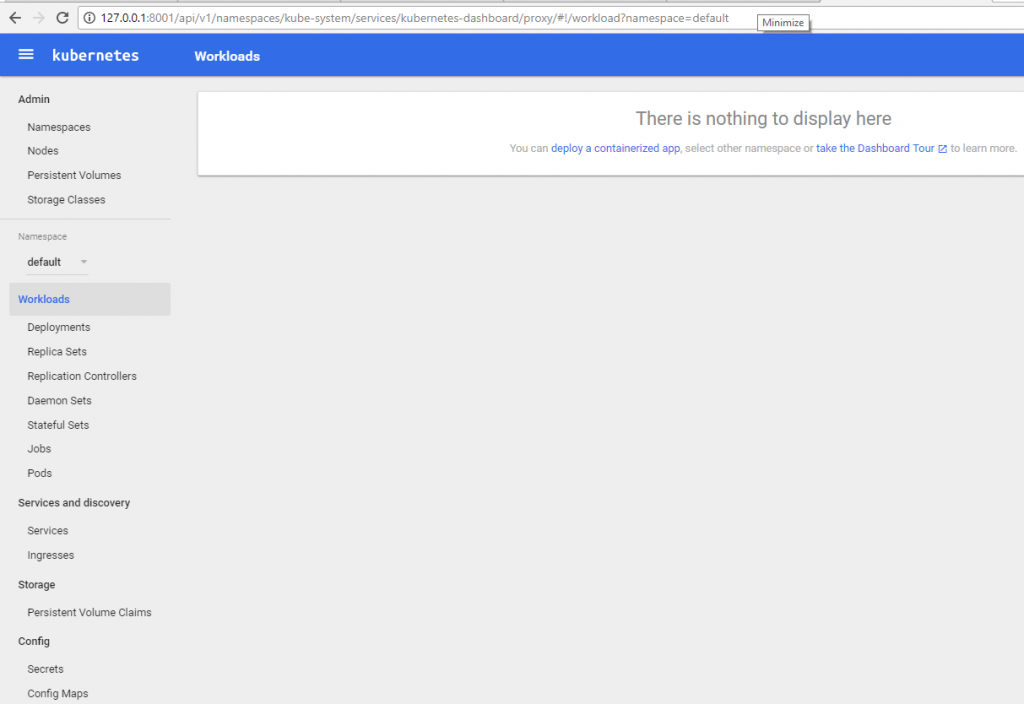
Navigating to https://127.0.0.1:8001/ui takes you to the Kubernetes dashboard (see Figure 11).

Figure 11. Navigating to the Kubernetes dashboard.
An Azure-based Kubernetes cluster is now ready and can be accessed via a dashboard in a browser. My next post will dive deeper into the Kubernetes dashboard.
Comments
- Anonymous
October 31, 2017
Continue on to Part 3 of this series: https://blogs.msdn.microsoft.com/azurecat/2017/10/24/choosing-the-right-kubernetes-object-for-deploying-workloads-in-azure-part-3/Return to Part 1 of this series: https://blogs.msdn.microsoft.com/azurecat/2017/10/24/choosing-the-right-kubernetes-object-for-deploying-workloads-in-azure-part-1/Return to the Overview article for this series: https://blogs.msdn.microsoft.com/azurecat/2017/10/24/choosing-the-right-kubernetes-object-for-deploying-workloads-in-azure/ - Anonymous
January 22, 2018
This material has been added to a full eBook, Kubernetes Objects on Microsoft Azure: https://azure.microsoft.com/en-us/resources/kubernetes-objects-on-microsoft-azure/en-us/