Getting Started with the Data Services Update for .NET 3.5 SP1 – Part 1
Yesterday we released the Data Services Update for .NET 3.5 SP1 that basically brings the functionality available in .NET 4.0 to .NET 3.5 too.
To help you get started with the Update, in this post we will:
- Install the Update
- Create a database.
- Create a Web Application containing:
- An Entity Data Model (EDM) to expose the database
- A configured Data Service to expose the EDM using V2 of the OData protocol
And in Part 2 we will Create a WPF Application to use the Data Service
So without further ado, lets get started…
Walkthrough:
Step 1 – Install the Update:
There are two installs one for Windows7 or Windows Server 2008 R2 and one for all other supported versions of Windows simply download and install the right one for your machine.
Step 2 – Create the Database:
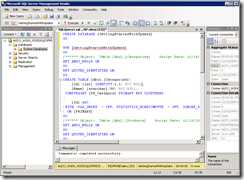
Next create the database (we are using .NET 3.5 here so unfortunately we don’t yet have Model First), so go into your database management tool off choice, say SQL Server Management Studio, and run this script.
After you’ve done that you should have a GettingStartedWithUpdate database.
The database will have two tables Products and Categories, and one relationship.
The script also include some sample data so that your database should have 2 Categories and 2 Products.
Step 3 – Create a Web Application:
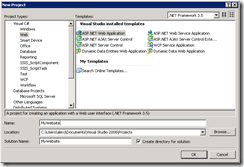
Next start up Visual Studio 2008 and create a new Web Application like this:
Step 4 – Create an Entity Data Model:
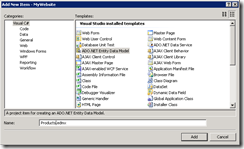
Right Click on your project in Solution Explorer and select ‘Add New Item’, choose ‘ADO.NET Entity Data Model’ and give your model a name:
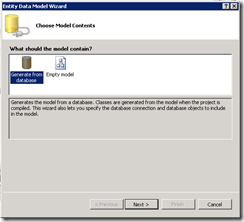
You will be asked to choose between ‘Generate from a database’ or ‘Empty model’:
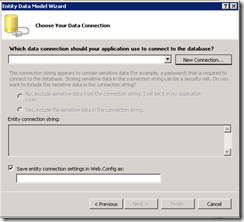
Choose ‘Generate from a database’, next you will be prompted for a database connection:
Because we don’t have a connection to ‘GettingStartedWithUpdate’ yet we need to create one by clicking ‘New Connection…’:
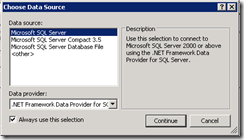
On the ‘Choose Data Source’ screen select ‘Microsoft SQL Server’ and hit Continue:
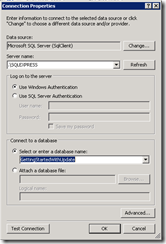
Fill in the Server and Database details, then click ‘OK’ to return to the ‘Choose Your Data Connection’ screen and then click ‘Next’:
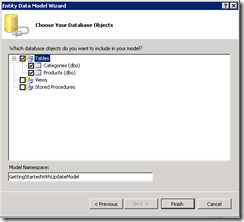
Next you are asked what database objects you want in your model, select both tables:
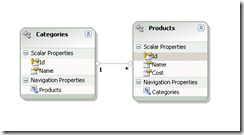
Select Finish, and finally you should see something like this:
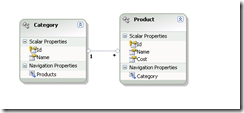
Then do a little model fix-up by…
- Renaming Categories to Category
- Renaming Products to Product
- Renaming Product.Categories to Product.Category
So that your model looks like this:
NOTE: in .NET 4.0 this step is no longer required because EF Pluralization does this for you automatically.
Now we are ready to expose our Model as a Data Service…
Step 5 – Create a Data Service to expose our Model:
Right click on your project and select ‘Add new Item’:
Select ‘ADO.NET Data Service’ and call it ‘ProductsService.svc’.
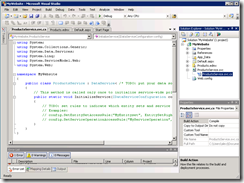
You should end up with something that looks like this:
Next configure the ProductsService to expose our EDM like this:
public class ProductsService : DataService<GettingStartedWithUpdateEntities>
{
The GettingStartedWithUpdateEntities here is simply the name of the strongly typed ObjectContext class generated by the Entity Framework to interact with our model.
Step 6 – Configure the Data Service to use V2:
Next to take advantage of the all the new features in the Update you need to change this:
public static void InitializeService(IDataServiceConfiguration config)
{
To this:
public static void InitializeService(DataServiceConfiguration config)
{
The DataServiceConfiguration class has a DataServiceBehavior property which is not available via IDataServiceConfiguration interface.
Using the DataServiceBehavior property we can tell Data Services to support V2 of the protocol:
config.DataServiceBehavior.MaxProtocolVersion = DataServiceProtocolVersion.V2;
Step 7 – Expose ResourceSets:
Finally we configure the Data Service to expose only the parts of the model we want exposed. Our EDM has a ProductSet and a CategorySet, but clients of this Data Service need read-only access to the CategorySet, for lookups etc, and read-write access to the ProductSet, so they can add and modify products:
config.SetEntitySetAccessRule("CategorySet", EntitySetRights.AllRead);
config.SetEntitySetAccessRule("ProductSet", EntitySetRights.All);
After all our changes our Data Service should look like this:
public class ProductsService : DataService<GettingStartedWithUpdateEntities>
{
// This method is called only once to initialize service-wide policies.
public static void InitializeService(DataServiceConfiguration config)
{
config.SetEntitySetAccessRule("CategorySet", EntitySetRights.AllRead);
config.SetEntitySetAccessRule("ProductSet", EntitySetRights.All);
config.DataServiceBehavior.MaxProtocolVersion = DataServiceProtocolVersion.V2;
}
}
Step 8 – Verify our Service is up and running:
The next step is pretty simple, set ProductsService.svc as the startup page of your Web Application and debug your website.
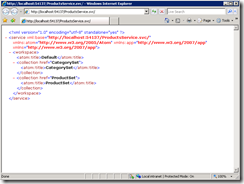
You should see something like this in your Browser:
You can then browse to one of the sets, and by default you will see internet explorer’s feed view, which proves your Data Service is working:
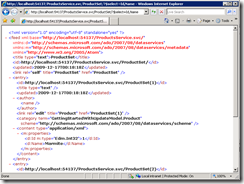
If you want to see the raw XML / ATOM simply turn off the feeds view (by selecting ‘Internet Options’ \ Content tab \ Feeds Setting \ Uncheck ‘Turn on feed reading view’).
Then you can try an Update specific feature like projections, by using the $select operator like this:
At this point your service is up and running.
If you want to play around more with your Data Service here is a handy quick guide to navigating your Data Service.
Summary:
In this post we learned how to get started with the Data Services Update for .NET 3.5 SP1.
We walked through creating a Database, an Entity Data Model over that Database and a Data Service to expose that model.
We saw how to configure our Data Service to use V2 of the OData protocol and newer features like Projections and inline count.
In the next post we will build a simple WPF application to work against our shiny new Data Service.
Alex James
Program Manager, Data Frameworks Team. GettingStartedWithUpdate.sql
Comments
- Anonymous
February 22, 2010
1)in ProductsService.svc we also need to add using System.Data.Services.Common;2) CategorySet or ProductSet names will vary for different language versions of update
