Getting started with Drupal and WebMatrix
Last week I had the opportunity to present to the LA Drupal group on building a Drupal site with WebMatrix. The session was also recorded, but unfortunately there was a problem with the audio. Although you can look forward to a recording with audio, hopefully this preliminary version gives you a good idea of how to get started with Drupal and WebMatrix. In the meantime, here are some easy-to-follow screen shot instructions and clear code snippets from of the beginning of my demo, based on Laurence Maroney's video.
First, if you don’t have WebMatrix, get it free! I’m using v2 Beta released September 2011.
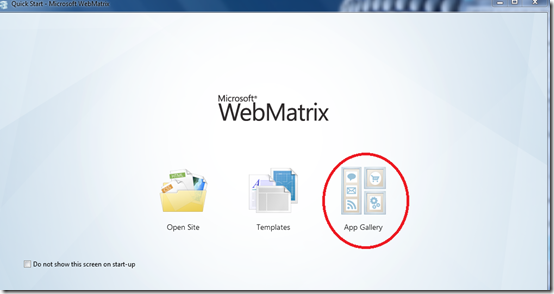
Select App Gallery.
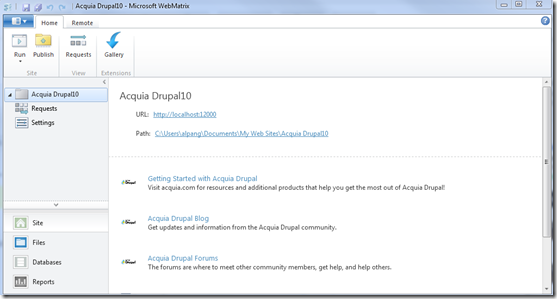
Select Acquia Drupal. Give your site a name and click Next.
Select a database or let WebMatrix take care of the installation for you if you don’t have one installed.
Accept the end-user license agreement.
Run your site in your preferred browser.
Fill out Site Information. Since I don’t have an Acquia subscription, I left those two entries blank.
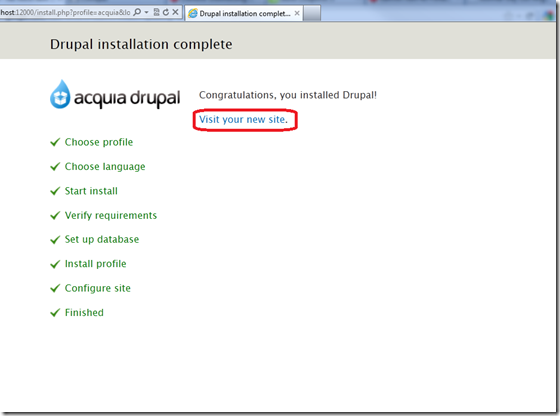
Click on Visit your new site.
Let’s customize our Drupal site within the Acquia Drupal framework. Click on Modules at the top.
Deselect Acquia site information.
Save configuration.
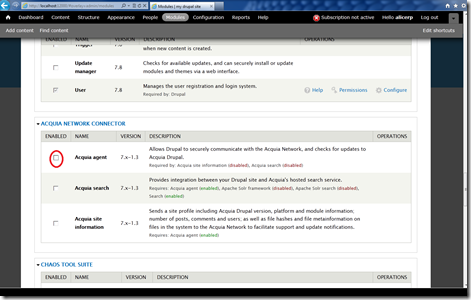
Deselect Acquia agent.
Save configuration.
Let’s add the Lightbox2 module by searching for it in contributed modules.
You can also download the Lightbox2 module here.
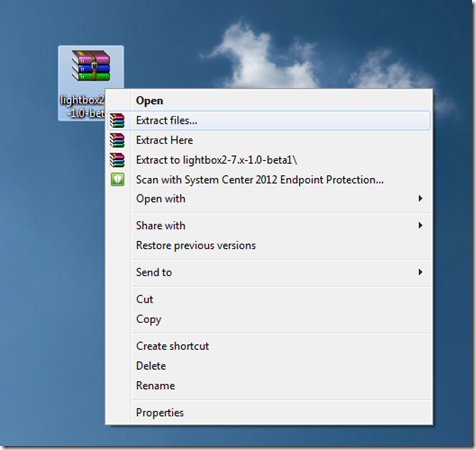
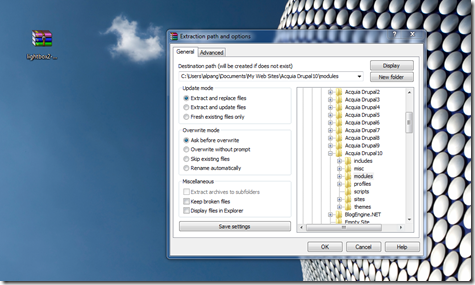
Extract the lightbox2 module into the modules folder of your website.
Notice that the lightbox2 module has been added in WebMatrix. Click Run.
Select Modules.
Enable the Lightbox2 module and Save configuration.
Back in WebMatrix, add a New Folder to your website and name it images.
Add Existing File… and add a few images to the images folder.
Go back to your site running locally, and click Content. We’re going to edit a basic page.
Click on the default page.
Click Edit.
Let’s edit the default page by giving it a new title and adding some code leveraging the Lightbox2 module.
<a href="#" onclick="Lightbox.triggerLightbox('lightshow', 'mypics');">Start Slideshow</a>
<a href="\images\pic1.png" rel="lightshow[mypics]">image #1</a>
<a href="\images\pic2.png" rel="lightshow[mypics]">image #2</a>
<a href="\images\pic3.png" rel="lightshow[mypics]">image #3</a>
Click Save when you’re done.
When I click on Start Slideshow, my slideshow of images starts.
And here I am with some happy raffle winners from the SoCal Code Camp at USC in October 2011.
Finally, let’s see how easy it is to modify your code in WebMatrix by adding some code to the page template. In the template I’m using (Barthik by default), I’m going to add a Twitter Follow button based on code from Twitter Resources found here.
Notice the Twitter Follow button has been added to the footer of the template when you run your site.


