Configure Saba as a content source for Microsoft Viva Learning
This article shows you how to configure Saba as a third-party learning content source for Microsoft Viva Learning. You must be a Saba System Admin or Super User to perform these steps. You need a Microsoft Viva Suite or Viva Learning license to add Saba as a content source for your organization.
Note
Content accessible through Viva Learning is subject to terms other than the Microsoft Product Terms. Saba content and any associated services are subject to Saba's privacy and service terms.
Note
Viva Learning integration with Saba uses APIs from your bucket of API calls per month and count towards your throttle limit.
Configure in your Saba portal
Note
You need to have admin permissions in Saba to complete these steps.
Permissions
The account used for Saba setup must have the following security roles:
Learning Admin - Catalog builder in the world domain*.
- To remove privileges to create or update courses, then make a copy of this security role and remove New and Edit privileges on Courses and other catalog objects.
Human Capital Admin in the world domain*
- To remove privileges to create or update people records, make a copy of this security role and remove the New and Edit privileges on People and other HR objects.
*Or the highest domain that encompasses all learning you wish to send to Viva.
Client’s Host URL
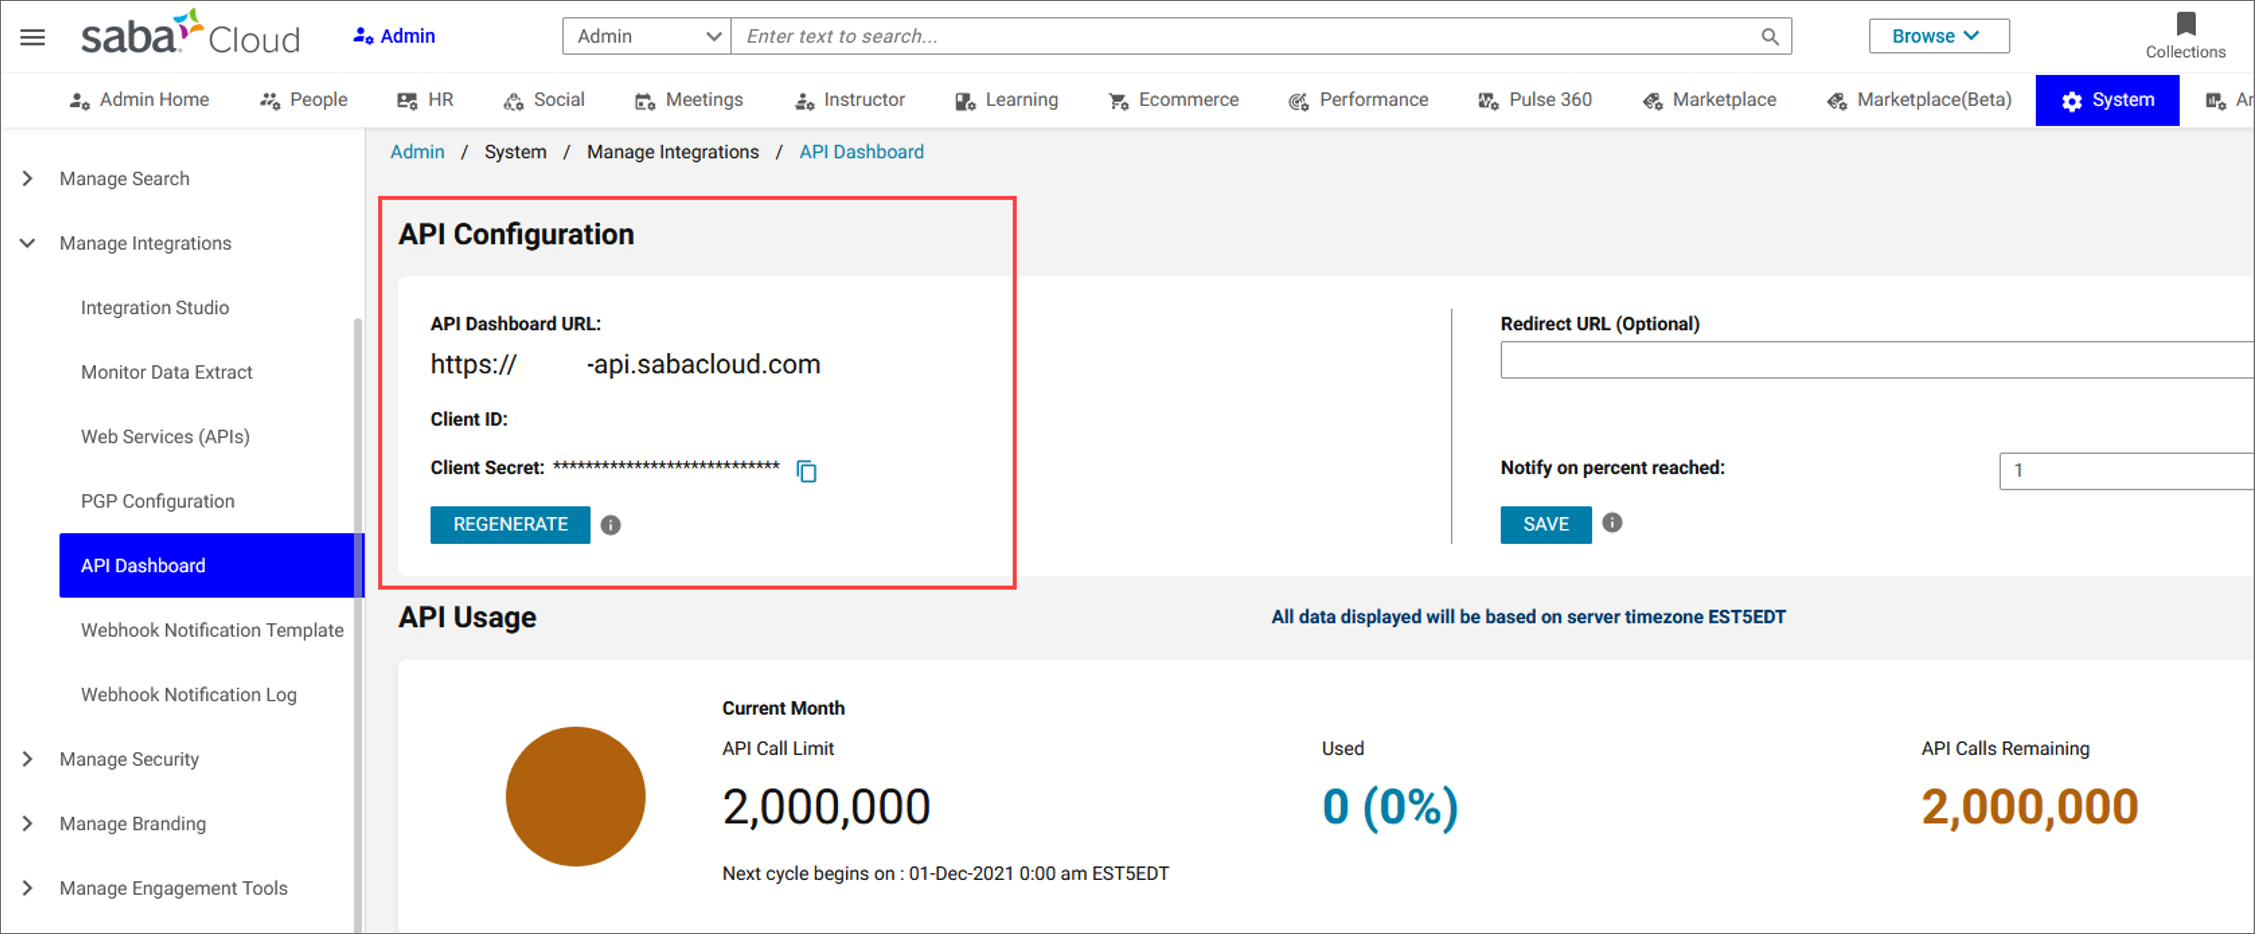
Identify your primary Saba Cloud URL (for example "org".sabacloud.com). If your API dashboard URL is org-api.sabacloud.com, your Host URL is org.sabacloud.com.
Identify your API Dashboard URL by going to Saba Cloud > Admin > System Admin > Manage Integrations > API Dashboard. Find the API Dashboard URL, then remove "https://" and "-api" to get your Host URL.

Client ID and Client Secret
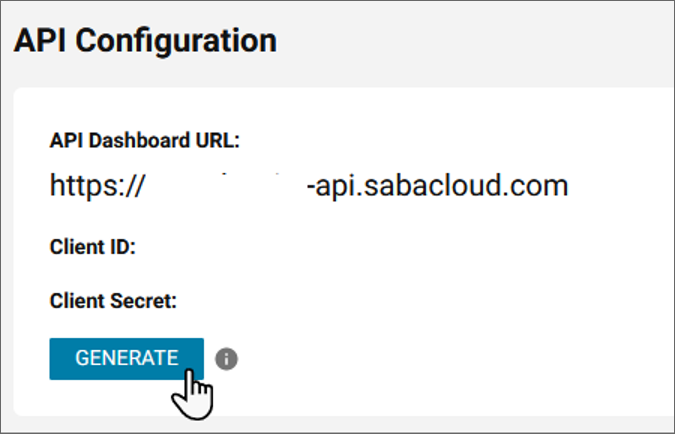
On the same screen where you got the host URL, copy the Client ID and Client Secret if they're already generated.
If the Client Secret isn't there yet, select the GENERATE button to generate it.

Configure in the Viva Learning Admin tab
Note
You need to have admin permissions in Microsoft 365 to complete these steps.
- Open Viva Learning App in Teams or go to the Viva Learning web app
- Go to the Admin tab in Viva Learning and select Manage Providers on the left menu.
- Select Add Provider.
- Select Saba from the Provider list and select Next.
- Fill in the details that you got from your Saba portal.
Note
Display name is the name of the carousel under which Saba learning content appears for users in your organization in Viva Learning. If you don't enter a new name, it displays the default name "Saba Cloud."
- Select Save to activate Saba Cloud content in Microsoft Viva Learning. It may take up to 24 hours for the content to display in Viva Learning.
- Once configured, Saba start appearing automatically in configured providers list. You can track the sync status and export sync log.
- You can edit or delete the configuration directly from manage provider.
Note
For Saba Cloud integration, you need to have a sabacloud.com domain in your Host URL. If you have a different domain name, you need to raise a support ticket to allow your domain name.
Note
Currently, all the users within an organization can discover all the tenant-specific courses but they're only able to consume the courses that they have access to. User-specific content discovery based on roles and permissions is planned for future releases.
Learner record sync
Select Enable Learner Record Sync to enable assignments and course completion records to sync from the learning management system (LMS) to Viva Learning. Users from your organization can then see their assigned and completed courses from your LMS within Viva Learning.
By enabling learner record sync, you're allowing Viva Learning to fetch user information, user assignments, and completed courses. The user information from the LMS is only used for user mapping, and doesn't remain in storage. Only mapping-related information is deduced. Viva Learning fetches the following fields from the LMS:
- FirstName
- LastName
- Username
Prerequisite for enabling SSO
Refer to the Microsoft Entra ID single sign-on (SSO) integration with Saba Cloud article for configuration information on enabling SSO.
Ensure that the SSO configuration on Entra ID and Saba is same and that the users' sign in method on Saba is set to "SSO."
Note
If the SSO on both Entra ID and Saba is already configured in the tenant, as described in this documentation, then no action is required.