Describe and refine your app
Copilot for Power Apps is a powerful assistant that allows makers to create an app by providing a natural language description of their app. The maker and the copilot engage in a series of prompts and responses to craft the data model first, and then the system builds the initial version of the app. Then, the maker can continue to enhance the app with remaining changes that meet their full requirements.
Consider this feature as an alternative way of starting an app, similar to how you would choose a template. However, with templates, you're limited to only choosing the ones that are available. With Copilot, you can create a wider variety of apps by describing the app.
The apps that you build with this approach store the data in Microsoft Dataverse. Therefore, to use the feature, you must have access to an environment with Dataverse already set up. Make sure that the initial app focuses on a scenario that uses a single Dataverse table. You can add more tables after you create the app and start your editing session.
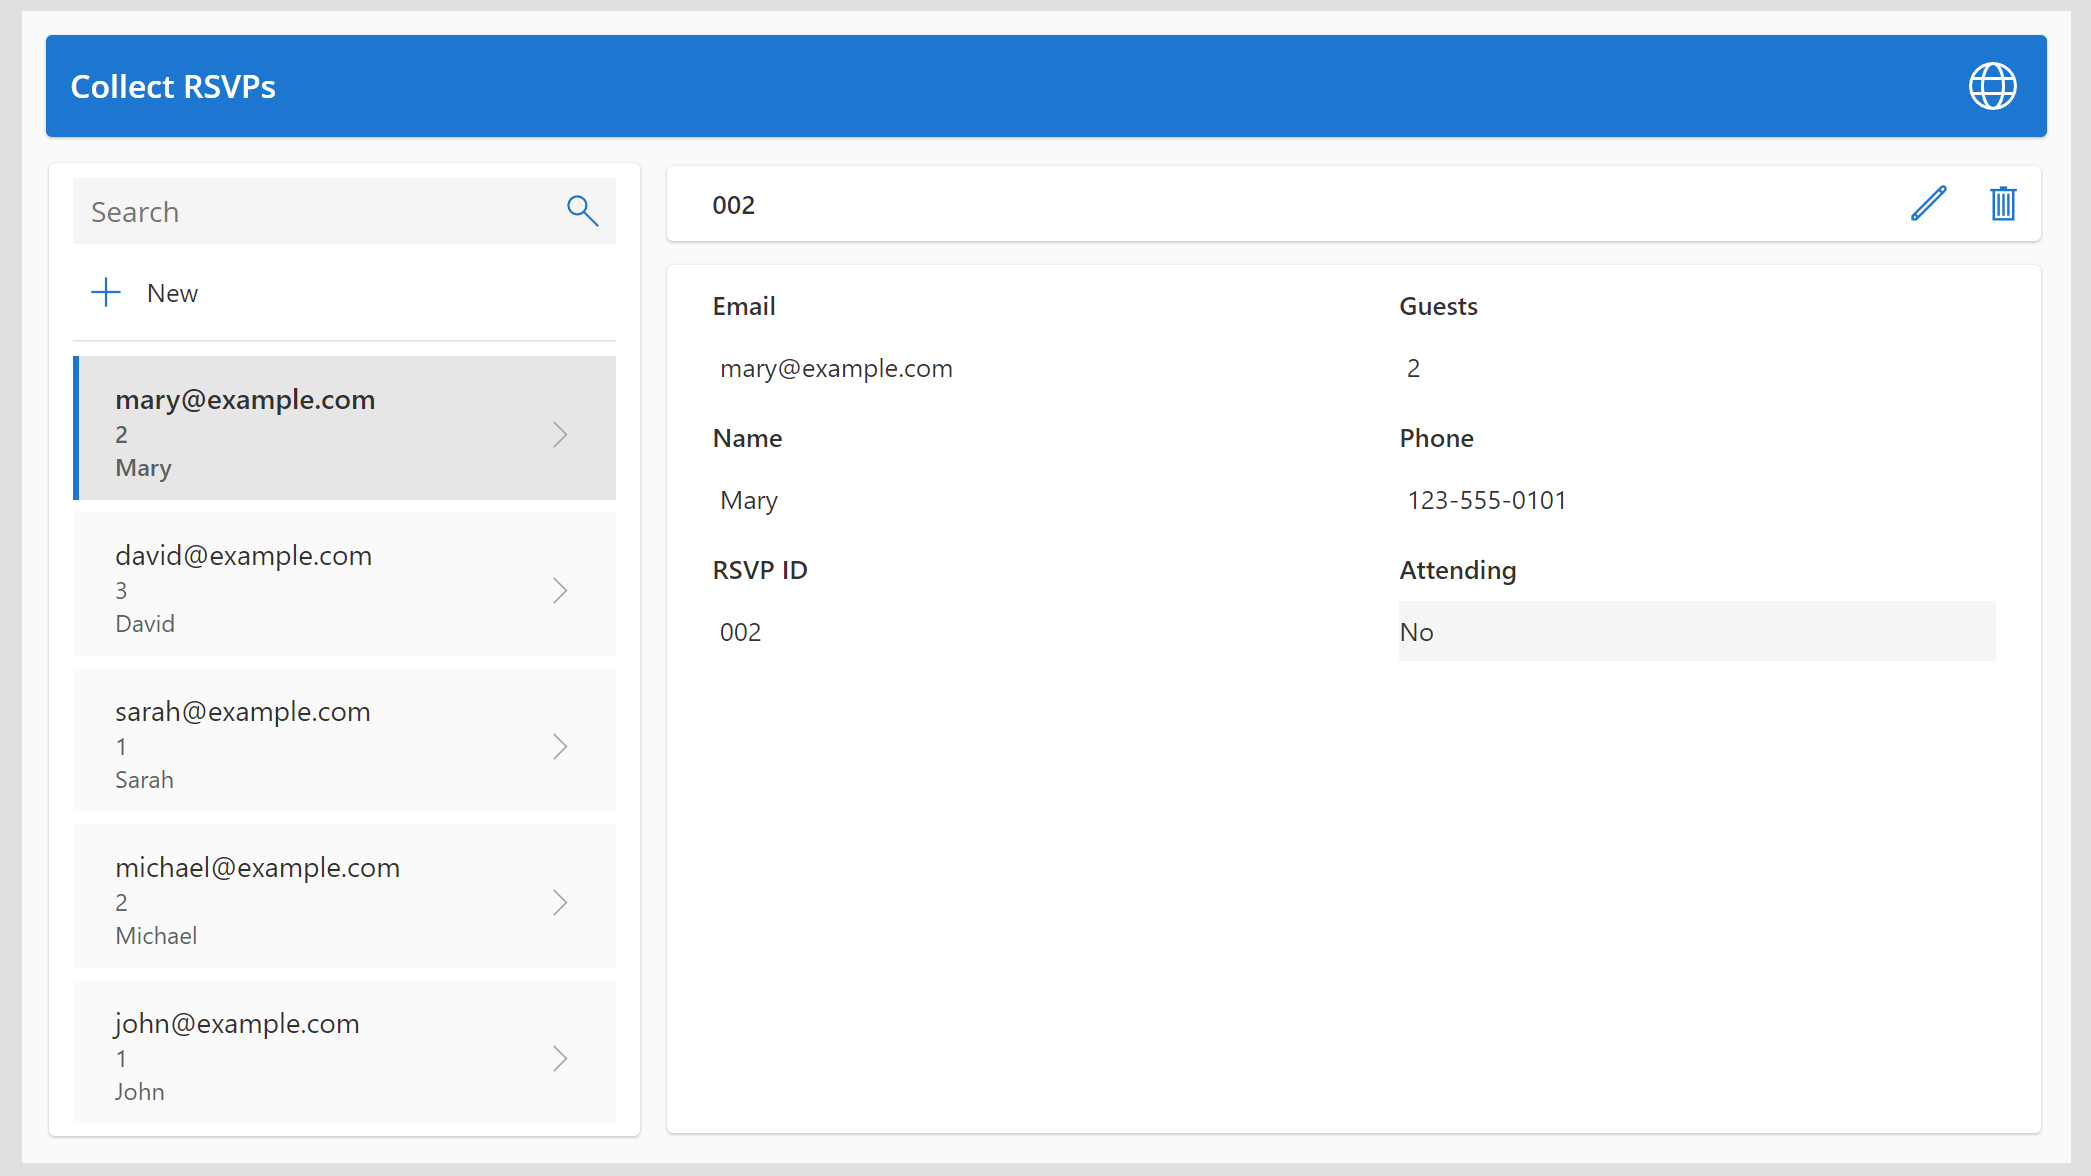
After the system creates the app, you have a fully functional application to create, edit, view, and remove data from the Dataverse table that's designed from your prompt. For some scenarios, the created application might be the only requirement. For others, you can continue editing the application to add other screens and tables to support your full scenario. The following image shows an example of what the system creates from the "Collect RSVPs" prompt.
As with all copilots, it's important that you plan for what you hope to achieve. When you first tell the copilot what to make, you have up to 250 characters to explain the goal. If you need to give the copilot more information to get the exact app that you need, you can continue the interaction past the initial screen.
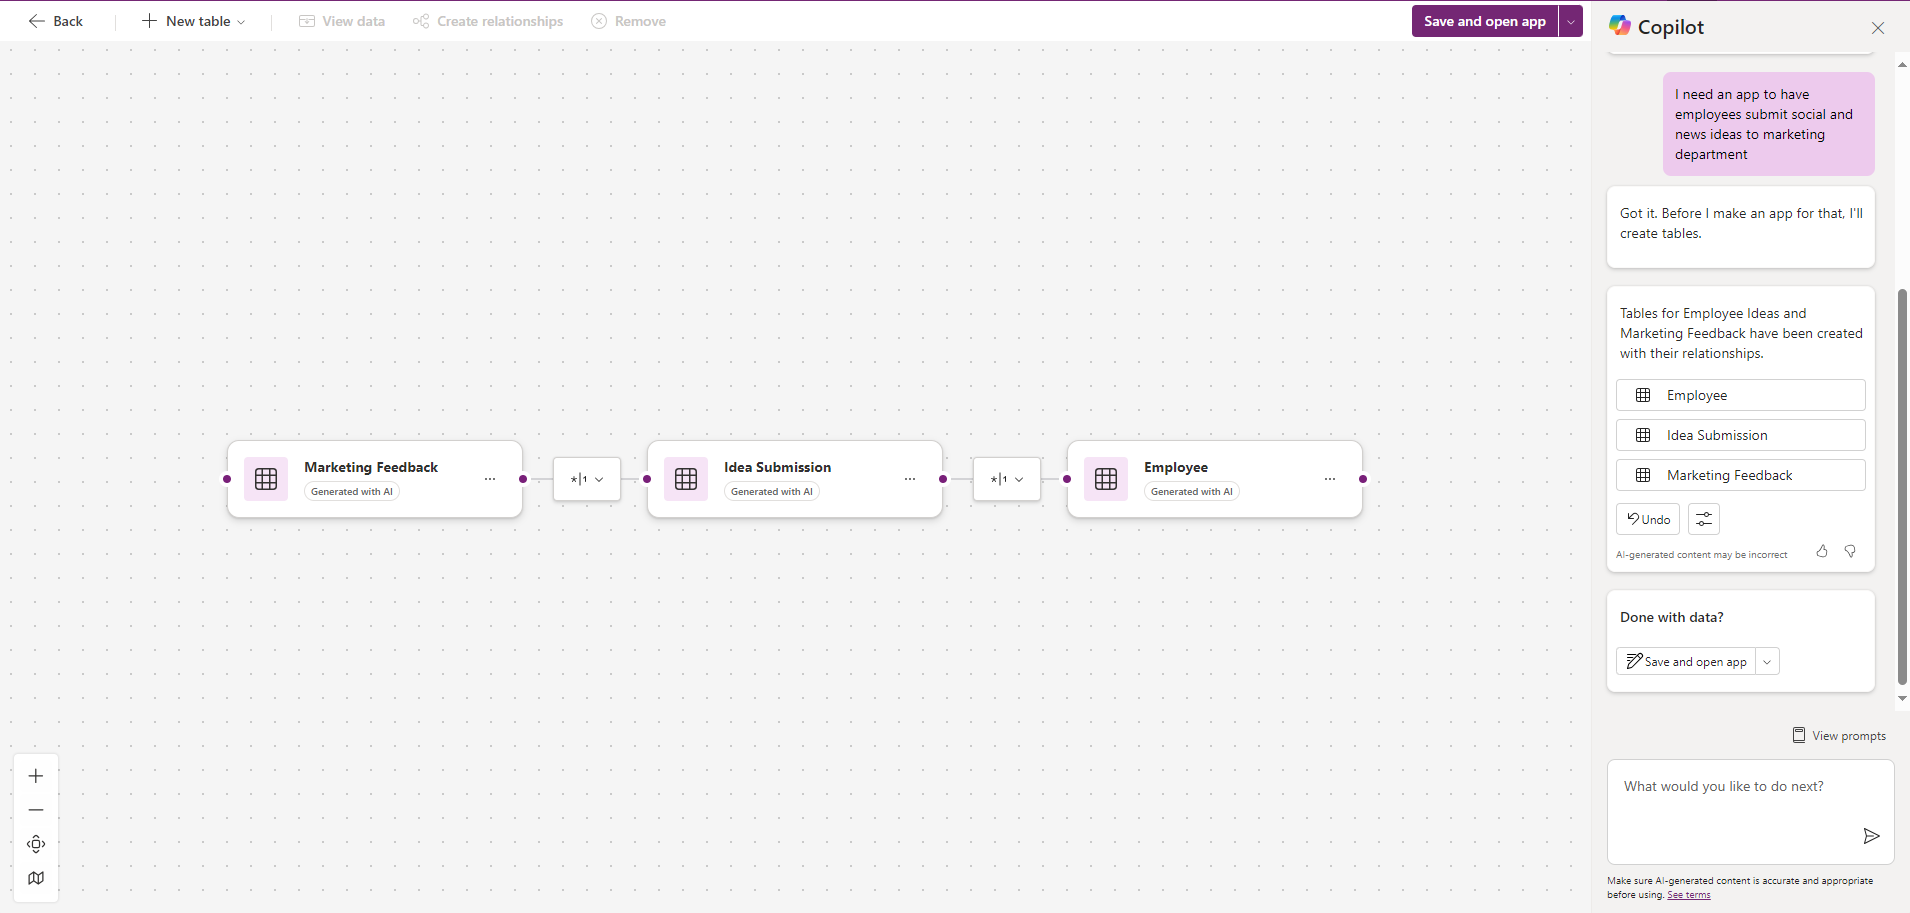
The following screenshot shows an example where the user asks Copilot to build an app to have employees submit social and news ideas to the marketing department.
After you provide the first prompt, the copilot presents you with the first draft of the relationships between your Dataverse tables for your app. The draft table includes column names and relevant sample data. Select any of the tables and select View data to see the table structure.
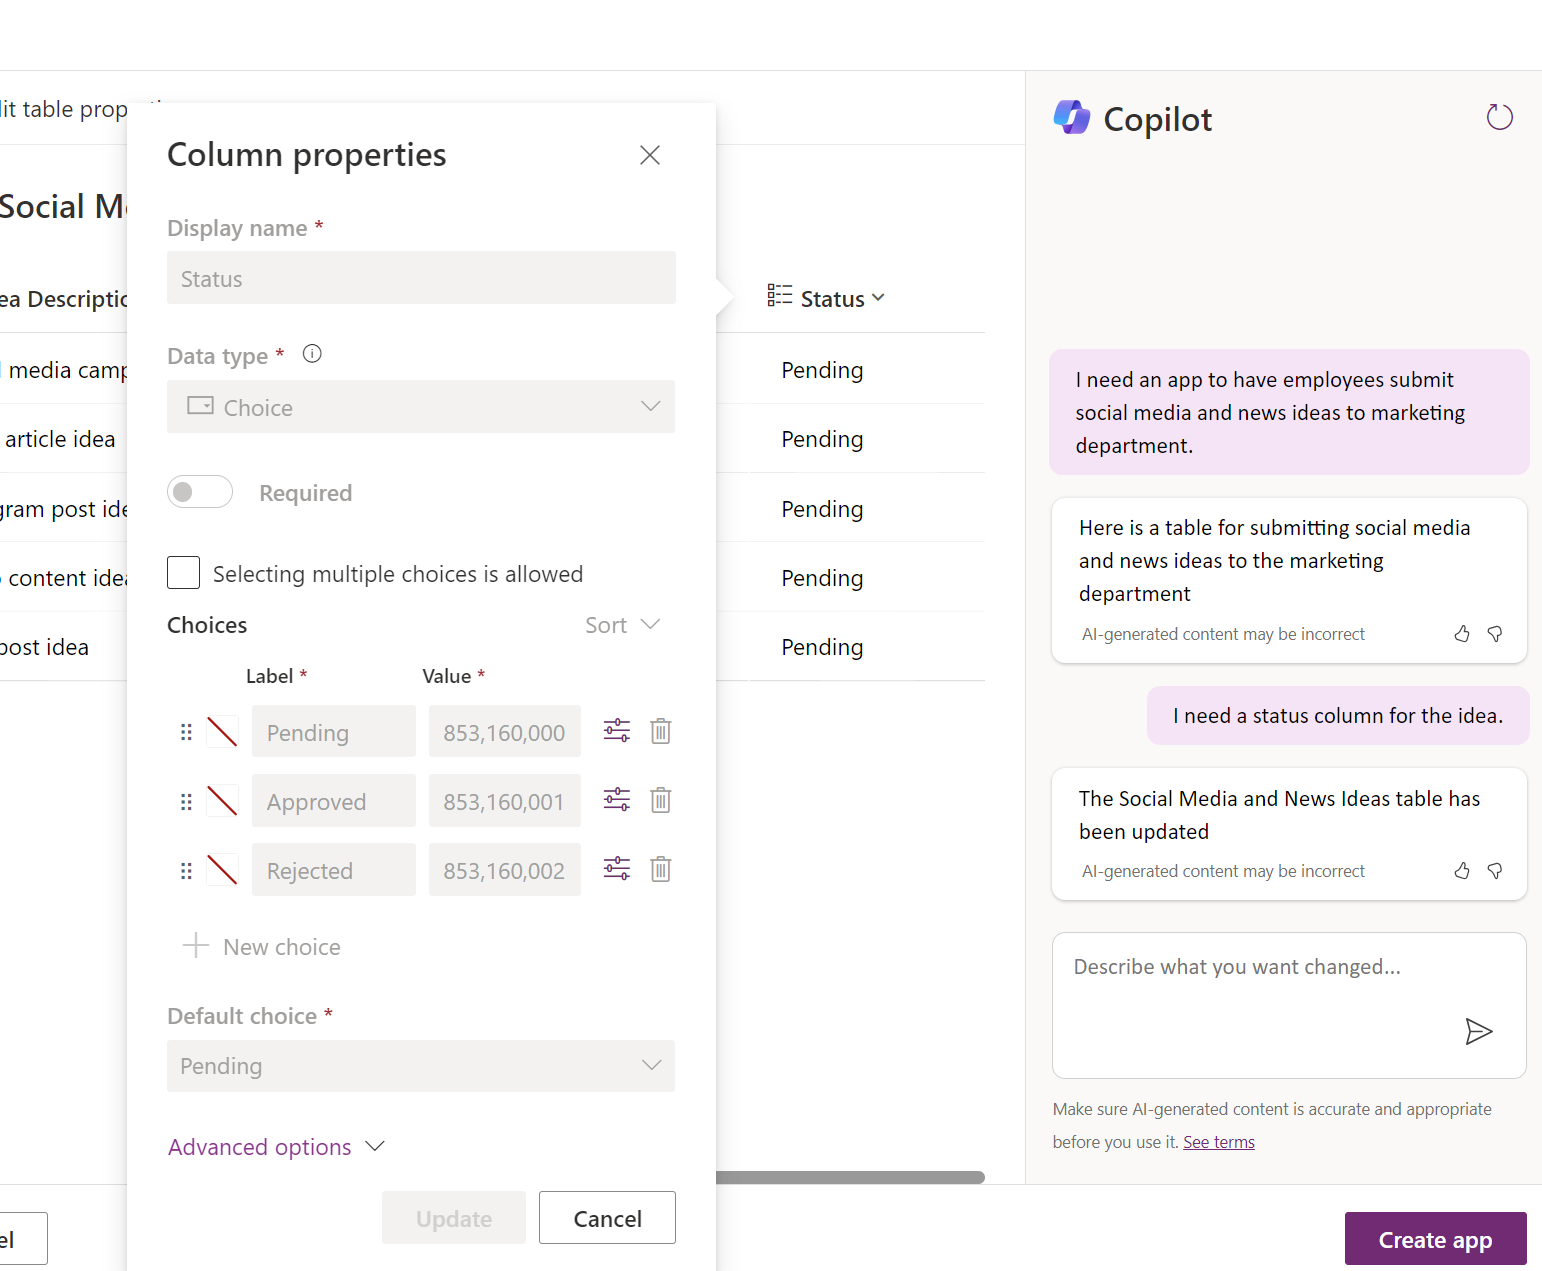
Next, you refine what you need. As the following example shows, you could tell the copilot to add a column for status or include the first name and family name for the employee who submits the idea. Additionally, you could ask the copilot to edit column properties, such as adding another choice option if you needed more choices.
After you and the copilot finish the table design, you can create the initial version of the canvas app.
How to describe what you need
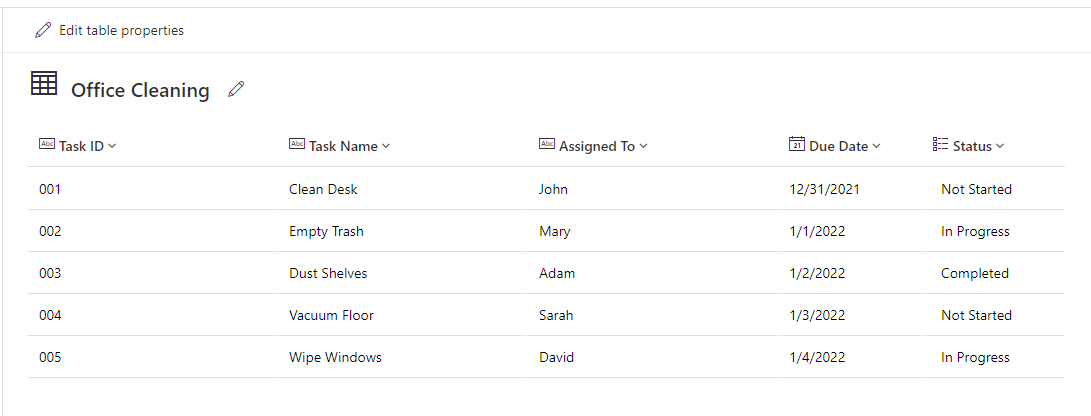
When telling the copilot what you need, be as specific as possible. For example, you need to make an app that tracks tasks for your commercial cleaning business. You could start by entering Office cleaning.
Though the information isn't sufficient to give your copilot, it still attempts to build your data model for your review. Then, the copilot iterates the data model with you until you have the model that you need to support your app.
If you give the copilot more information from the beginning, it gets a different table to use. Changing the prompt to An app to track tasks and location for commercial office cleaning gets a different result that likely comes closer to the desired results on the first iteration.
How to refine the initial table design
After Copilot presents you with the initial table design, you can modify the design before it creates the app. The following sections outline actions that you should do and other actions that you can and can't do at this point.
Actions that you should do:
Check the table name and revise.
Make sure that all columns make sense for your scenario. Remove or change any that don't make sense.
Review the icon in front of the column name that indicates the data type and then confirm that it makes sense.
Use the view column feature to view details on columns, such as the choice options that the copilot sets up.
Confirm that yes/no columns truly contain only two options and that they're not choice columns that can have more than two choices.
Actions that you can do:
Add new columns that you want in the initial application.
Ask copilot to "Give me suggestions" to get ideas on changes that you could make.
Use Add a row to add more test data. For example, add a row with no email.
Actions that you can't do from this point:
Change the scenario completely. To restart, go back and start with a revised initial prompt.
Add more tables. If your app needs more tables, you can add them after the system creates the app.
Create lookup columns to other tables (though you can do choice columns); you need to do this task later.
You might use the following common prompts:
Change table name to [new name]
Add a column for [purpose]
Change [column name] name to [new column name]
Add [option name] to [choice column name] choice
Change data type of [column name] to [data type]
Remove column [column name]
Add [column name 1] and [column name 2] to add multiple columns at once
Change all email data to be contoso.com
In the next unit, you learn about using copilot to iterate on your canvas app.


