Navigate, triage, and manage Microsoft Sentinel incidents in the Azure portal
This article describes how to navigate and run basic triage on your incidents in the Azure portal.
Prerequisites
The Microsoft Sentinel Responder role assignment is required to investigate incidents.
Learn more about roles in Microsoft Sentinel.
If you have a guest user that needs to assign incidents, the user must be assigned the Directory Reader role in your Microsoft Entra tenant. Regular (nonguest) users have this role assigned by default.
Navigate and triage incidents
From the Microsoft Sentinel navigation menu, under Threat management, select Incidents.
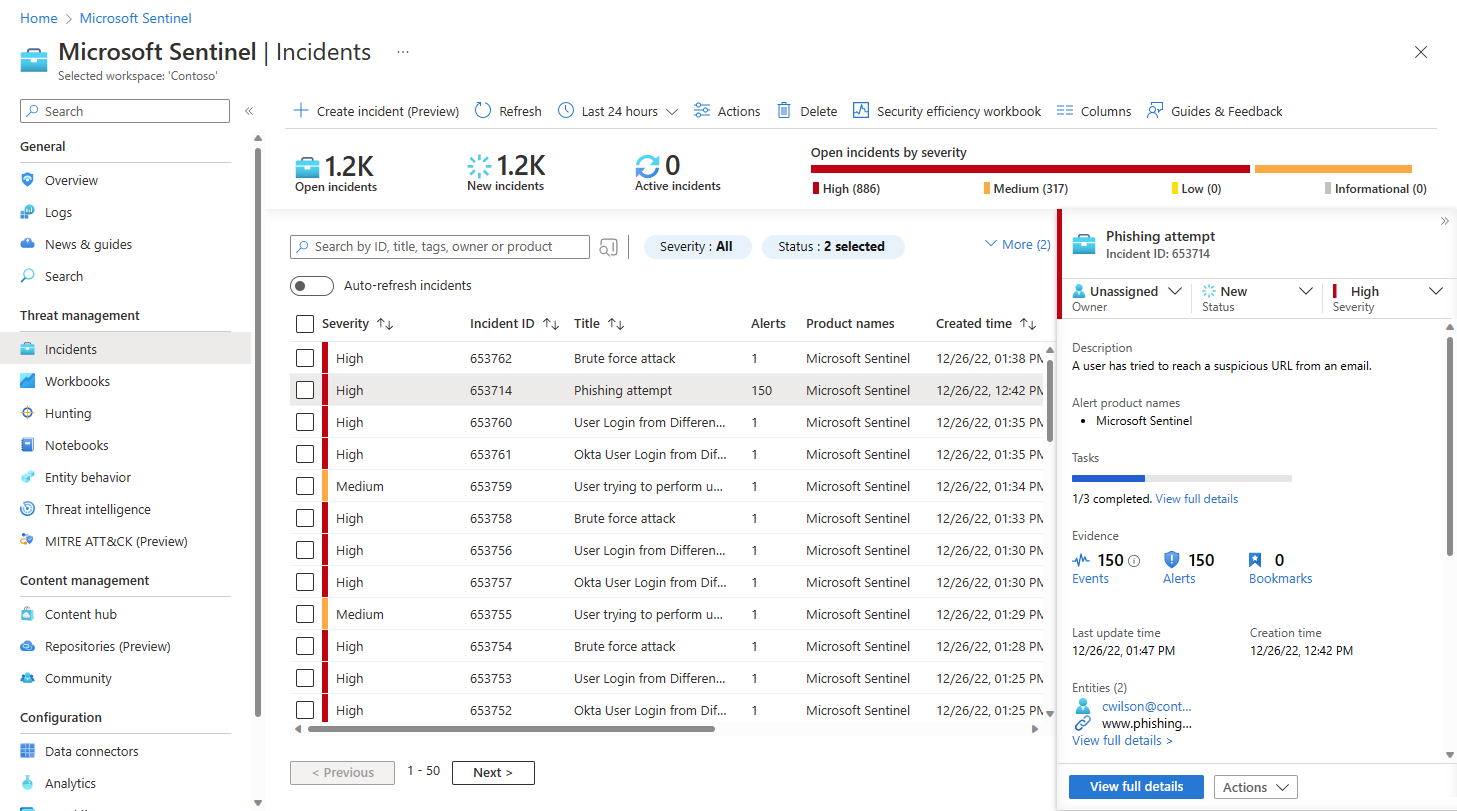
The Incidents page gives you basic information about all of your open incidents. For example:
Across the top of the screen, you have a toolbar with actions you can take outside of a specific incident—either on the grid as a whole, or on multiple selected incidents. You also have the counts of open incidents, whether new or active, and the counts of open incidents by severity.
In the central pane, you have an incident grid, which is a list of incidents as filtered by the filtering controls at the top of the list, and a search bar to find specific incidents.
On the side, you have a details pane that shows important information about the incident highlighted in the central list, along with buttons for taking certain specific actions regarding that incident.
Your security operations team might have automation rules in place to perform basic triage on new incidents and assign them to the proper personnel.
In that case, filter the incident list by Owner to limit the list to the incidents assigned to you or to your team. This filtered set represents your personal workload.
Otherwise, you can perform basic triage yourself. Start by filtering the list of incidents by available filtering criteria, whether status, severity, or product name. For more information, see Search for incidents.
Triage a specific incident and take initial action on it immediately, right from the details pane on the Incidents page, without having to enter the incident’s full details page. For example:
Investigate Microsoft Defender XDR incidents in Microsoft Defender XDR: Follow the Investigate in Microsoft Defender XDR link to pivot to the parallel incident in the Defender portal. Any changes you make to the incident in Microsoft Defender XDR are synchronized to the same incident in Microsoft Sentinel.
Open the list of assigned tasks: Incidents that have tasks assigned display a count of completed and total tasks and a View full details link. Follow the link to open the Incident tasks page to see the list of tasks for this incident.
Assign ownership of the incident to a user or group by selecting from the Owner drop-down list.
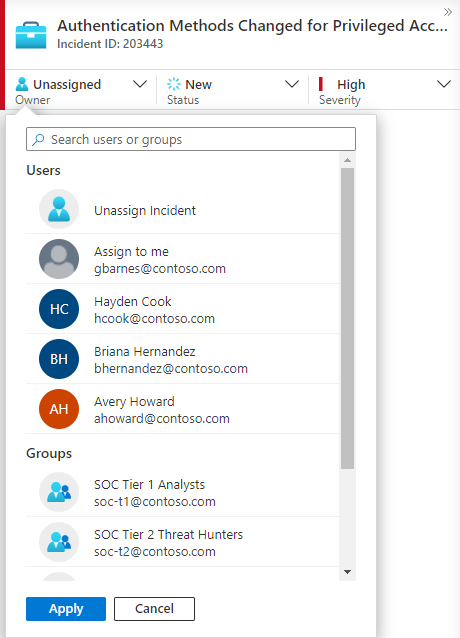
Recently selected users and groups appear at the top of the pictured drop-down list.
Update the incident’s status (for example, from New to Active or Closed) by selecting from the Status drop-down list. When closing an incident, you're required to specify a reason. For more information, see Close an incident.
Change the incident’s severity by selecting from the Severity drop-down list.
Add tags to categorize your incidents. You might need to scroll down to the bottom of the details pane to see where to add tags.
Add comments to log your actions, ideas, questions, and more. You might need to scroll down to the bottom of the details pane to see where to add comments.
If the information in the details pane is sufficient to prompt further remediation or mitigation actions, select the Actions button at the bottom to do one of the following:
Action Description Investigate Use the graphical investigation tool to discover relationships between alerts, entities, and activities, both within this incident and across other incidents. Run playbook Run a playbook on this incident to take particular enrichment, collaboration, or response actions such as your SOC engineers might have made available. Create automation rule Create an automation rule that runs only on incidents like this one (generated by the same analytics rule) in the future, in order to reduce your future workload or to account for a temporary change in requirements (such as for a penetration test). Create team (Preview) Create a team in Microsoft Teams to collaborate with other individuals or teams across departments on handling the incident. For example:
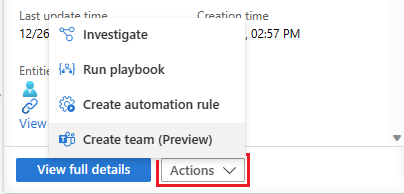
If more information about the incident is needed, select View full details in the details pane to open and see the incident's details in their entirety, including the alerts and entities in the incident, a list of similar incidents, and selected top insights.
Search for incidents
To find a specific incident quickly, enter a search string in the search box above the incidents grid and press Enter to modify the list of incidents shown accordingly. If your incident isn't included in the results, you might want to narrow your search by using Advanced search options.
To modify the search parameters, select the Search button and then select the parameters where you want to run your search.
For example:
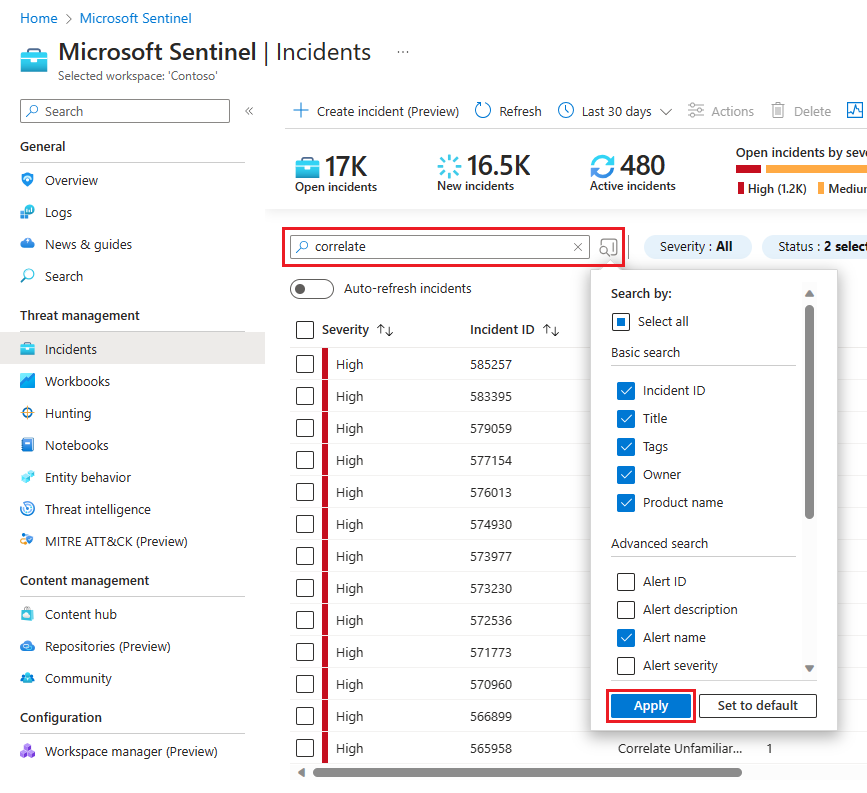
By default, incident searches run across the Incident ID, Title, Tags, Owner, and Product name values only. In the search pane, scroll down the list to select one or more other parameters to search, and select Apply to update the search parameters. Select Set to default reset the selected parameters to the default option.
Note
Searches in the Owner field support both names and email addresses.
Using advanced search options changes the search behavior as follows:
| Search behavior | Description |
|---|---|
| Search button color | The color of the search button changes, depending on the types of parameters currently being used in the search.
|
| Auto-refresh | Using advanced search parameters prevents you from selecting to automatically refresh your results. |
| Entity parameters | All entity parameters are supported for advanced searches. When searching in any entity parameter, the search runs in all entity parameters. |
| Search strings | Searching for a string of words includes all of the words in the search query. Search strings are case sensitive. |
| Cross workspace support | Advanced searches aren't supported for cross-workspace views. |
| Number of search results displayed | When you're using advanced search parameters, only 50 results are shown at a time. |
Tip
If you're unable to find the incident you're looking for, remove search parameters to expand your search. If your search results in too many items, add more filters to narrow down your results.
Close an incident
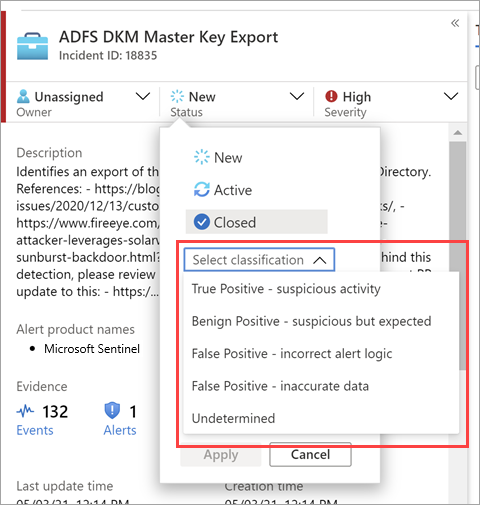
Once you resolve a particular incident (for example, when your investigation reaches its conclusion), set the incident’s status to Closed. When you do so, you're asked to classify the incident by specifying the reason you're closing it. This step is mandatory.
Select Select classification and choose one of the following from the drop-down list:
- True Positive – suspicious activity
- Benign Positive – suspicious but expected
- False Positive – incorrect alert logic
- False Positive – incorrect data
- Undetermined
For more information about false positives and benign positives, see Handle false positives in Microsoft Sentinel.
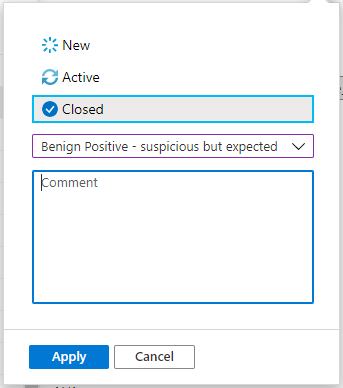
After choosing the appropriate classification, add some descriptive text in the Comment field. This is useful in the event you need to refer back to this incident. Select Apply when you’re done, and the incident is closed.
Next step
For more information, see Investigate Microsoft Sentinel incidents in depth in the Azure portal
