Enter client credentials in Power BI or Excel
Azure DevOps Services | Azure DevOps Server 2022 - Azure DevOps Server 2019
When connecting from Power BI or Excel to Analytics using the OData feed, choose Microsoft Entra ID (Microsoft Entra ID) for the most secure option. It is also possible to authenticate with Personal Access Tokens (PATs), but this is less recommended.
When connecting from Power BI or Excel to Analytics using the OData feed, choose Windows credentials as the most secure option. It is also possible to authenticate with Personal Access Tokens (PATs), but this is less recommended.
Prerequisites
| Category | Requirements |
|---|---|
| Access levels | - Project member. - At least Basic access. |
| Permissions | By default, project members have permission to query Analytics and create views. For more information about other prerequisites regarding service and feature enablement and general data tracking activities, see Permissions and prerequisites to access Analytics. |
| Tools | Power BI Desktop |
Note
The Analytics service is automatically enabled and supported in production for all Azure DevOps Services. Power BI integration and access to the OData feed of the Analytics Service are generally available. We encourage you to use it and give us feedback.
Available data is version-dependent. The latest supported version is v2.0, and the latest preview version is v4.0-preview. For more information, see OData API versioning.
Note
The Analytics service is automatically installed and supported in production for all new project collections for Azure DevOps Server 2020 and later versions. Power BI integration and access to the OData feed of the Analytics Service are generally available. We encourage you to use it and give us feedback. If you upgraded from Azure DevOps Server 2019, then you can install the Analytics service during upgrade.
Available data is version-dependent. The latest supported version is v2.0, and the latest preview version is v4.0-preview. For more information, see OData API versioning.
Note
The Analytics service is in preview for Azure DevOps Server 2019. You can enable or install it for a project collection. Power BI integration and access to the OData feed of the Analytics Service are in Preview. We encourage you to use it and give us feedback.
Available data is version-dependent. The latest supported version is v2.0, and the latest preview version is v4.0-preview. For more information, see OData API versioning.
Microsoft Entra ID
Microsoft Entra ID is also known as "Organizational Credential" in Power BI Desktop. You can use it in Power BI through OAuth selection when configuring data refresh.
When connecting with Power BI Desktop, you'll be prompted to enter your credentials for the data source. Select Organizational account as shown here:
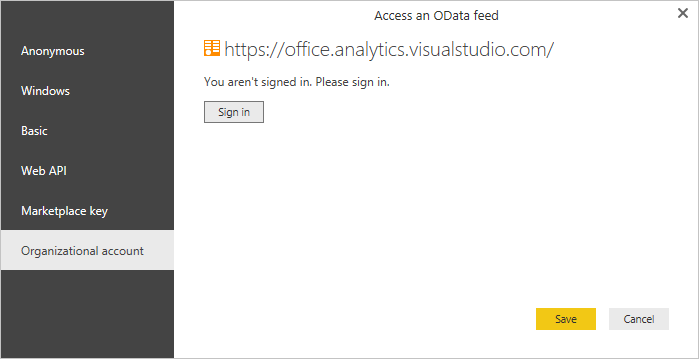
Choose Sign in and enter your Microsoft Entra credentials. After that, you're done.
To change an existing URL to use Microsoft Entra ID instead of a PAT, see Change authentication credentials later in this article.
Windows authentication
You can use Windows authentication in Power BI through OAuth selection when configuring data refresh.
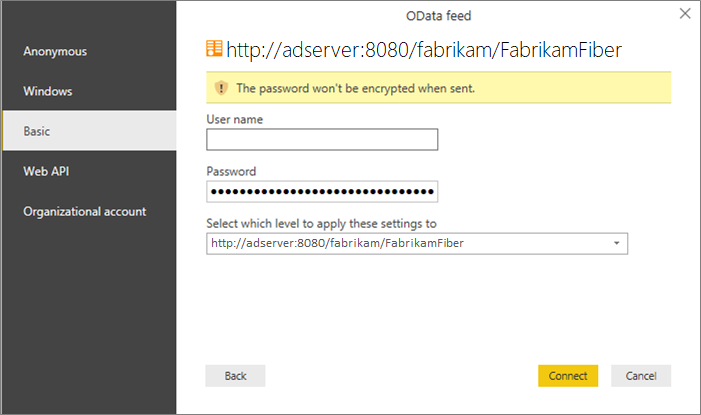
When connecting with Power BI Desktop, you'll be prompted to enter your credentials for the data source. Select Windows as shown here:
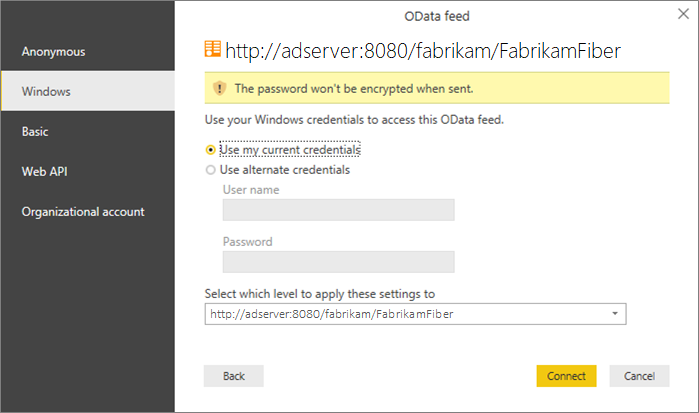
Enter your Windows credentials and choose Connect.
To change an existing URL to use Windows instead of a PAT, see Change authentication credentials later in this article.
Create a Personal Access Token
Note
PATs are a less desirable option compared to connecting Power BI with Microsoft Entra ID or Windows Authentication. Consider them an extension of your identity. When used, the token is acting as you. Keep your tokens secret. To help keep your token more secure, consider using credential managers. If you use a credential manager, you won't have to enter your credentials every time you push.
Follow the steps on the Create a PAT with scope: Analytics (read) (
vso.analytics).Copy the token that displays. If you navigate away from the page, you can't retrieve it later.
If you need to revoke a token, navigate to this page and choose the Revoke link. That token will immediately be denied access to Azure DevOps Services.
Enter credentials within a client
Both Power BI and Excel work using Power Query when accessing OData. The authentication mechanism, including the various authentication screens, are identical. This walkthrough is done using Power BI Desktop. It also applies to Excel.
Open Power BI Desktop.
Choose Get Data.
Select OData Feed (or More>Other>OData Feed).
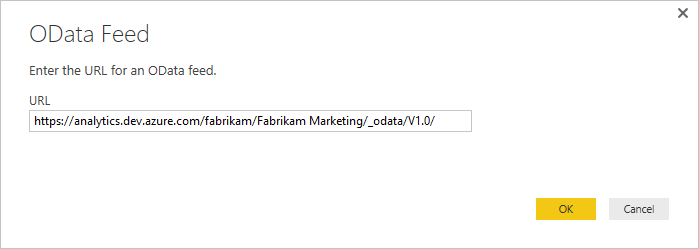
Enter the URL for the OData endpoint and choose OK.

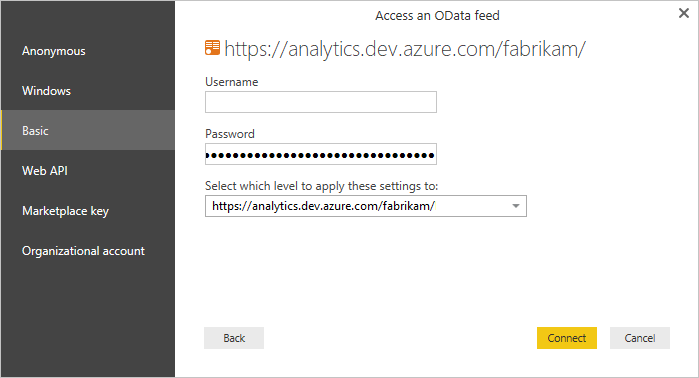
In the authentication dialog, choose Basic, enter your credentials, and then choose Connect.
Change authentication credentials
If you receive an access denied message, you may need to change your authentication credentials. Power Query caches your credential information so you only have to enter it once. However, Personal Access Tokens expire and you may need to update or change your authentication information.
Update credentials in Power BI Desktop
Open Power BI Desktop.
Select File > Options and Settings > Data Source Settings. Select the correct URL to the OData Feed and select Edit.
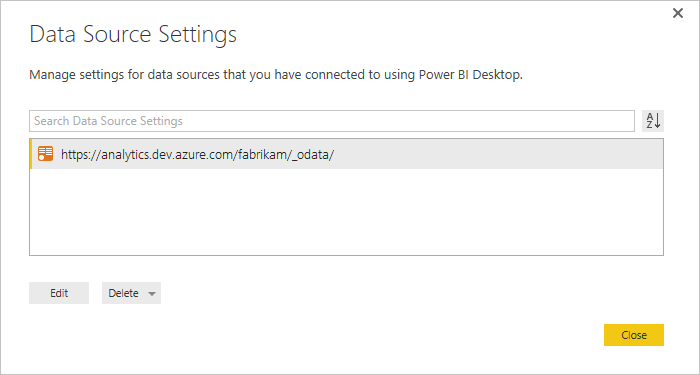
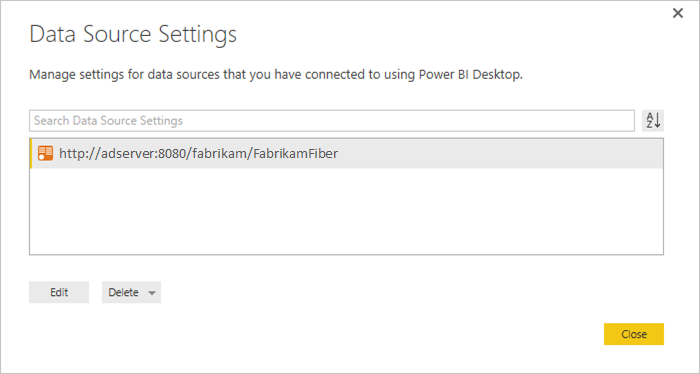
In the next Data Source Settings dialog, select the Edit button under the Credentials setting.
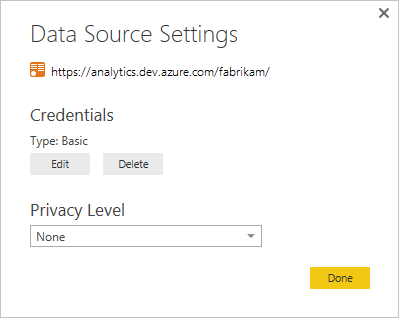
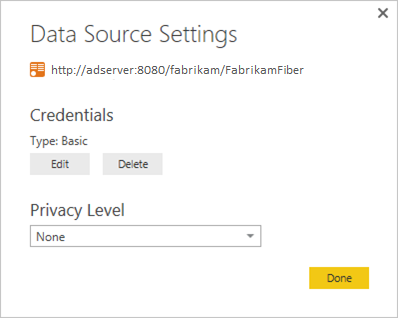
Edit the credentials as noted above, select Save, then Done, then Close.
Update credentials in Excel
Open Excel and select the Data tab.
Select New Query > Data Source Settings...
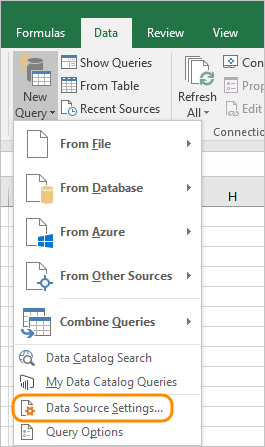
Select the correct URL to the OData Feed and select Edit.


In the next Data Source Settings dialog, select the Edit button under the Credentials setting.


Edit the credentials as noted above, select Save, then Done, then Close.
Publish to Power BI
After you've created a model and loaded it with data, you can publish it to Power BI. When using Microsoft Entra ID or Windows, make sure to select the oAuth2 option.